ServiceNow Data Sources
You can add data from your ServiceNow knowledge base to your AI Agent Knowledge Base.
General Prerequisites
- You have a ServiceNow developer account. If you don't have one, create it here.
- You have already built a ServiceNow instance.
- Your developer account has permissions to register apps.
- You have a published AI Agent.
Add Data from ServiceNow to the Knowledge Base
This section explains how to add a ServiceNow data source and extract data from the ServiceNow Knowledge Base.
Step 1. Create OAuth client in ServiceNow
If you want to authenticate with OAuth when creating your ServiceNow data source, you need to create an OAuth client:
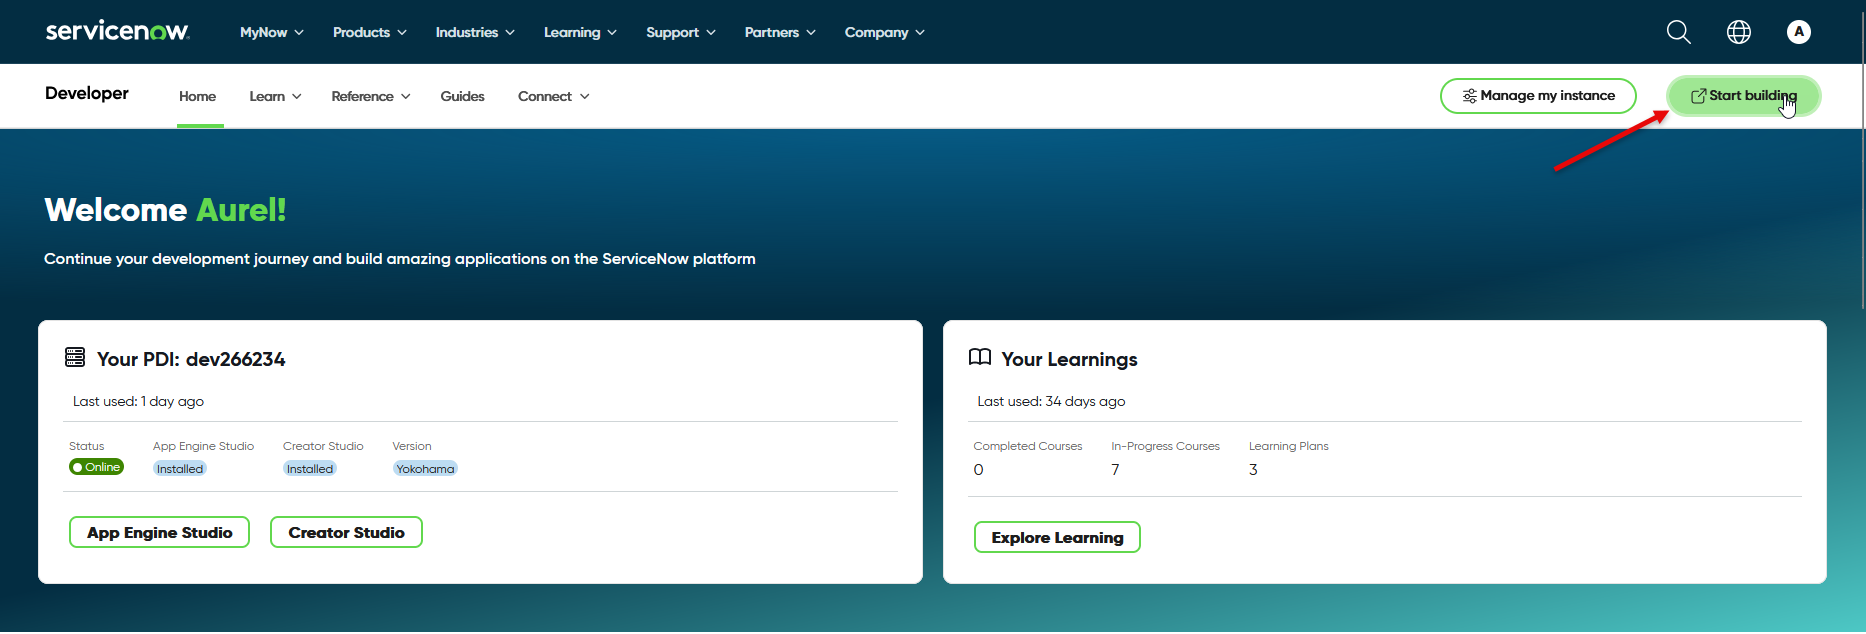
- Log into the ServiceNow developer portal.
- Click the Start building button.
- Your ServiceNow instance opens in a new browser window.
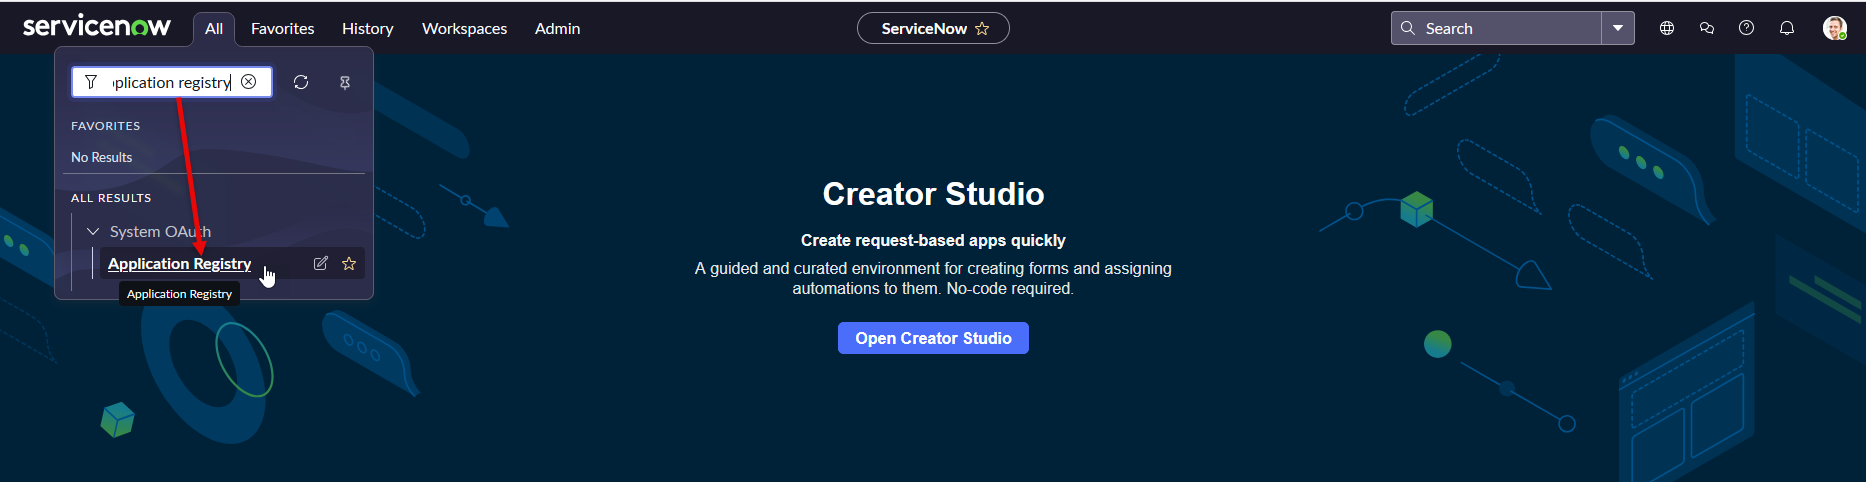
- In the All menu, search for 'Application registry' and click on it.
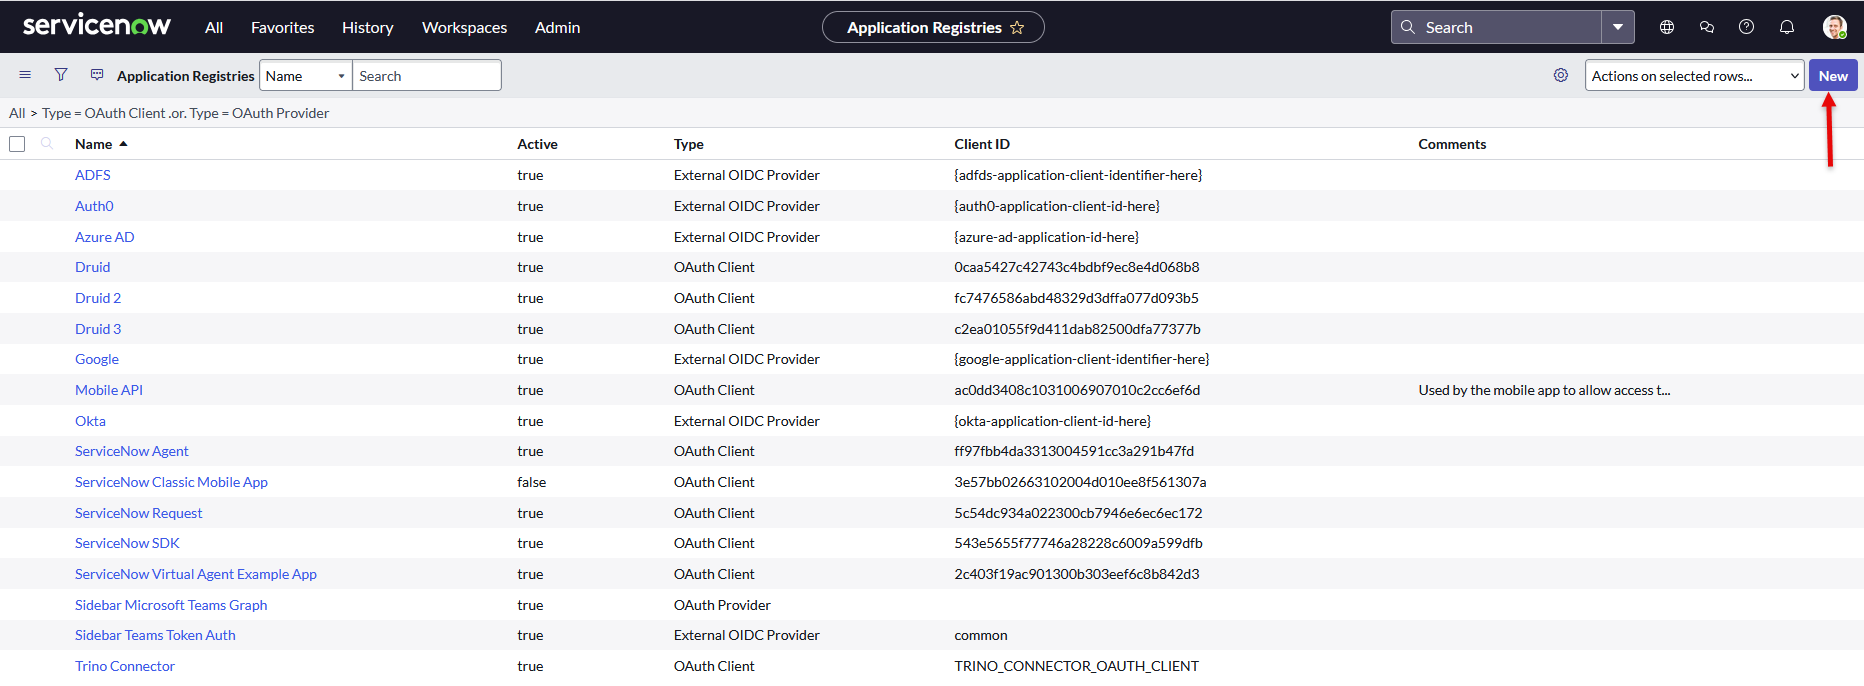
- The Application Registries page appears.
- Click the New button.
- Click on 'Create an OAuth API endpoint for external clients'.
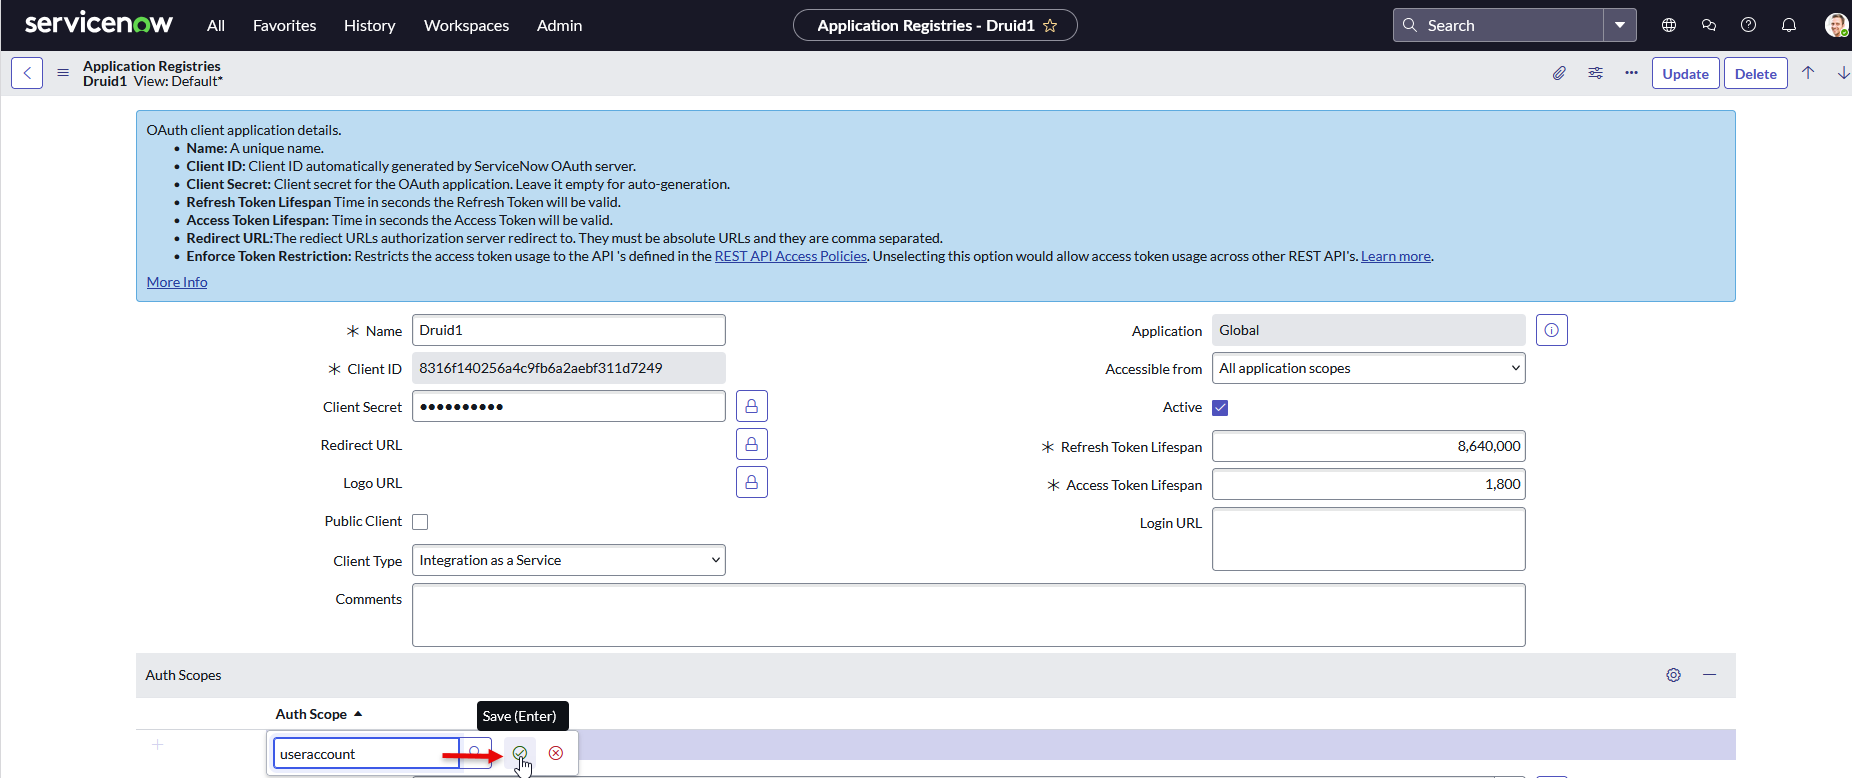
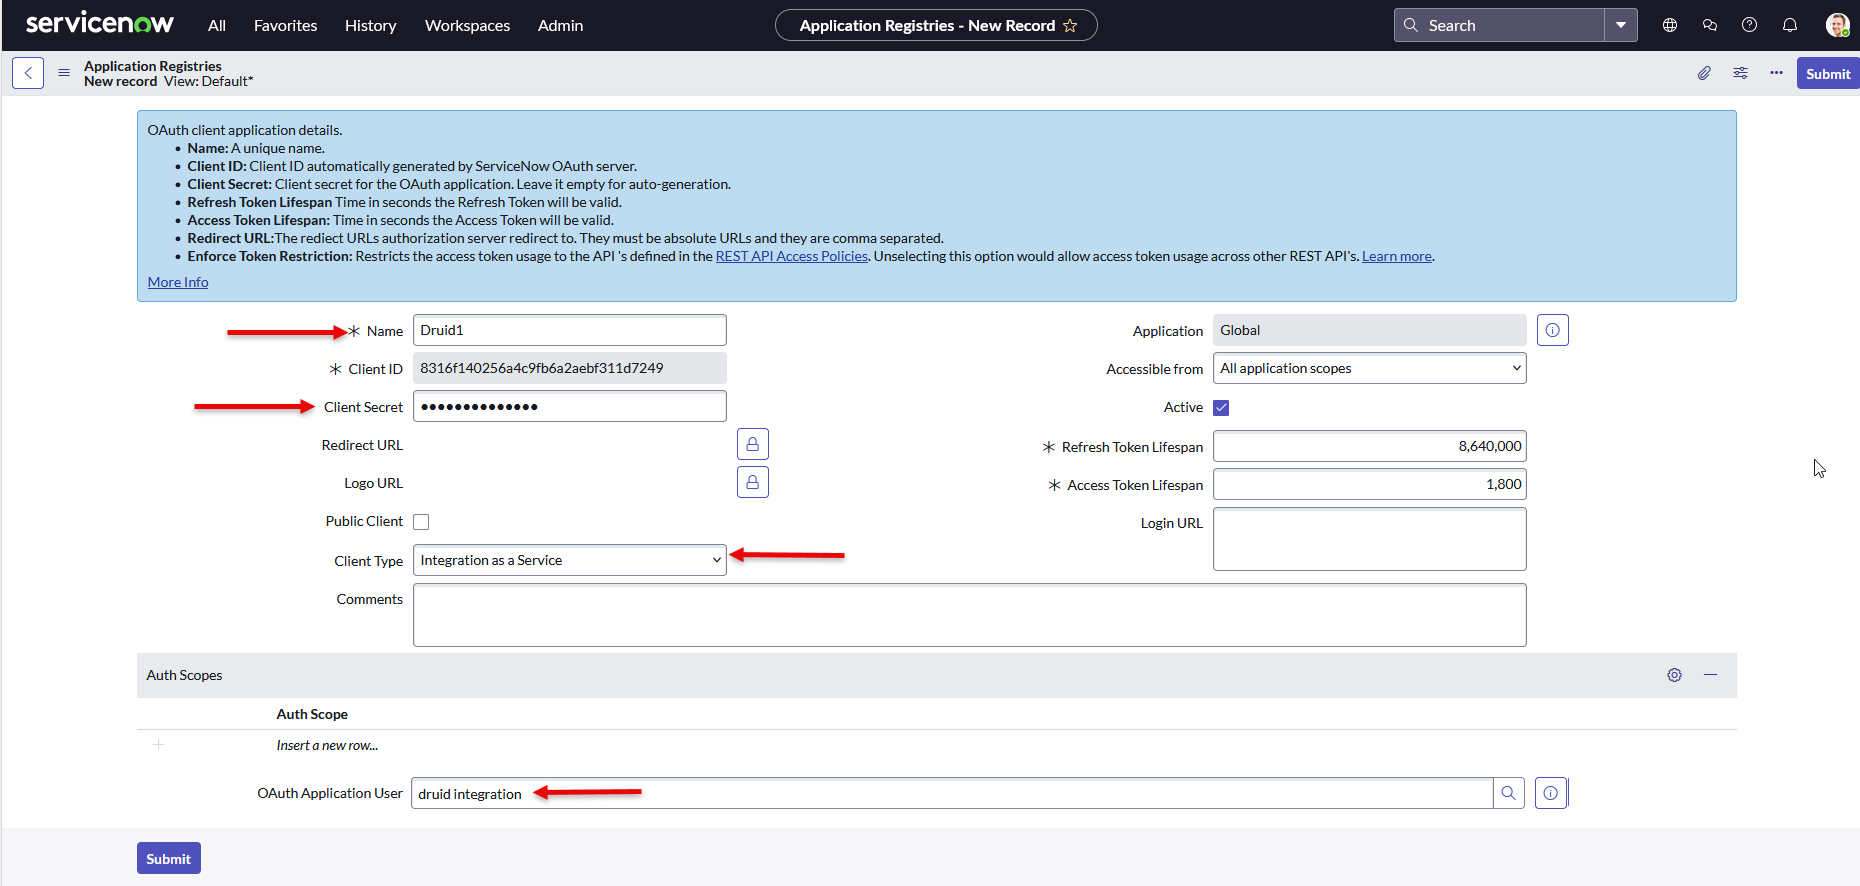
- Enter a Name and in the Client secret field, enter a password.
- Copy the Client ID, you will need it in the Druid Portal.
- Enter a password in the Client Secret field and save it securely. You will need this value later in the Druid Portal.
- From the Client Type drop-down, select Integration as a Service.
- In the Auth Scopes table, double-click on Insert new row, enter useraccount and save the record.
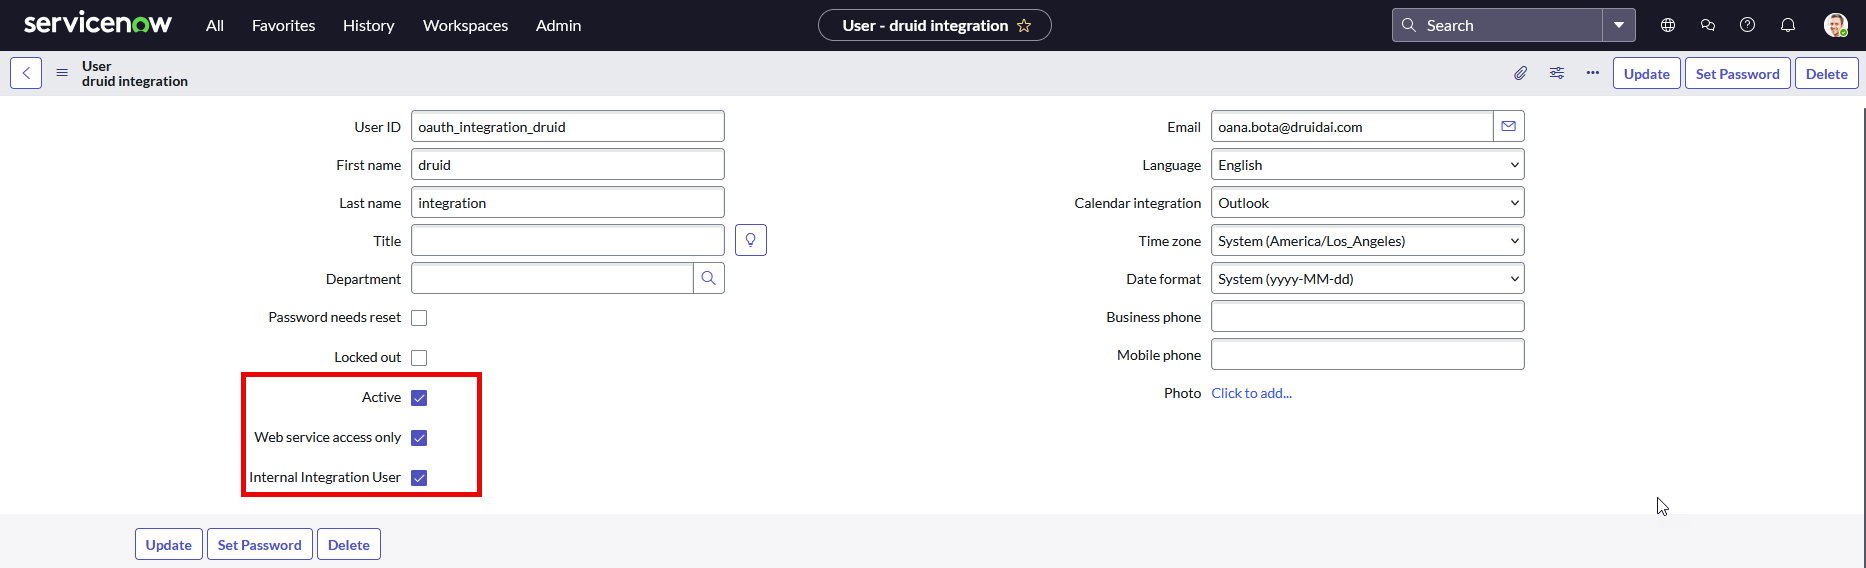
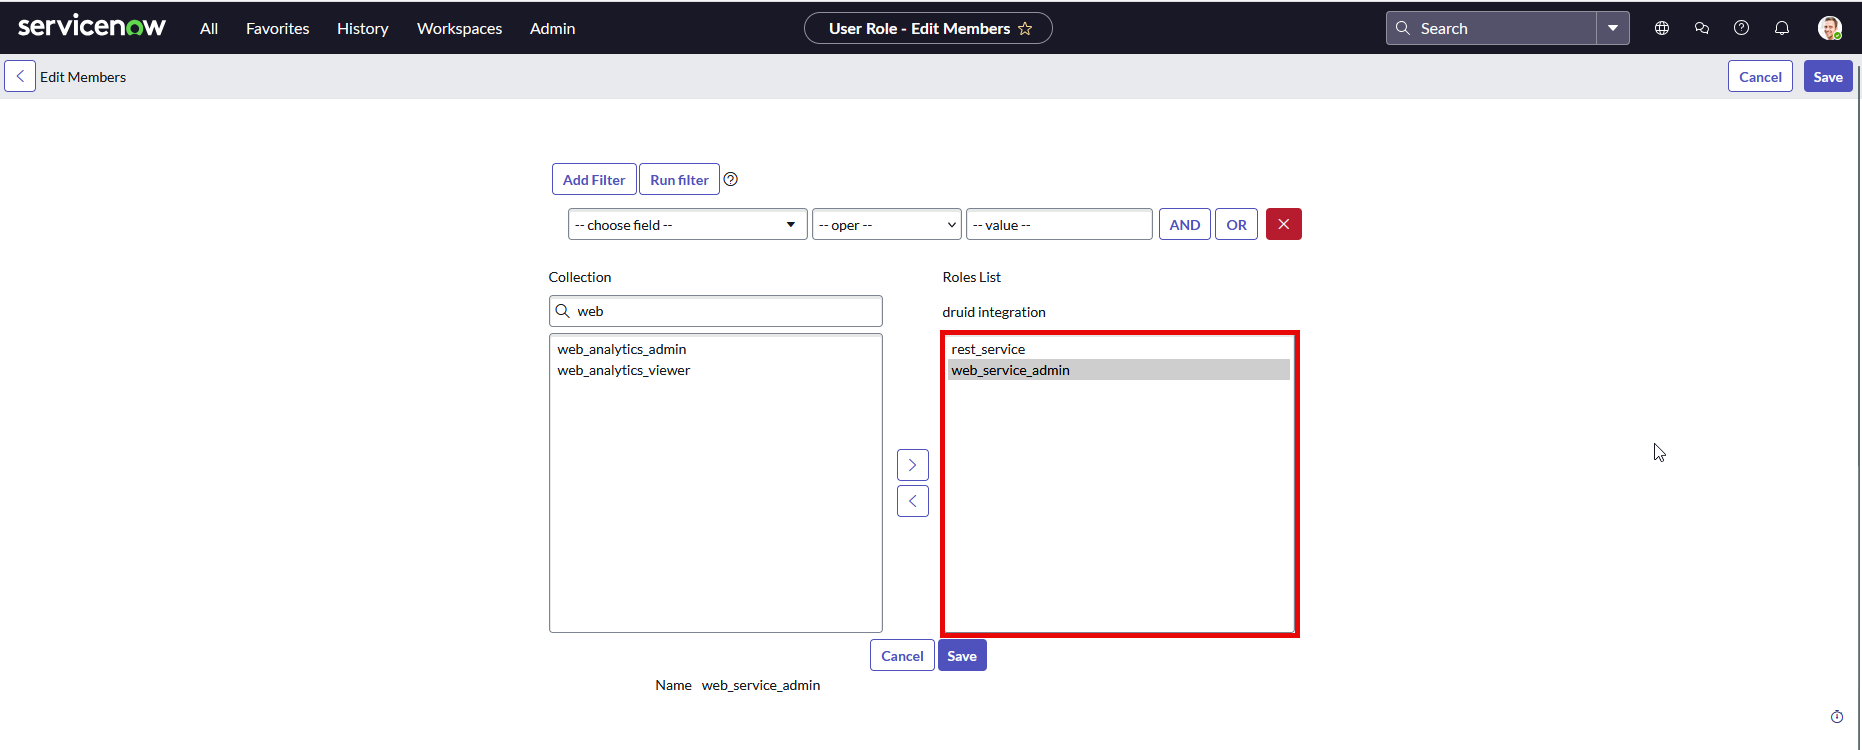
- In the OAuth Application User field, enter the name of the user to which the OAuth app binds for client credential flow. Note that in this field you see only active users who haven been granted the roles rest_service or web_service_admin.
- Click the Submit button.

Step 2: Create the data source
To begin, follow the step-by-step instructions in Data Source Creation. In the Add New Data Source modal, make the following settings:
- From the Type drop-down, select ServiceNow. After you select the type, the content of the page displays additional fields required for adding a ServiceNow data source.
- Authenticate with ServiceNow. You can authenticate using Basic Authentication or OAuth:
- Basic Authentication:
- From the Authentication type field, select Basic.
- Enter the credentials (Username and Password) of a ServiceNow user with roles rest_service and web_service_admin.
- OAuth:
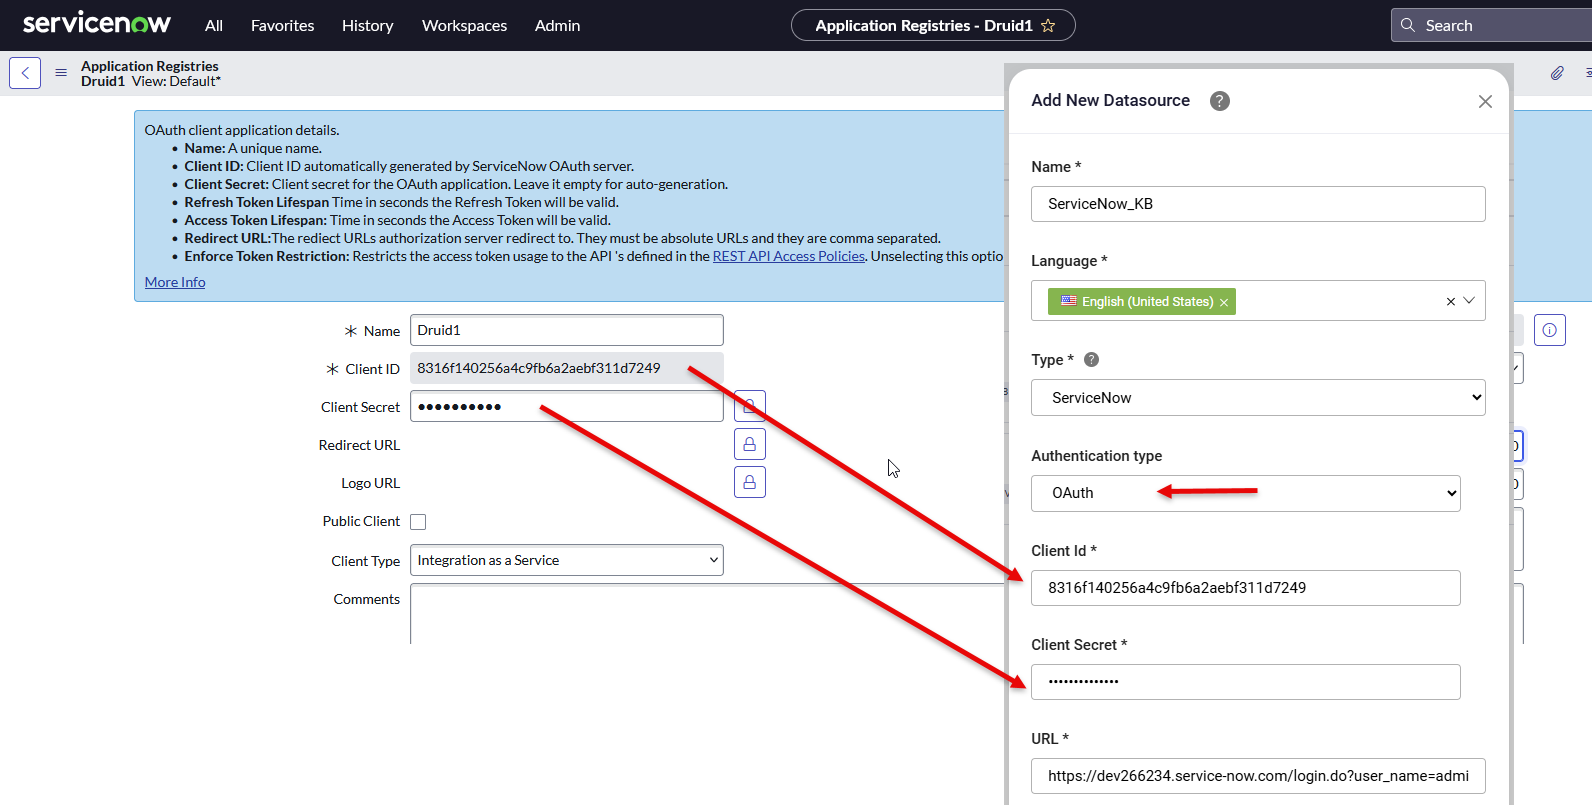
- From the Authentication type field, select OAuth.
- Enter the Client ID and Client Secret from your ServiceNow OAuth client.
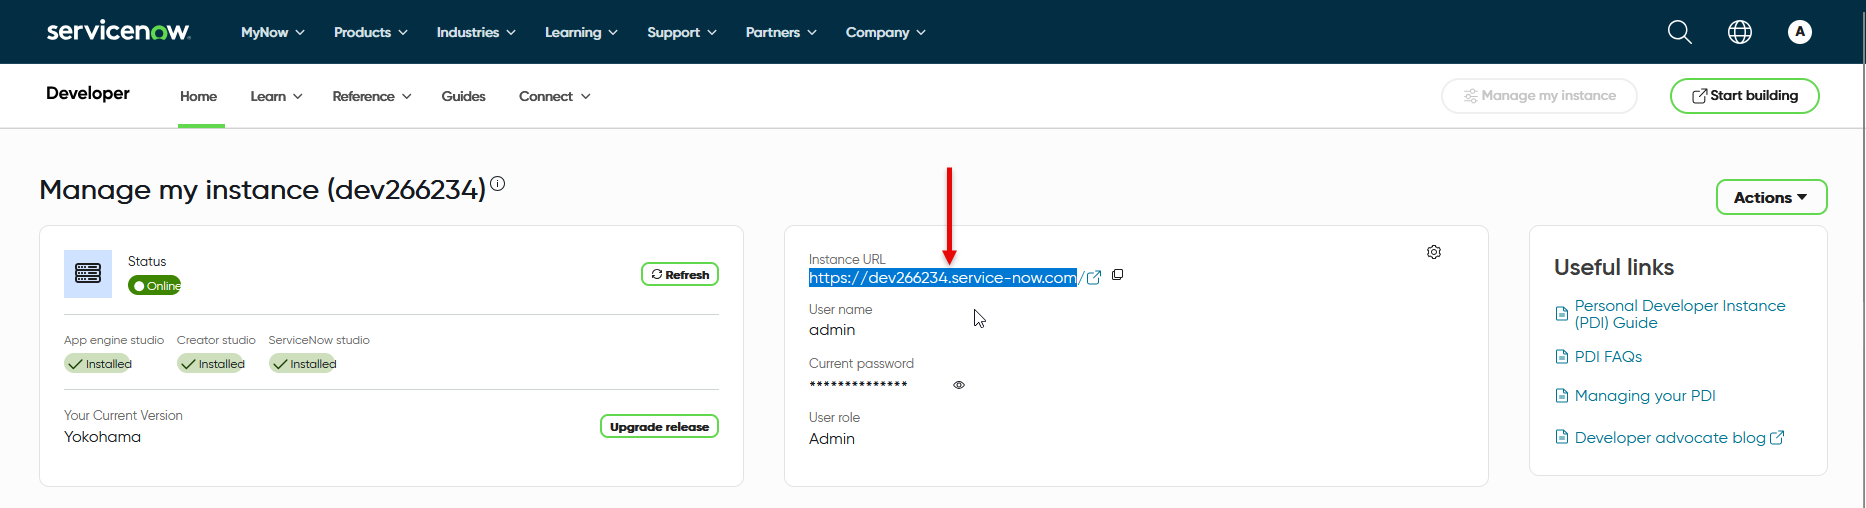
- In the URL field, provide the ServiceNow Instance Base URL.
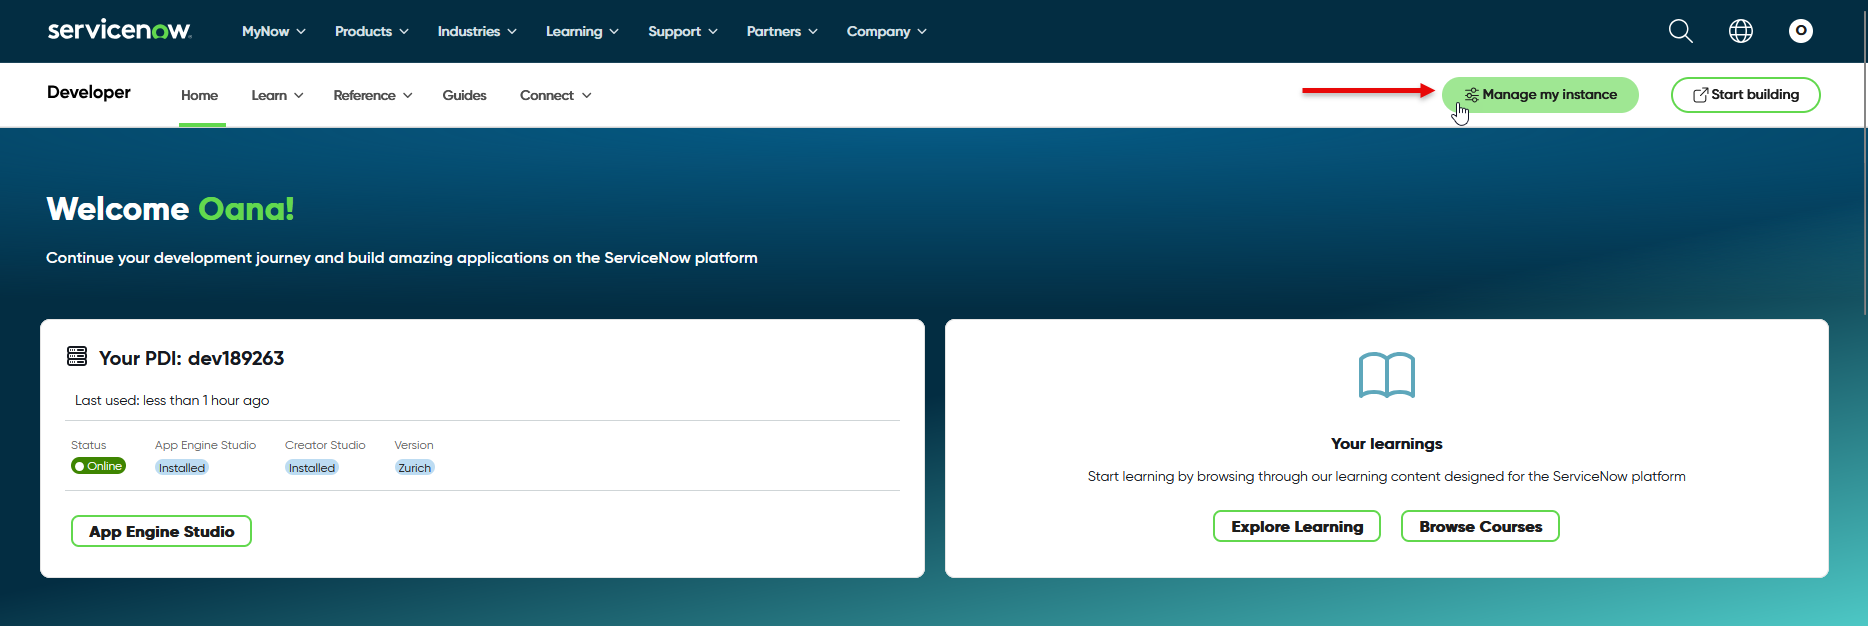
- Log into the ServiceNow developer portal.
- Click on the Manage my instance button.
- Copy the Instance Base URL. Do not use the Copy icon, as it does not copy the full Base URL.
- The View endpoint field is prefilled with kb_view.do?sysparm_article={0}.
-
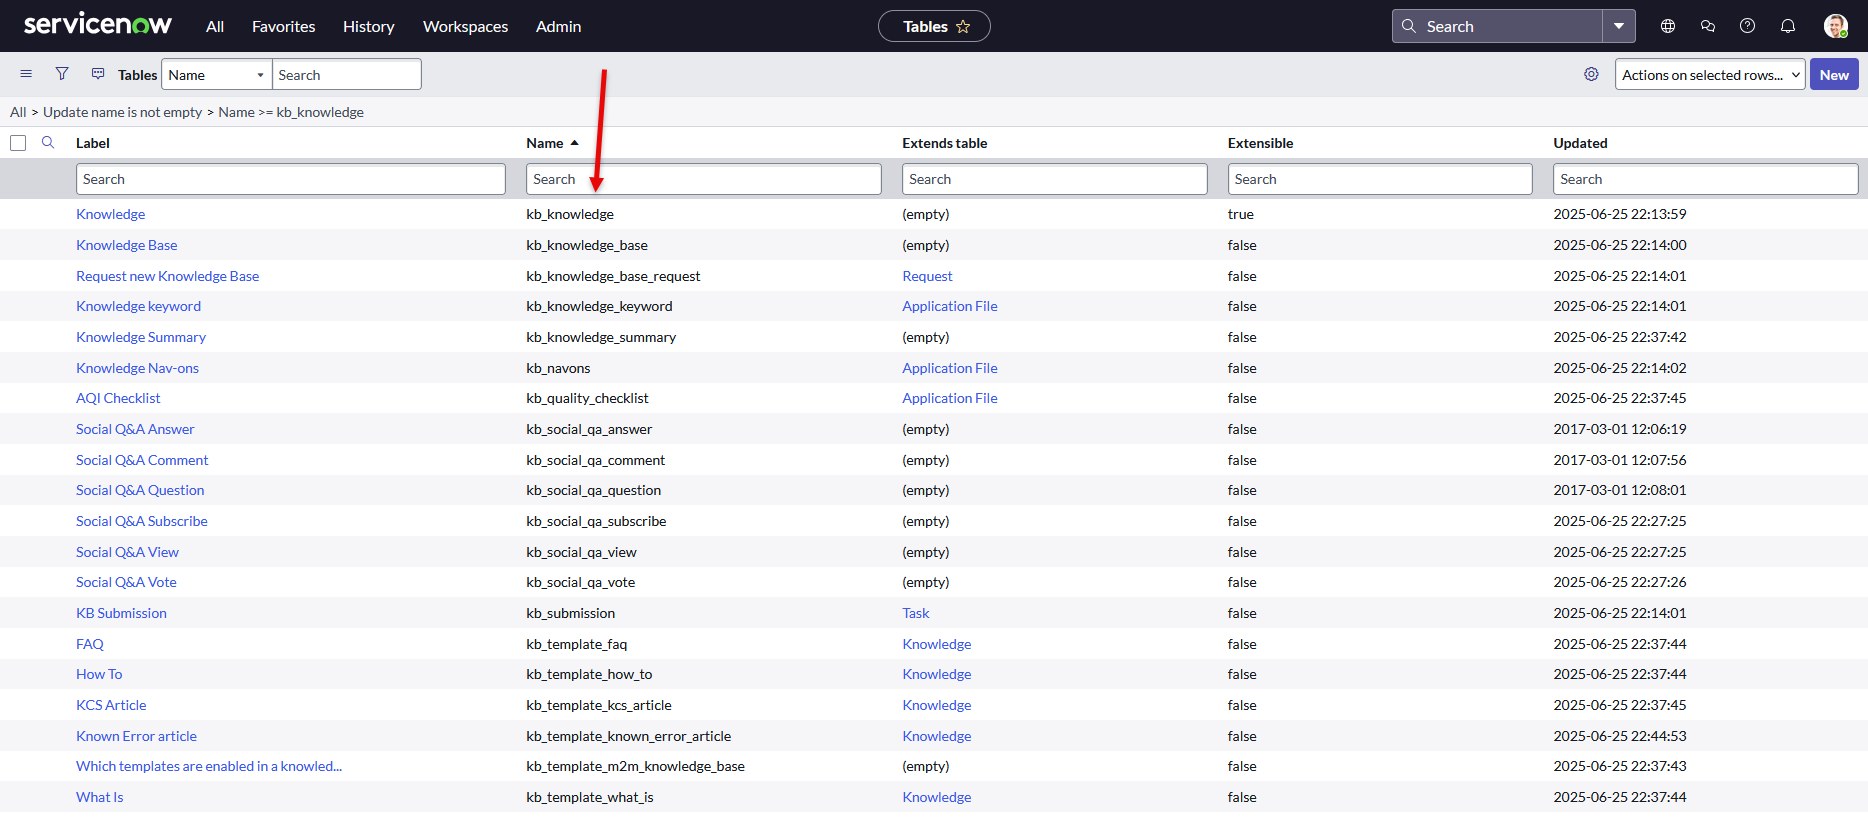
In the Discovery table field, the default value is kb_knowledge?workflow_state=published. This table is used by the KB Engine to crawl only published articles.
- In the Content table field, enter the name of the ServiceNow table from which the KB Engine will extract data.
- In the Discovery batch size field, change the number of items extracted per page if needed.
- In the Content JSON paths field, specify the JSON paths to extract content from the response when querying the content table. Example: result.text, result.kb_question, result.kb_answer.
- Click Create.
To get the Instance URL, follow these steps:
If left empty, content will be downloaded from the view endpoint for each article (only if the page is public).
Step 2. Crawl the data source
Click the Crawl button at the top-right corner of the data source page. Wait until the crawling process finishes. This prepares the data for extraction.
Step 3. Extract the data
Click the Extract button at the top-right corner of the data source page. Wait until the extraction process completes.
Step 4. Train the data source
To ensure the KB Engine can search through the data source paragraphs, train your data source after extraction.
 Related Topics