Infobip
Connect your Druid AI Agent to WhatsApp via Infobip omnichannel communication platform. This integration enables automated messaging workflows, customer engagement, and cross-channel chat delivery managed through a single Druid Portal setup.
Prerequisites
- You built and published an AI Agent.
- An active user account on the Infobip platform.
Integration procedure
To connect your AI Agents with WhatsApp via Infobip, follow these steps:
Step 1. Create Infobip API Key
- Sign in to the Infobip platform.
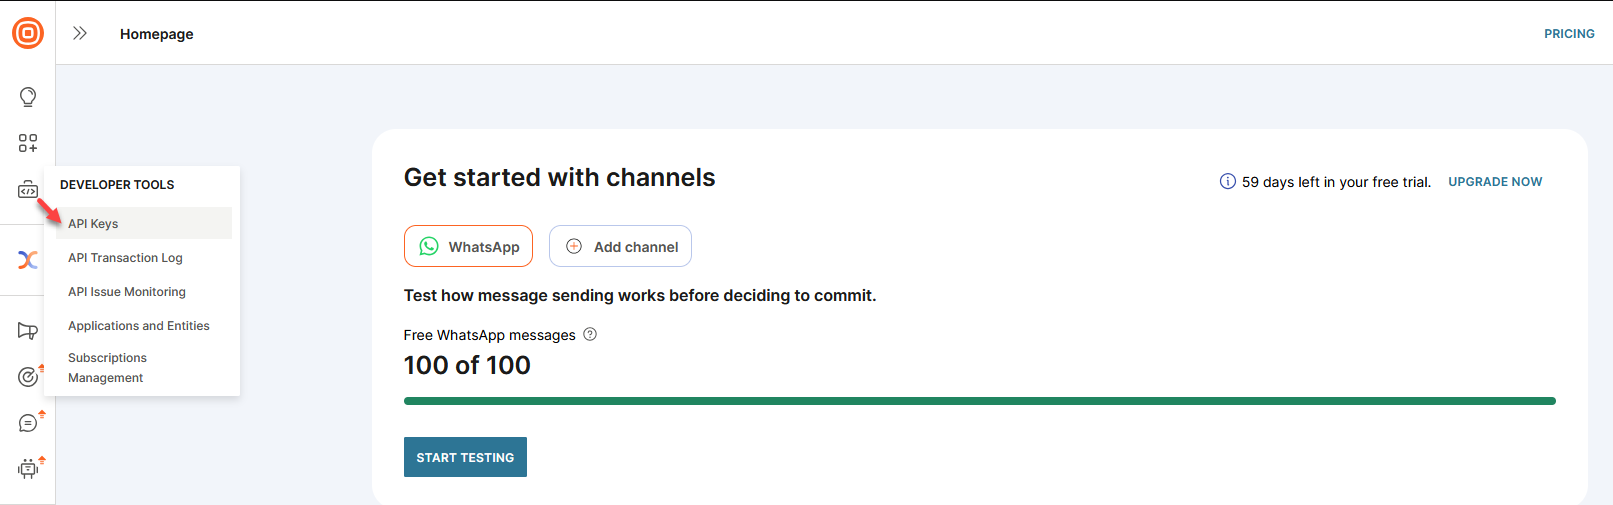
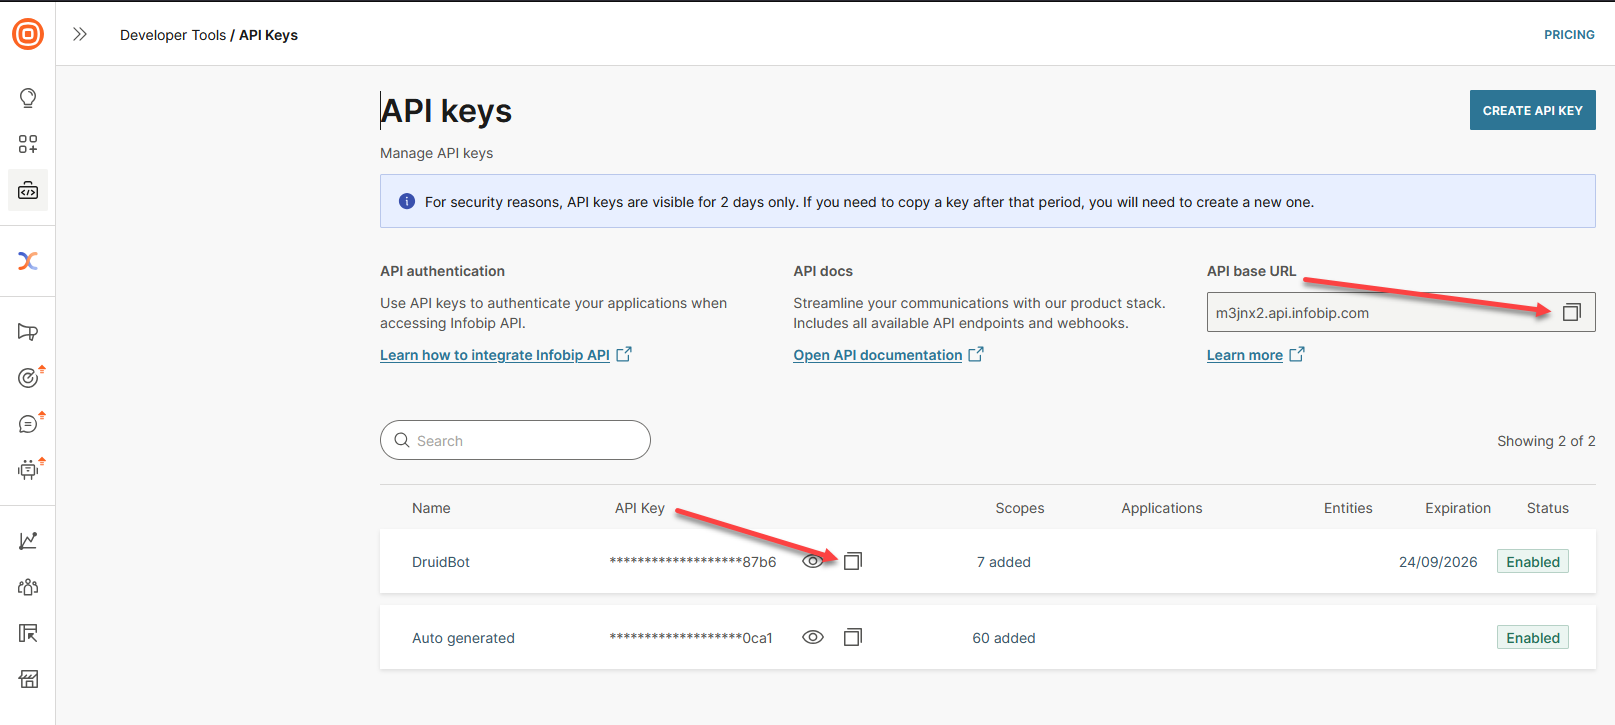
- Go to DEVELOPER TOOLS, and then select API Keys from the drop-down.
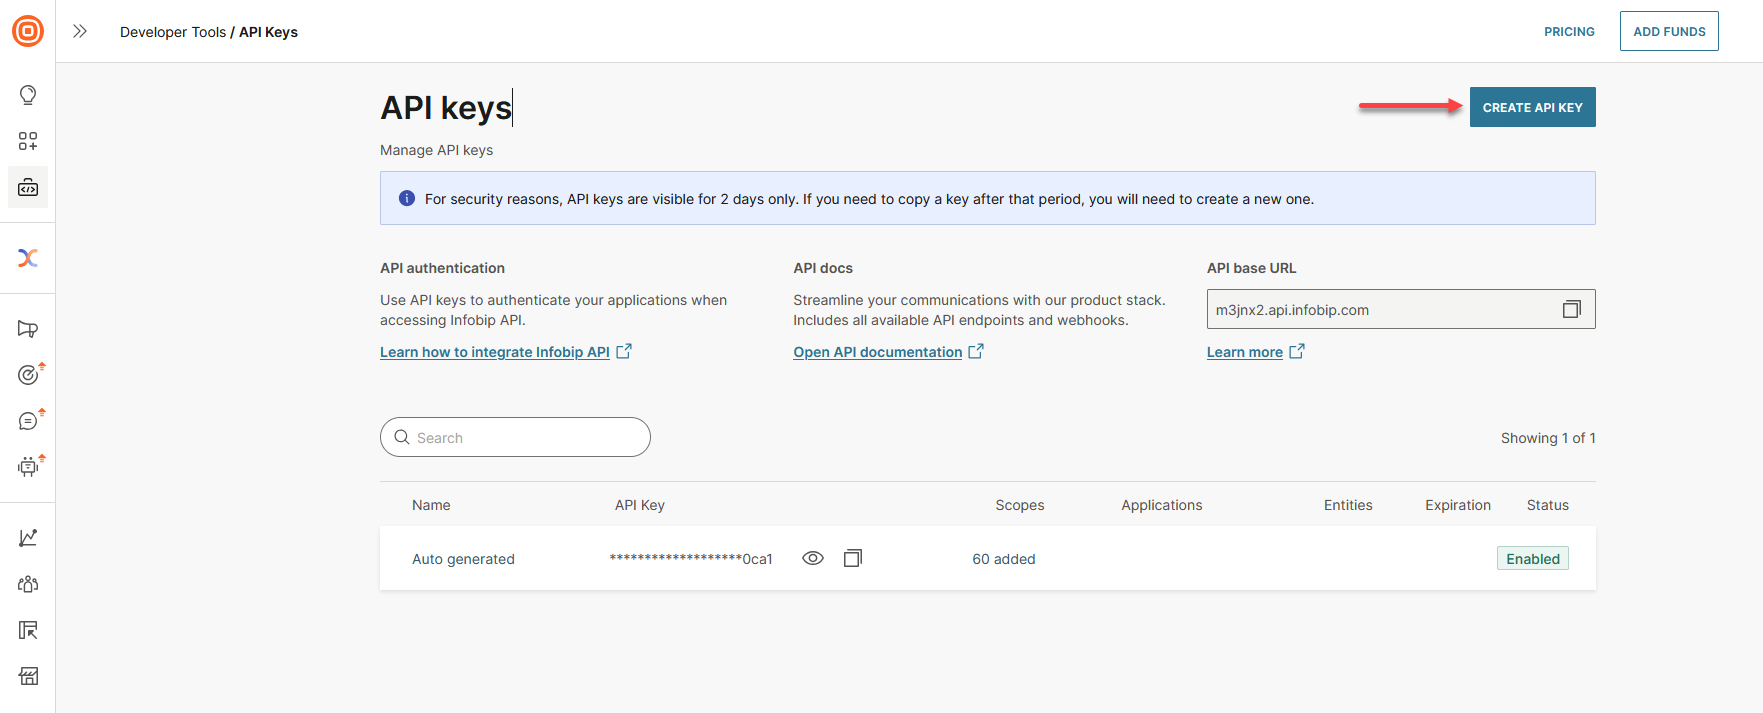
- In the API Keys page, click the CREATE API KEY button.
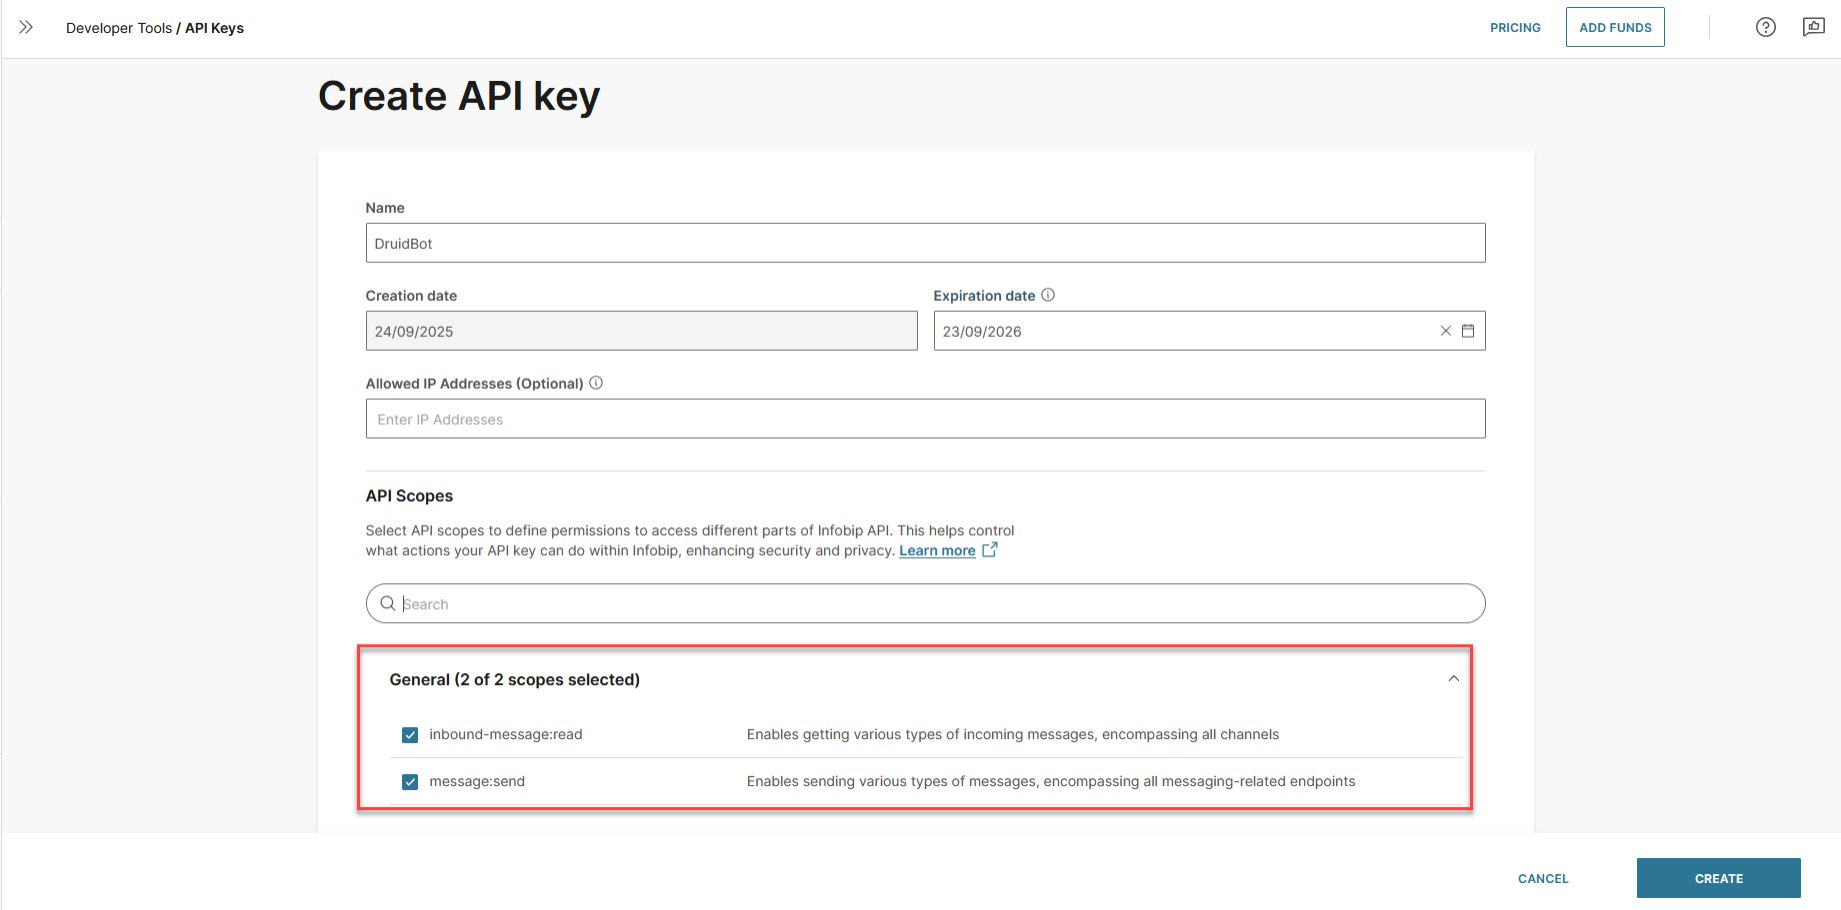
- In the Name field, enter a name for the API key.
- By default, the API key expires after one year. You can set a different Expiration date to match your security policies..
- In the API Scopes section, click on General, and then select the two available general scopes.
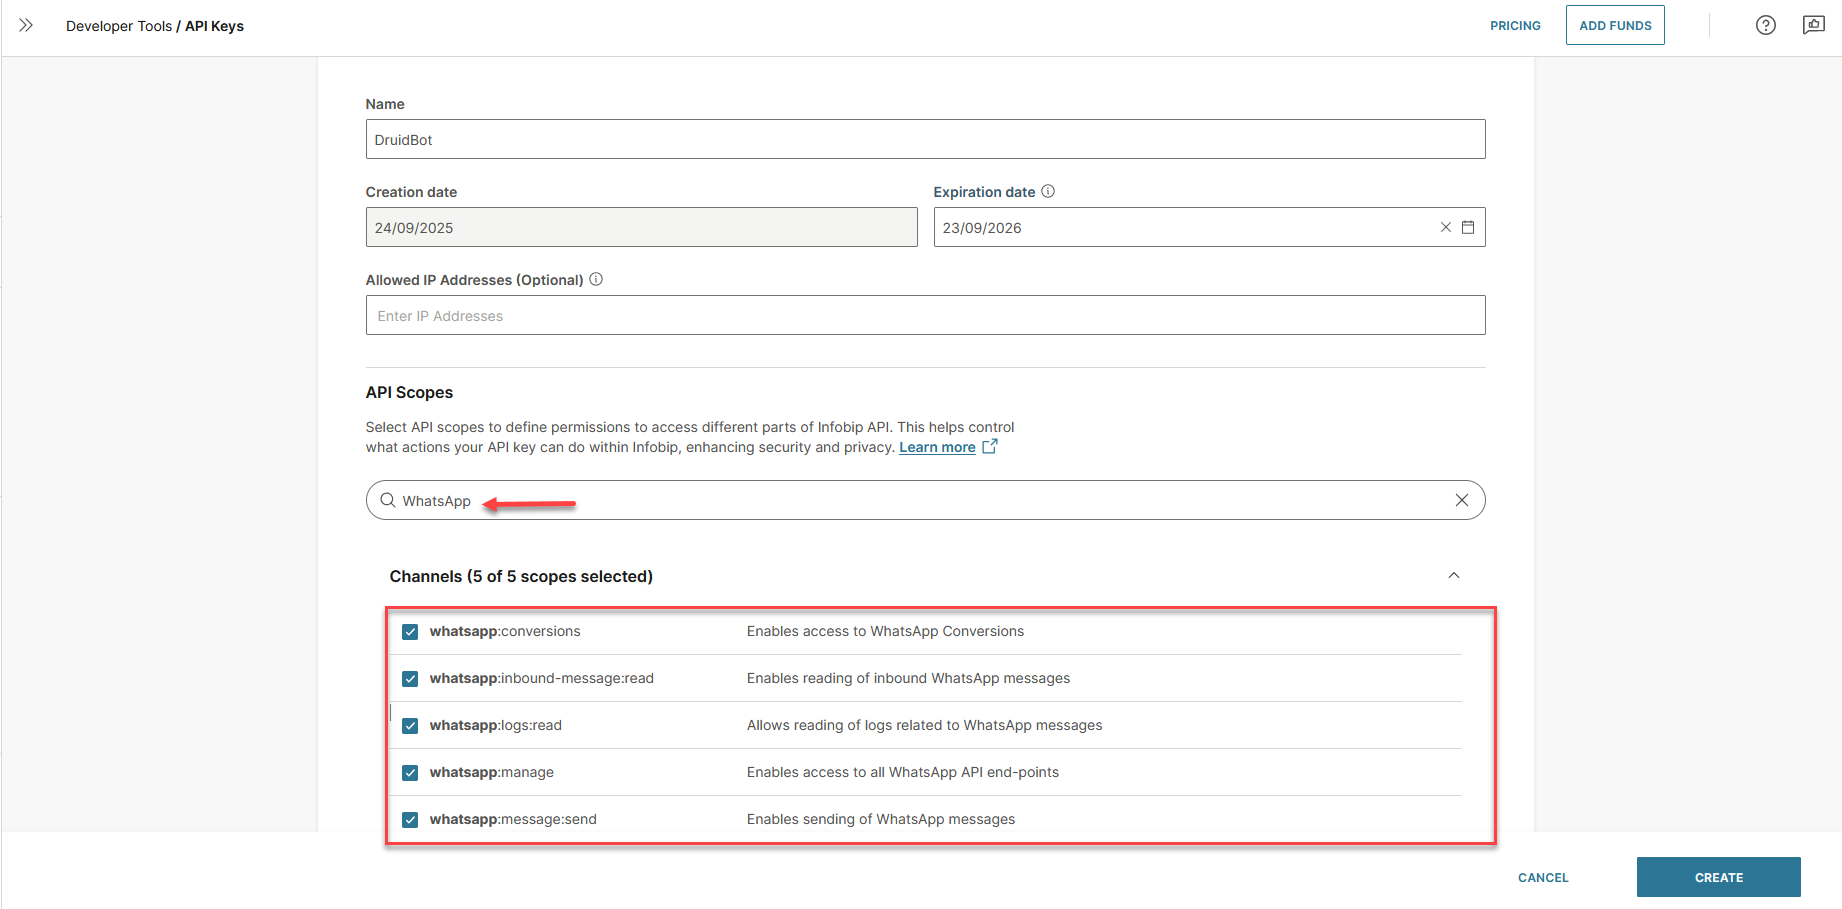
- In the API Scopes section, search for WhatsApp, and then select all the listed scopes.
- Click CREATE. A new API key is created.
- From the API Keys page, copy the API base URL and the API Key, you will need them to configure the channel in DRUID.
Step 2. Get Infobip phone number
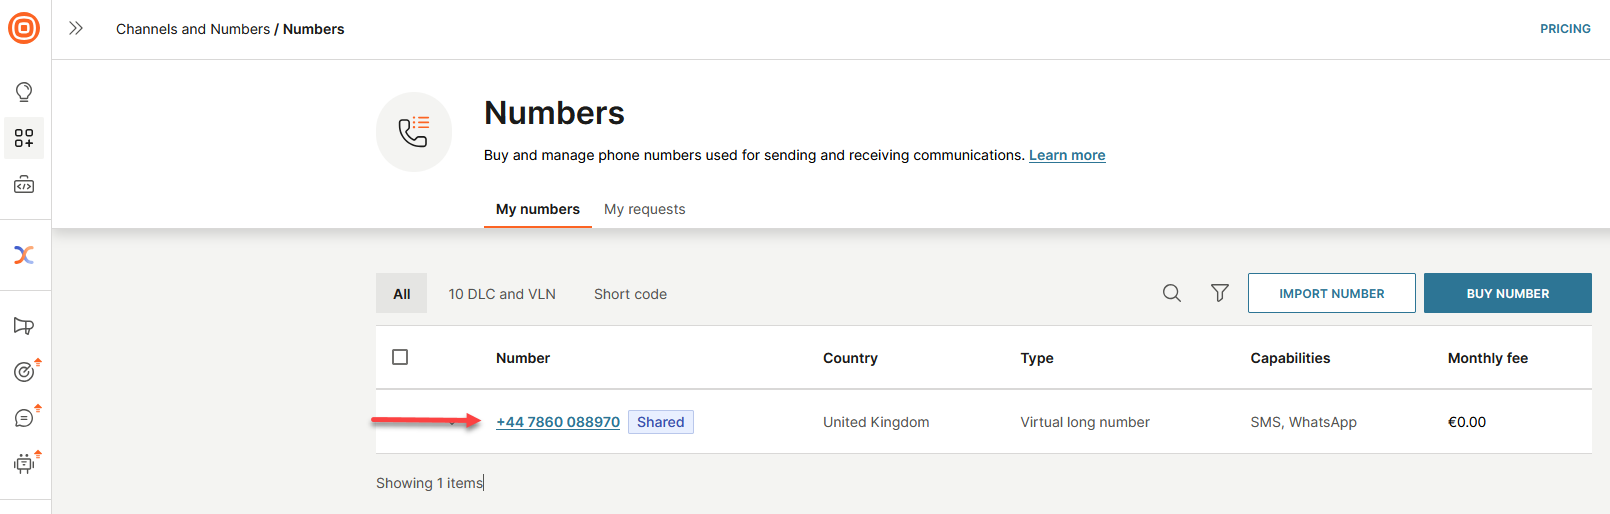
- Go to CHANNELS AND NUMBERS and then select Numbers from the drop-down.
- Copy the phone number you want to use. For more information about managing numbers, see the Infobip documentation.
Now configure the Infobip channel in the Druid Portal.
Step 3. Configure the Infobip channel in Druid Portal
- In the Druid Portal go to your AI Agent settings.
- Click the Channels tab, then search for Infobip and click on the Infobip card.
- In the modal, fill in the fields as follows:
- Copy the Druid url (webhook) as you will need it to configure an Infobip notification profile.
- Optionally, customize channel display settings as follows:
- Alias: Enter a clear, business-friendly display name (e.g., Interactive Messaging). This value is stored in[[ChatUser]].ChannelDisplayName, which appears in reporting tools like AI Agent Summary dashboard - Engagement KPIs and can also be referenced in flow business logic.
- Description: Enter a brief description. This is particularly helpful when using an alias, as it helps identify the channel's specific purpose within the Druid Portal.
- Channel Icon: Upload a custom icon to display on the channel card within the Druid Portal.
- Click the Publish button and wait until the channel is activated.
| Field | Description |
|---|---|
| API Host |
Enter the Infobip API URL in the following format: https://<Infobip API base URL>. IMPORTANT! The API base URL you copy from Infobip does not include https://. Make sure to add it; otherwise, the Infobip channel will not work.
|
| API key | Enter the API key you copied from Infobip. |
| Phone number | Enter the phone number you copied from Infobip, without the + sign. |
When the channel is active, the following fields are available in Druid:
- [[ChatUser]].ChannelId = "infobip"
- [[ChatUser]].ChannelDisplayName - Stores the Alias which is used in AI Agent Summary Dashboard > Engagement KPIs > Channel chart
- [[ChatUser]].UserId - Stores the user's phone number as an unique identifier of the WhatsApp user account for authentication purposes.
- [[ChatUser]].ChannelBotIdentifier - Stores the AI Agent number through which a user message arrived.
Step 4. Create Infobip notification profile
- Go back to the Infobip platform.
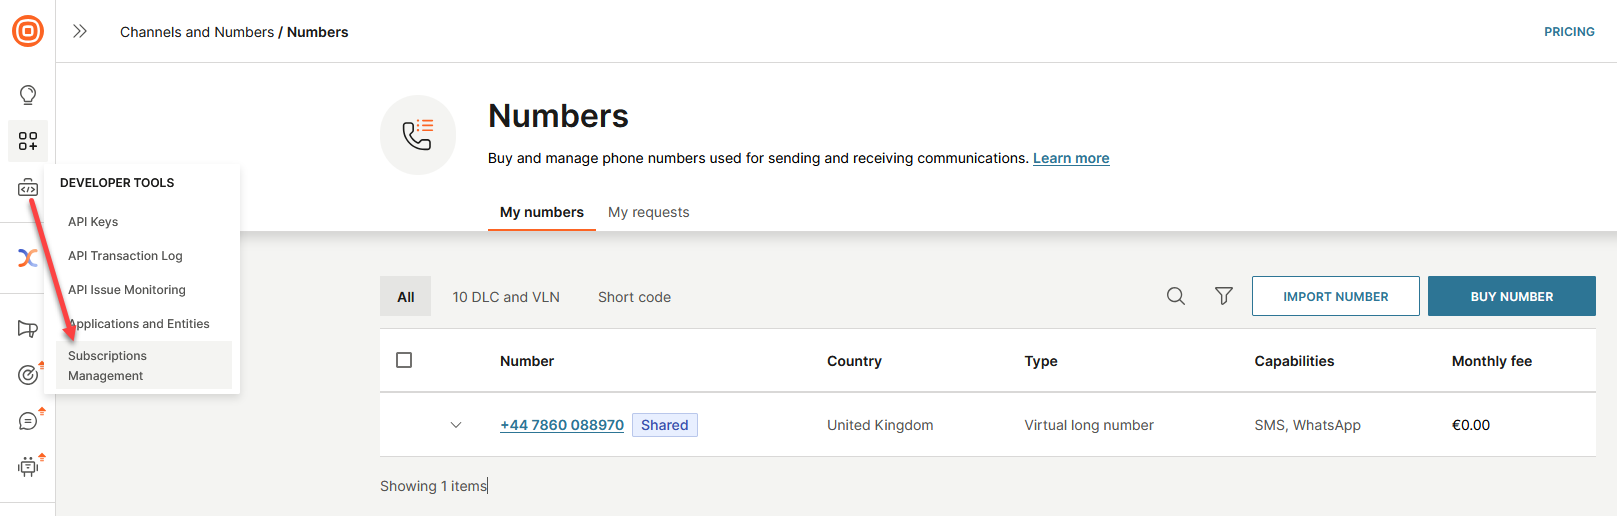
- Go to DEVELOPER TOOLS, and then select Subscriptions Management from the drop-down.
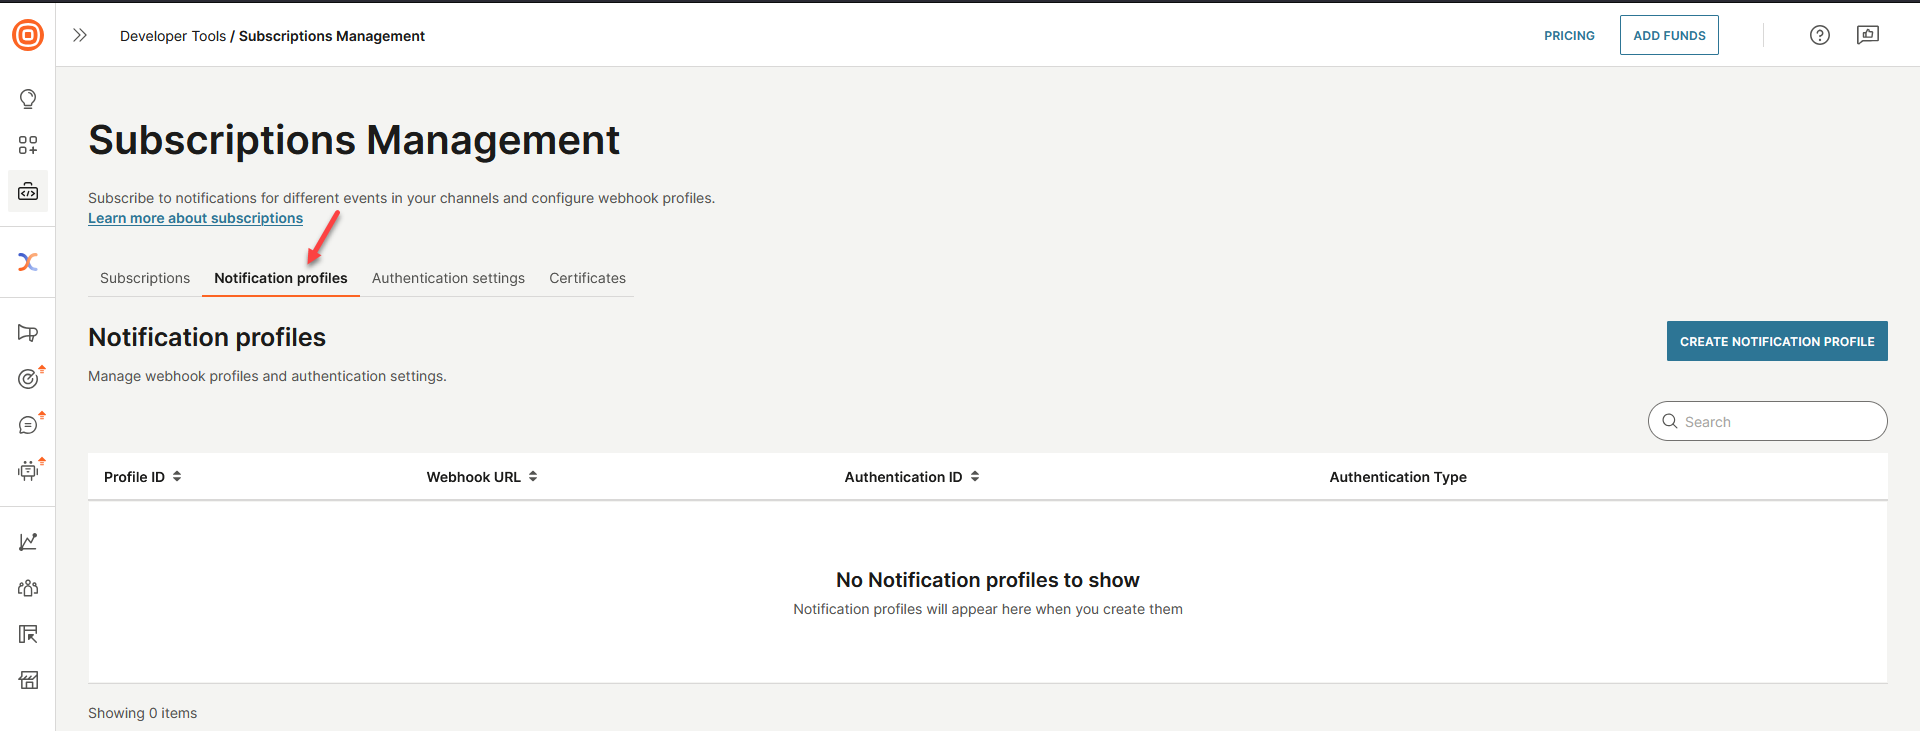
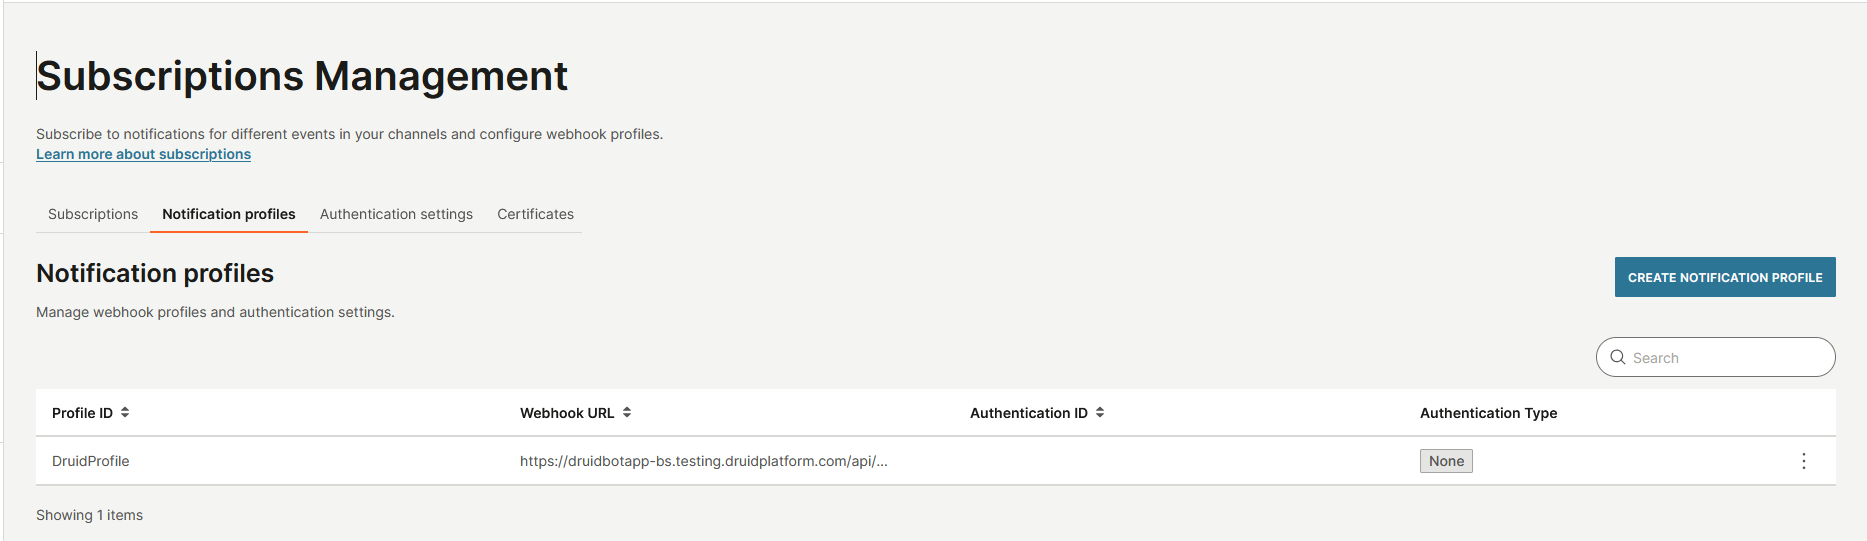
- By default, the Subscriptions tab is selected. Click the Notification profiles tab.
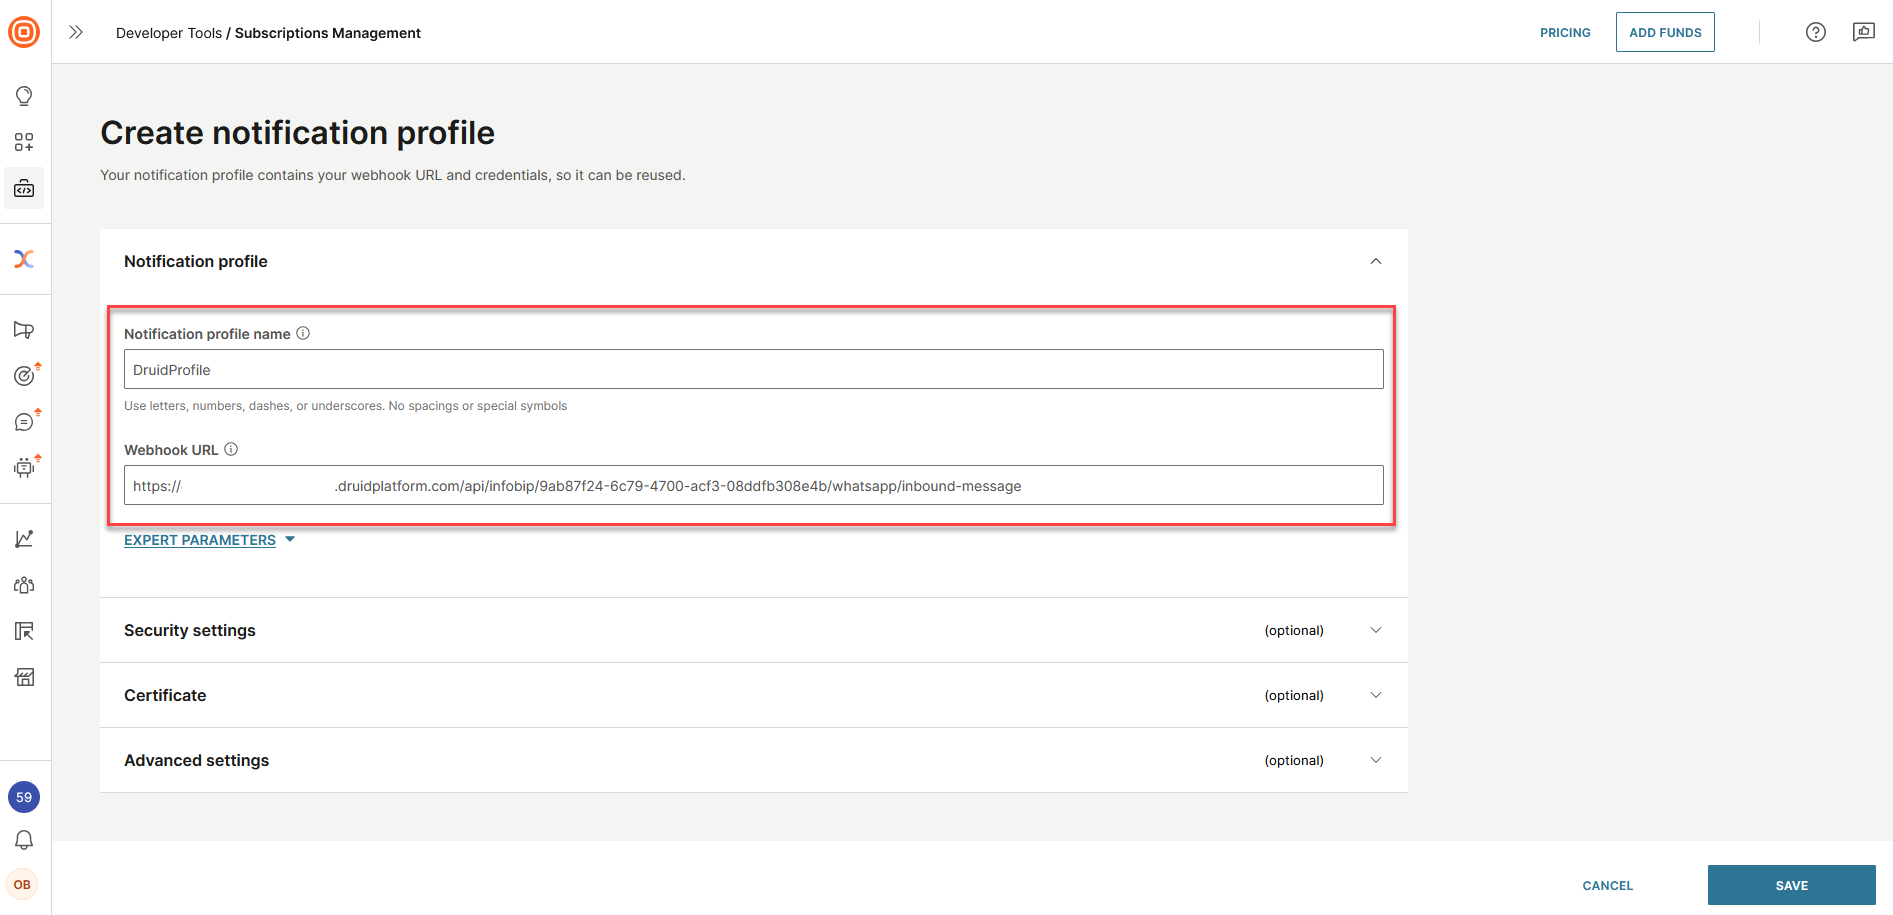
- Click the CREATE NOTIFICATION PROFILE button. The 'Create notification profile' page appears.
- In the Notification profile name field, enter a profile name.
- In the Webhook URL field, enter the Druid url (webhook) you copied from the you copied from the Druid Portal’s Infobip channel configuration.
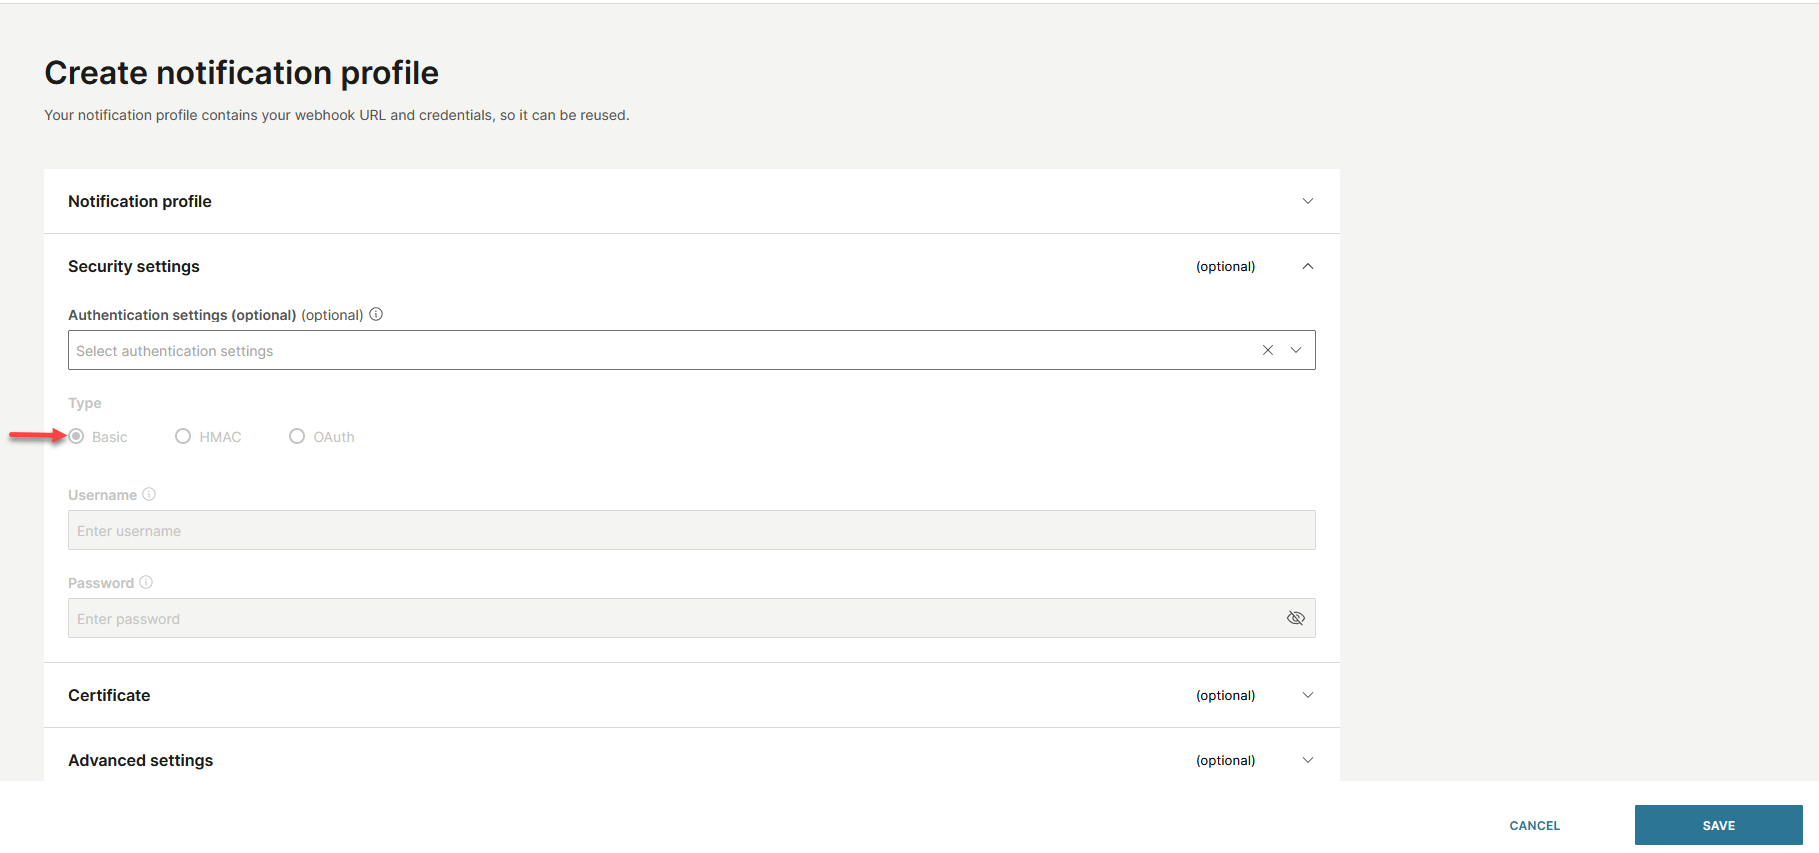
- Click SAVE. The notification profile is created.
- You can now create an Infobip subscription for WhatsApp.
Step 5. Create WhatsApp notification subscription
To create a notification subscription for the WhatsApp channel:
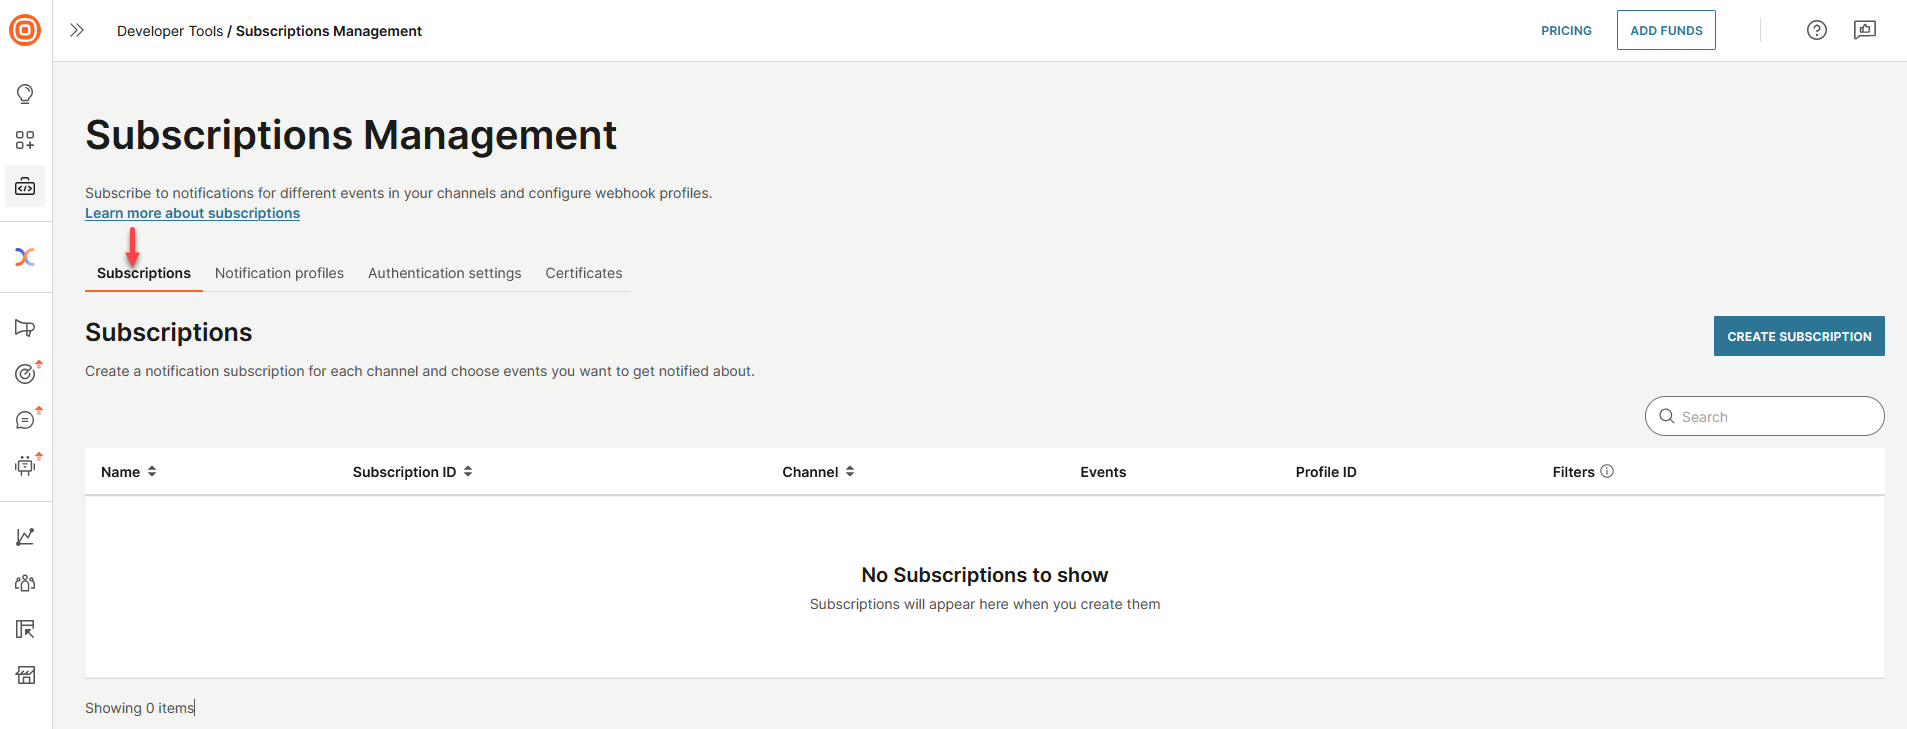
- Click on the Subscriptions tab.
- Click the CREATE SUBSCRIPTION button. The subscription management wizard appears.
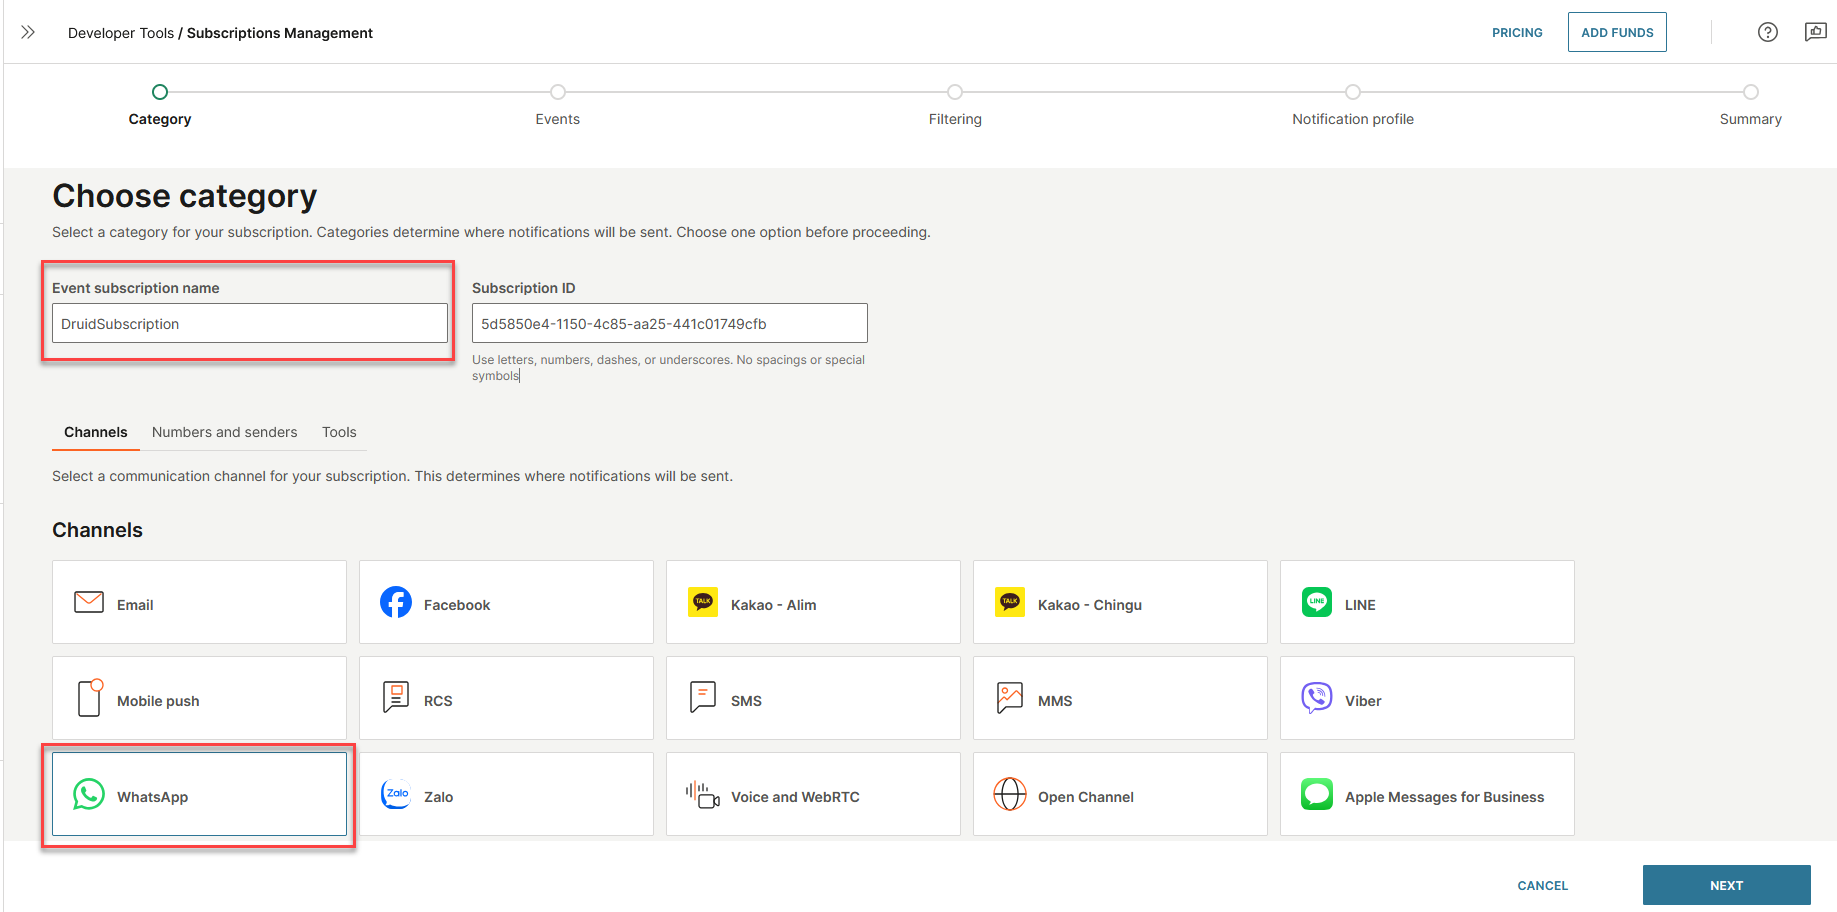
- In the Event subscription name field, enter a name.
- From the Channels area, select WhatsApp.
- Click NEXT.
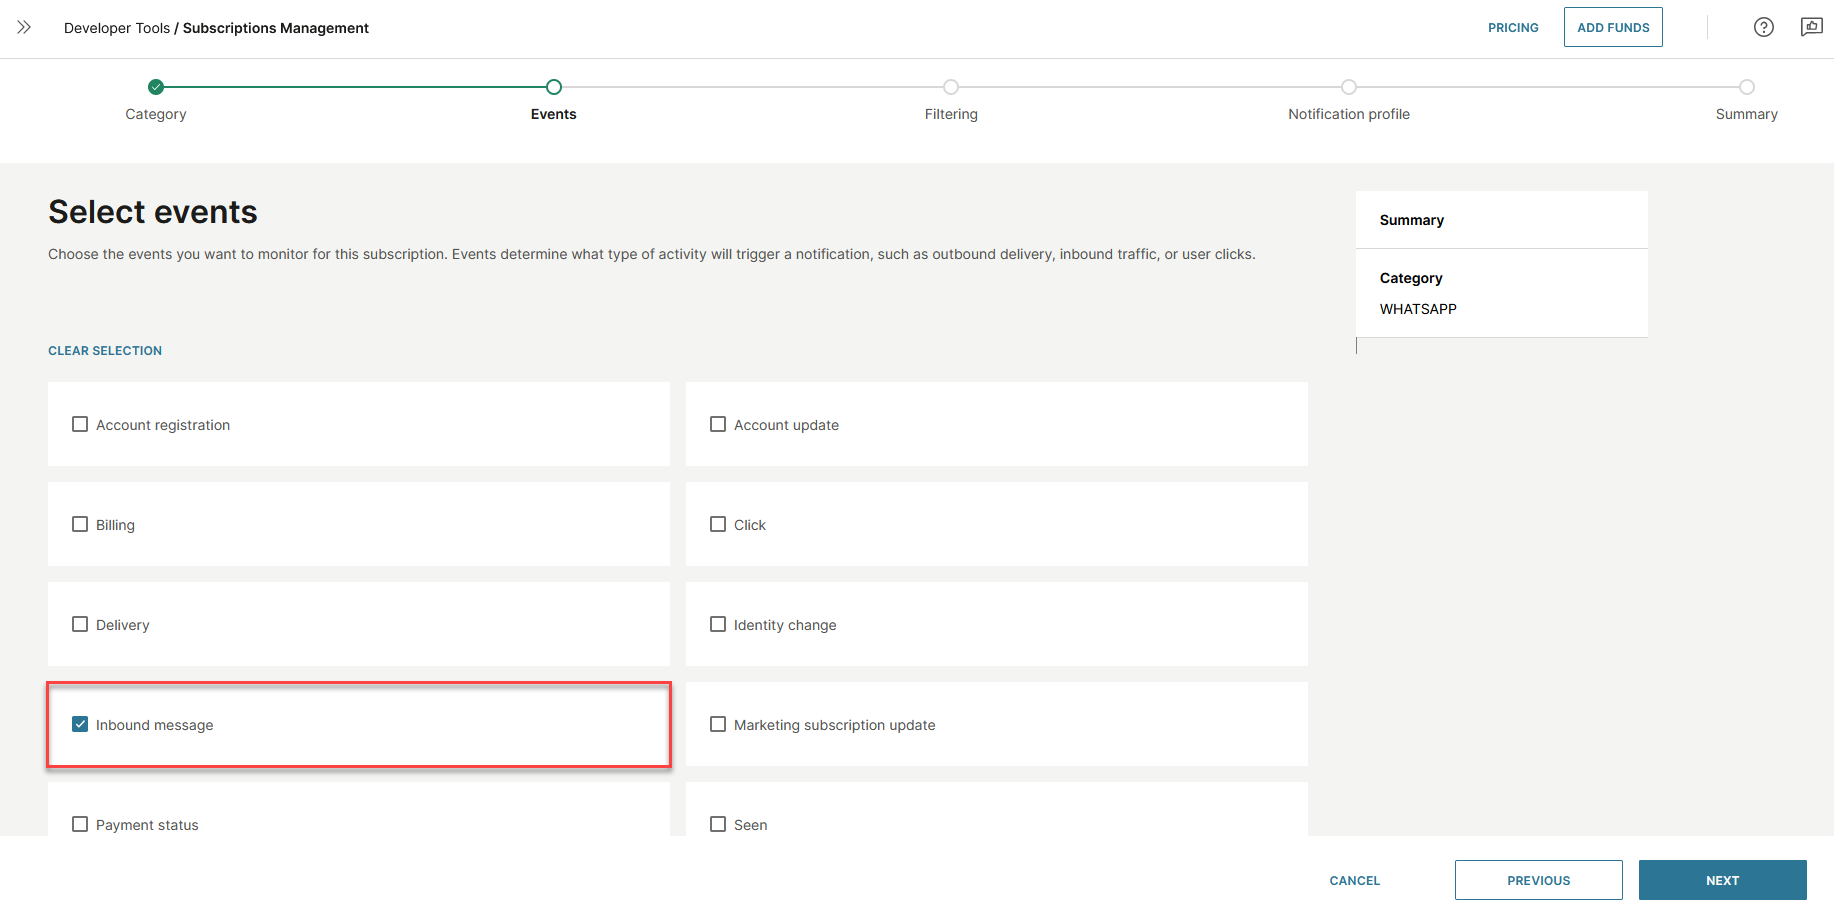
- Select Inbound message as events to monitor for this subscription.
- Click NEXT.
- Optionally, you can filter event traffic based on various parameters.
- Click NEXT to continue.
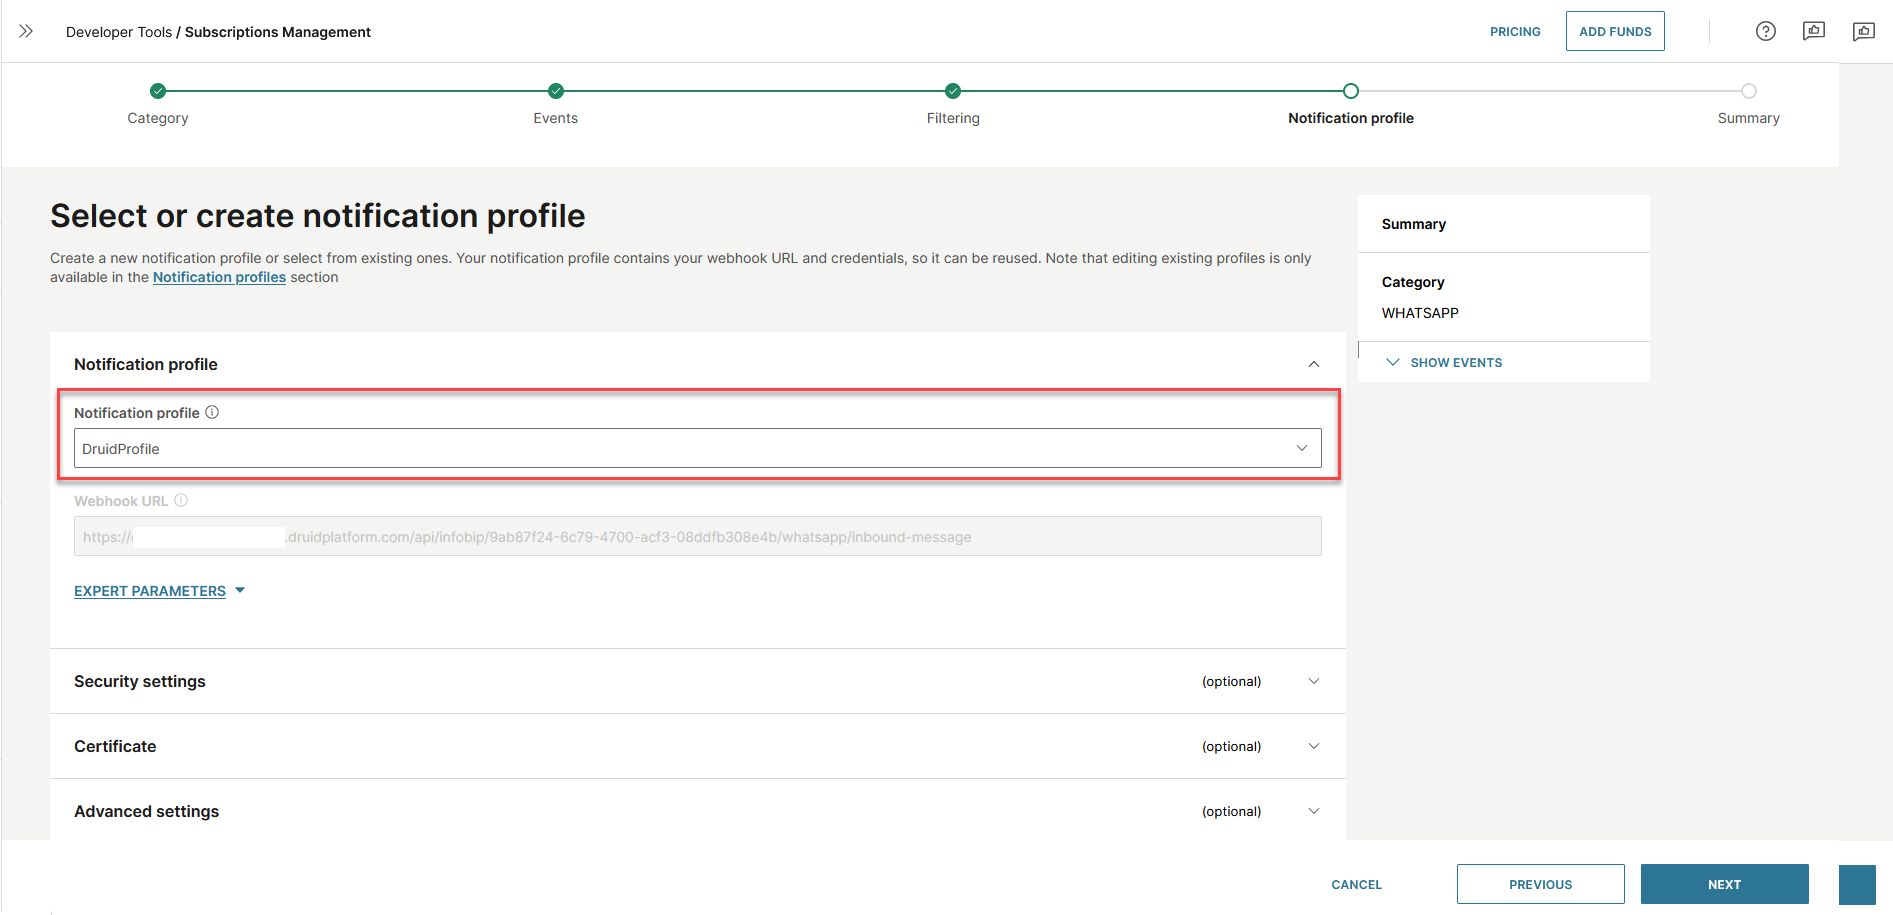
- Select the Infobip notification profile you created at Step 4.
- Click NEXT.
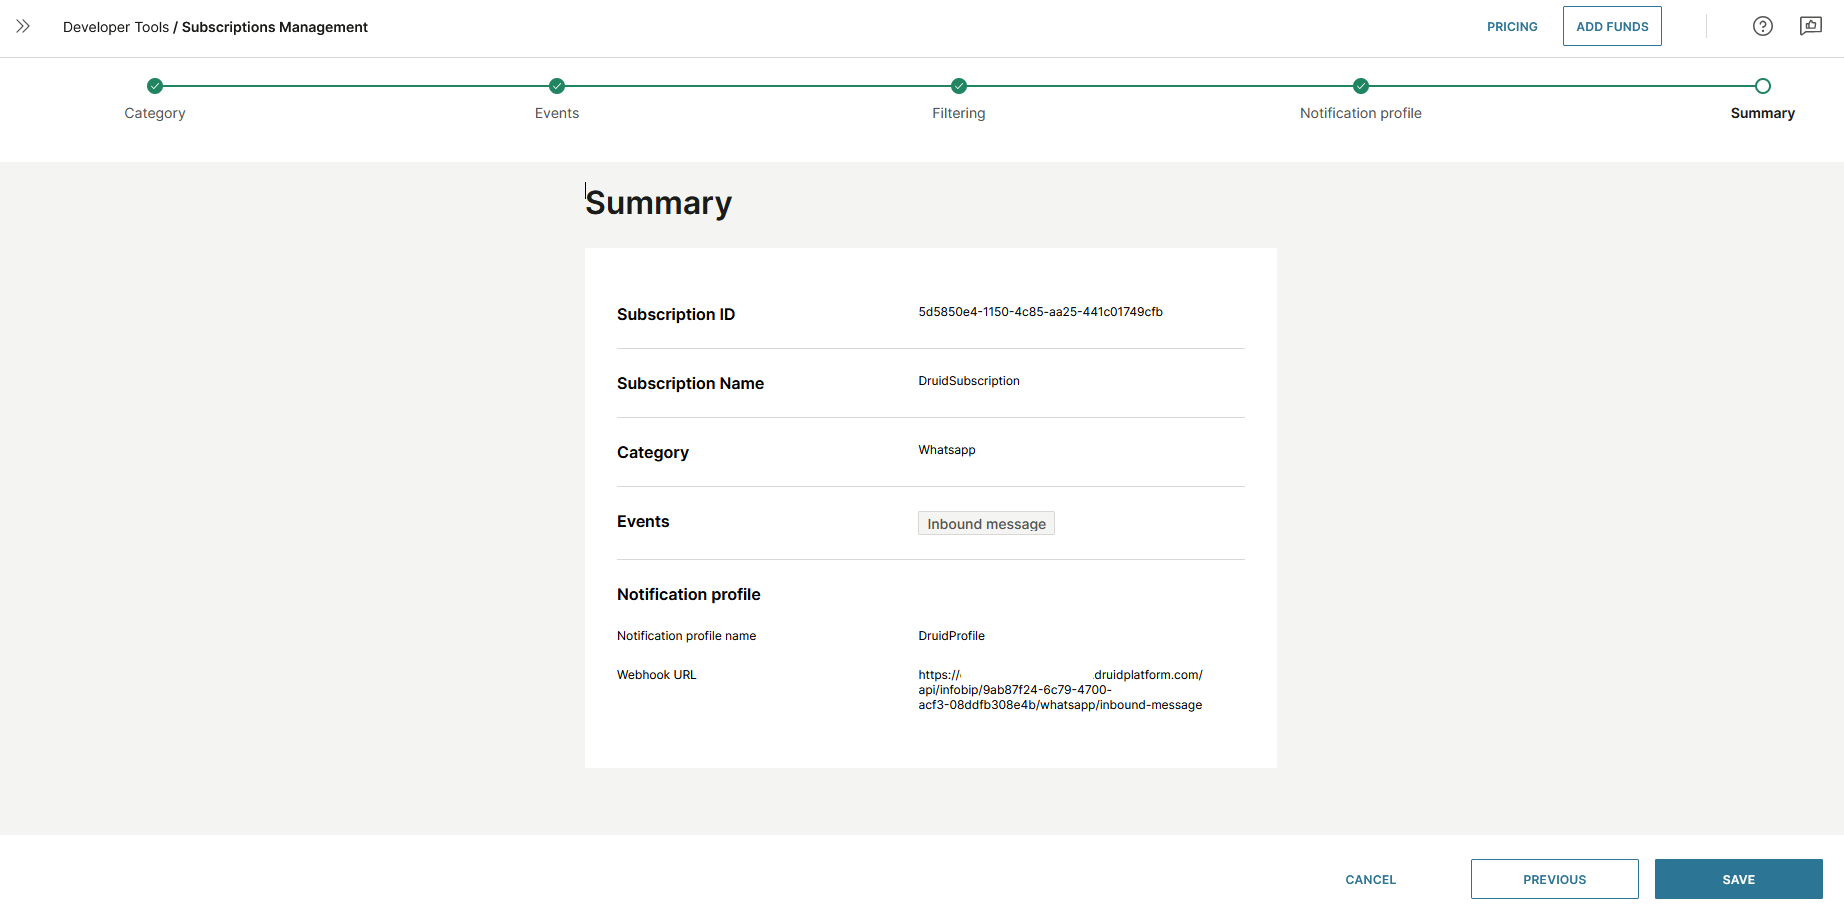
- Review the subscription details.
- Click SAVE.
Users can now interact with the AI Agent on WhatsApp using the configured phone number.