JWT Assertion Authentication
This section explains how to configure Druid to authenticate API calls using a JSON Web Token (JWT) assertion with Microsoft Identity Platform. This method is particularly useful when integrating with APIs that require JWT assertion authentication.
What is JWT Assertion Authentication?
JWT assertion authentication allows your application to prove its identity to an API by presenting a digitally signed JWT. This JWT is signed using a certificate owned by your application and trusted by the Microsoft Identity Platform.
Prerequisites
Before you begin, ensure you have completed the following steps within the Microsoft Entra admin center:
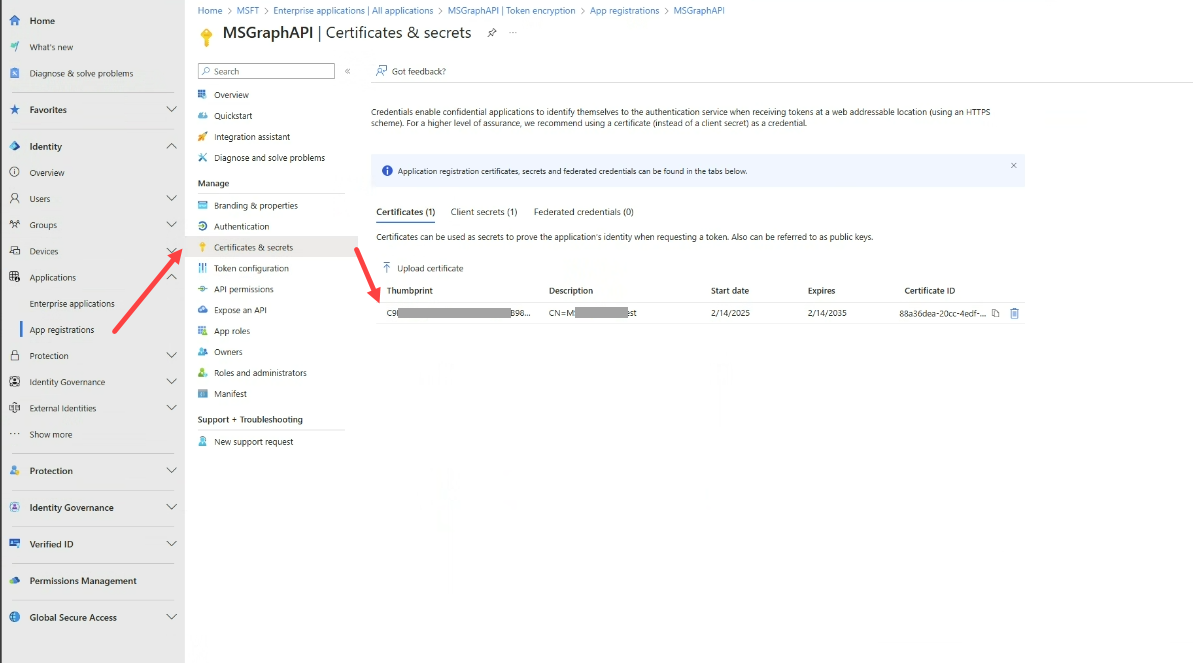
- Associate a certificate credential with your client application: This involves uploading your certificate to the application registration.
- Grant Druid API access permissions to your application. Ensure your application has the necessary permissions to interact with the Druid API.
Set up JWT Assertion Authentication in Druid
Configuring an app in Druid for JWT assertion authentication shares similarities with setting up custom authentication. This section highlights the specific steps for this method:
- Create a new REST app.
- Provide a name and description for your application.
- In the Security Type field, select MicrosoftIdentityPlatform.
- In the Authorization Server field, replace {TenantID} with your Microsoft Entra ID.
- In the Token Expires After field, enter the expiration time on or after which the JWT must not be accepted for processing, and select the time in hours, minutes, days.
- Upload the Private Key file associated with the certificate you configured in the Microsoft Identity Platform. This key is crucial for signing the JWT assertion.
- In the Audience field, enter the intended recipient of the JWT. In this scenario, it is the Microsoft login server. You can directly copy and paste the URL from the Authorization Server field.
- In the Issuer field, provide the identifier of the principal that issued the JWT. This is your client application's ID.
- In the Subject field, specify the claim that identifies the subject of the JWT. This is also the ID of your client application.
- In the Client ID field, enter the ID of your application registered in Microsoft Entra.
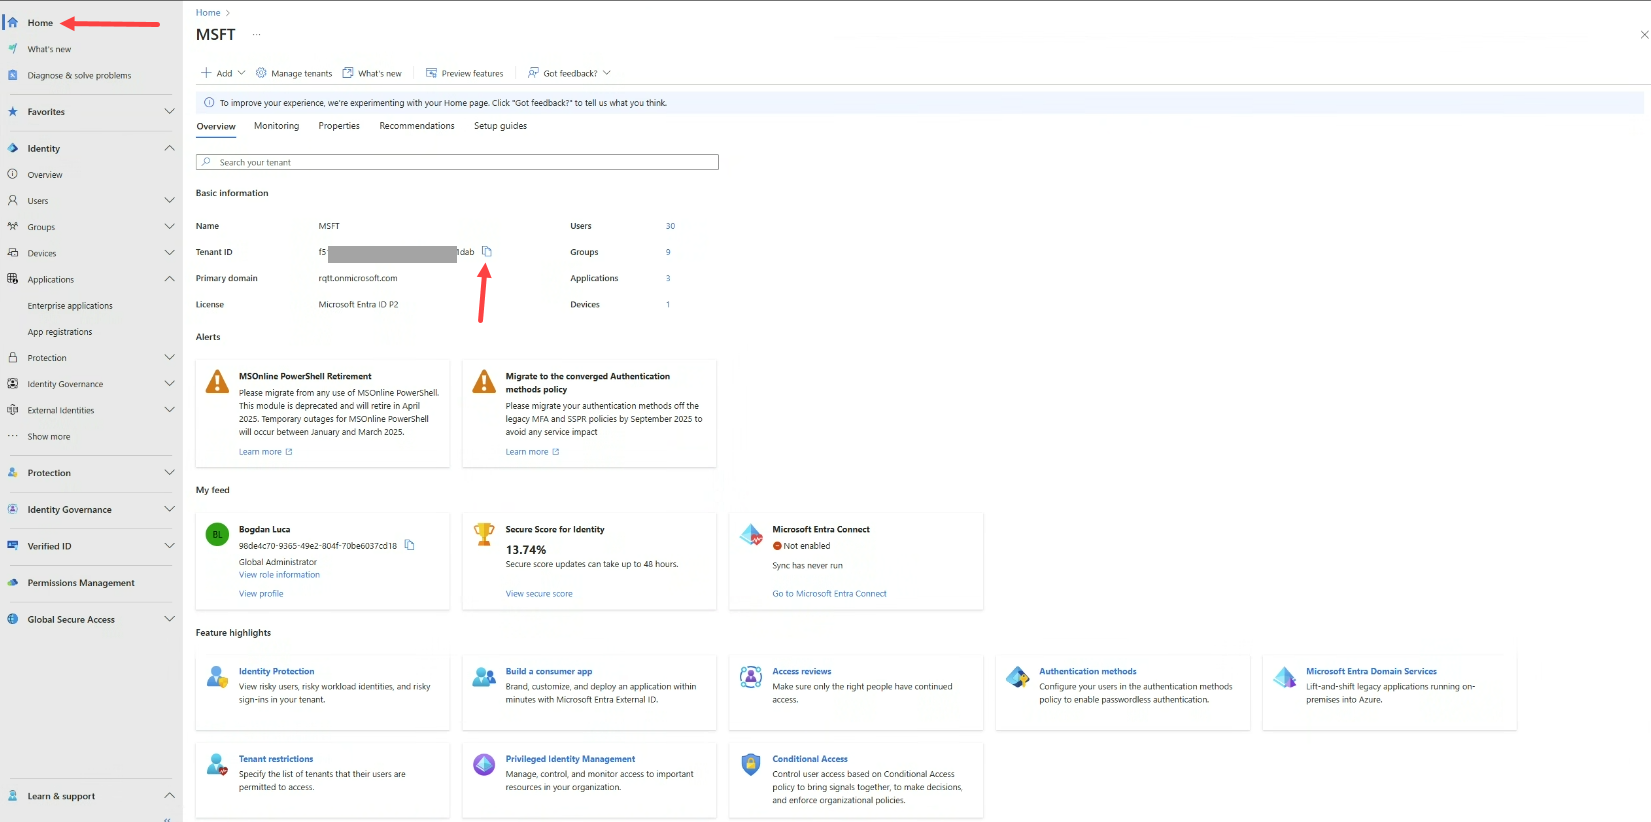
- In the Tenant ID, enter your Microsoft Entra tenant ID (the same ID used in the Authorization Server field).
- Sign in to the Microsoft Entra admin center.
- In the left navigation pane, expand Identity and select Applications > App registrations.
- Click the All applications tab.
- Search for and select the target third-party application you are authorizing.
- On the Overview page, locate the Application (client) ID field.
- Copy to clipboard the GUID value (e.g., 11111111-2222-3333-4444-555555555555).
- Paste this ID in place of <Application-ID> in your Scope value.
- Save the app.
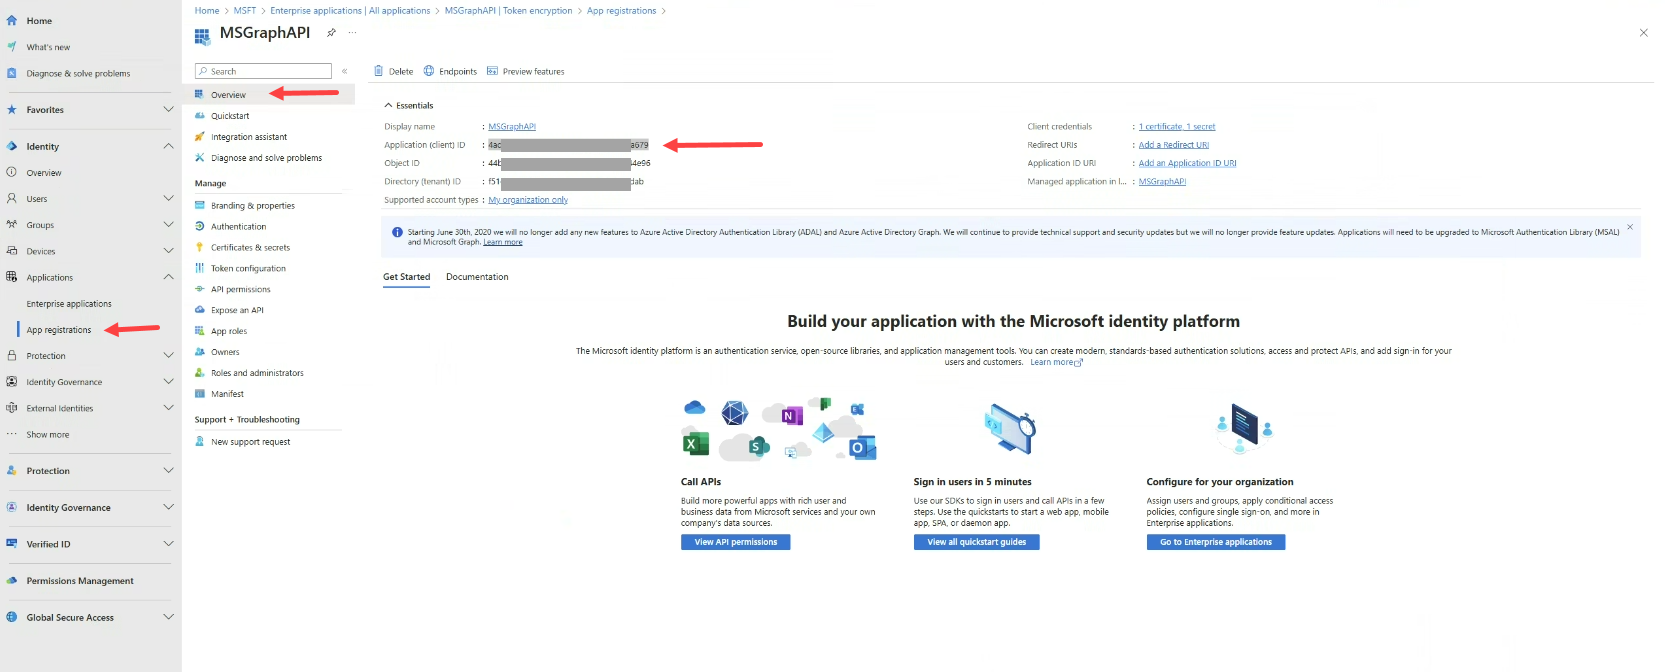
To get the Application (client) ID, follow these steps: