Export Solutions
Before exporting a solution, you need to link all elements (integration entities, document templates, apps roles) that you need on destination (especially those which do not exist on destination, on the tenant or environment where you will import the solution); otherwise, the solution import will fail.
Link entity / entity fields to the current solution
Linking entities / entity fields to the current solution is useful when you want to export a solution with views and forms defined for specific entities.
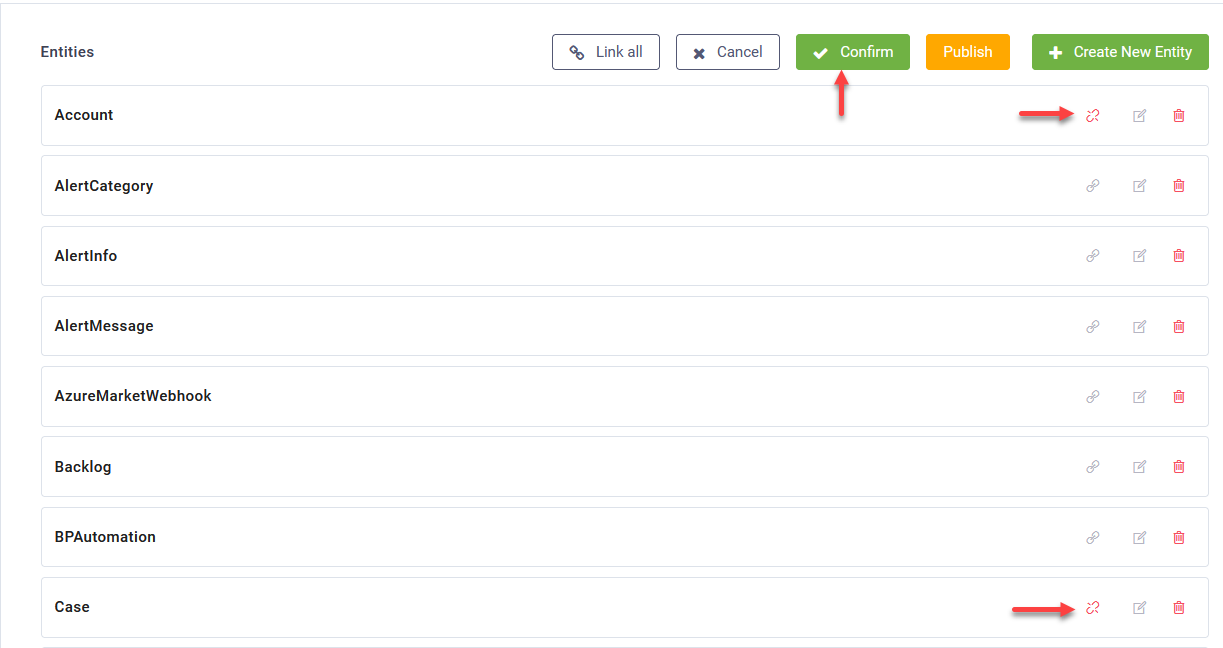
To link entities /entity fields, from the Solution Contents menu, click Entities and at the top-right corner of the Entities page, click  . Click the link icon displayed in line with the entities you want to link and at the top of the page, click the Confirm button.
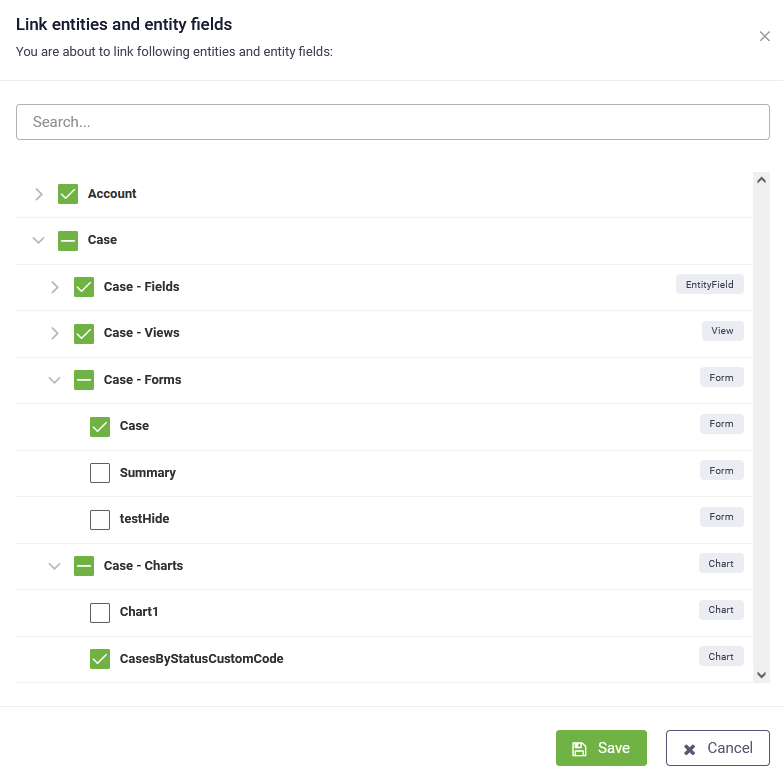
The Link entities and entity fields pop-up appears which lists the entities you selected and all the entities already linked to the current solution (if any).
You can link all entity fields or only specific fields that are used in web views, forms and charts. Click the drop-down displayed in front of the entity name and select all the entity fields or only the ones you want to link to the current solution, then click Save.
Link elements to the current solution
To link elements to the current solution, from the main menu, click References, click the Link icon corresponding to the elements you want to link and click Apply changes.

The elements are linked to the current solution, that is the solution has all needed dependencies. You can now export the solution.
Export a solution
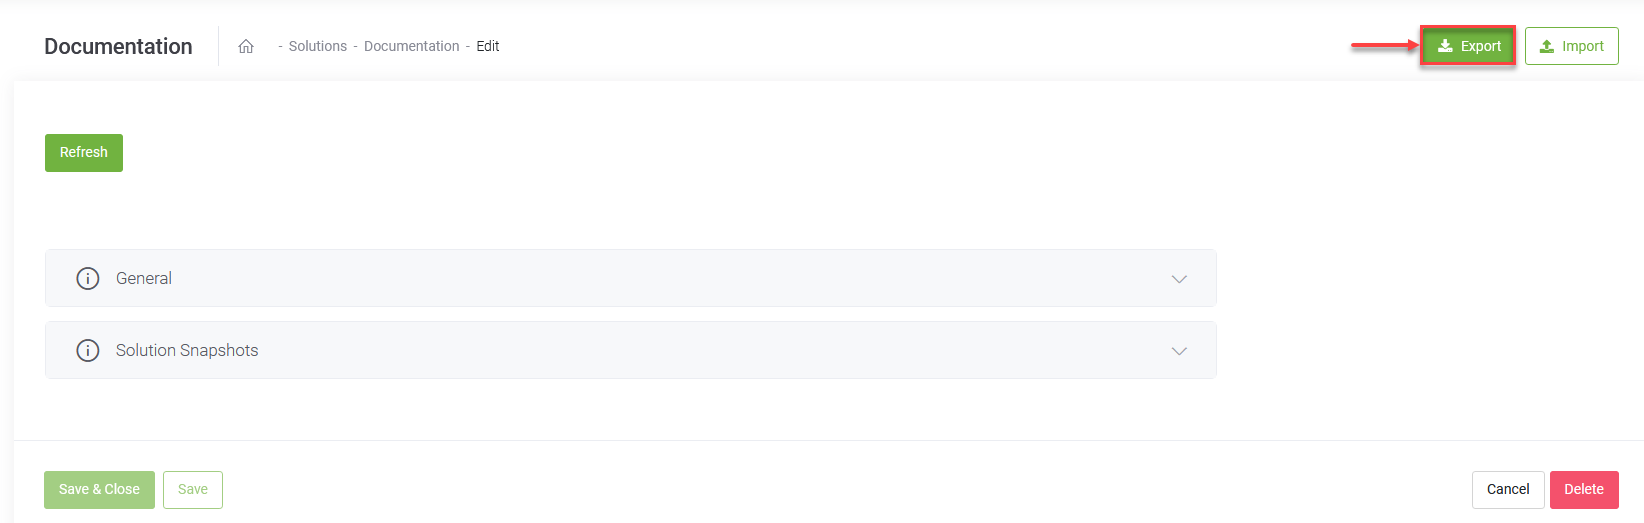
To export a solution, at the top-right corner of the solution configuration page, click the Export solution button.
You can include the following AI Agent-related settings in the solution export package, by selecting the Include AI Agent settings toggle:
- Enable Web Socket
- Block File Upload
- Is out of band upload
- Bot framework version
- Authentication expiration minutes
- Additional languages (including machine translation setup, but without credentials)
- Theme and webchat custom parameters
- NLU settings (without credentials to external NLU providers)
- Dialog management (special flows)
- Live Chat configurations (without Queues and Agents)
- Analytics
- Roles
If the export was successful, Druid generates a new archive (zip file) with the latest version of the elements included in the solution and it's downloaded on your computer in the default Download folder. The zip file contains json files with object metadata.
At the top of the configuration page, the status of the solution packaging operation appears. It's “Pending” while the solution is packed in a zip file and “Failed” if the operation failed. If status is “Pending”, click the Refresh button to refresh the status of the solution packaging operation.
Download a solution
Downloading a solution is similar to exporting it but faster.
Click Download solution and wait for the download to finish.
You can restore the solution at a later moment or import it in another AI Agent or in a different tenant.