Electronic Signature with Evrotrust
This solution enables electronic signing of documents by integrating Evrotrust and DigiTech Consult's REST API services. These services handle different aspects of the process:
- Evrotrust
- Sending documents
- User authentication
- User identification
- Downloading documents
- Document encryption
- DigiTech Consult (DCS)
- Generating RSA encryption keys
- Extracting metadata from documents
- Document decryption
- Generating and returning dynamic, temporary URLs for the decrypted signed documents
- Automatically and periodically deleting signed documents shortly after creation.
Key Benefits
- Secure Encryption: RSA encryption ensures document confidentiality at every step.
- Streamlined Workflow: Automated metadata extraction and temporary URLs simplify document handling.
- User-Friendly Process: Integration with Evrotrust’s provides a seamless signing experience.
How it works
Step 1: Initiating the Process
- The user provides their phone number to the AI Agent.
- After validation, an integration call is made to DigiTech Consult’s server (DCS) to generate a new RSA key pair:
- The public key is sent to Druid.
- The private key is securely stored in DCS for use during decryption steps.
Step 2: Authentication
- An integration call is triggered to Evrotrust’s authentication service with the phone number and public key.
- Evrotrust returns a transaction ID, completing the authentication process.
Step 3: Identification
- When the user clicks the Identify button, Druid sends another integration call to Evrotrust’s identification service with the phone number and public key.
- Evrotrust:
- Sends a document containing the user's personal data to their mobile app.
- Returns a transaction ID to Druid.
Step 4: Signing the Document
- After signing the document in the Evrotrust mobile app, the user confirms in Druid by clicking a button.
- An integration call is made to DCS with:
- The transaction ID
- A unique conversation token generated for the chat session
- DCS requests the signed document from Evrotrust:
- The encrypted document is downloaded and decrypted by DCS.
- DCS extracts metadata from the document (e.g., personal data fields) and generates a temporary URL pointing to the signed document.
- The metadata and the temporary URL are returned to Druid.
Step 5: Sending the Signed Document for Final Approval
- The user clicks the Sign button to proceed, triggering another integration call to Evrotrust with the phone number and public key.
- Evrotrust sends the prepared document to the user’s mobile app and provides a transaction ID.
- Druid waits for the user to sign the document in the app.
Step 6: Finalizing and Downloading the Signed Document
- Once the user confirms the signed document in the chat:
- Druid triggers a call to DCS with the transaction ID and conversation token.
- DCS downloads the encrypted signed document from Evrotrust, decrypts it, and stores it temporarily.
- DCS generates a temporary URL pointing to the signed document.
- Druid presents this URL to the user, allowing them to download the signed document.
Prerequisites
- Tenant Druid community (open new tenant here) or Druid subscription.
- You should have a AI Agent. For information on how to create an AI Agent, see Creating AI Agents.
-
To integrate Evrotrust and DigiTech Consult services for electronic document signing, obtaining specific API keys and completing contractual steps is essential. These measures ensure secure communication and proper usage of the services. To obtain the required API keys, contact DigiTech Consult Ltd Sales.
Configuring the solution
To configure the solution, follow these steps:
Step 1. Install the solution from the Solutions Library
Go to the Solutions Library, search for solution 'Electronic Signature with Evrotrust' and import it following the instructions provided in section Installing Solution Templates.
Wait until the import status shows as “Success.”
Once the import is successful, click Save & Close.
Step 2. Set up the AI Agent special flows
Make sure that the Intent not found flow is selected on the AI Agent (AI Agent details > Dialogue Management).
Step 3. Configure Evotrust API key
On the Solution Contents menu, click Integrations, then click on the Hash Request integration. The integration contains only a custom code task.
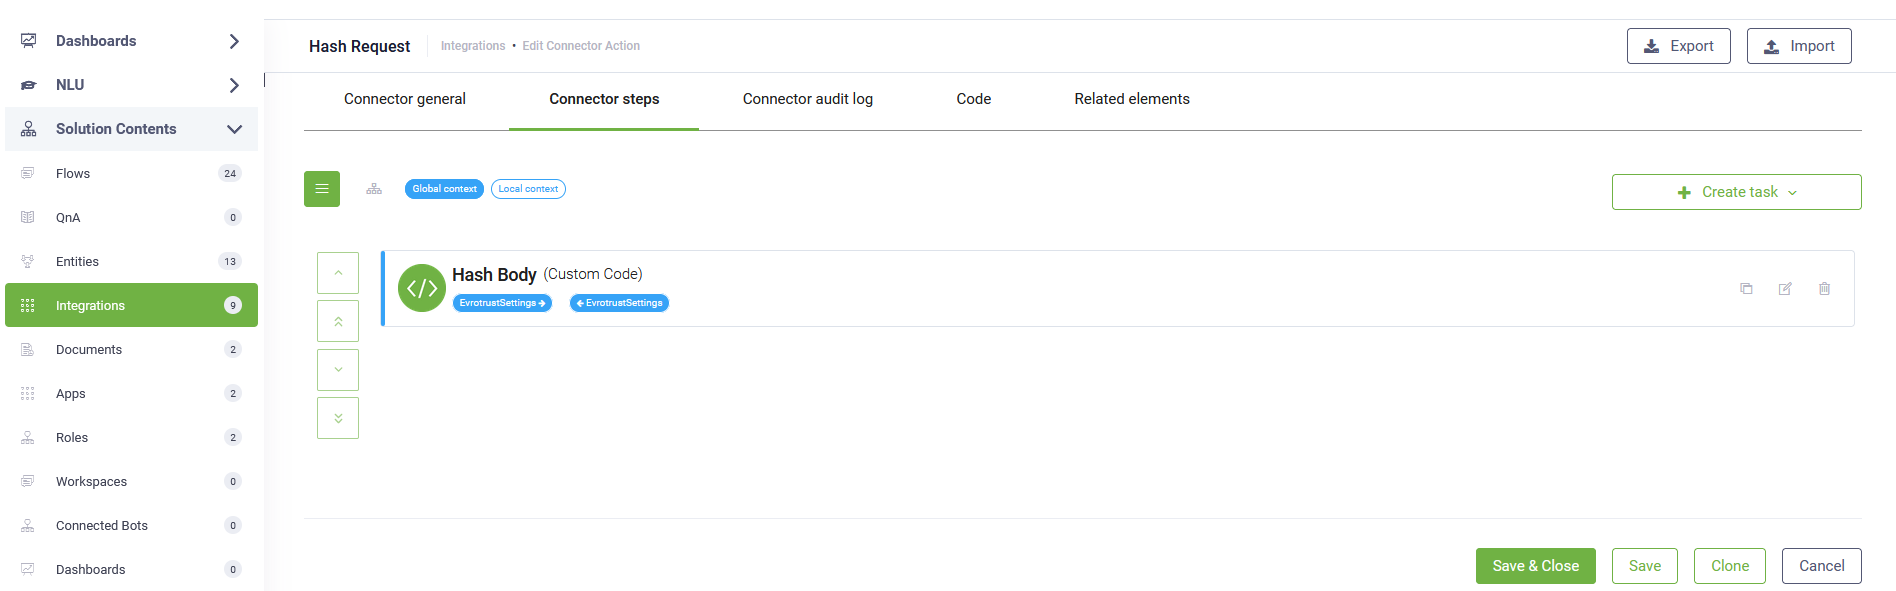
Click on it and enter the API key you got from DigiTech Consult Ltd.
Save the integration task.
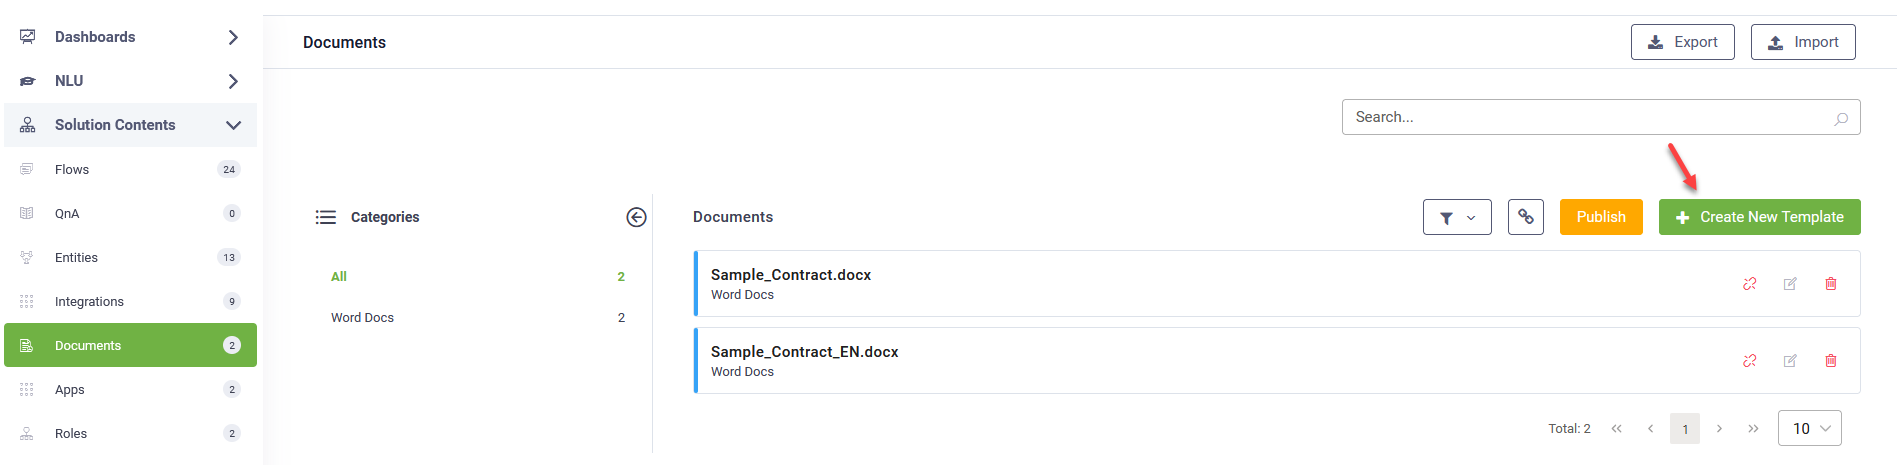
Step 4. Upload your document template and configure the integration
On the Solution Contents menu, click Documents and upload the document template that the AI Agent will send to the user in the chat for signing. Use the 'Create new template' feature to upload a new document template.
On the Solution Contents menu, click Integrations. Click on Document_Generator integration, then click on the integration task.
From the Document Template Name field, select your document template.
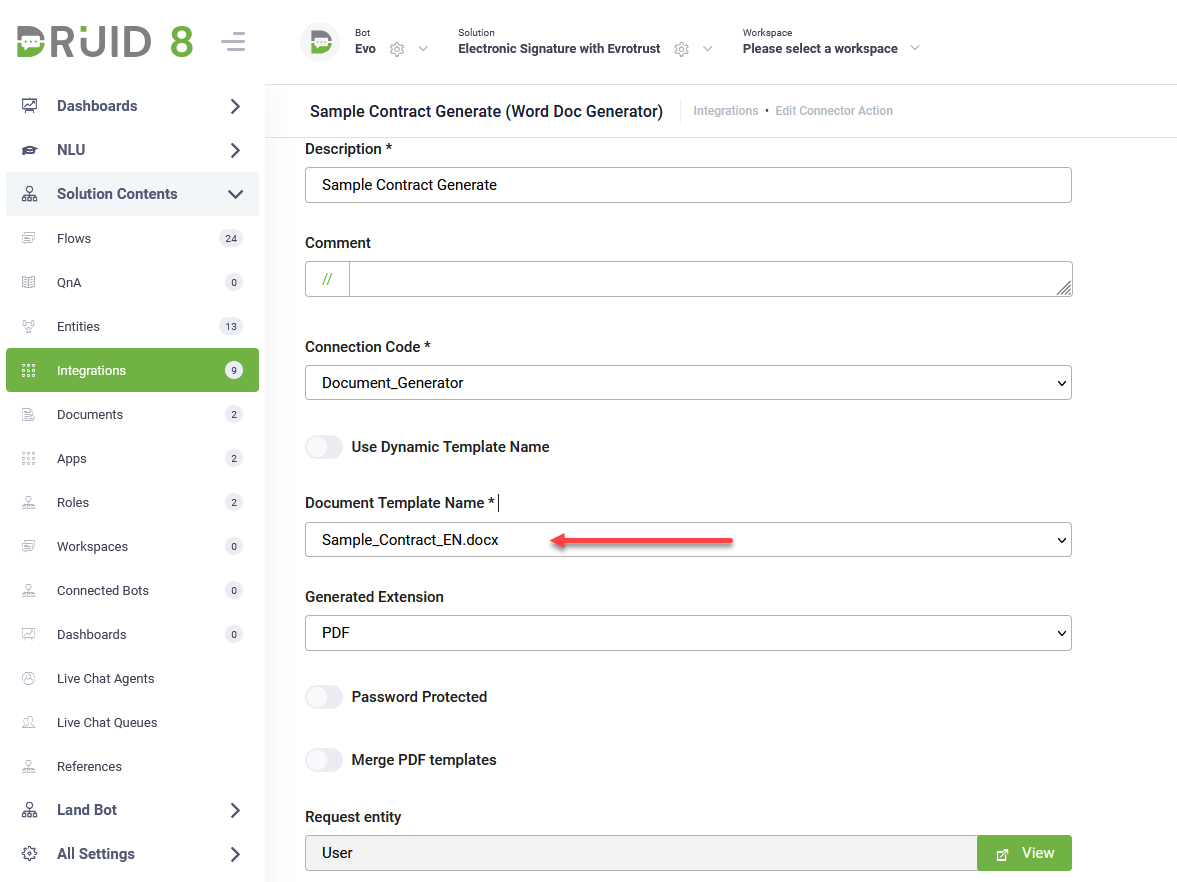
Click Save & Close, then click Save.
Publish the integrations.
Step 5. Additional configuration for new fields in the document template
If additional fields need to be included in the document template, to ensure seamless integration between the AI Agent data and the document template, allowing the user’s information to populate dynamically during the signing process, follow these steps:
- Add the desired fields to the [[User]] entity. These fields will serve as placeholders for dynamic values in the document template.
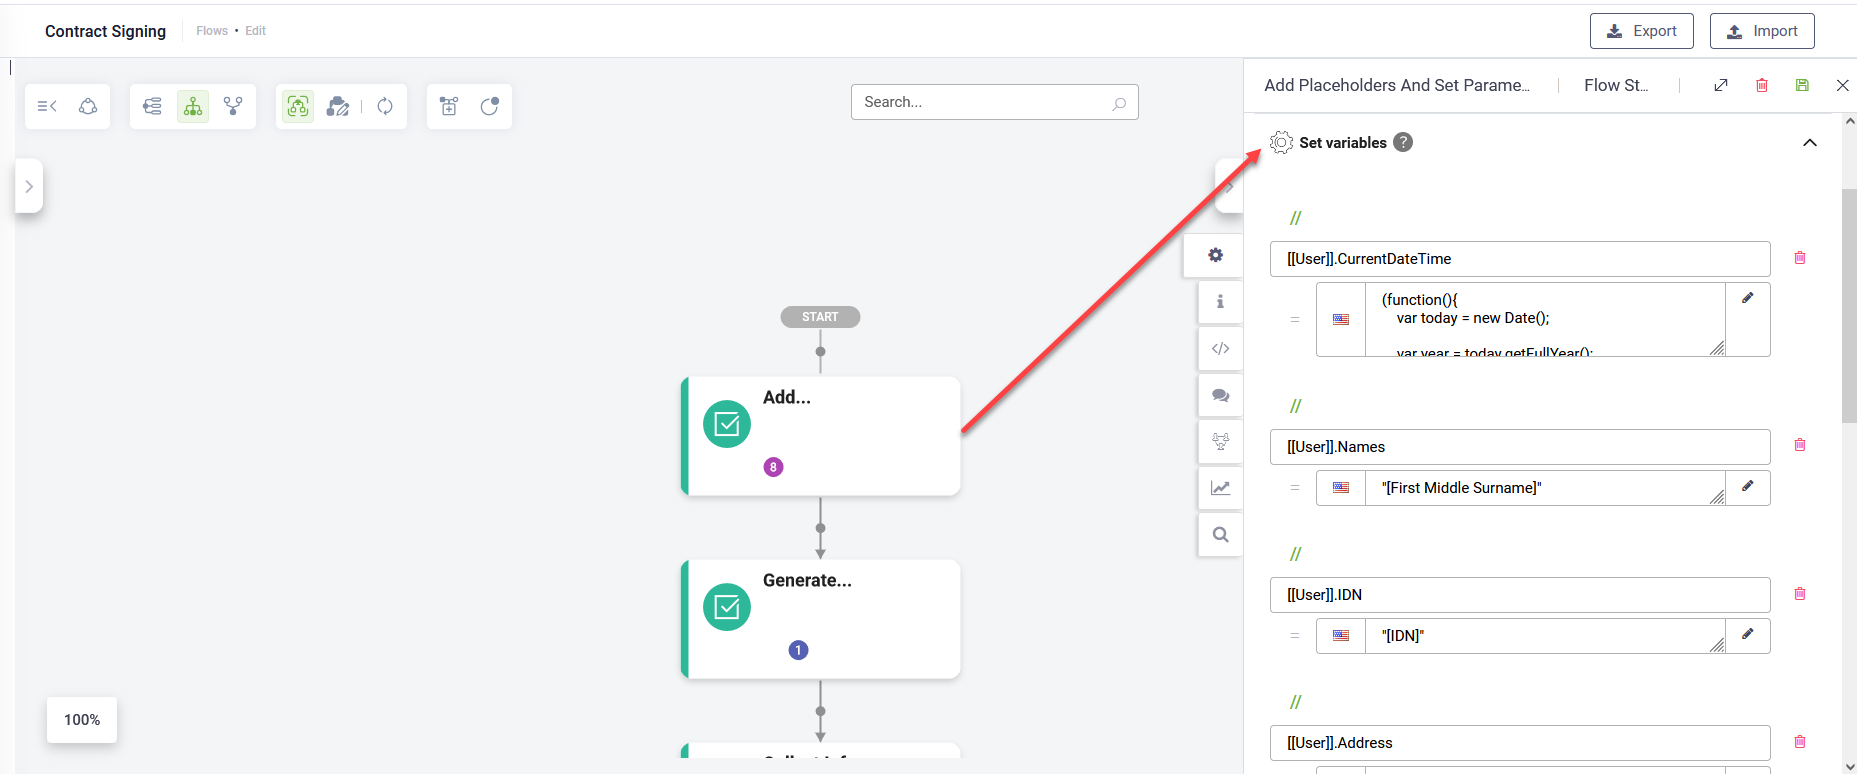
- Add Placeholders in the Contract Signing flow:
- Go to the 'Add Placeholders And Set Parameters' step and under Set Variables, add the new placeholders.
- Ensure each placeholder corresponds to the field you want to display in the document when it is initially shown to the user.
- Map the additional fields to the corresponding entity fields.
Example:
If the AI Agent has an entity field such as [[UserInfo]].Occupation, and you want its value to appear in the document template, in the 'Collect Info From Document' step of the Contract Signing 2 flow, set the value as a variable: [[User]].Occupation = [[UserInfo]].Occupation
This mapping ensures the data from the AI Agent field ([[UserInfo]].Occupation) is correctly transferred to the corresponding field ([[User]].Occupation) in the document template.