UiPath Salesforce Integration
Use this solution template if you want to showcase the ticket management process in Salesforce for opening a new ticket, see your tickets list and close tickets by using Druid-UiPath unattended activities integration.
Prerequisites
- Tenant Druid community or Druid subscription.
- UiPath Orchestrator subscription, Community or Enterprise edition.
- Salesforce account used for ticket management integration. You need to have a Salesforce instance. If you don't have one, go to https://www.salesforce.com and create your first Salesforce instance.
Setting up the solution template
Step 1. Install the solution from the Solutions Library
For information on how to install the solution, see Installing Solution Templates.
Step 2. Download the UiPath processes

The archive contains the following files:
- add-salesforce-ticket - used to showcase the creation of new tickets in Salesforce
- get-salesforce-tickets – used to get the list of open tickets
- close-salesforce-ticket – used to close a ticket in Salesforce
Unzip the files, you will need them during the processes setup.
Step 3. Set up the UiPath processes
Step 3.1. Create Orchestrator folder
Go to the UiPath Orchestrator and create a new modern folder where you will add the Salesforce Ticket UiPath Processes.
Step 3.2. Define the UiPath Assets for Salesforce
Under the folder created at the previous step, click the Assets tab.
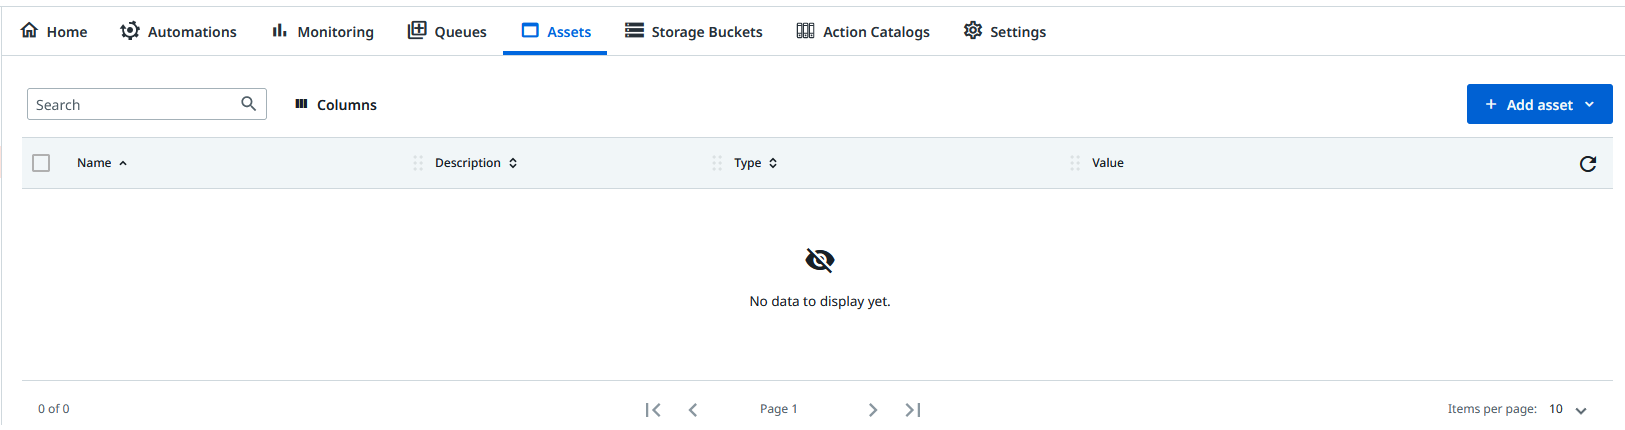
Add the following UiPath assets:
- Salesforce Consumer
- Type: Credential
- Username: Your Salesforce Client Id
- Password: Your Salesforce Client Secret.
- SalesForce Endpoint & Security Token
- Type: Credential
- Username: The endpoint URL of your Salesforce instance.
- Password: Your Salesforce Security Token.
- Salesforce User&Pass
- Type: Credential
- Username & Password: Your Salesforce instance credentials.
NOTE: You must have admin privileges with your Salesforce instance credentials.
Step 3.3. Publish the Salesforce Ticket UiPath Processes
3.3.1 For each of the following UiPath Processes: add-salesforce-ticket and close-salesforce-ticket, follow these steps:
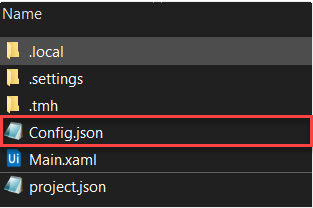
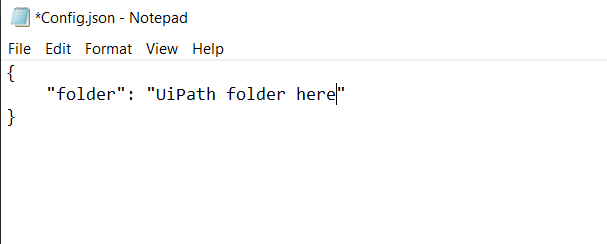
- Go to the Config.json file and open it.
- Set up the name of the folder where you will add the process.
- Go to the Main.xaml, open it.
- To publish the process in your orchestrator, click Publish.
3.3.2 Publish the get-salesforce-tickets process
To publish this process, follow these steps:
- Open UiPath Studio.
- Click Open a Local Project. Browse for the > get-salesforce-tickets folder (from prerequisites) and choose the project.json file.
- Right click on the process name and click Open Project Folder.
- Open the Framework folder, then the Config folder. There are two json files.
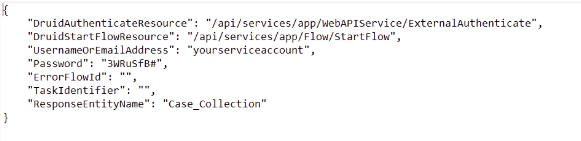
- Open DruidConfig.json. Complete all the fields as shown in the screenshot and save.
- Fill in the correct service account username or email address and the password for a service account, which has enough permissions to create a flow.
- Open UiPathConfig.json. Complete the folder name and the queue name you previously created.
- Switch to UiPath Studio. Click Publish.

Step 4: Set up Druid
- In Druid, go to Apps, search for Salesforce UiPath and configure the connection string to your orchestrator following the procedure described in Creating the UiPath Connection Strings.
- Go to Integrations and configure each UiPath integration following the integration procedure as listed below:
- Go to the Salesforce Flows, search for the show-open-tickets-response flow and copy the flow ID.
- Search for the show-open-tickets-trigger flow and open it. It contains only one step.
- Click the edit icon.
- In the Set Variables section, modify the variable [Case]].FlowId with the flowId taken from the show-open-tickets-response flow.
- Save the step.
- Open the chatbot and type in the chat one of the following phrases:
| UiPath Process | Integration Procedure |
|---|---|
| add-salesforce-ticket | Starting UiPath Unattended Processes |
| close-salesforce-ticket | Starting UiPath Unattended Processes |
| get-salesforce-tickets | Running Unattended Process using Orchestrator Queues |
| English (EN) | Romanian (RO) |
|---|---|
| I want to open a new ticket | Vreau sa postez un nou incident |
| I want to see my tickets list | Arata-mi lista ticketelor |
| Set up closing for my ticket | Vreau sa inchid ticketul |