Knowledgebase with GPT V4
Knowledgebase with GPT V4 combines DRUID’s Knowledge Base capabilities with the power of DRUID LLMs (Druid Becus and Azure OpenAI model gpt-4o-mini) to deliver accurate, conversational answers in real time without requiring users to browse through multiple articles.
The solution is perfect for teams looking to streamline information access, improve support efficiency, and get clear visibility into how their virtual assistant handles real-world questions.
This solution introduces intelligent fallback handling and powerful analytics:
- If a user’s intent is recognized, the system returns the best match from the KB.
- If the intent is not recognized, the system uses DRUID LLM general-purpose gpt-4o-mini model to generate a relevant answer — still using your business context.
- Built-in intent logging and reporting lets you see exactly how each question was answered (by KB, flow, or GPT) and track performance trends over time.
- Includes specialized agents like Rephrase, AskGPT, and Intent Not Recognized to manage different types of queries.
This solution also includes the KB Agent Workspace, where you can:
- Track all intents
- View and export collected user feedback
- Access detailed reports on KB agent usage.
Prerequisites
- Tenant Druid community (open new tenant here) or Druid subscription.
- You should have a published Druid bot. For information on how to create a bot, see Creating Druid Bots.
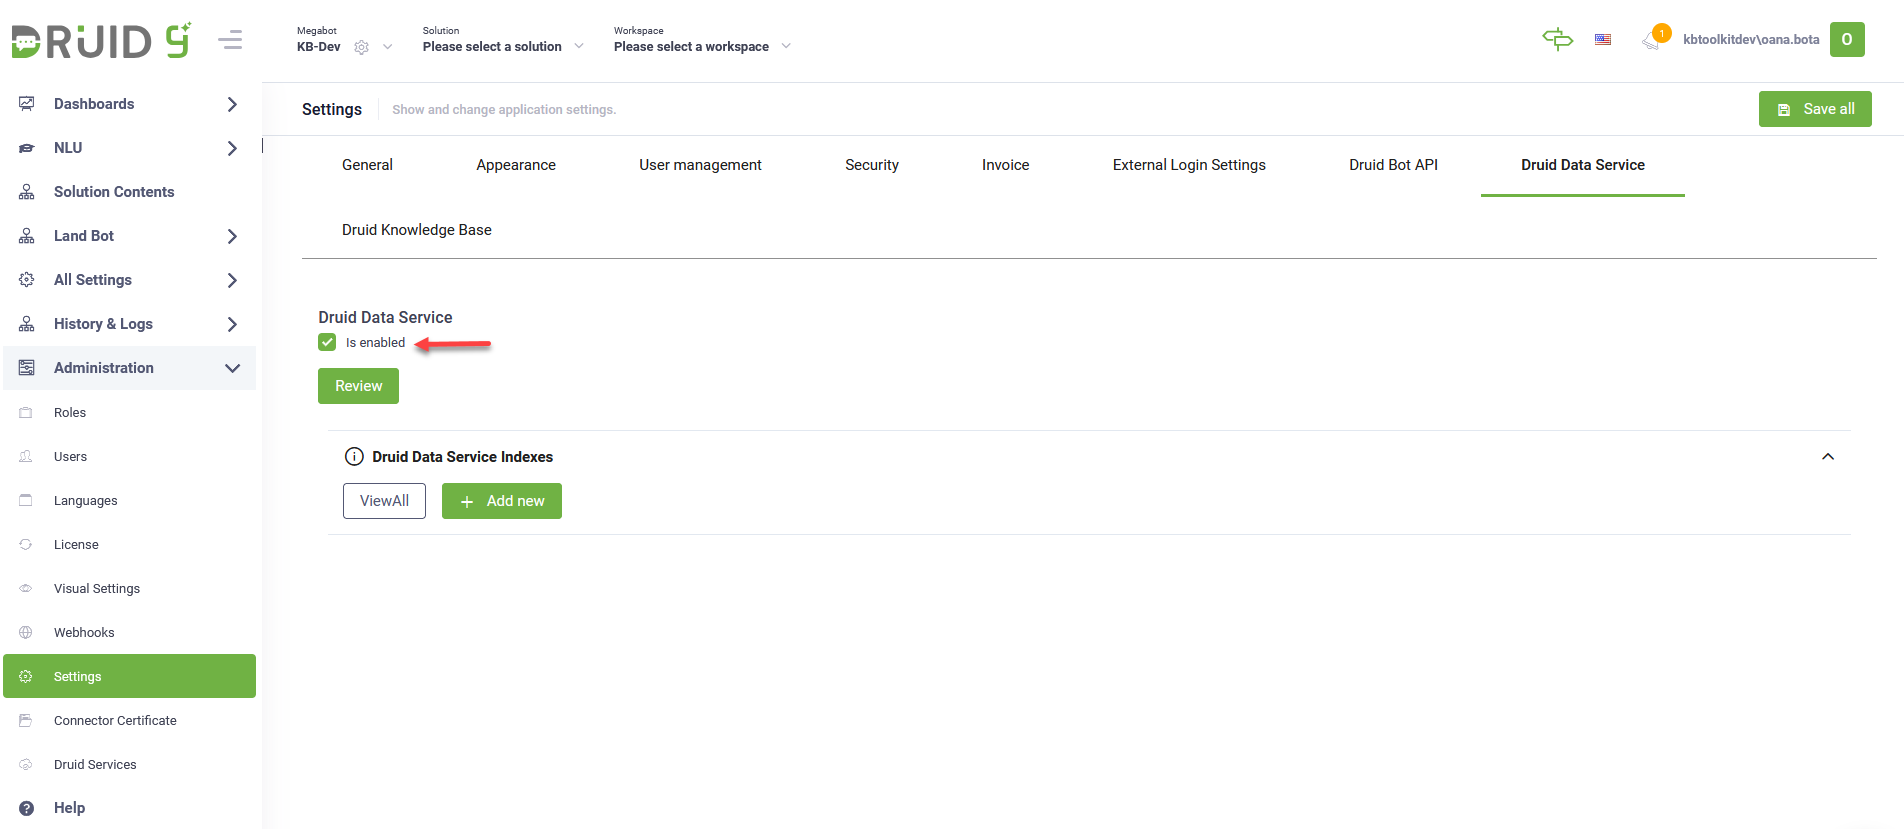
- You should have the API Resources for Druid WebView and Druid Data Service enabled on your tenant. Contact your DRUID sales representative to enable them. Then, activate the Druid Data Service in your tenant by navigating to Administration > Settings > Druid Data Service, and selecting Is enabled and clicking the Save all button at the top right of the page.
- DRUID LLM API resources must be activated for DRUID Becus and AzureOpenAi/gpt-4o-mini on your tenant. Contact your DRUID sales representative to enable DRUID-dedicated resources and generate API tokens for Druid.LLM.
Configuring the solution
To configure the solution, follow these steps:
Step 1. Install the solution from the Solutions Library
Go to the Solutions Library, search for solution "Knowledgebase with GPT V4" and import it following the instructions provided in section Installing Solution Templates.
Wait until the import status shows as “Success”.
Step 2. Install the custom solution from the Solutions Library
Go to the Solutions Library, search for solution "Knowledgebase with GPT V4 Custom" and import it following the instructions provided in section Installing Solution Templates.
Wait until the import status shows as “Success”.
The Knowledgebase with GPT V4 – Custom solution allows you to tailor the Knowledge Base flows to meet your bot’s specific needs.
Step 3. Set up the bot and KB special flows
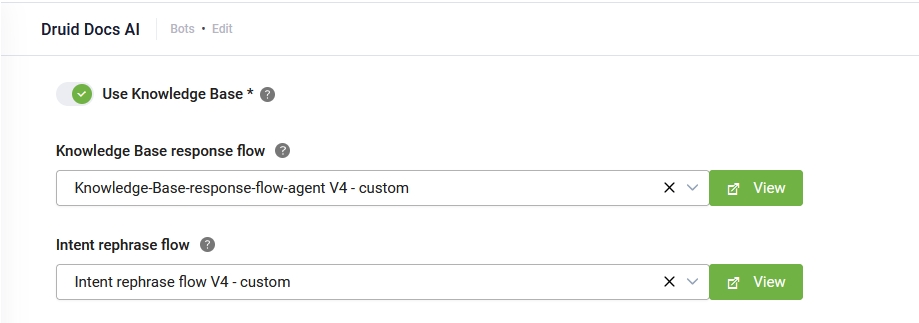
Go to the bot settings, Details page and click the Dialog management section header. The section expands. Select the following special flows belonging to the custom solution you imported from the Solution Library, as follows:
|
Special Flow |
Select |
|---|---|
| Intent not found flow | Intent-not-recognized V4 - custom |
| Knowledge Base response flow | Knowledge-Base-response-flow-agent V4 - custom |
|
Intent rephrase flow |
Intent rephrase flow V4 - custom |
Tap on Use Knowledge Base.
Scroll down and click Save & Close.
Step 4. Enable Feedback Reactions in Web Chat
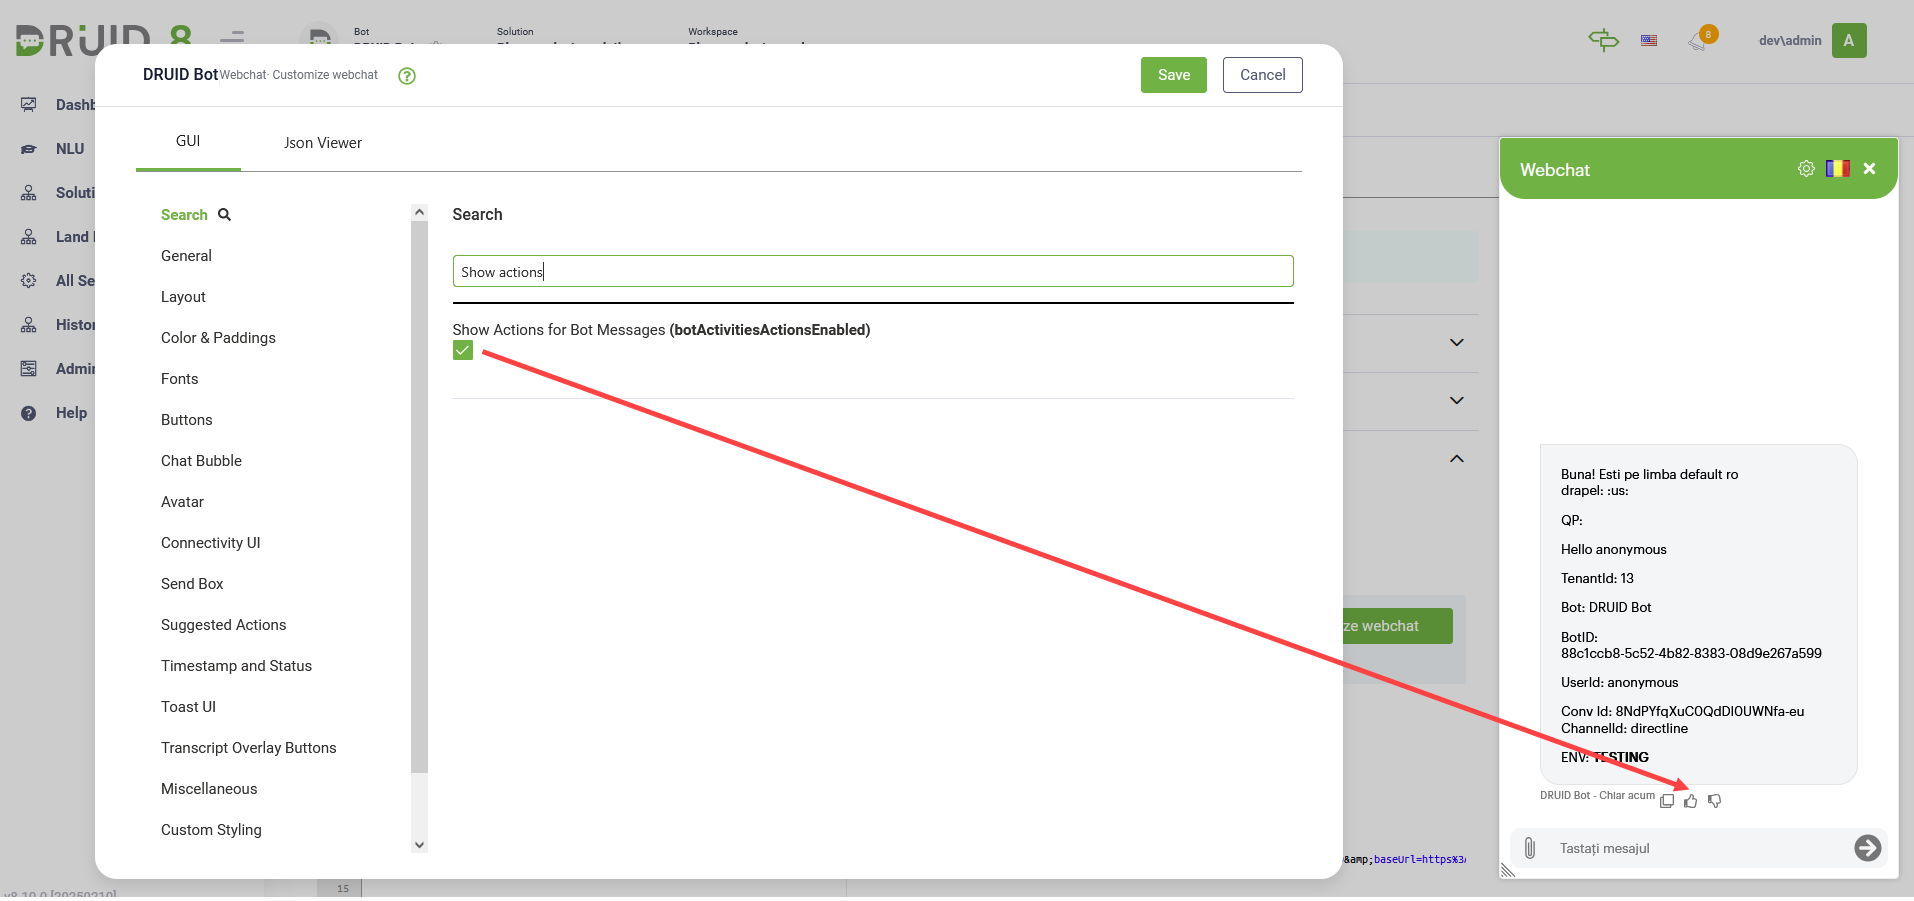
Users can provide positive or negative feedback using thumbs-up or thumbs-down emojis, helping you enhance bot interactions and improve the user experience.
While the solution contains the flow for feedback collection, you need to enable feedback reactions.
To enable feedback reactions in web chat, follow these steps:
- Go to the bot details page.
- Click Theme and navigate to the Webchat snippet section.
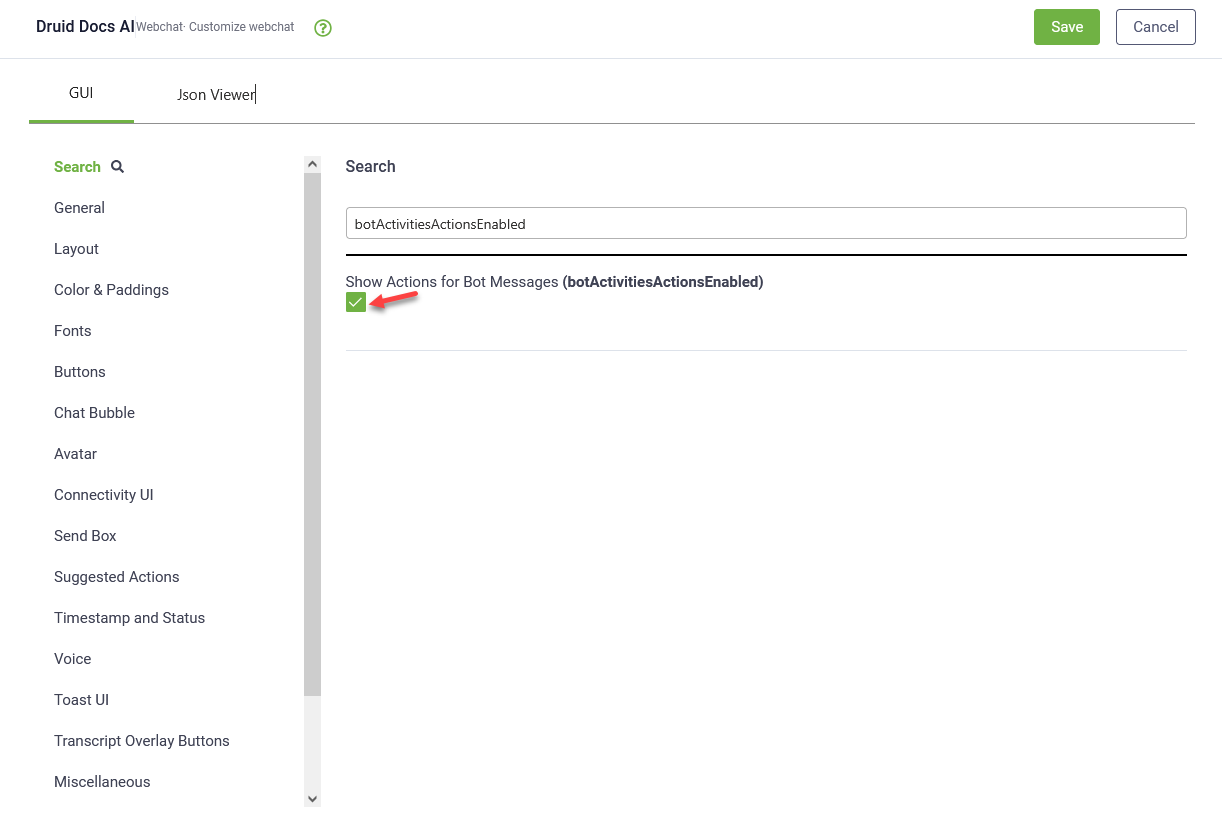
- Click Customize webchat and search for Show Actions for Bot Messages (botActivitiesActionsEnabled).
- Select the option to enable it.
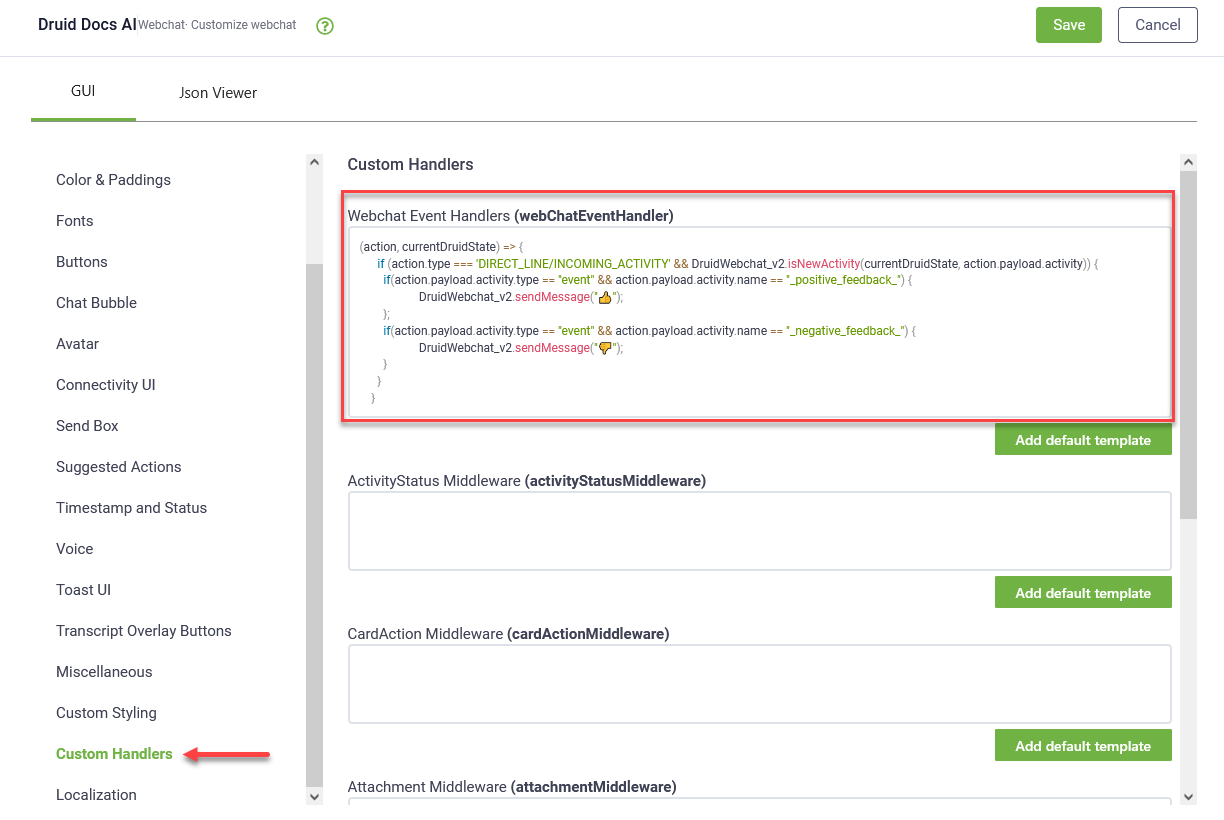
- Click on Custom Handlers and in the Webchat Event Handlers (webChatEventHandler) field, enter the following code:
- Click the Save button at the top right-corner of the pop-up.
- Save the bot.
(action, currentDruidState) => {
if (action.type === 'DIRECT_LINE/INCOMING_ACTIVITY' && DruidWebchat_v2.isNewActivity(currentDruidState, action.payload.activity)) {
if(action.payload.activity.type == "event" && action.payload.activity.name == "_positive_feedback_") {
DruidWebchat_v2.sendMessage("👍");//replace the code between "" with the thumbs up emoji
};
if(action.payload.activity.type == "event" && action.payload.activity.name == "_negative_feedback_") {
DruidWebchat_v2.sendMessage("👎");//replace the code between "" with the thumbs down emoji
}
}
}