Product recommendation with GPT-Azure (ReAct)
Combining the DRUID technology and GPT technology, you provide users with an amazing human-like multi-turn conversation based on form completion and the GPT response. DRUID orchestrates the entire conversation.
How it works?
Using ReAct system prompts allows you to build a structured conversational flow where based on the resolution, the AI Agent follows different paths in the conversation.
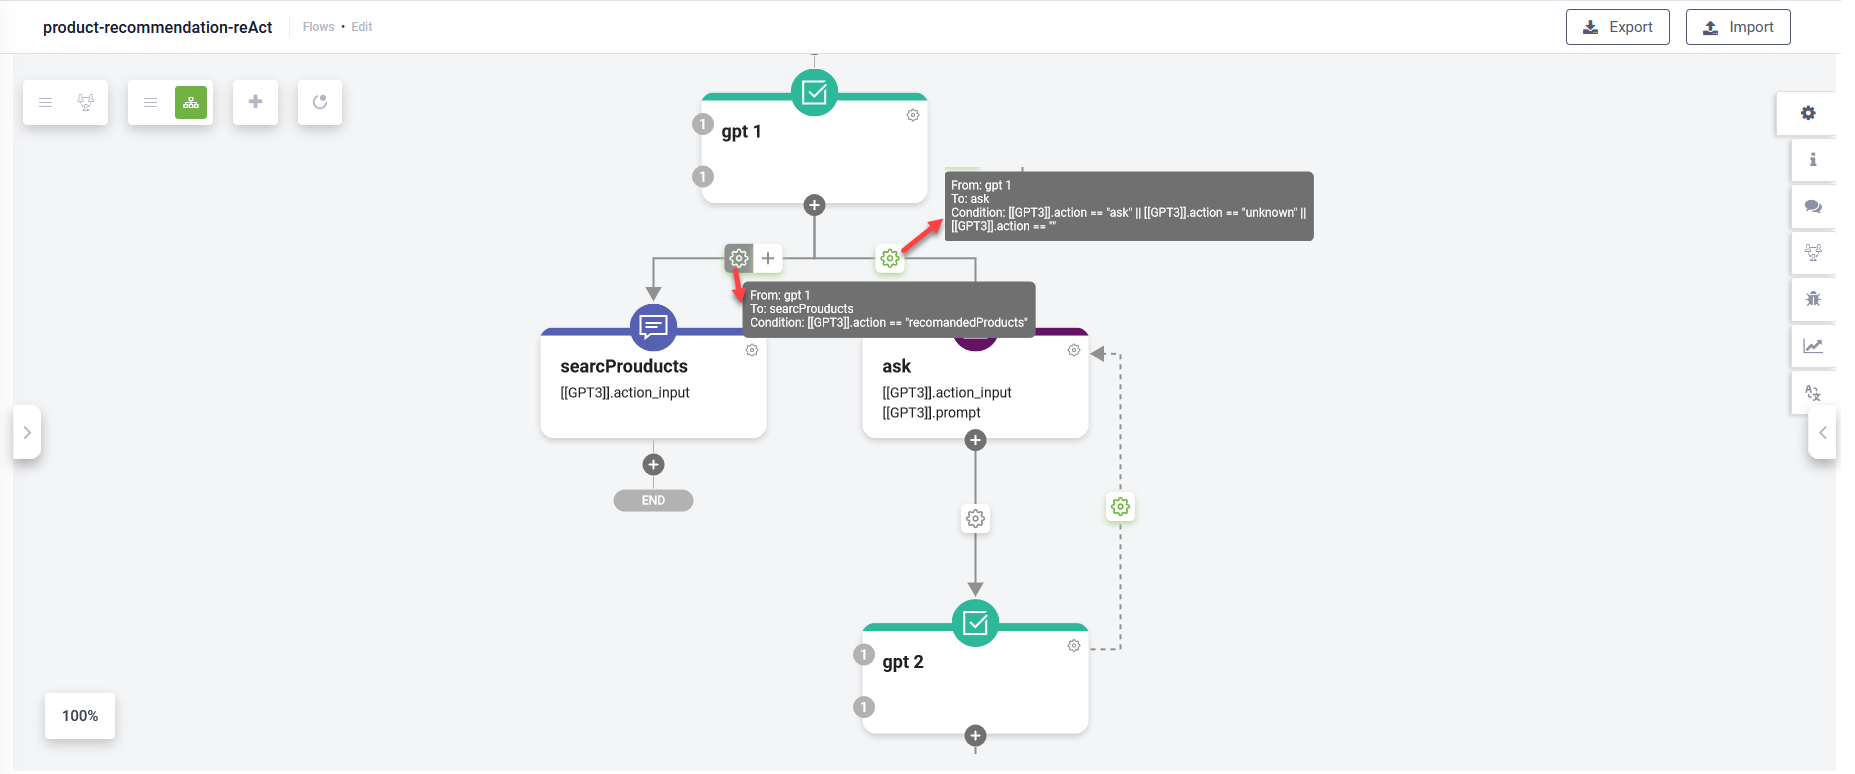
The ReAct (Reason + Act) prompt engineering technique involves combining reasoning traces and task-specific actions.
Reasoning traces help the model with planning and handling exceptions, while the actions and observations allow the model to interact with external tools to retrieve information.
This prompt engineering technique is flexible as it allows you not only restrict the business context, but also allow the GPT to consume the open GPT knowledge.
The multimodal reasoning and action process occurs behind the scene to gather the necessary information for generating final responses to users.
To set up the solution, follow these steps:
Step 1. Import the solution
Go to the Solutions Library, search for solution Product recommendation, ReAct, GPT and import it.
Step 2. Set up your OpenAI API URL and key
To set up the Azure OpenAI URL and key:
-
In Druid Portal, on your AI Agent, select solution Product recommendation, ReAct, GPT and on the main menu, click Apps.
-
Click on the app.
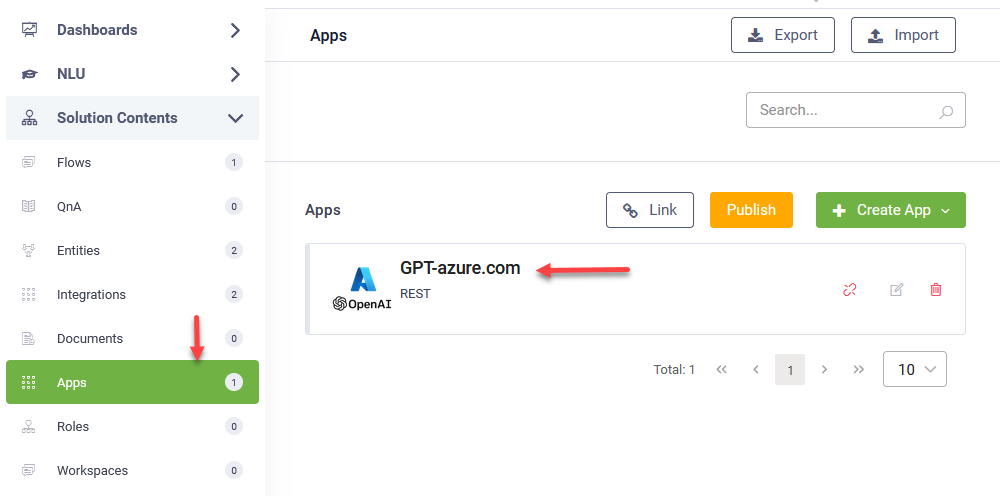
The app configuration page opens.
-
In the Base URL field, enter the URL of your Azure OpenAI.
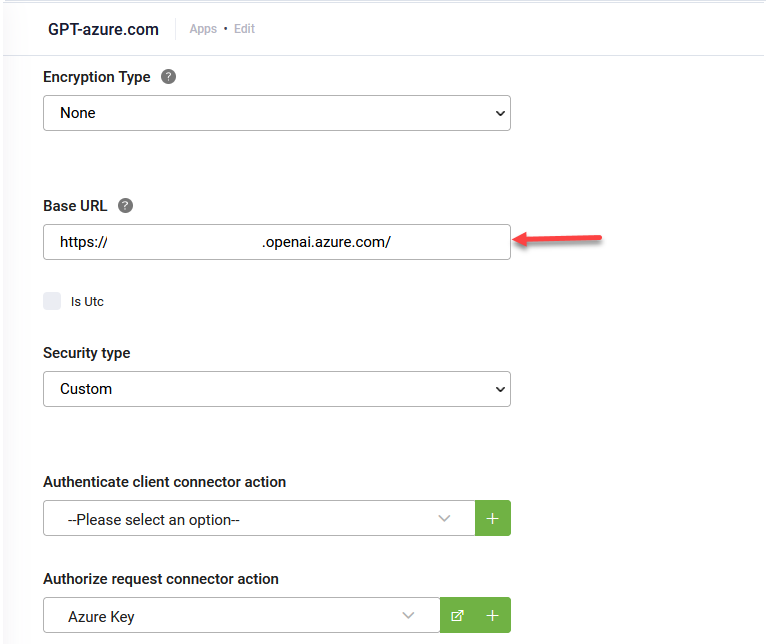
-
Scroll down to the Variables table and as value for the key variable, set up the secret key of your Azure OpenAI.
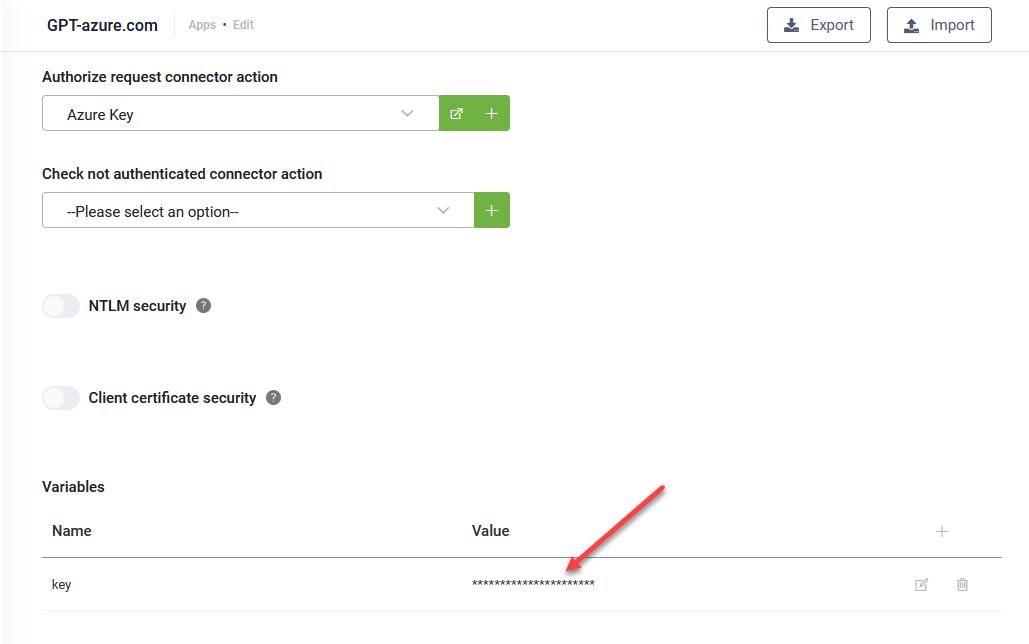
-
Publish the changes.
Step 3: Set the System role (message)
The system role also known as the system message is included at the beginning of the conversational flow. It provides the initial instructions to the model.
To learn more about the system role, see Microsoft documentation.
To customize the system role, click the Settings icon on the first message step and in the step editor, click on the Set Variables section, then click the Code Editor icon.
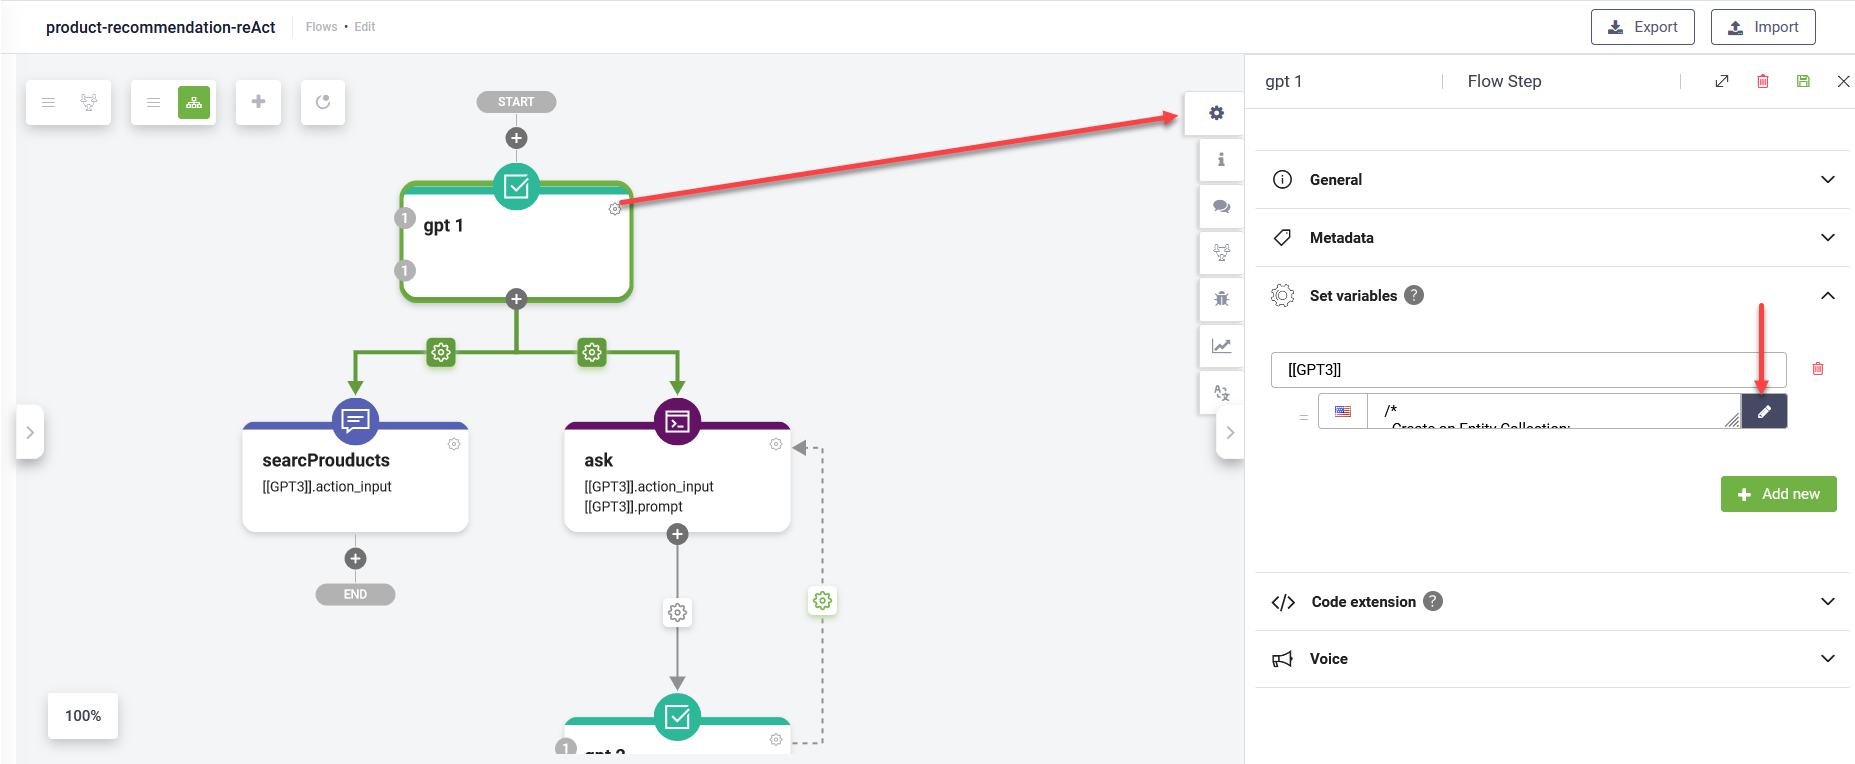
Using the Code Extension, customize the system role for your use case or just include basic instructions.

The system role that comes with the solution template provides GPT with the following instructions:
-
Set the personality and the purpose.
-
Set the parameters of the search.
-
Tell GPT to consume the GPT open knowledge, you can do so in addition to restricting the search context mentioned at step f.
-
Provide the list of tools available for GPT and tell GPT when to use each tool. In DRUID, you will follow predefined paths per response returned by the GPT according to each particular available tool.
-
Define the JSON schema of the response.
-
Set the search context aligned with the business domain to instruct the GPT model to provide an answer within a restricted business context.
-
Instruct GPT what to answer when the response is outside of the specified business context.
-
Instruct the GPT to act with the ReAct pattern:
-
Instruct GPT to ALWAYS respond with a response in the following format: Question/Thought/Action/Observation. This way you will be able to use regular expressions to extract structured content from the response.
-
Enforce GPT to respond in the above format.
Step 4: Run the first call to OpenAI
The solution uses the REST Connector to call the OpenAI service. Make the request to the generative AI model completions API endpoint.
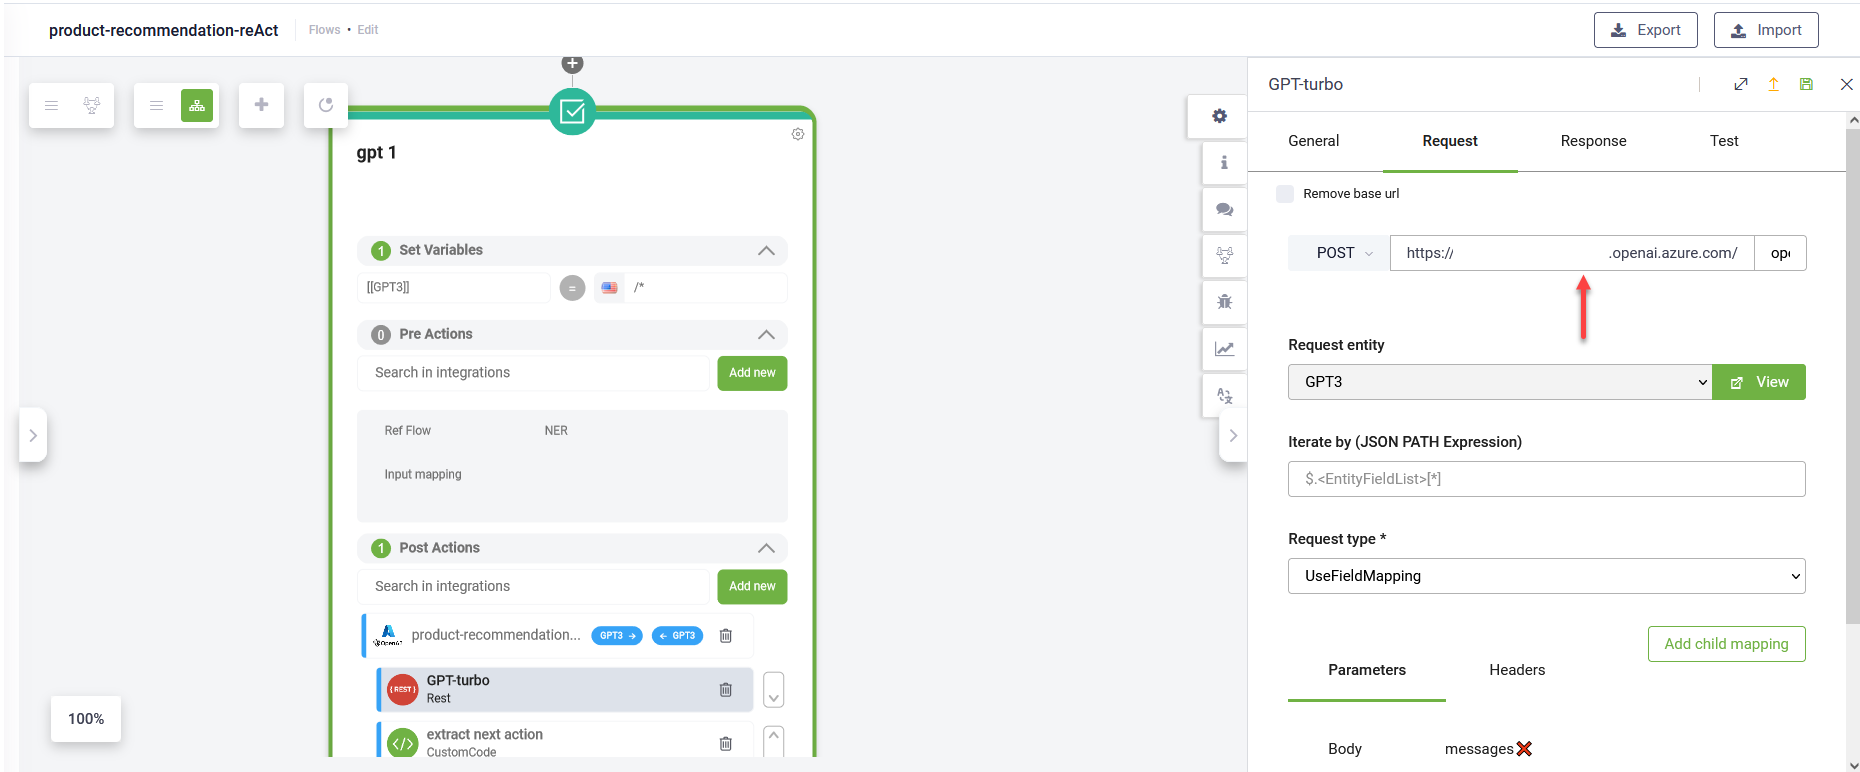
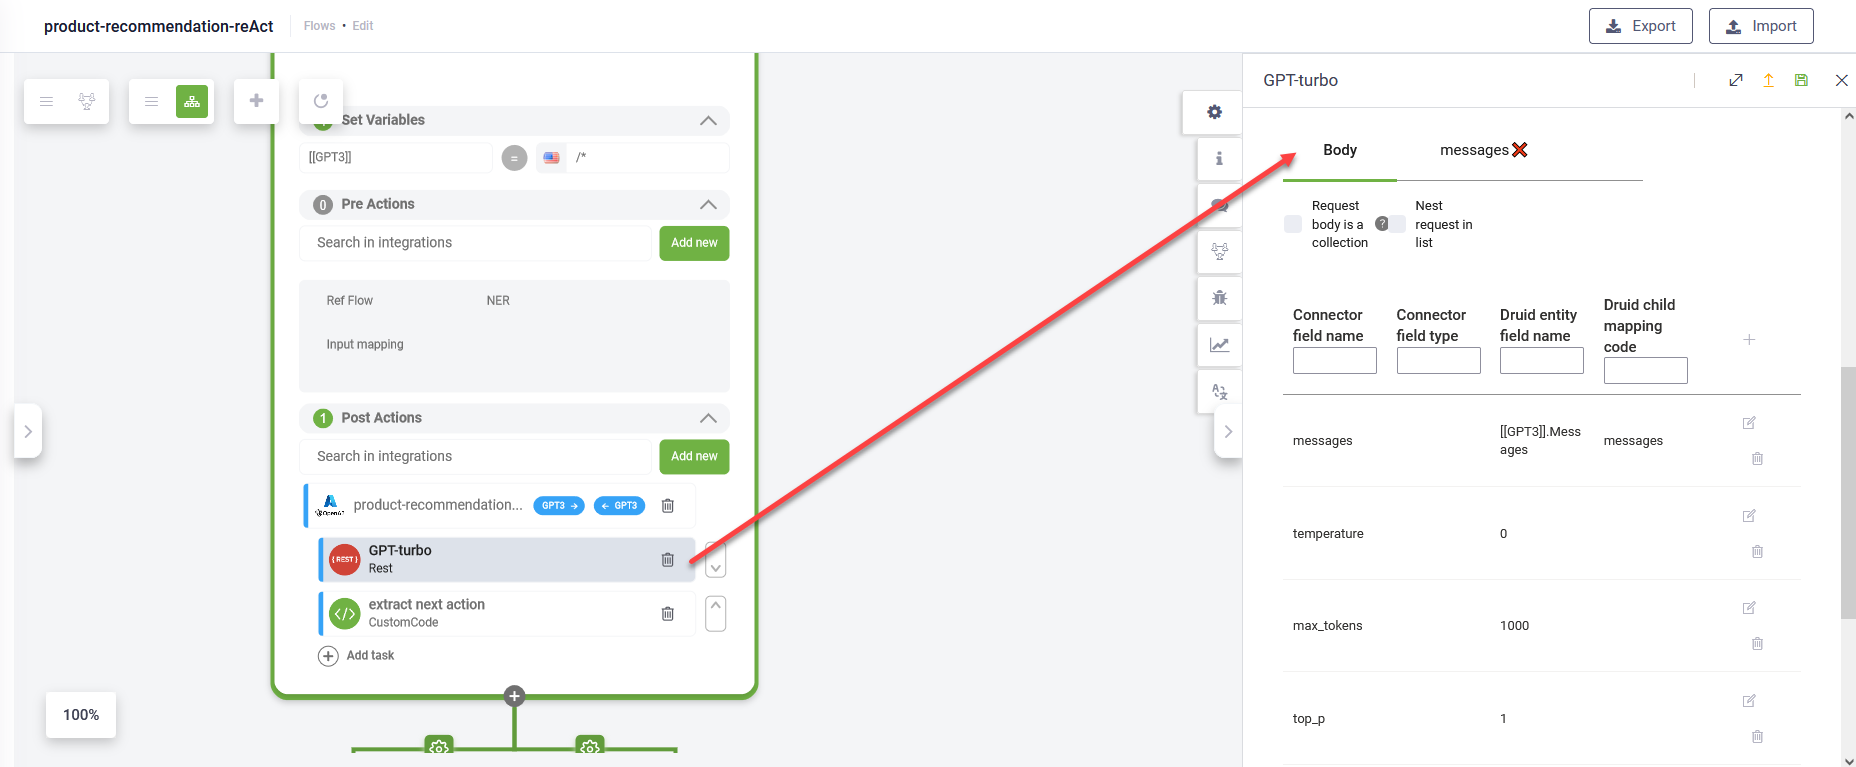
In the request body, control the hallucination. Set the “temperature” to zero if you want to disable the usage of OpenAI open knowledge, in correlation with the instructions you provided in the prompt. You can also limit the tokens consumption by setting up the “max_tokens”. You can set additional Open API call paramateres.
The prompt comes with a predefined Custom Code task that adds the OpenAI response into the Messages collection, extracts the next action and the input of the action and also add errors to the connector audit log.
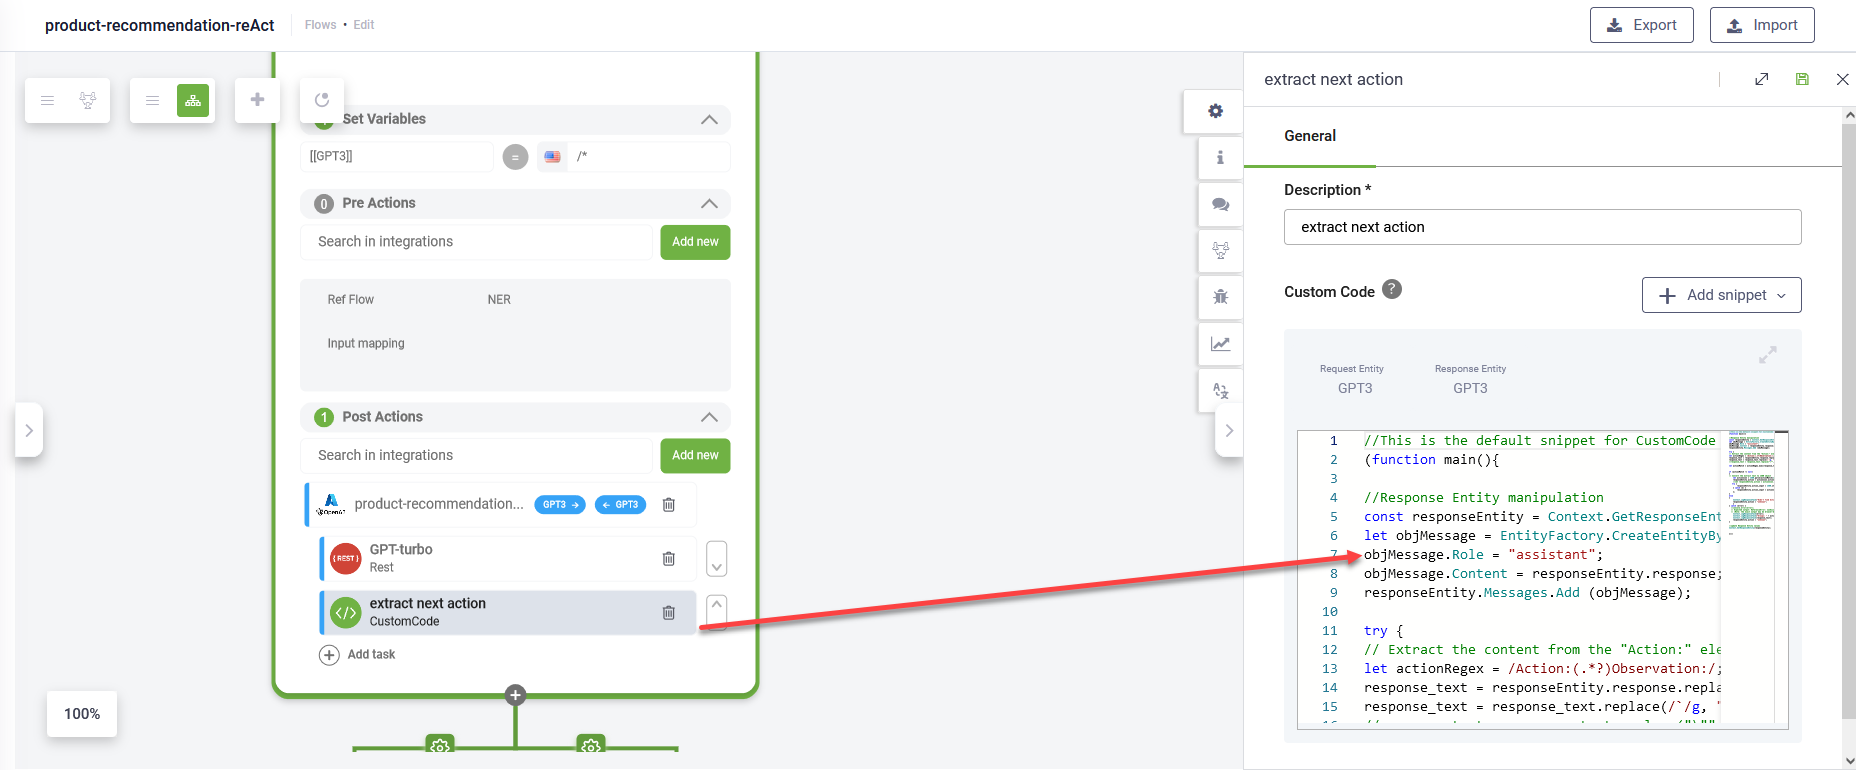
You can use the Code Extension task to add additional operations on the response (if required).
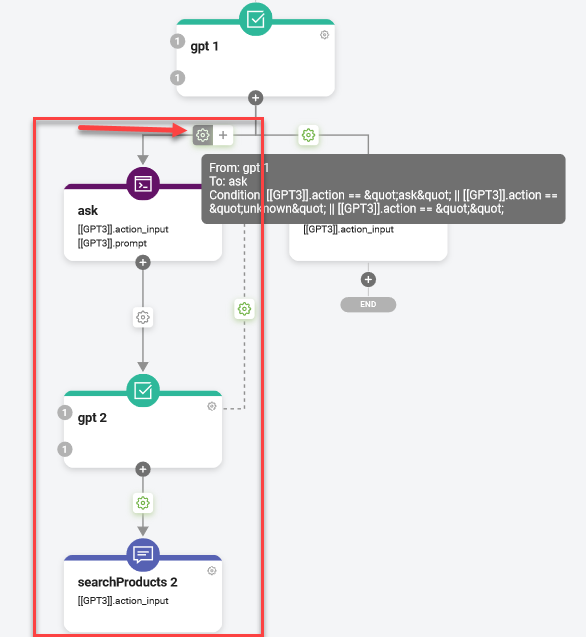
Step 5: Set up conditions to follow different paths
When customizing the conversational flow you need to take into consideration the available tools the GPT was instructed to use and when. Also knowing the next action returned by the GPT helps you set conditions on steps to drive the conversation. Using the different actions returned by the tools used by the GPT you will set up different conversation turns:
-
If the GPT returns knows the response, then provide the response to the user.
-
Otherwise, ask the user for more details, pass on the messages to the GPT and repeat the steps until GPT knows how to answer and DRUID provides the response to the user.
Step 5: Present the response in the chat
Present the Open AI response in the chat and capture the user input.
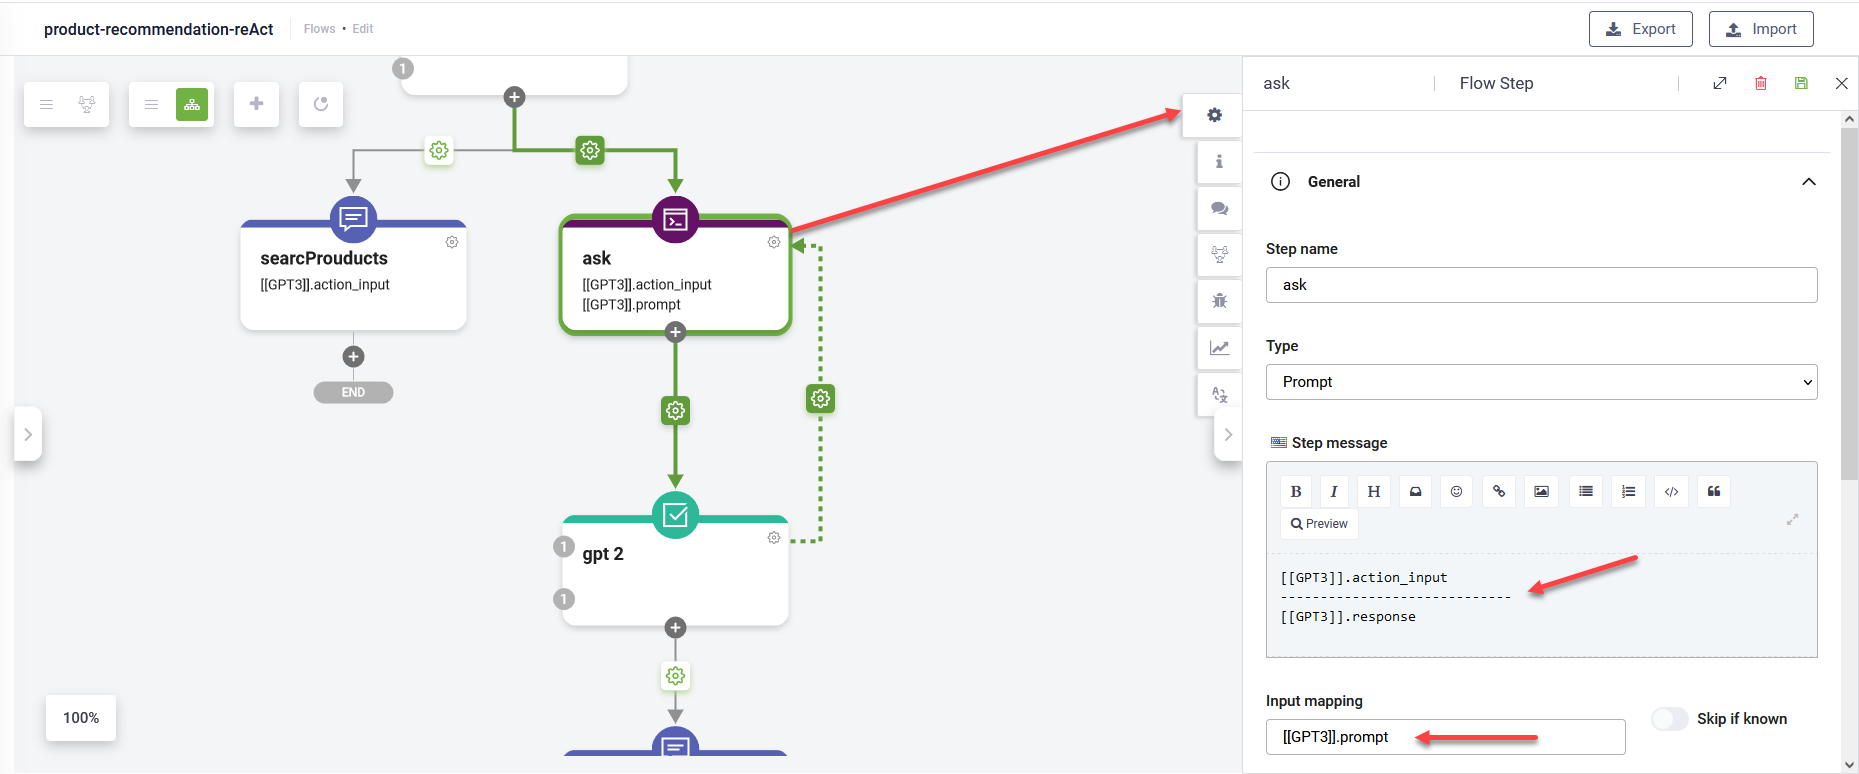
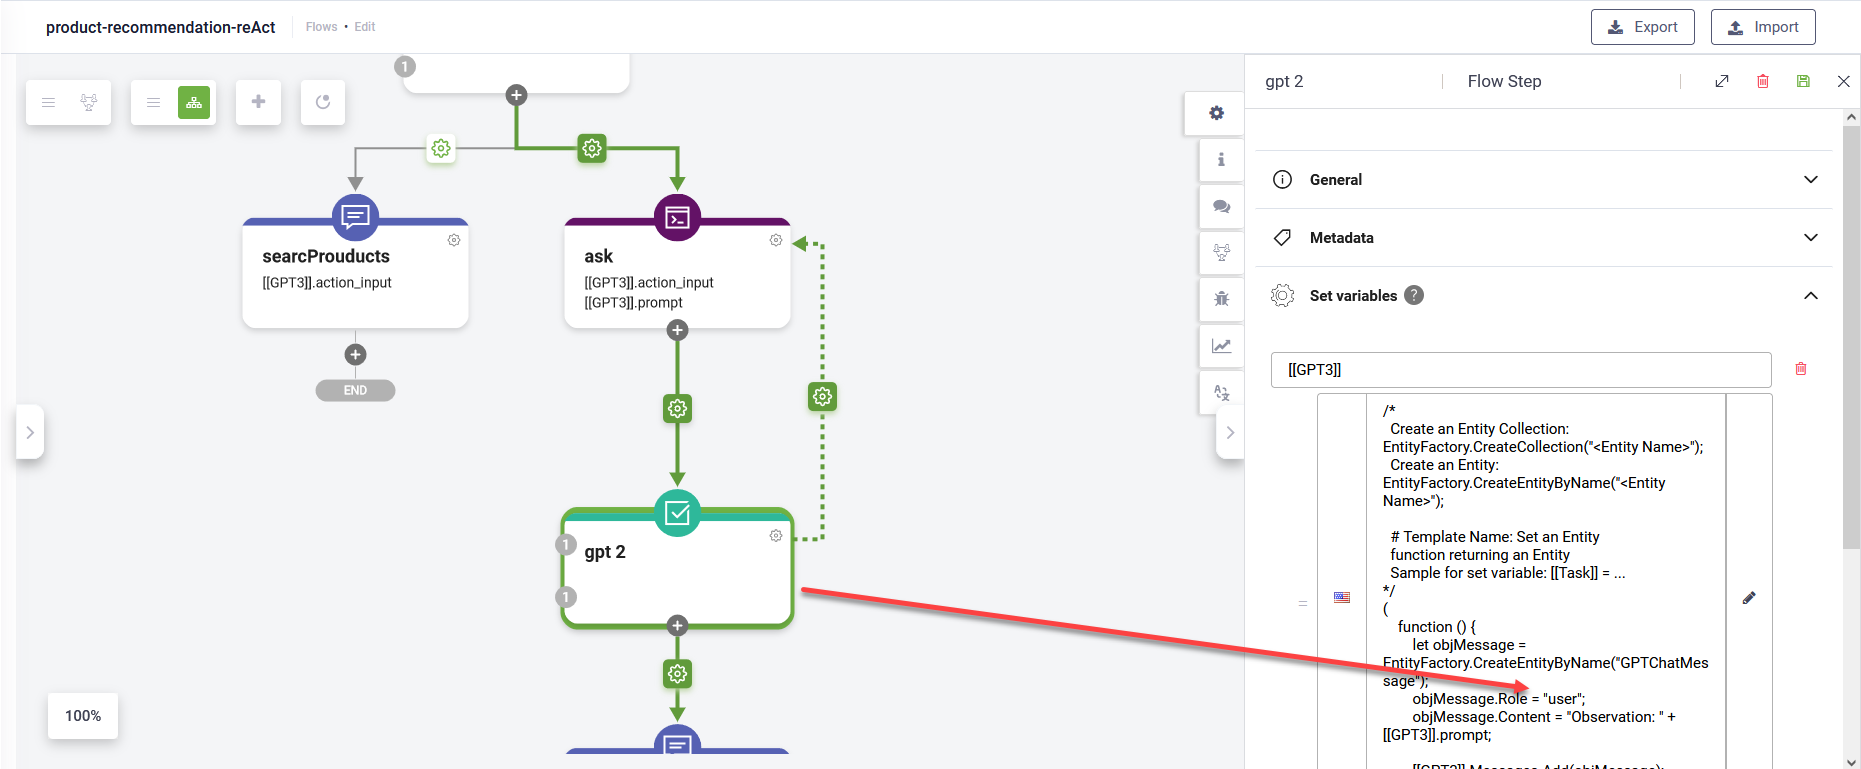
Step 6: Set the User role, prompt OpenAI again and loop
To set the User role (that is, add user messages to the Messages collection that is sent to OpenAI), in the Set variables section enter the name of the request entity you used in the REST integration for GPT, and then click the Code Editor icon and add set the user role by using the code format below.
(
    function () {
        let objMessage = EntityFactory.CreateEntityByName("<the entity that stores the messages>");
        objMessage.Role = "user";
        objMessage.Content = "Observation: " + <the entity field that stores user input provided in input mapping on a prompt step>;


        [[<GPT integration request entity>]].Messages.Add(objMessage);

        return [[<GPT integration request entity>]];

    }
)();
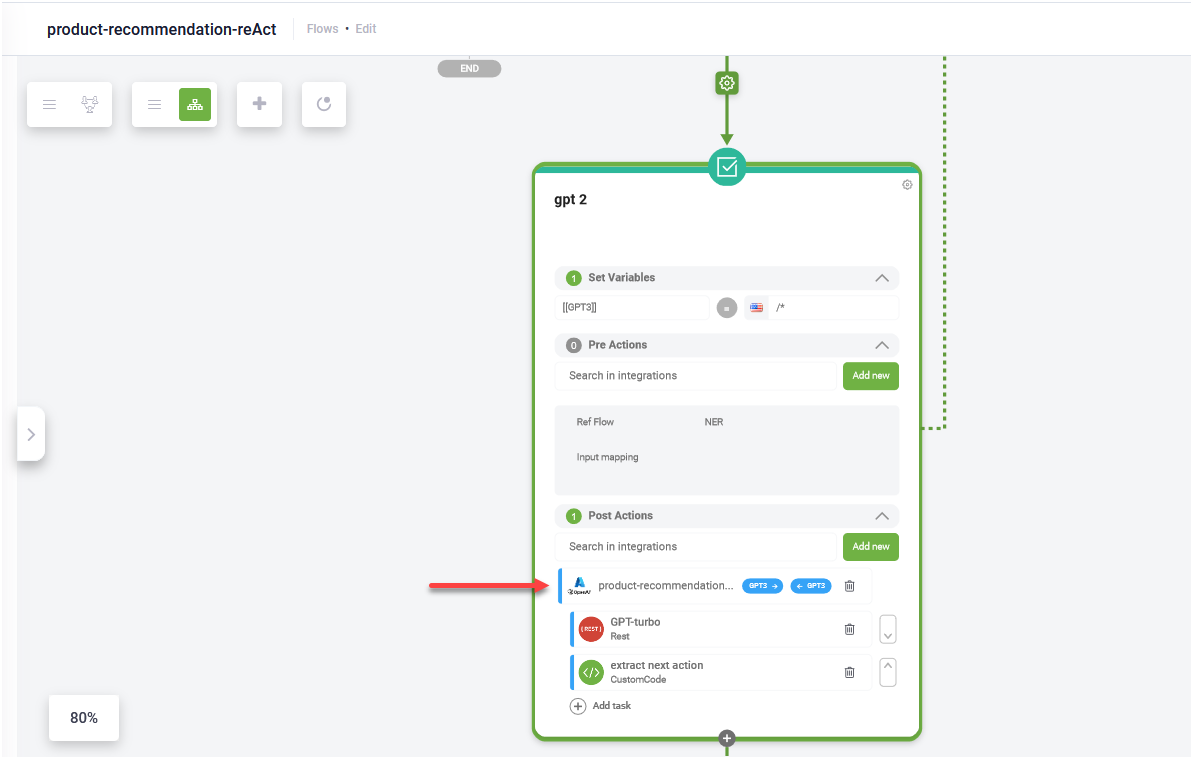
Ask Open AI again and loop until conversation completes. Use the same integration action as you used on the first OpenAI call.
You have successfully customized a multi-turn conversation using GPT technology via ReAct prompts.