Test Cases
A test case simulates a human tester and enables you to automate a conversation. A test case is a specification of the inputs, execution conditions, testing procedure, and expected results that define a single test to be executed to achieve a particular testing objective.
You can manually create test cases or you can import test cases from Excel files following a specific format.
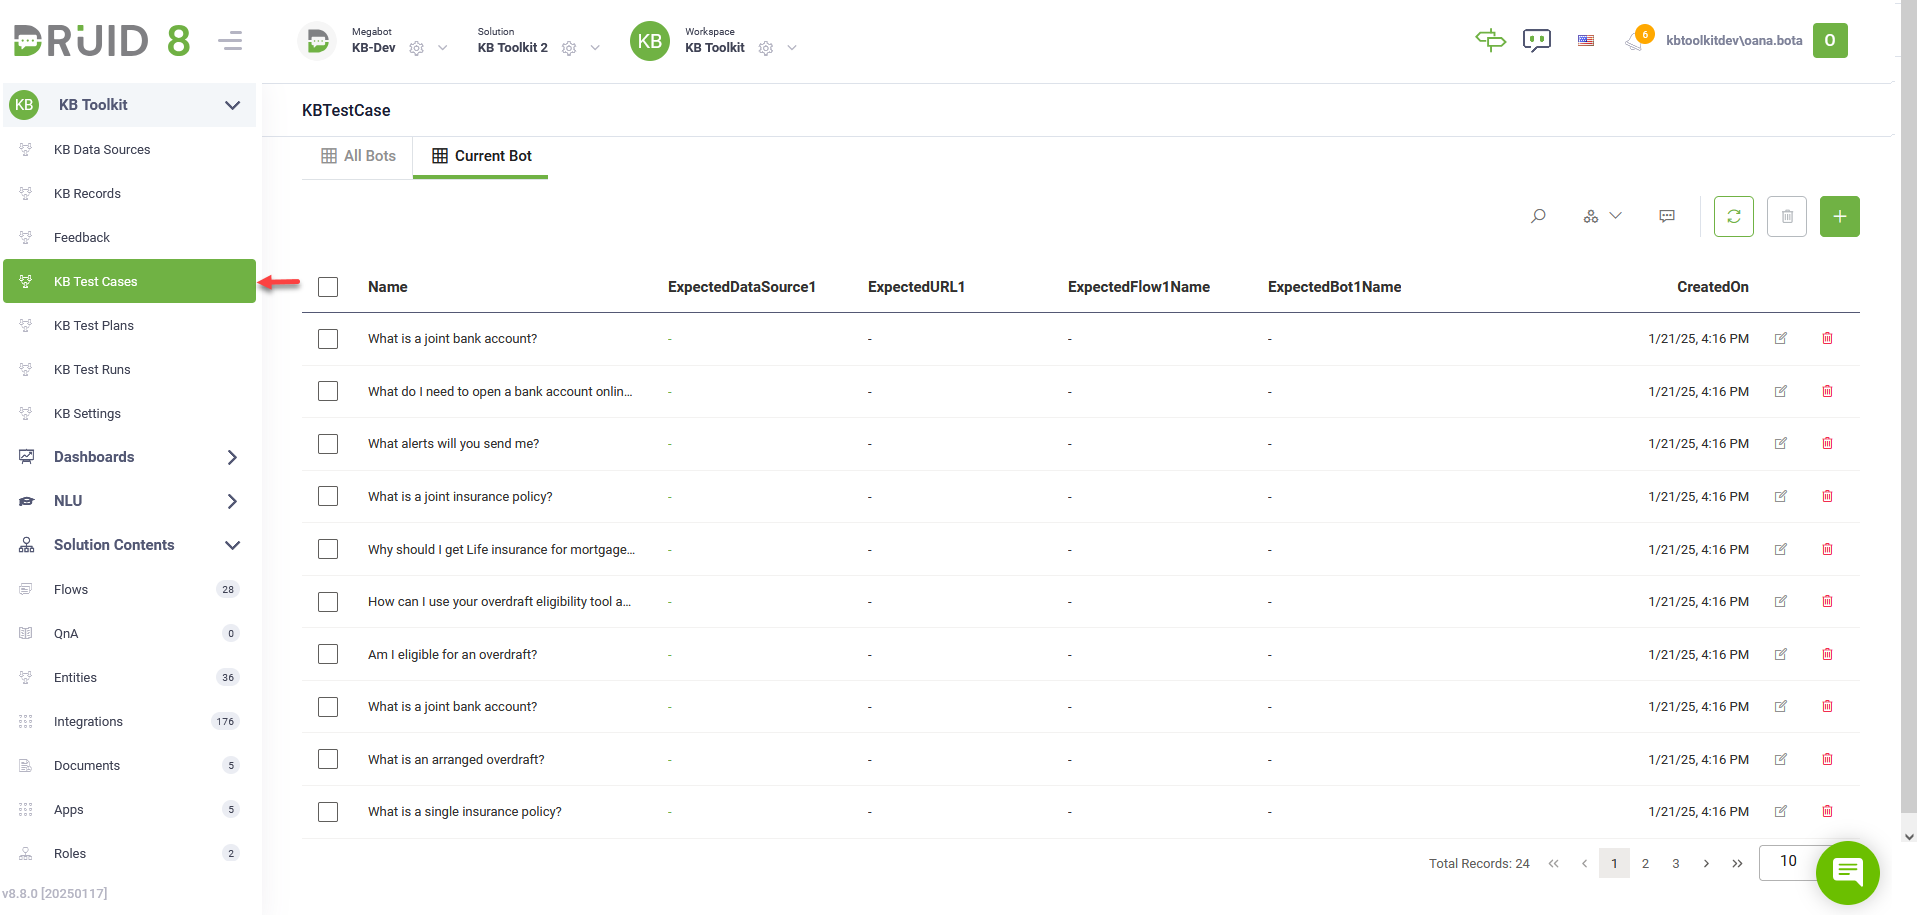
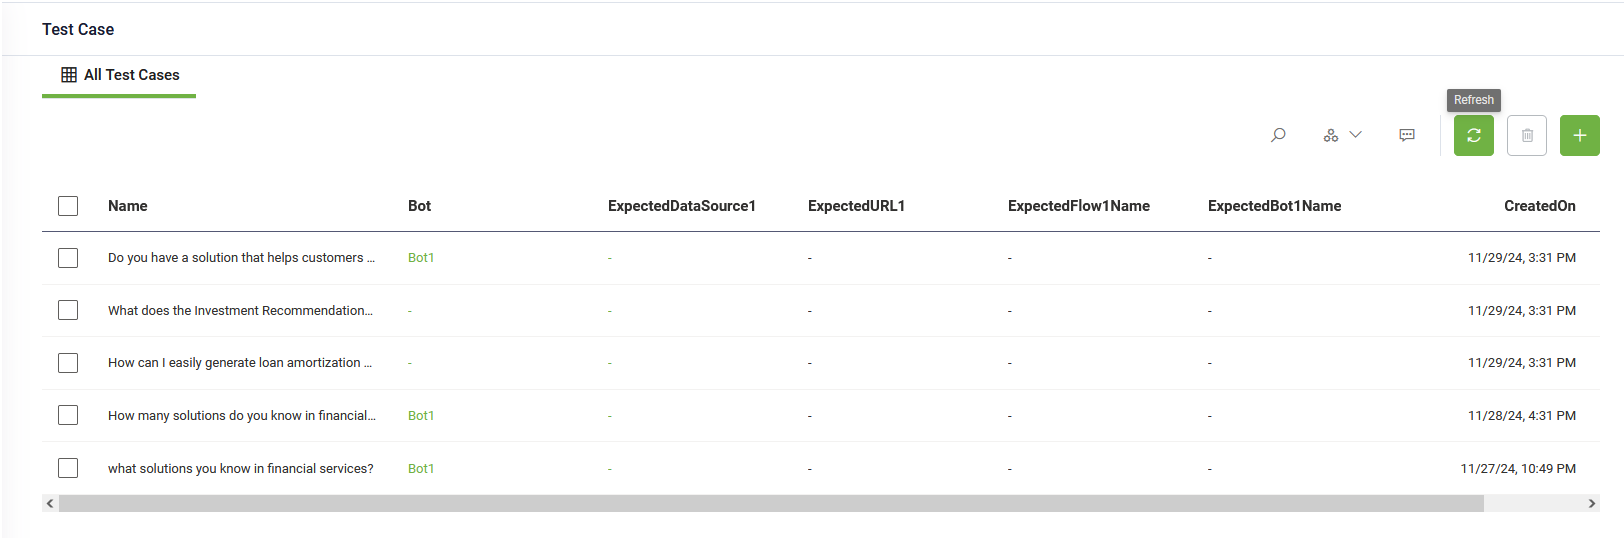
To access the test cases, click KB Test Cases in the KB Toolkit workspace menu.
Manually create QnA test cases
To create a QnA test case, follow these steps:
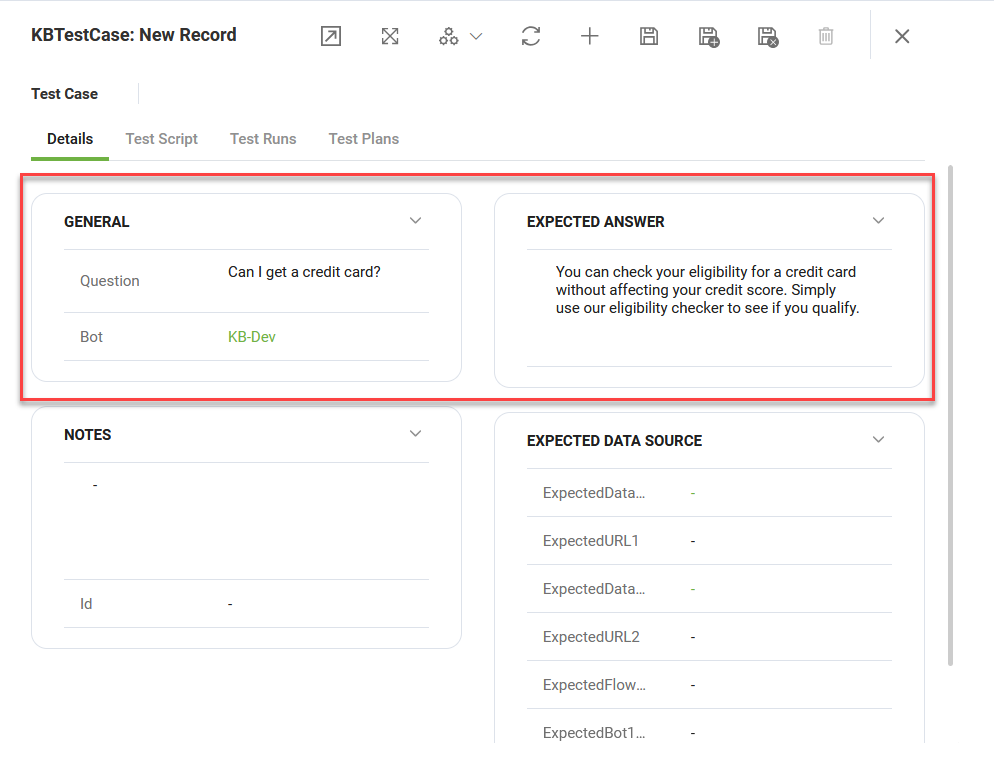
- In the Test Case page, click the New Record icon in the top-right corner. This opens the test case creation page, which defaults to the Details tab.
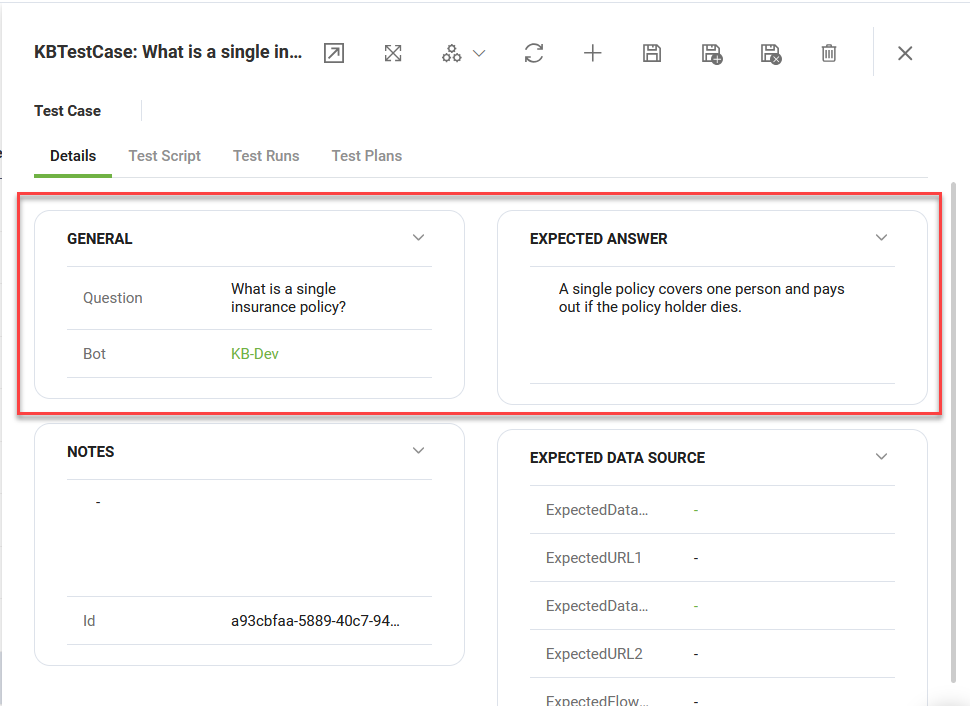
- Enter the following details in the General section:
- Question: Specify the question to test.
- Bot: Select the bot you want to test.
- Enter the Expected Answer.
- Click Save to save the test case.
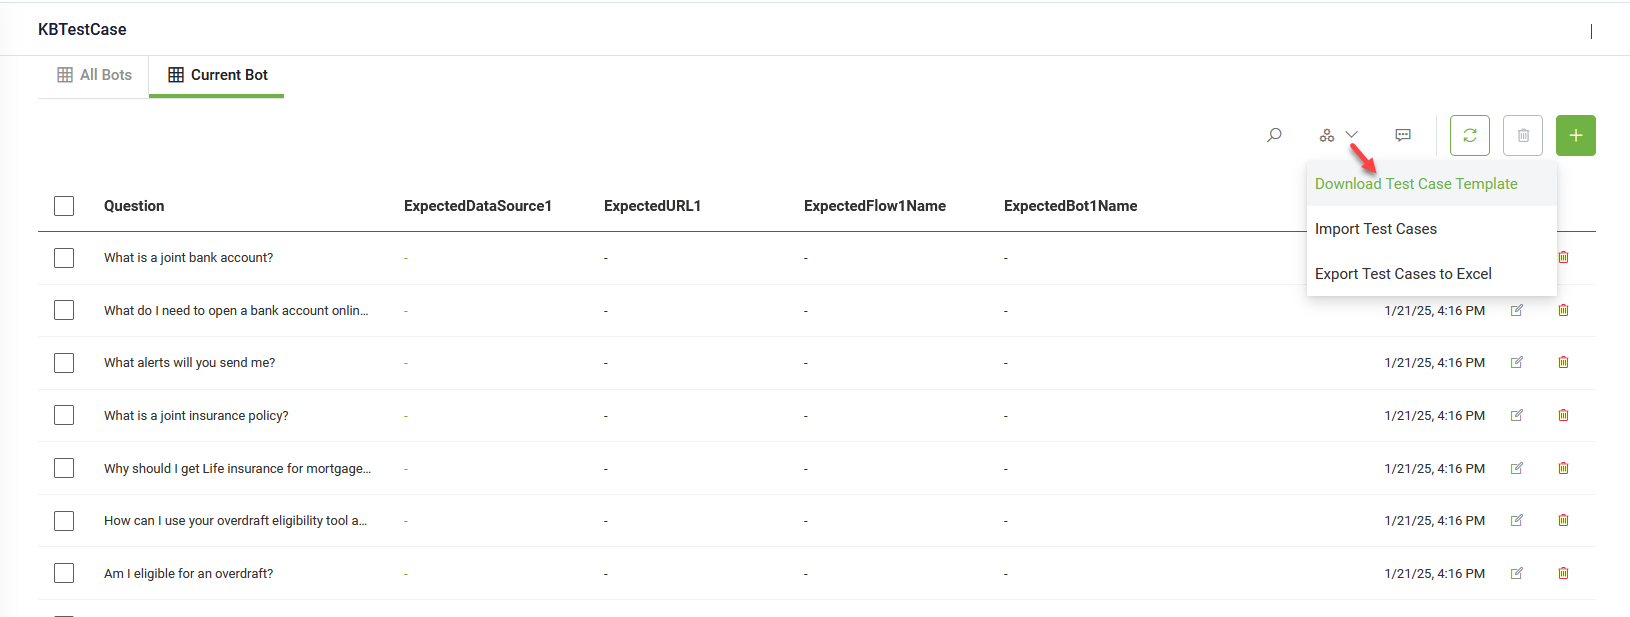
Import QnA test cases from an Excel file
To import QnA test cases from an excel file, follow these steps:
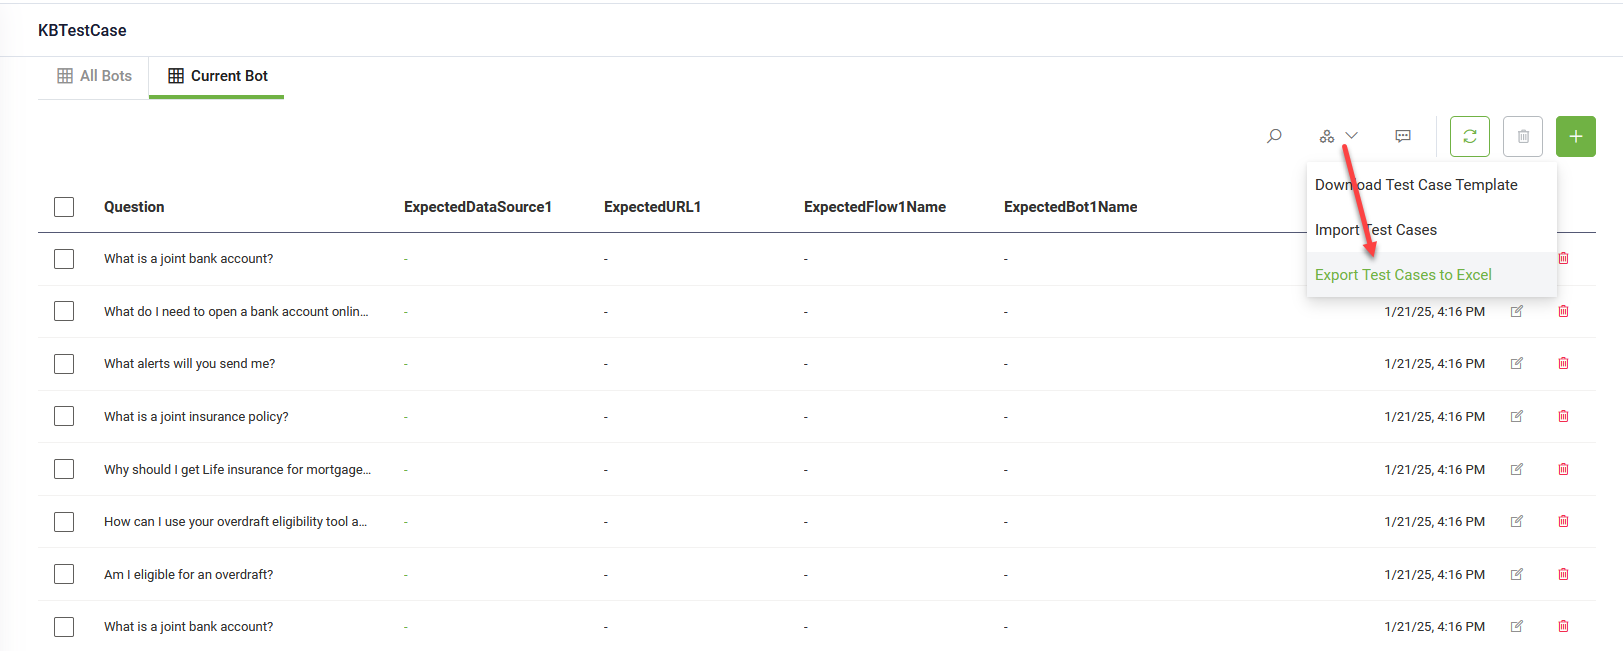
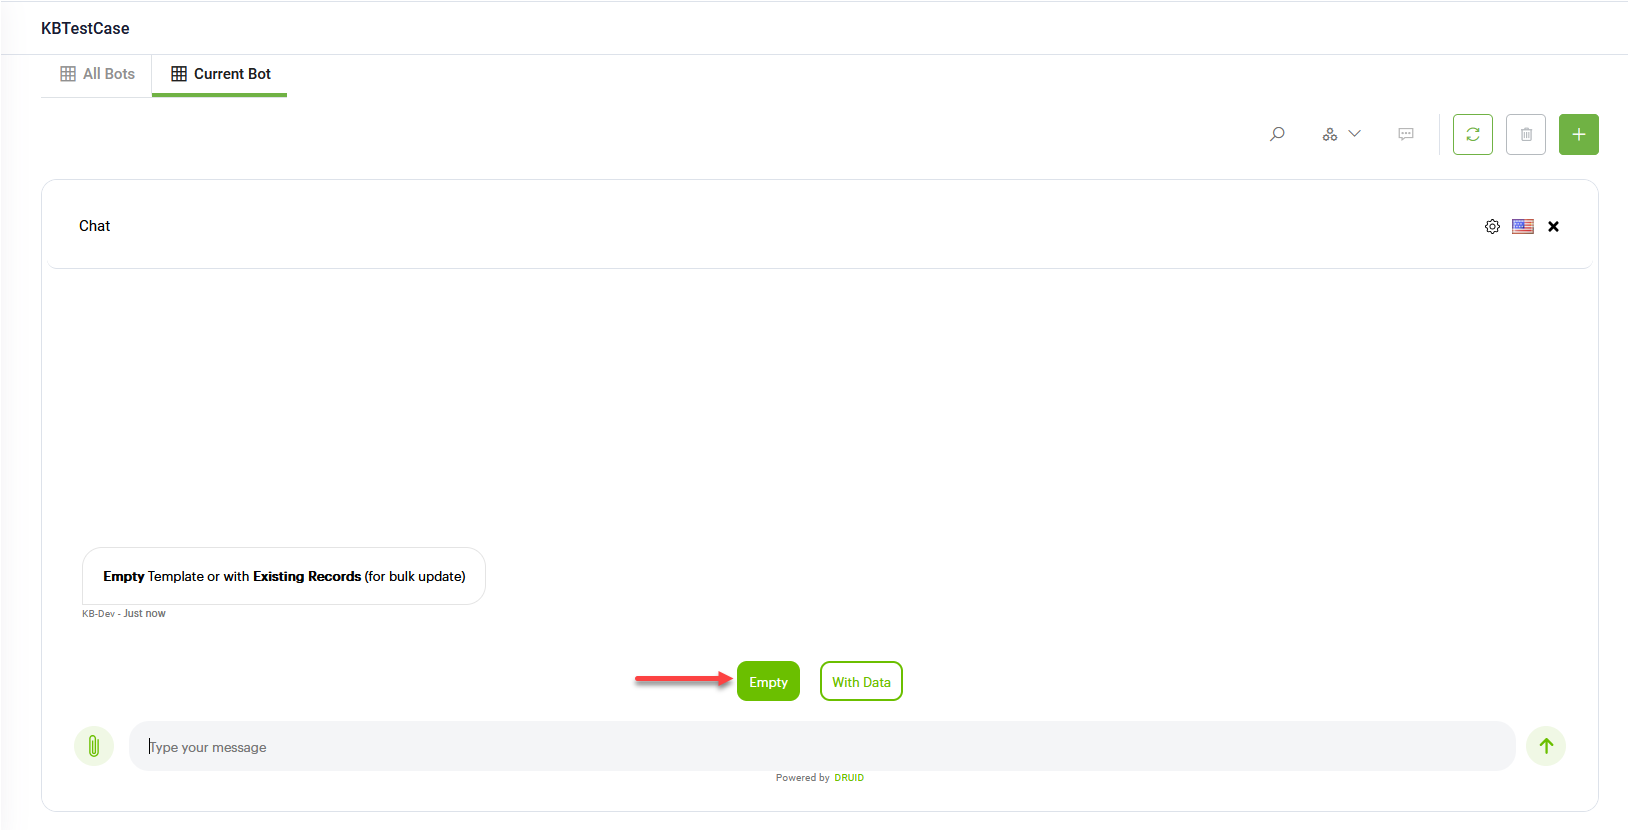
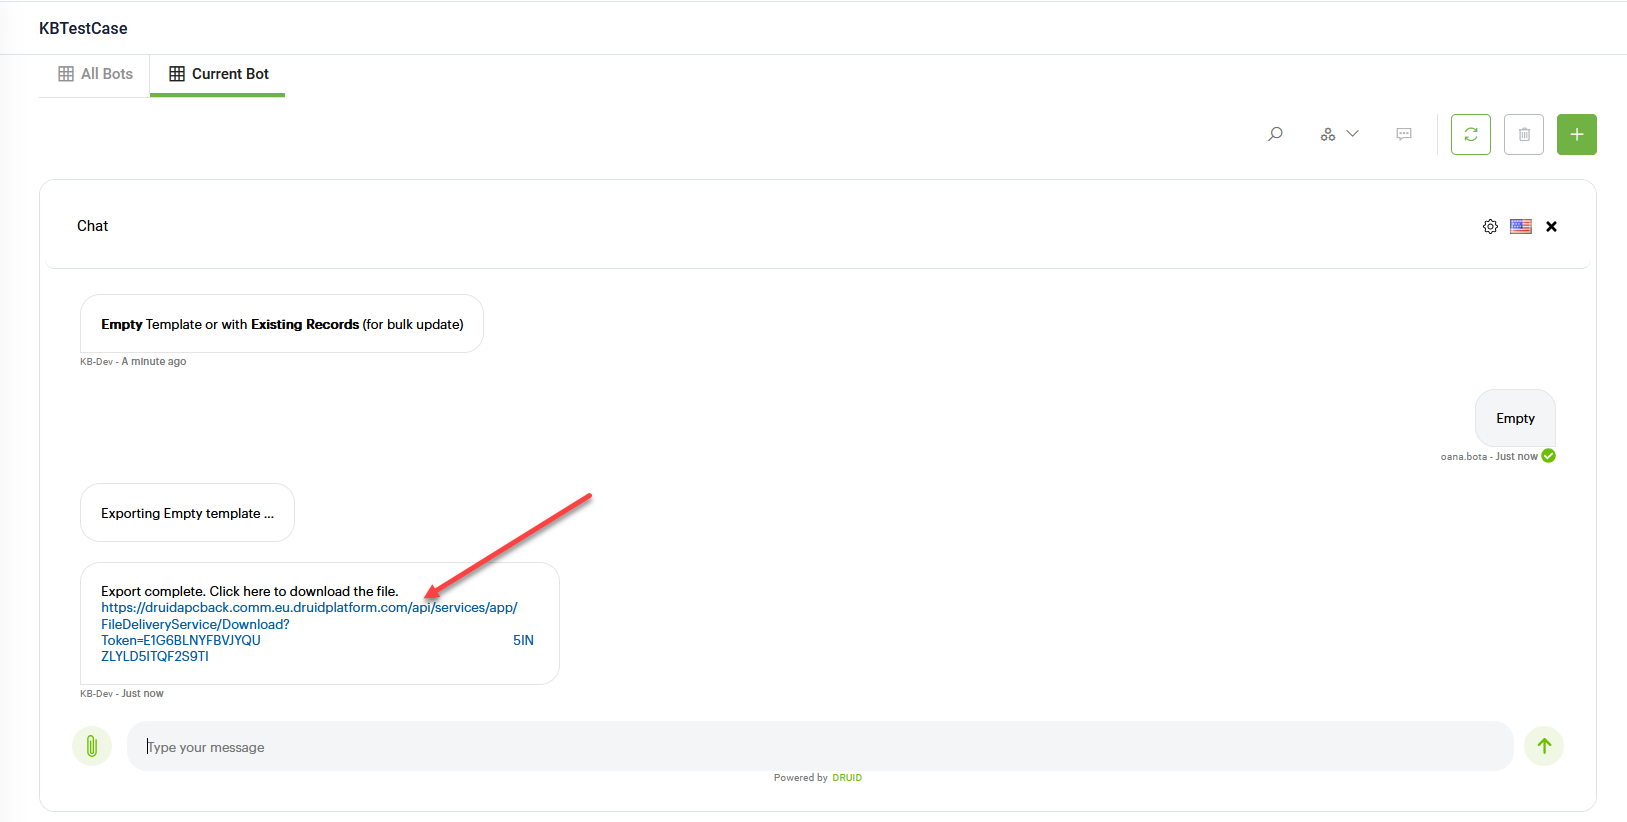
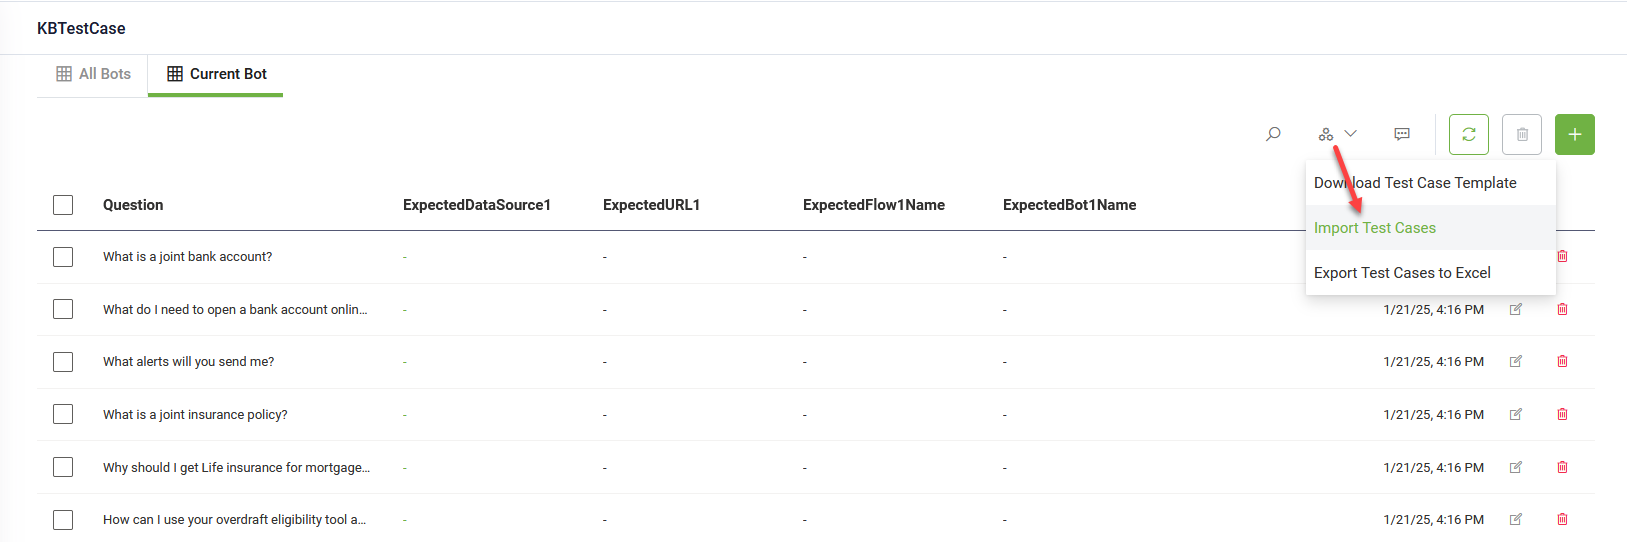
- On the Test Cases page, from the Automations drop-down, select Download Test Case Template. The Chat window opens and you can choose to get an empty template or a template containing all the existing data.
- Click the option you prefer.
- Click on the download link provided in the chat to download the template on your computer.
- Close the chat window.
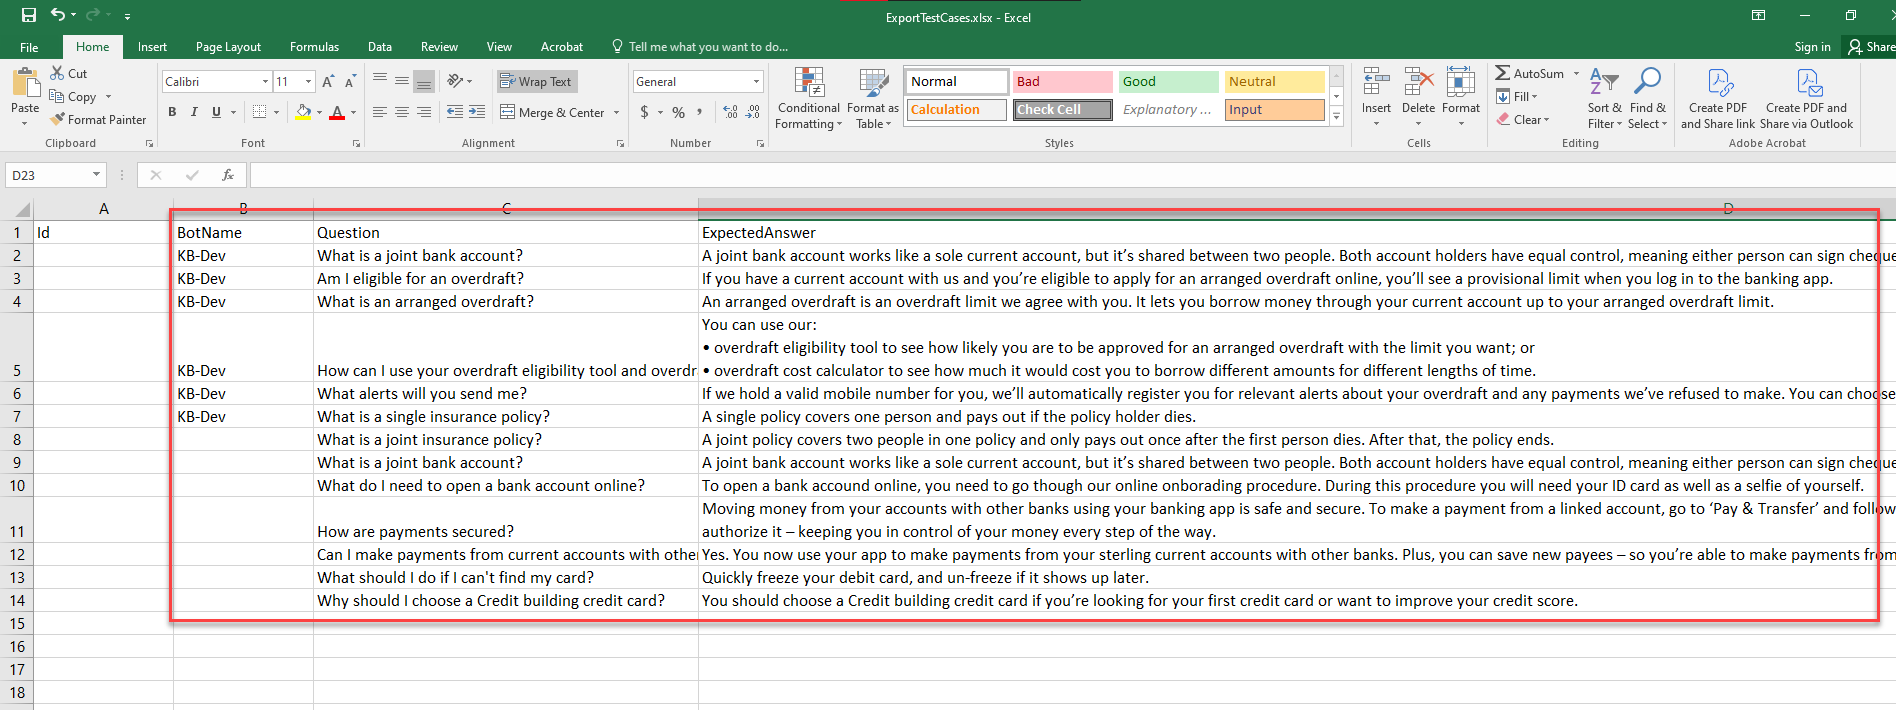
- Open the downloaded file. Enter your question in the 'Question' column and the corresponding answer in the 'Expected Answer' column. To add test cases to a specific bot, enter the bot name in the 'BotName' column. Add as many rows as needed for the test cases and save the file.
- In the DRUID Portal, from the Automations drop-down, select Import Test Cases.
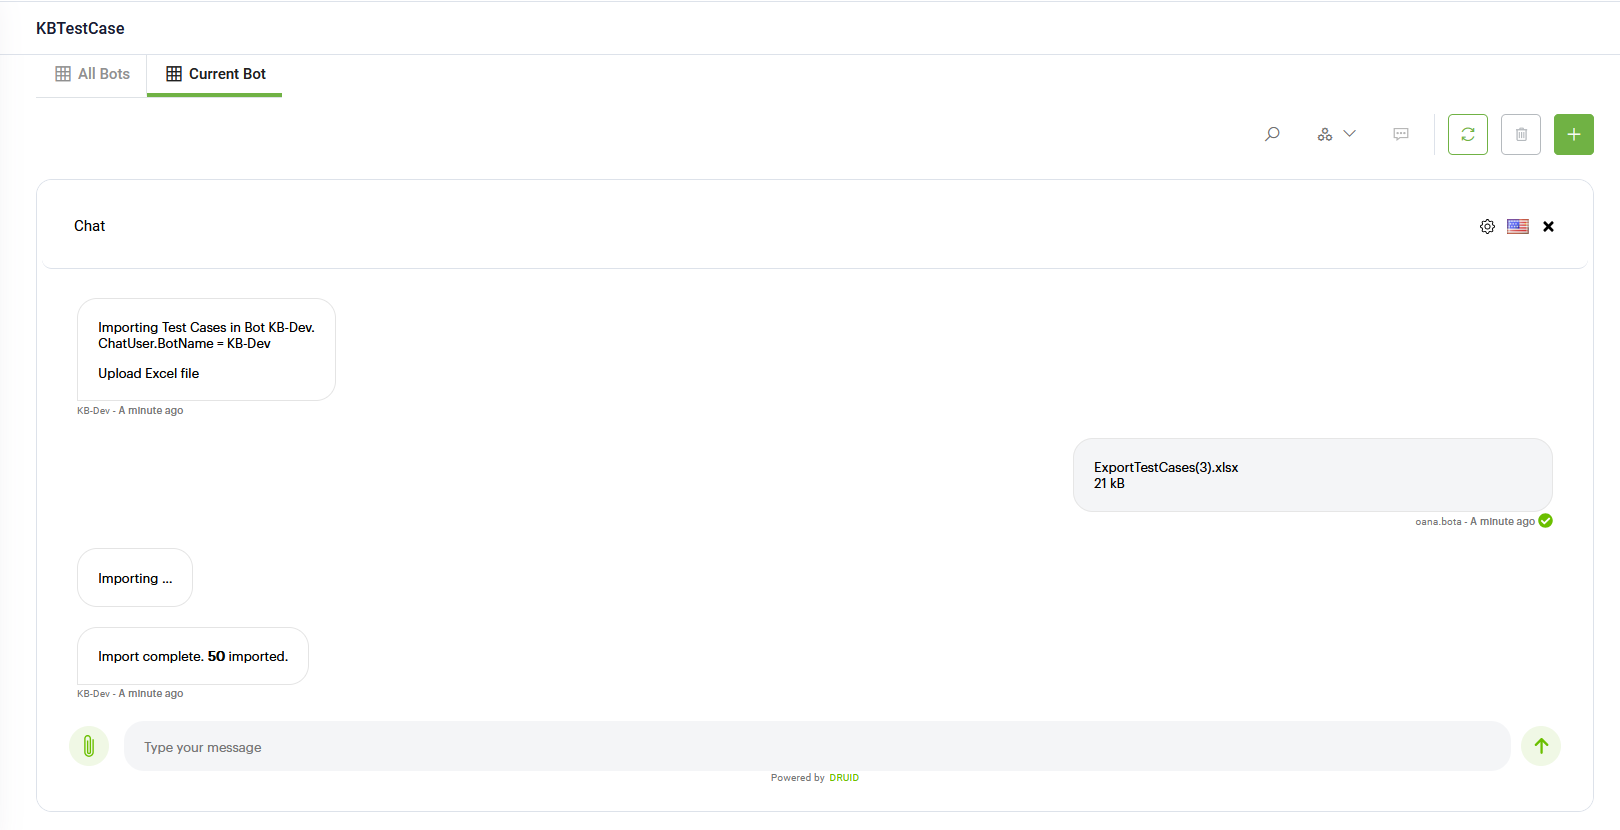
- In the Chat window that opens, click the Upload File icon. Browse for the test cases file and select it. Once the import is complete, you’ll see a notification in the chat showing how many test cases were successfully imported.
- Close the chat window and refresh the Test Case page to see all test cases.
When importing test cases from an Excel file, records with an empty 'BotName' will appear on the KBTestCase page under the 'All Bots' view.
Create test scripts – advanced multi turn conversations (optional)
To create an advanced test case for testing multi turn conversations, follow these steps:
-
In the Test Case page, click the New Record icon in the top-right corner. This opens the test case creation page, which defaults to the Details tab.
- Enter the following details:
- Specify the Question to test.
- Select the Bot you want to test.
- Enter the Expected Answer.
- Click Save to save the test case.
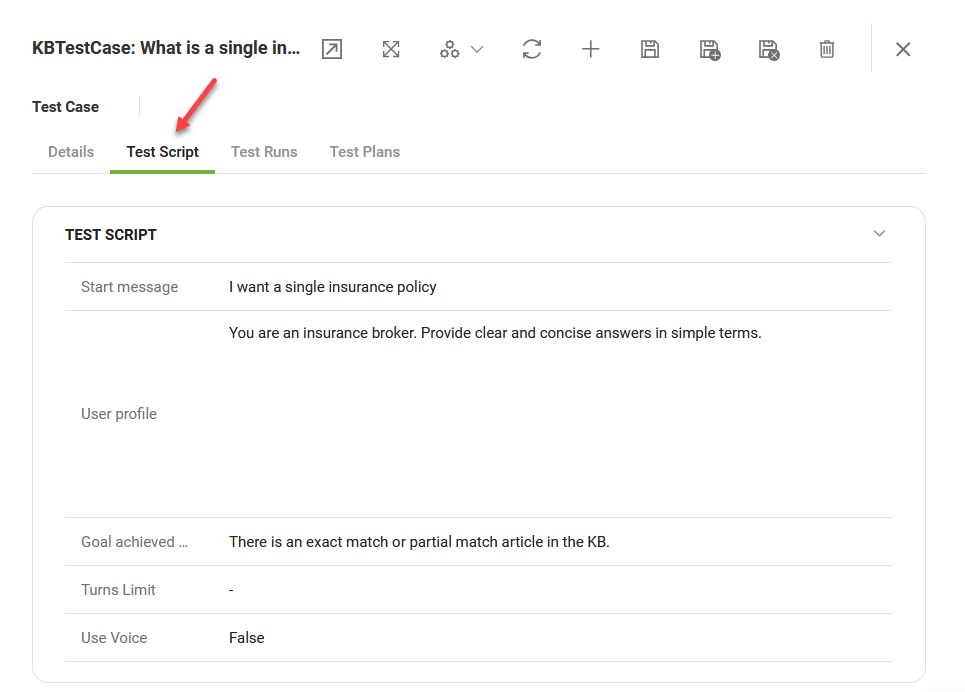
- Click on the Test Script tab and fill in the following parameters:
- Click Save to save the test case.
| Parameter | Description |
|---|---|
| Start Message | The question to test. E.g., 'I want a single insurance policy' . |
| User profile |
The context of a human tester. Write a prompt to define the persona and provide additional instructions to generative AI. E.g., 'You are an insurance broker. Provide clear and concise answers in simple terms'. |
| Goal achieved | The script is finalized with success when the provided goal is achieved. E.g., 'There is an exact match or partial match article in the KB'. |
| Turns Limit | The maximum number of conversation turns executed by the script. |
| Use Voice | Set to true if you want the test script to compare the responses on voice. |
Import Feedback as Test Cases
Importing feedback as test cases is a proven best practice for automating User Acceptance Testing (UAT). By encouraging users to interact with the bot and provide feedback during conversations, you can convert their insights into actionable test cases. These test cases can be replayed in bulk at any time, streamlining the testing process and saving countless hours of human effort.
This process allows you to refine test cases based on feedback, retest corrections, and validate improvements effectively.
Why Import Feedback as Test Cases?
- After each test, you provide feedback using a thumbs-up or thumbs-down.
- Negative feedback indicates a mismatch between the bot's response and the expected answer.
- By importing feedback, you can create test cases to retest and verify that the bot's responses align with the expected outcomes.
Benefits of Importing Feedback
- Retest negative feedback to ensure the bot now delivers expected answers.
- Validate that responses with positive feedback remain accurate.
- Maintain a high standard for bot performance and user satisfaction.
To import feedback as test cases, follow these steps:
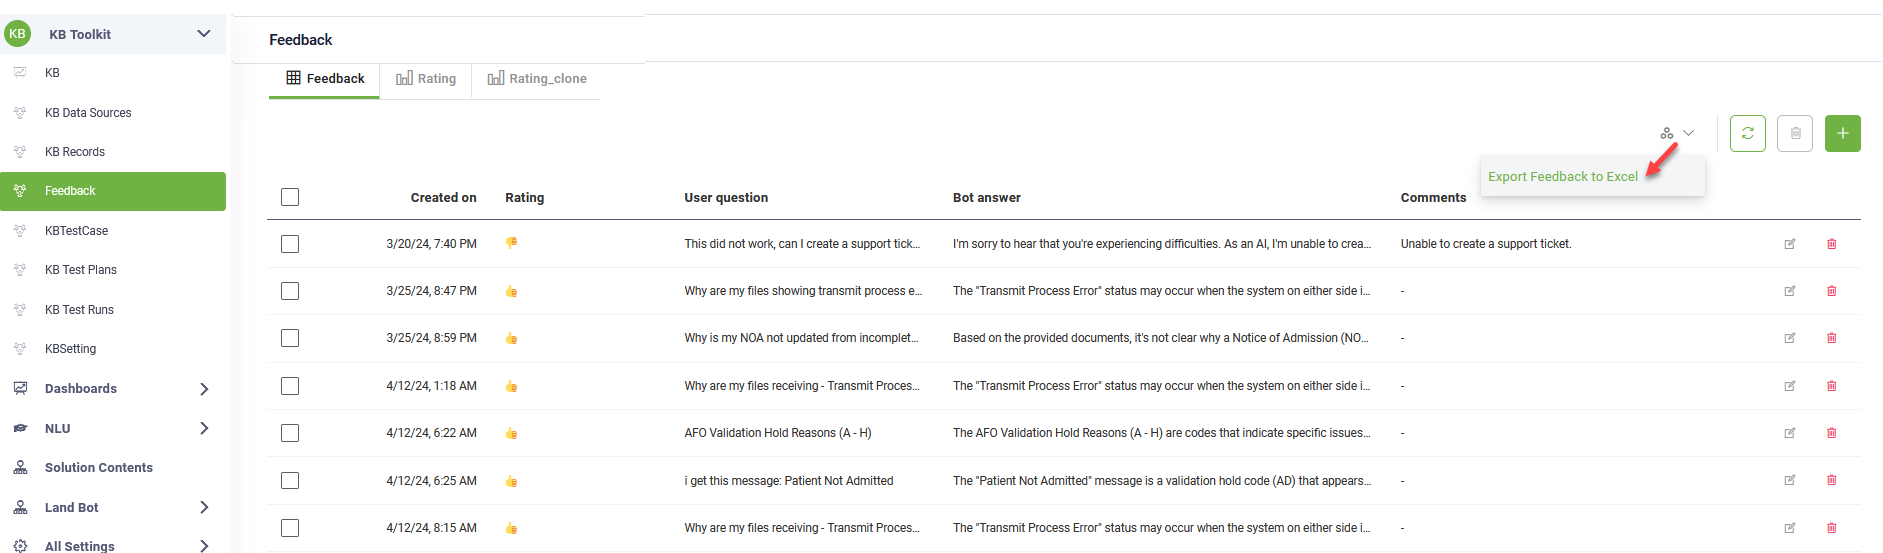
- On the workspace menu, click Feedback.
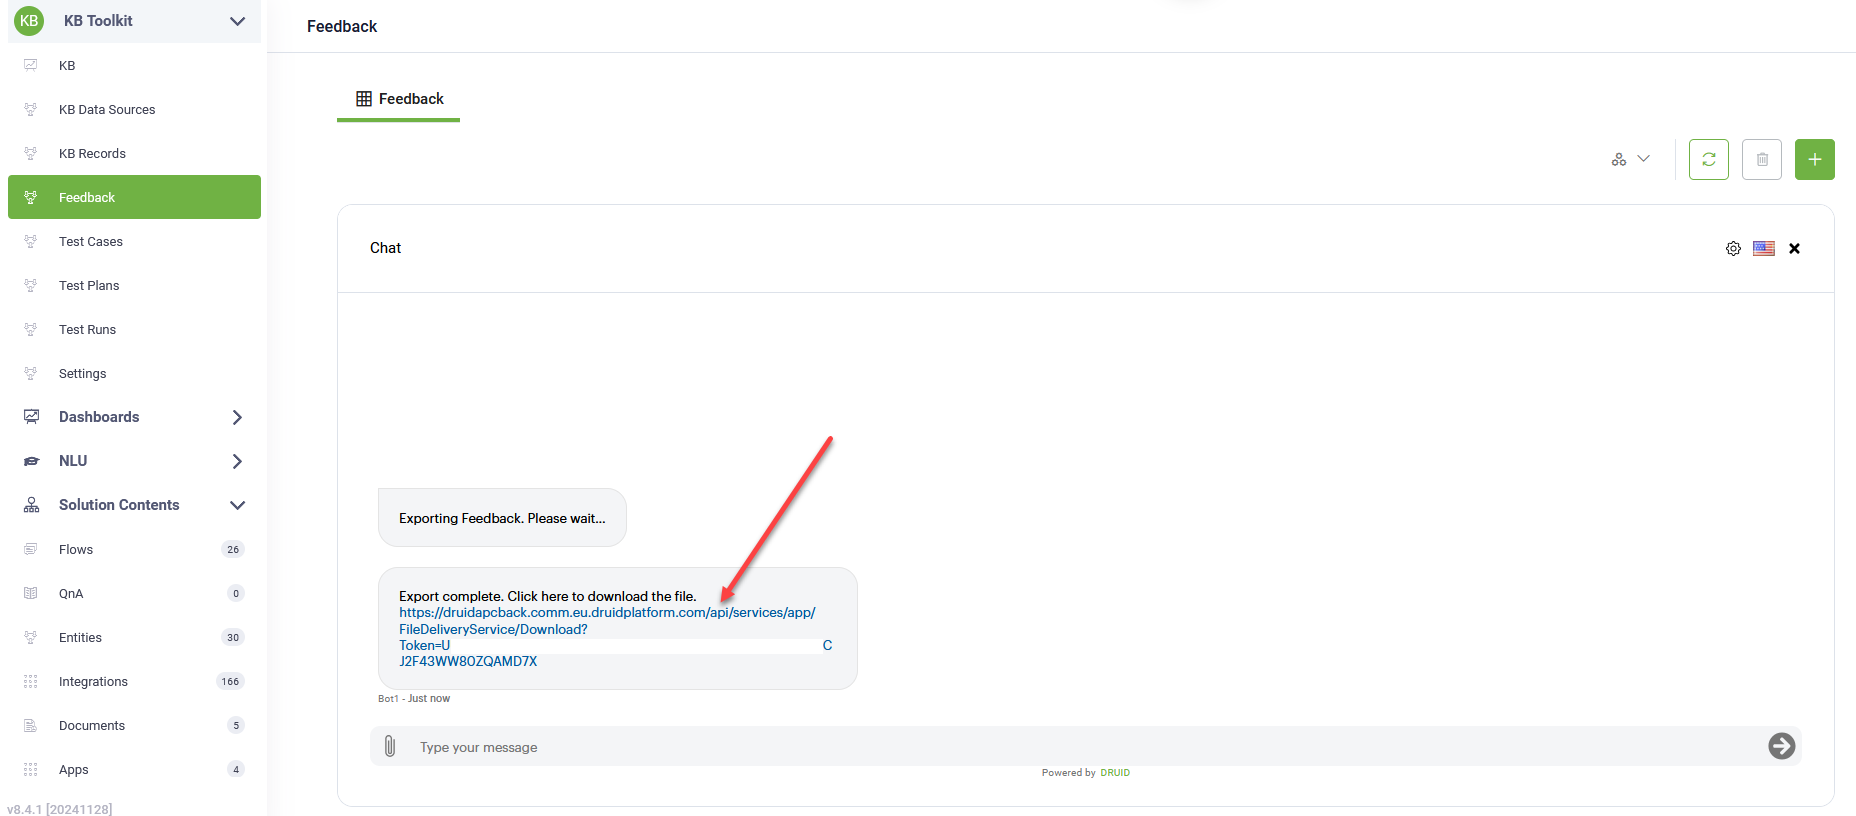
- In the Feedback page, from the Automations drop-down, select Export Feedback to Excel. The Chat window opens and the feedback is exported to Excel.
- Click on the download link provided in the chat to download the feedback file on your computer.
- Close the chat window.
- Open the Excel file and filter it to identify relevant feedback. You can filter the CreatedOn column to focus on feedback submitted during a specific time period.
- Download the test case template following these steps:
- Click Test Cases in the KB Toolkit workspace menu.
- On the Test Cases page, from the Automations drop-down, select Download Test Case Template. The Chat window opens and you can choose to get an empty template or a template containing all the existing data.
- Choose empty.
- Click on the download link provided in the chat to download the test case template on your computer.
- Close the chat window.
- Prepare Test Cases.
- For positive feedback:
- Copy the Question and Answer columns from the feedback file.
- Paste them into the Question and ExpectedAnswer columns in the test case template.
- For negative feedback:
- Copy the Question column from the feedback file and paste it in the Question column in the test case template.
- Copy the Comments (which usually reflect the expected answer) and paste them into the ExpectedAnswer column in the test case template.
- Save the updated test case template.
- Import the updated file as test cases:
- In the Test Case page, from the Automations drop-down, select Import Test Cases.
- In the Chat window that opens, click the Upload File icon. Browse for the test cases file and select it. Once the import is complete, you’ll see a notification in the chat showing how many test cases were successfully imported.
- Close the chat window and refresh the Test Case page to see all test cases.

Bulk update test case definition
To update test cases definition in bulk, follow these steps:
- In the Test Case page, from the Automations drop-down, select Export Test Cases to Excel.
- Click on the download link provided in the chat to download the file on your computer.
- Close the Chat window.
- Open the test cases file and make the desired changes, then save the file.
- In the Test Case page, from the Automations drop-down, select Import Test Cases. The Chat window opens.
- In the Chat window that opens, click the Upload File icon. Browse for the test cases file and select it. Once the import is complete, you’ll see a notification in the chat showing how many test cases were successfully imported.