Agentic Insurance
Agentic Insurance is an LLM–enabled business application that delivers a fully conversational customer experience tailored for insurance companies.
As the foundation of the new Agentic Insurance Business Suite, this solution supports core insurance processes with the following key features:
- Customer account access – Agent-driven conversations to view current policies and claims.
- Car MTPL insurance – Agent-driven conversation with OCR to scan car registration and ID documents that guides the user to discover the best insurance policies.
- Property insurance – Agent-driven conversation with OCR to scan ID documents that guides the user to discover the best insurance policies for a new apartment or house.
- Claim reporting – Agent-driven conversation for registering new claims for car and property incidents based on the active insurance policies. For car claims, the agent provides automatic damage evaluation based on incident images provided by the user.
- User authentication – Agent-driven conversations to sign in and create accounts using OTP (one-time password) verification.
Key Components
This solution includes:
- Insurance database – Hosted on DRUID Data Services, supports all core data operations.
- Insurance Agent workspaces:
- Admin Workspace – Manage insurance product features and customize GPT prompts.
- Insurance Workspace – Access a 360-degree view of customer details.
- LLM-enabled agents – Automate and streamline the main business processes.
Prerequisites
- Tenant Druid community (open new tenant here) or Druid subscription.
- You should have a Druid bot. For information on how to create a bot, see Creating Druid Bots.
- Enable the API Resources for Druid WebView and Druid Data Service. Then, activate the Druid Data Service in your tenant by navigating to Administration > Settings > Druid Data Service, and selecting Is enabled and clicking the Save all button at the top right of the page.
Configuring the solution
To configure the solution, follow these steps:
Step 1. Install the solution from the Solutions Library
Go to the Solutions Library, search for solution "Agentic Insurance" and import it following the instructions provided in section Installing Solution Templates.
Wait until the import status shows as “Success”.
Step 2. Configure apps connections
Go to Solution Contents > Apps. Click the app you want to configure. Follow the setup instructions provided in the sections below.
| App | Description | Setup required |
|---|---|---|
| DRUID-LLM | Configure this app if you want to use DRUID-dedicated LLM resources for one of the following providers on your tenant: Azure OpenAI, Mistral, or Google. | Optional |
| gpt-agent-4o |
Provides integration with GPT-4o, which is not included as a standard feature in DRUID. Configure this app to connect it to your own GPT-4o deployment (via Microsoft Azure, OpenAI, or other LLM provider that supports tools / function calling). |
Optional |
| DRUID Vision OCR |
Enables OCR capabilities for car registration and ID documents. Required for Car MTPL insurance conversations. |
Mandatory |
| DRUID-Sendgrid | Sends OTP codes and insurance policy emails to users. | Mandatory |
Configure the DRUID-LLM app
To configure this app connection, follow these steps:
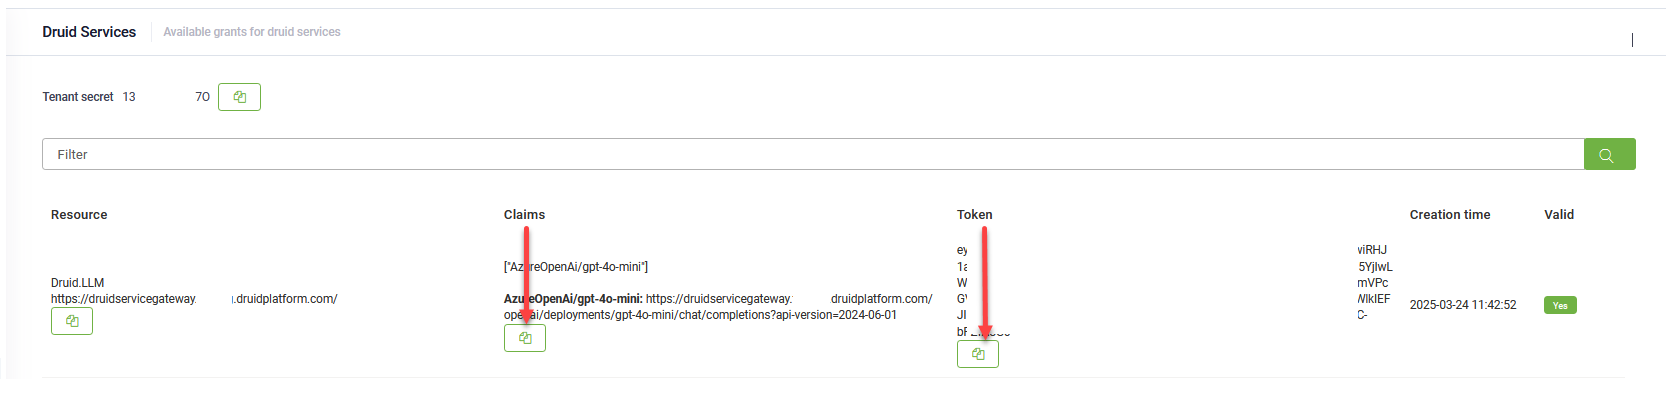
- Go to Administration > Druid Services.
- Copy the claims and token corresponding to the DRUID.LLM resource you want to use — you’ll need them to configure the app connection.
- Go to Solution Contents > Apps and click on DRUID-LLM.
- In the Base URL field, paste the claims value you copied at step 2.
- In the Variables table, enter the token you copied at step 2 as the key.
- Click Save to complete the configuration.
Configure the gpt-agent-4o app
To configure this app connection, click on the gpt-agent-4o app and configure it as follows:
- In the Base URL field, enter the endpoint URL of your LLM deployment.
- In the Variables table, enter your API key for authentication as the key.
- Click Save to complete the configuration.
Configure the DRUID Vision OCR app
To configure this app connection, follow these steps:
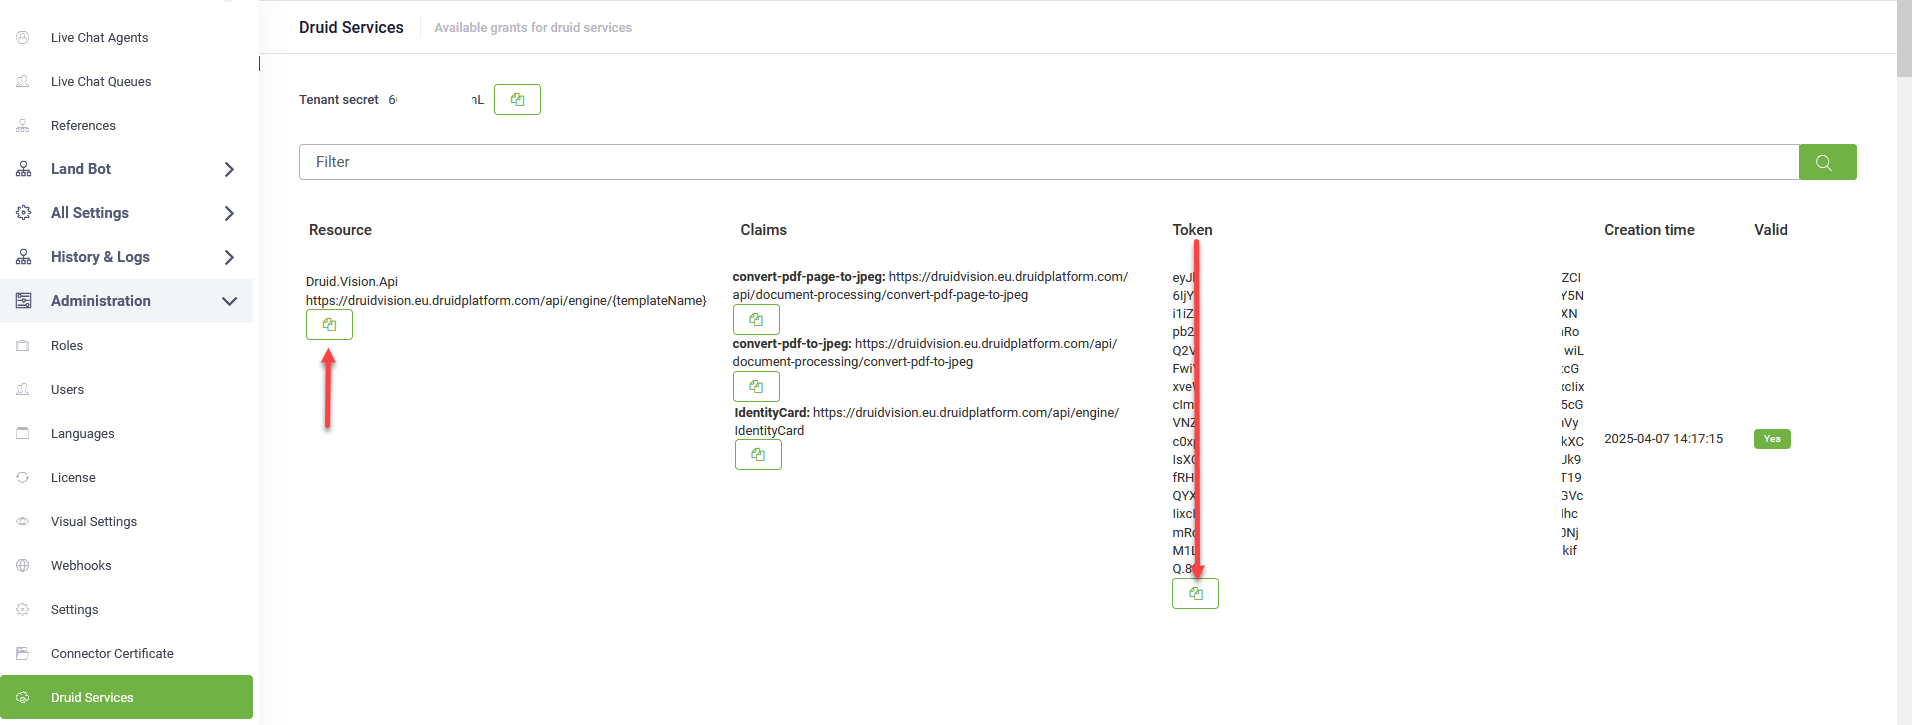
- Go to Administration > Druid Services.
- Copy the Resource URL and the Token corresponding to the DRUID.Vision.Api resource you want to use — you’ll need them to configure the app connection.
- Go to Solution Contents > Apps and click on DRUID Vision OCR.
- In the Base URL field, paste the resource URL you copied at step 2. Remove everything after api/, including engine/{templateName}. For example, change: https://druidvision.eu.druidplatform.com/api/engine/{templateName} to: https://druidvision.eu.druidplatform.com/api/.
- In the Variables table, enter the token you copied at step 2 as the key.
- Click Save & Close to complete the configuration and return to the Apps page.
Configure the DRUID-Sendgrid app
Click on the DRUID-Sendgrid app and in the API key field, enter your SendGrid API key.
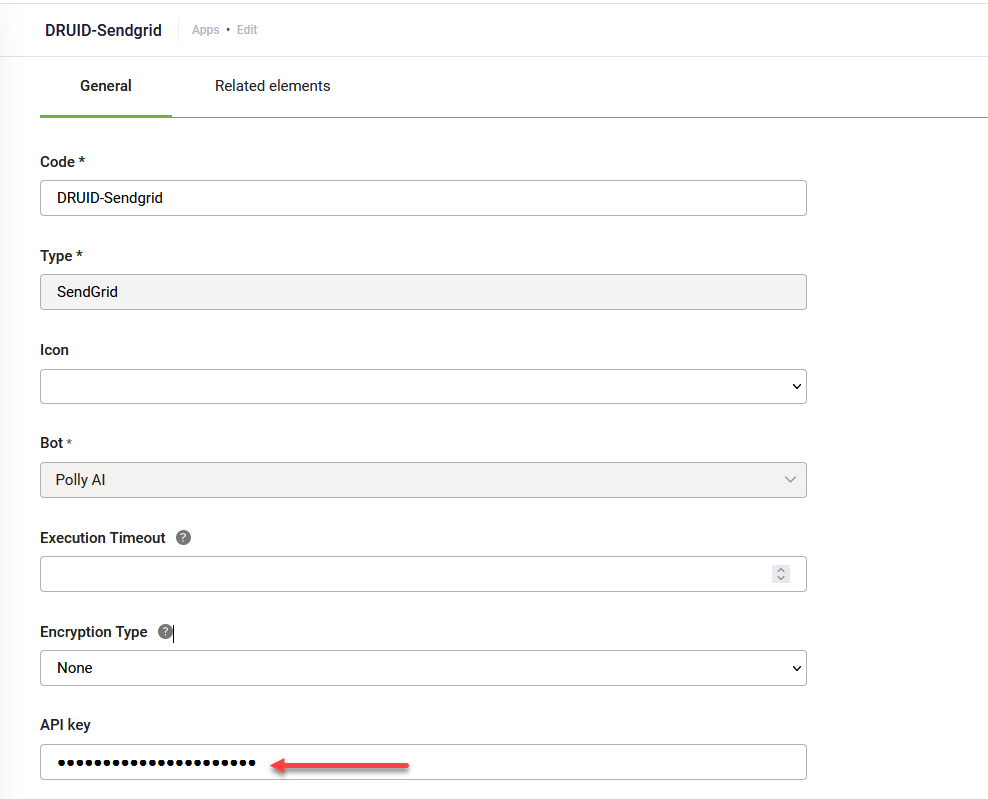
Click Save & Close to apply the configuration and return to the Apps page.
Step 3. Set up the bot special flows
Go to the bot settings, Details page and click the Dialog management section header. The section expands. Select the following special flows:
|
Special Flow |
Select |
|---|---|
| Welcome flow | welcome |
|
Intent Rephrase flow |
gpt-conductor-agent |
Scroll down and click Save & Close.
Step 4. Run database setup workflow
Open a new web chat to trigger the database setup workflow. The virtual assistant will automatically run the workflow, adding all required GPT prompts and demo data to the Insurance database.
Once the setup is complete, you can start interacting with the virtual assistant.