Step 2: Set up Orchestrator Victor_Unattended Next Best Deal Process
Go to https://cloud.uipath.com and log in to your orchestrator account.
Click on the desired tenant (we will use SetupTenant).
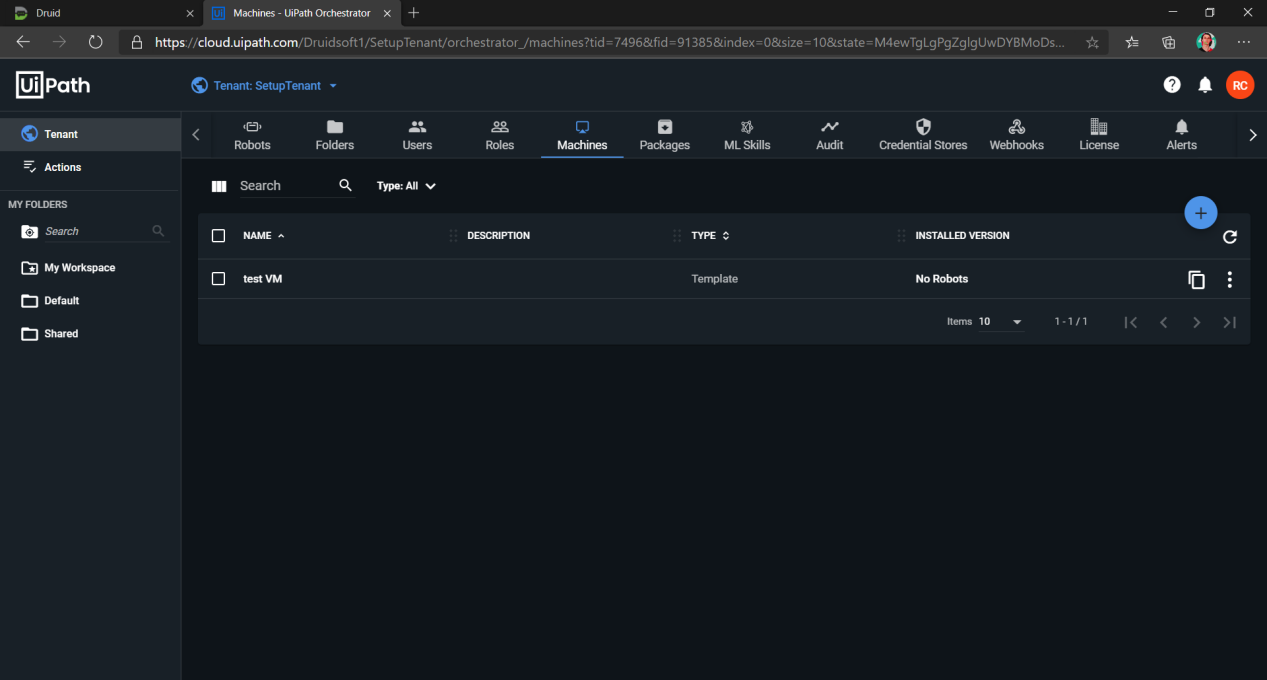
From the main menu, click Tenant. On the navigation bar, click the Machines tab and click the Add icon.
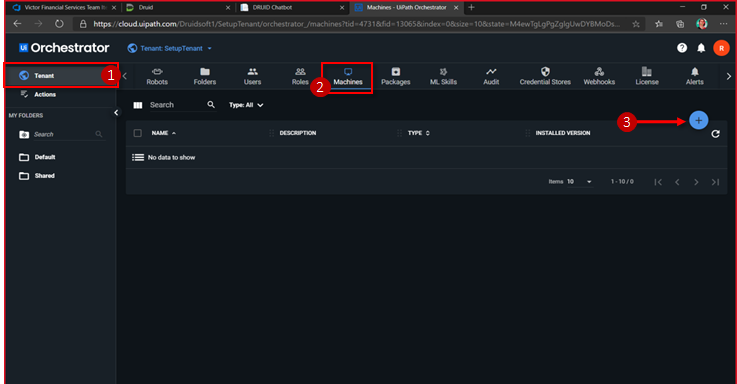
Click Machine Template.
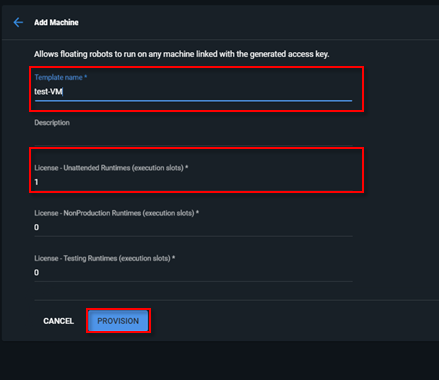
The Add machine page appears. Enter a Template name, an unattended runtime license and click PROVISION.
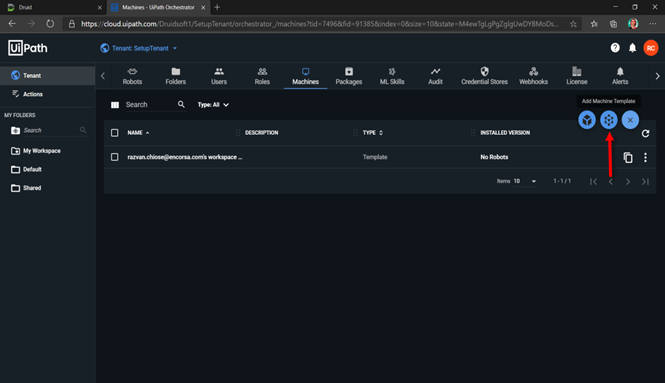
Click Copy Machine Key to Clipboard.
Copy the extended URL (in our case, https://cloud.uipath.com/Druidsoft1/SetupTenant/).
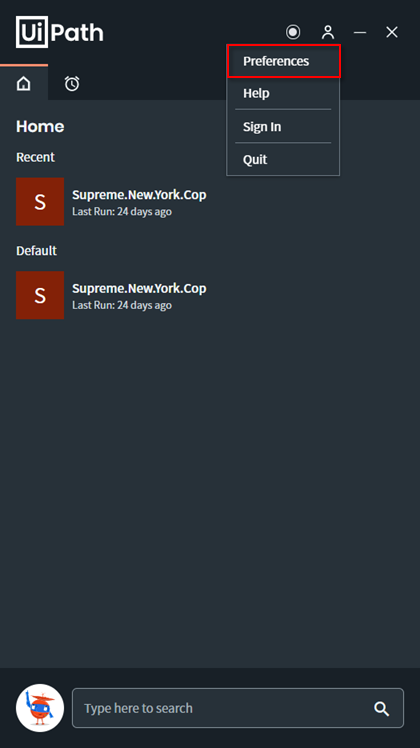
Open the UiPath Assistant app.
Click on Preferences.
From the main menu, click Orchestrator Settings. The Orchestrator Configuration page appears. From the Connection Type field, select Machine Key. The system automatically fills in the Machine Name field.
Paste the Machine Key and the Orchestrator URL (the ones you previously copied) and click Connect.
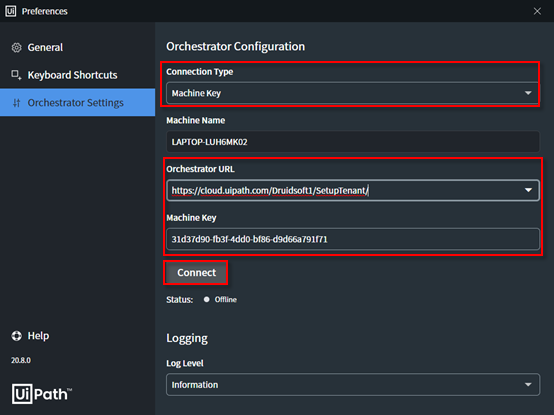
The machine status changes to “Connected, Unlicensed”.
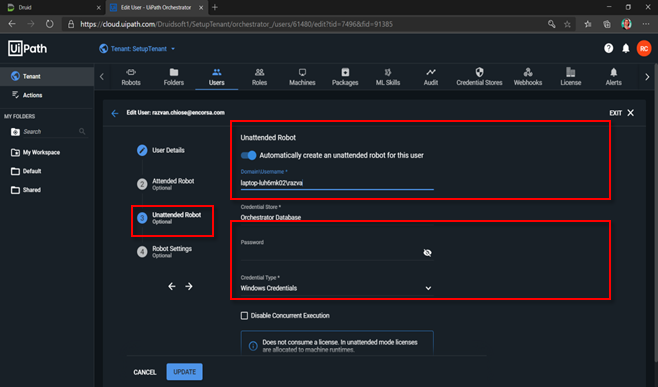
Go to Tenant, click Users, and search for your email address.

Click the three dots on the right and click Edit. The Edit user page appears.
On the page menu, click Unattended Robot and tap on Automatically create an unattended robot for this user.
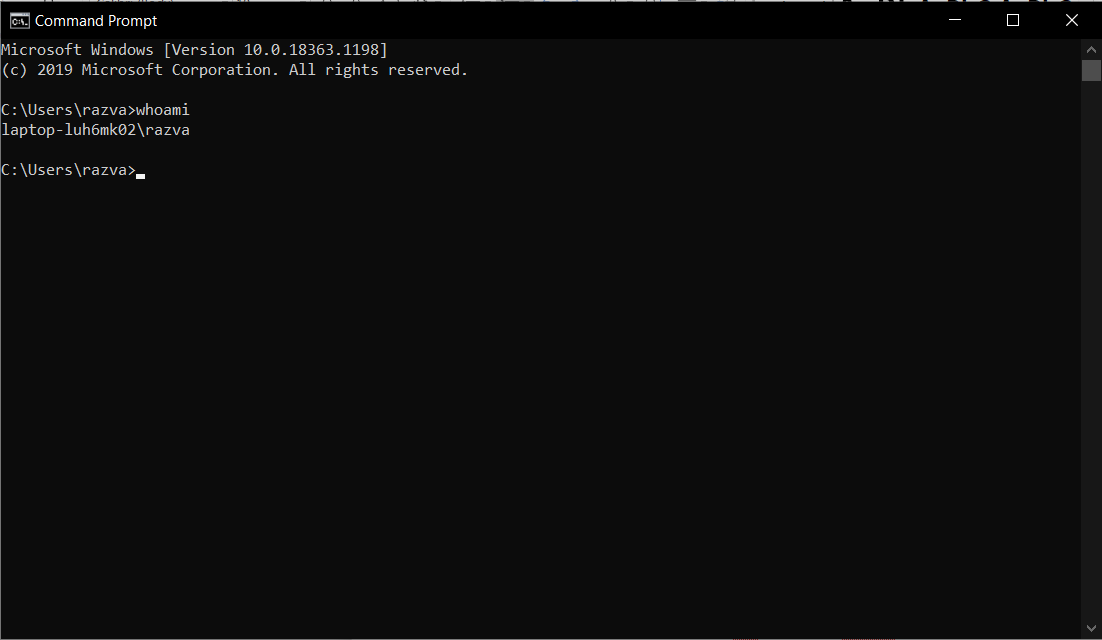
Open the command prompt app and type in “whoami”, copy the answer and paste it in the Domain\Username field.
In the Password field, write the password of your Windows account for this machine and click UPDATE.
You successfully created an UiPath Floating Unattended Robot!
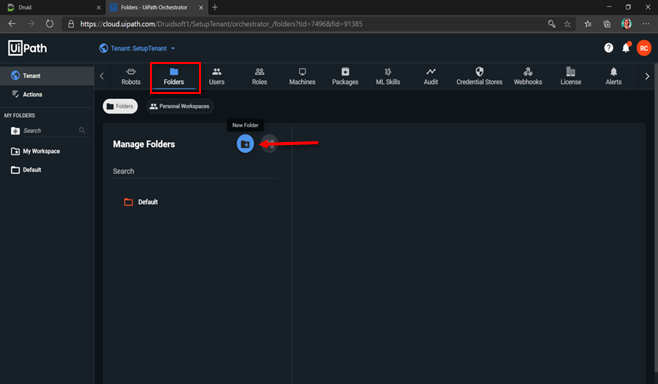
On the navigation bar, click Folders, and then click New Folder.
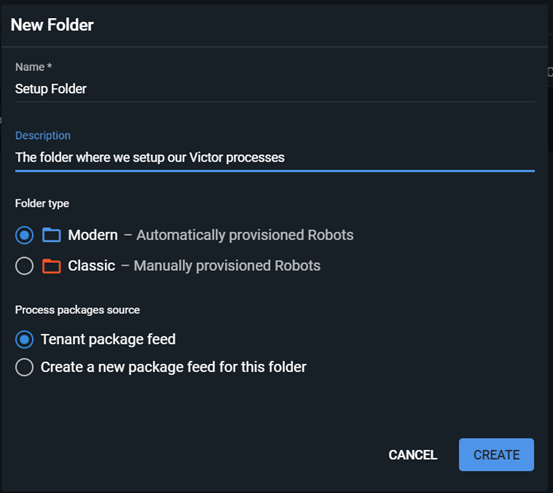
The New Folder page appears. Enter a folder Name and Description. Select Modern as Folder Type, select Tenant package feed as Process packages source and click CREATE.
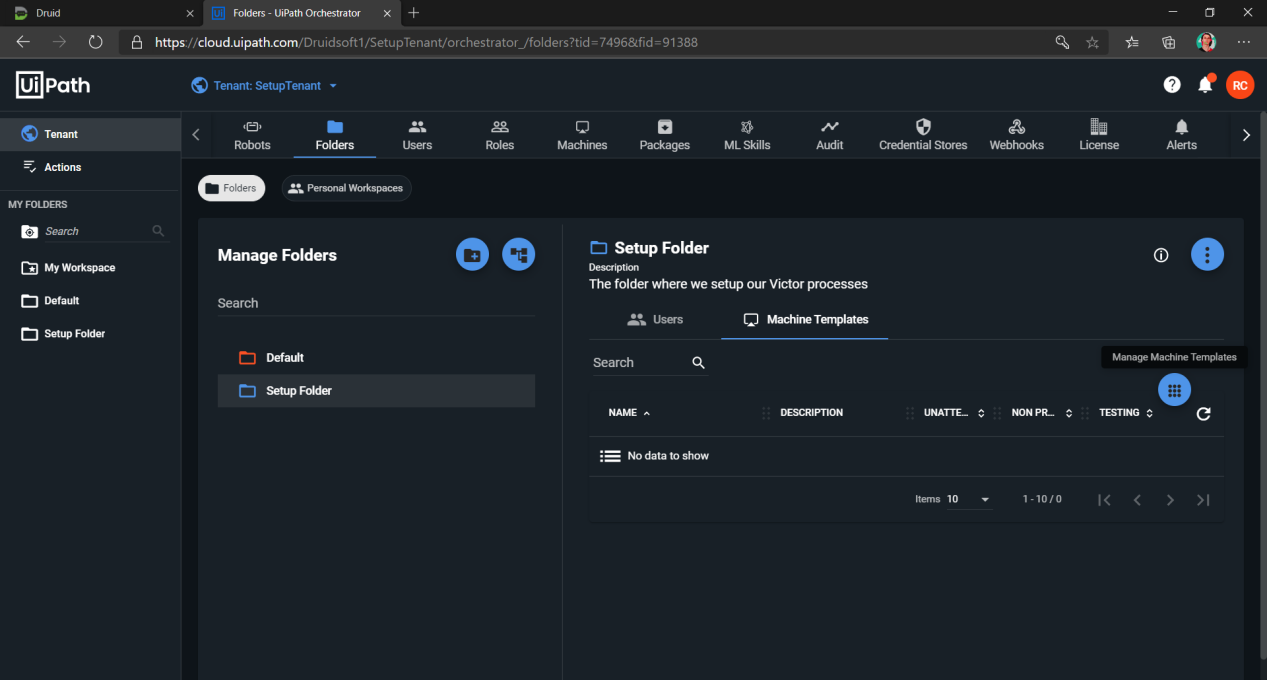
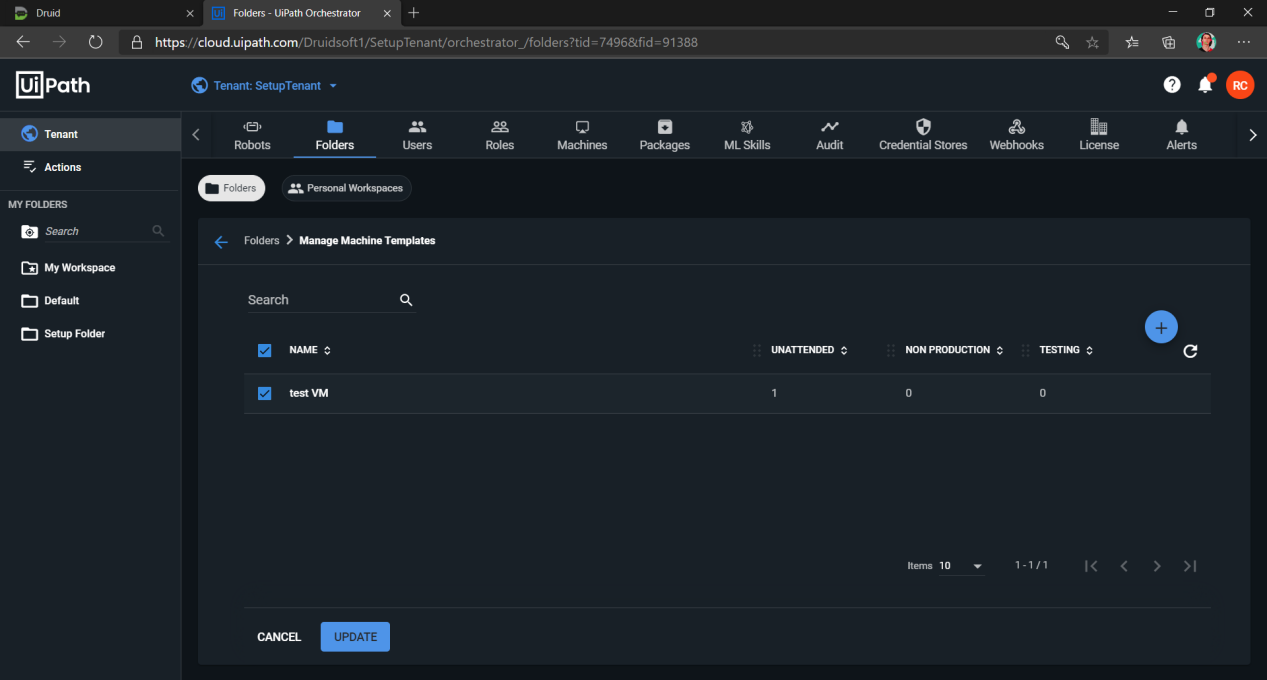
In the Tenant, click the Folders tab, select your folder, go to Machine Templates and click Manage Machine Templates.
Select your Machine Template (the one you created) and click UPDATE.
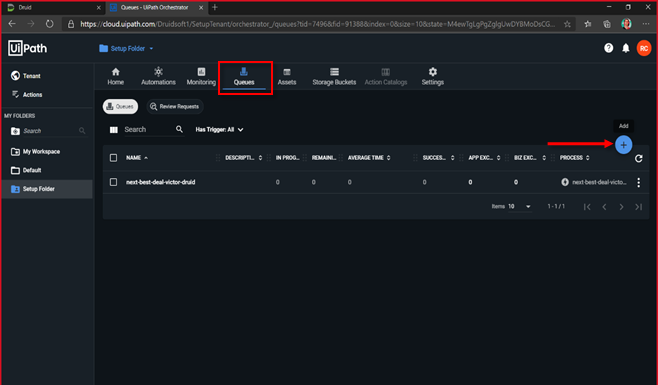
On the navigation bar, click the folder you created. Click the Queues tab, and then click the Add icon.
The Create Queue page appears. Complete the required fields. Write down the queue’s name, you will need it later.
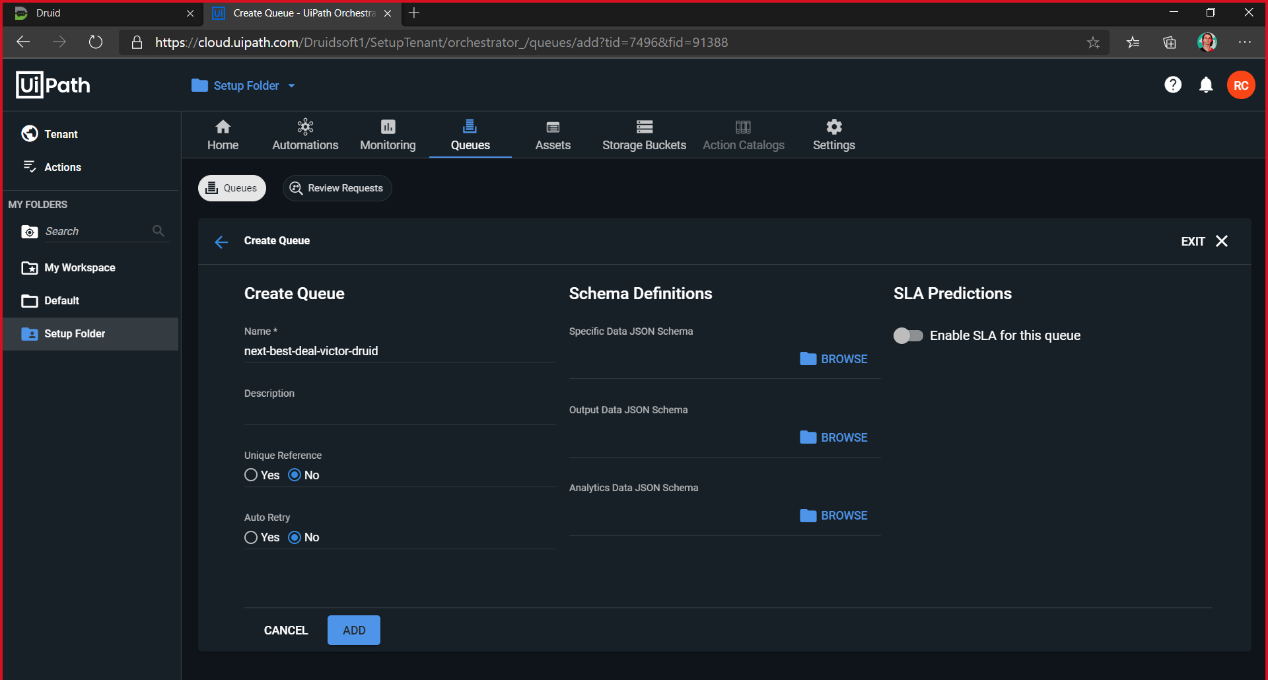
Click Add. The queue appears in the Queues page.
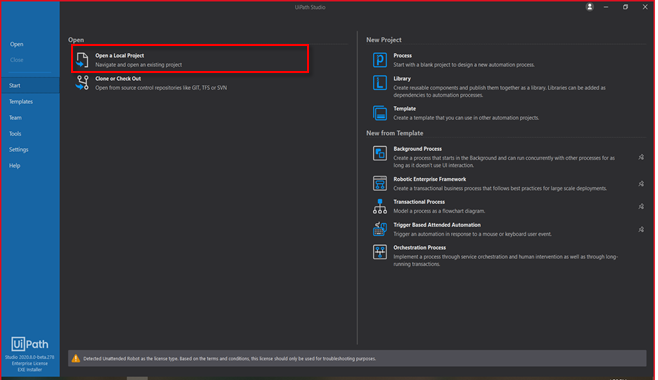
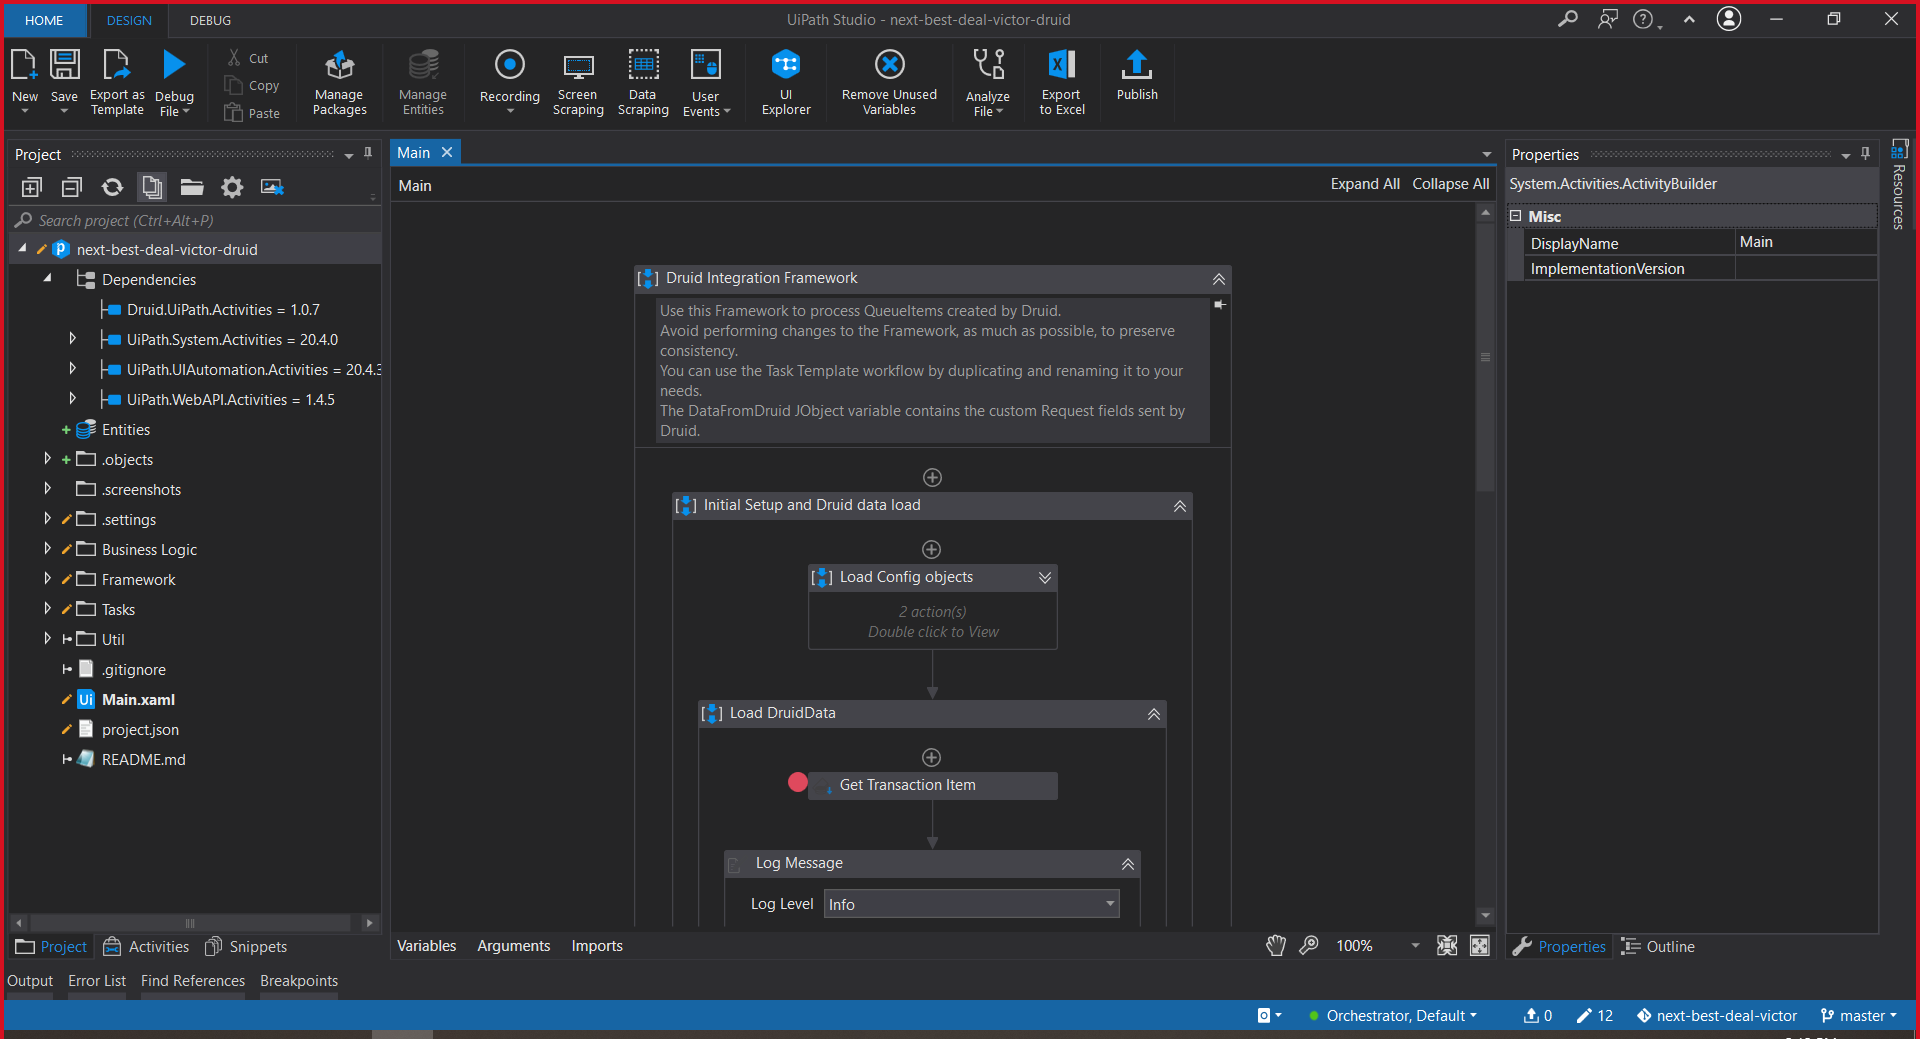
Open UiPath Studio.
Click Open a Local Project. Browse for the Unattended Next Best Deal Process folder > next-best-deal-victor folder (from prerequisites) and choose the project.json file.
Right click on the process name and click Open Project Folder.
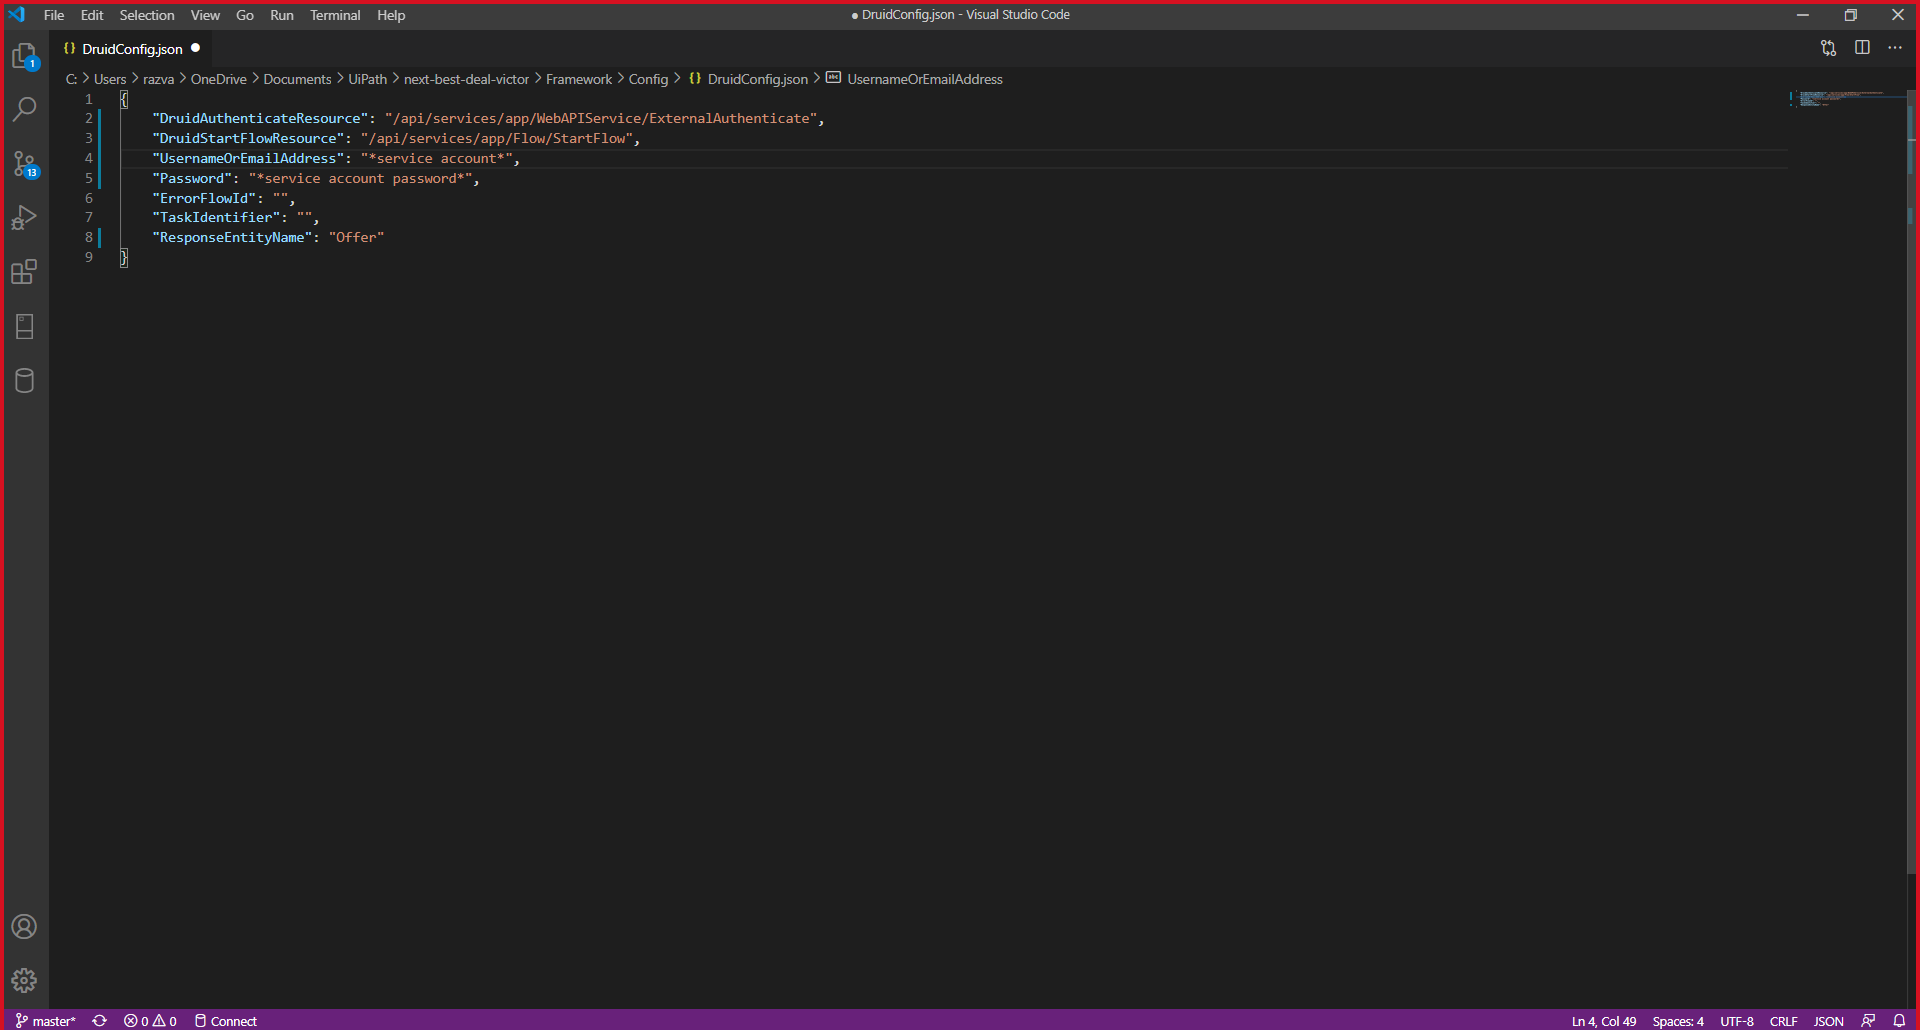
Open the Framework folder, then the Config folder. There are two json files.
Open DruidConfig.json. Complete all the fields as shown in the screenshot and save.
Fill in the correct service account username or email address and the password for a service account, which has enough permissions to create a flow.
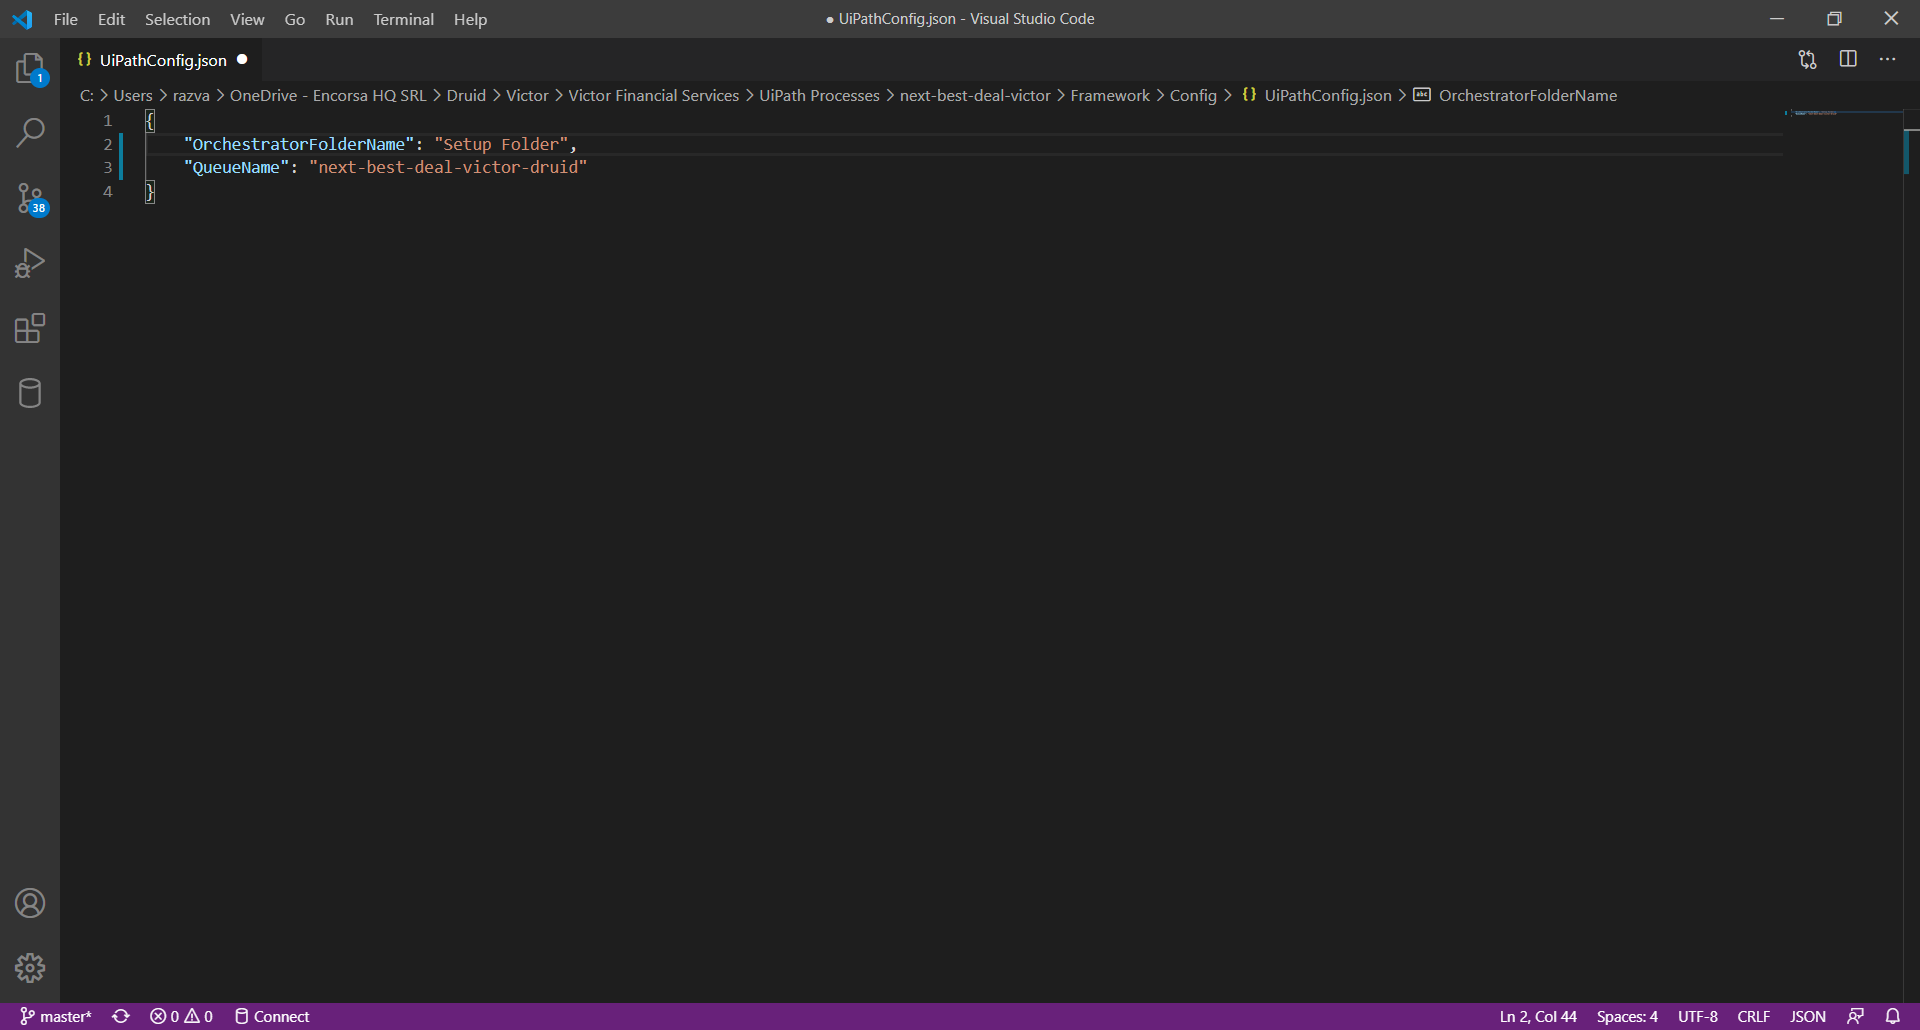
Open UiPathConfig.json. Complete the folder name and the queue name you previously created.
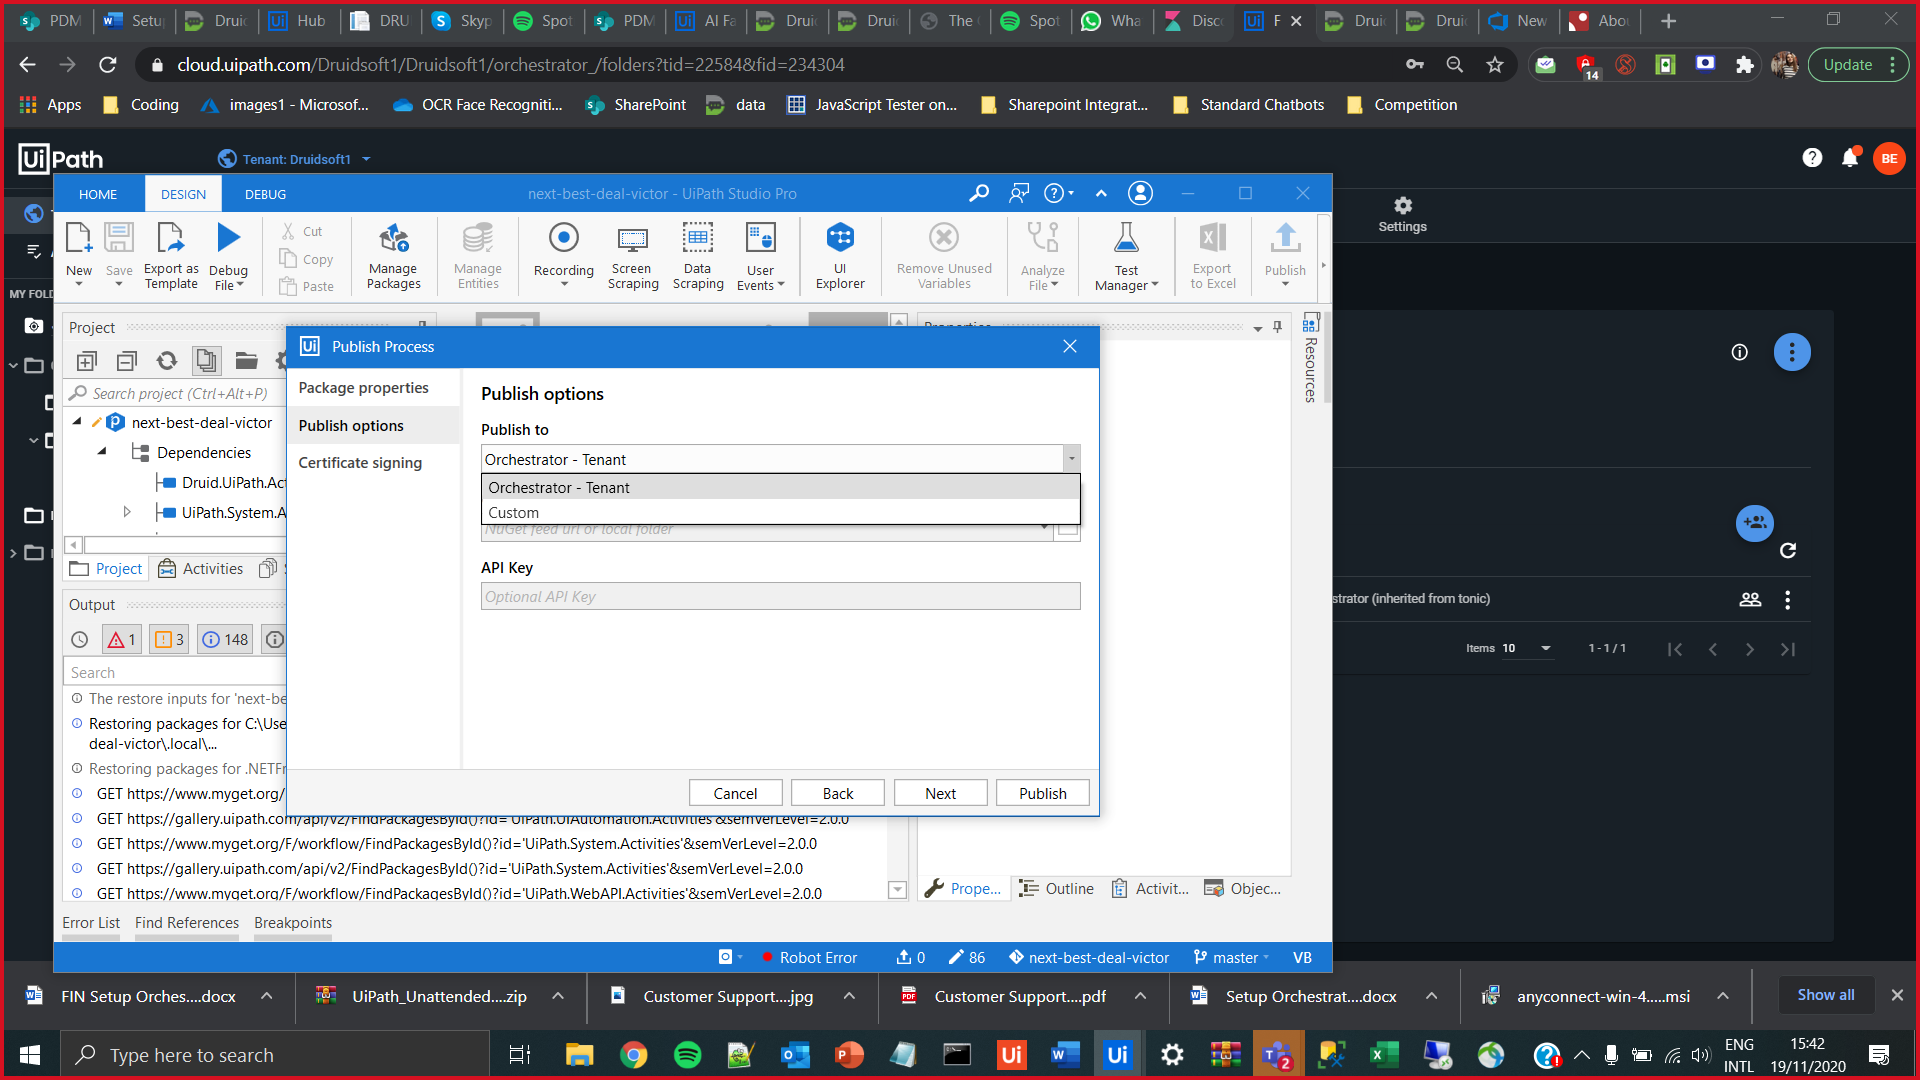
Switch to UiPath Studio. Click Publish.
Click Next, select Publish to Orchestrator Tenant Process Feed and click Publish.
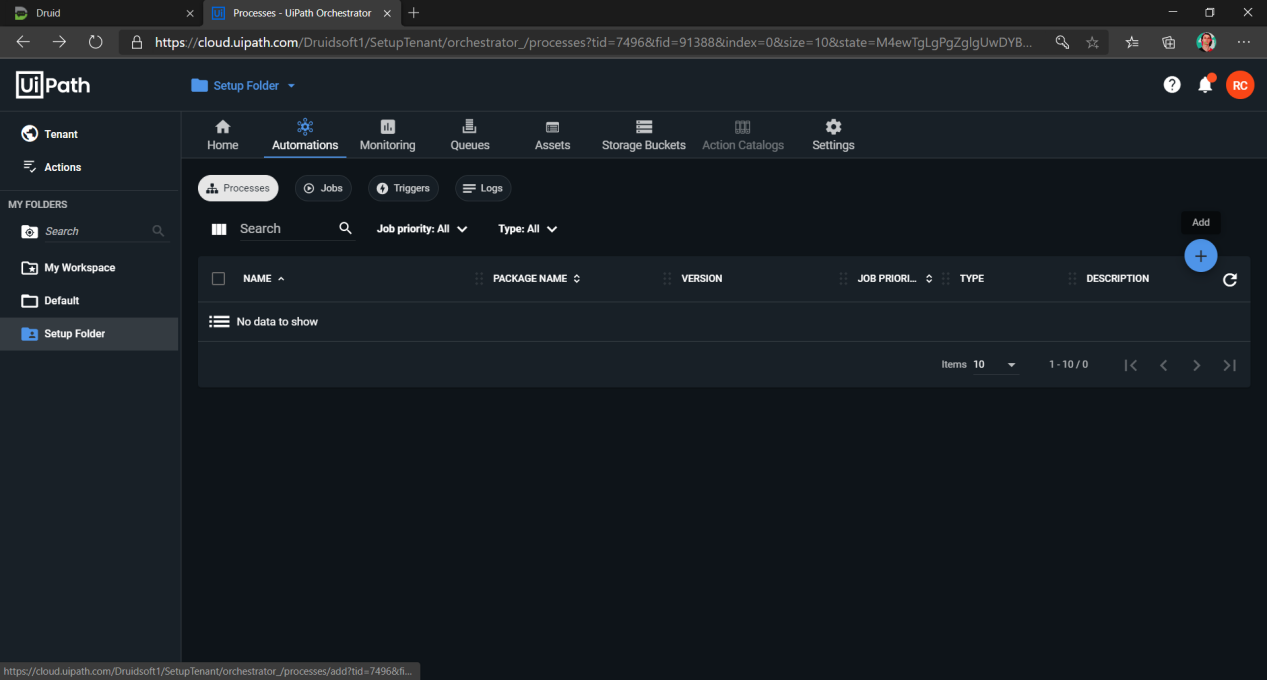
In your folder, on the navigation bar, click Automations > Processes and click the Add icon.
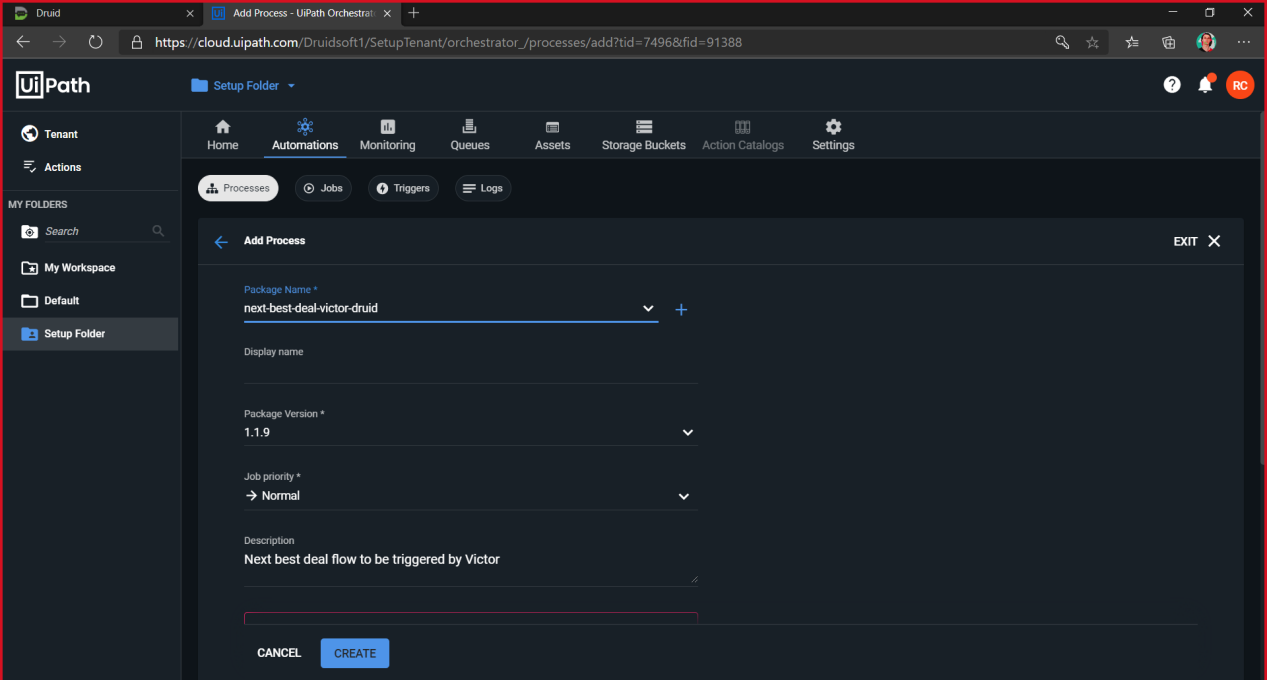
Choose the published package, enter a Process name and click CREATE.
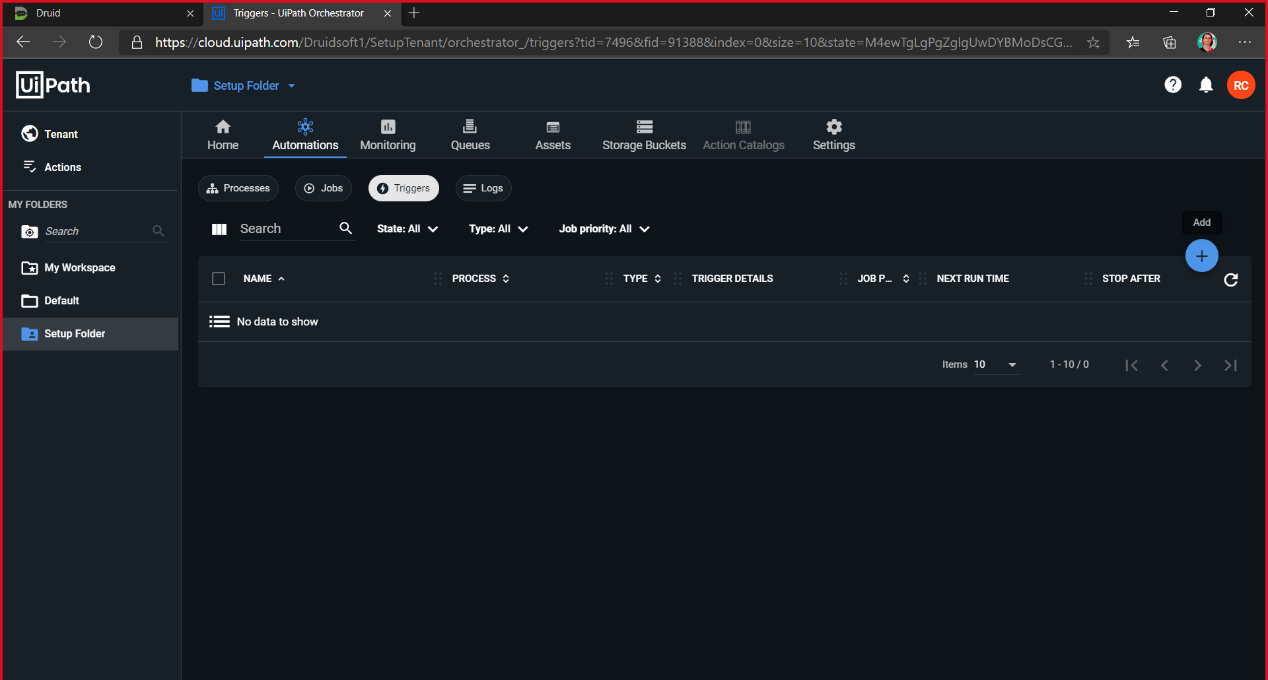
Click the Triggers tab, and then and click the Add icon.
Click the Queue button. The Create Trigger page appears. Enter a trigger Name, select the queue and the process you previously created.
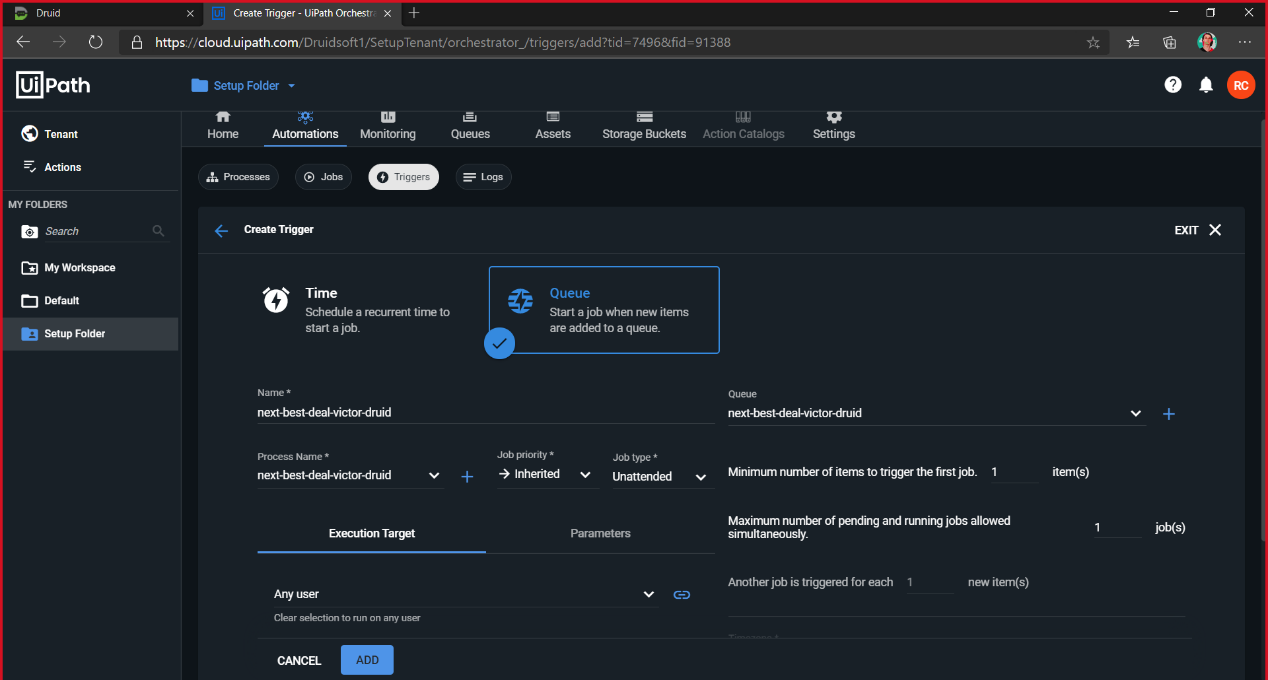
Click ADD.
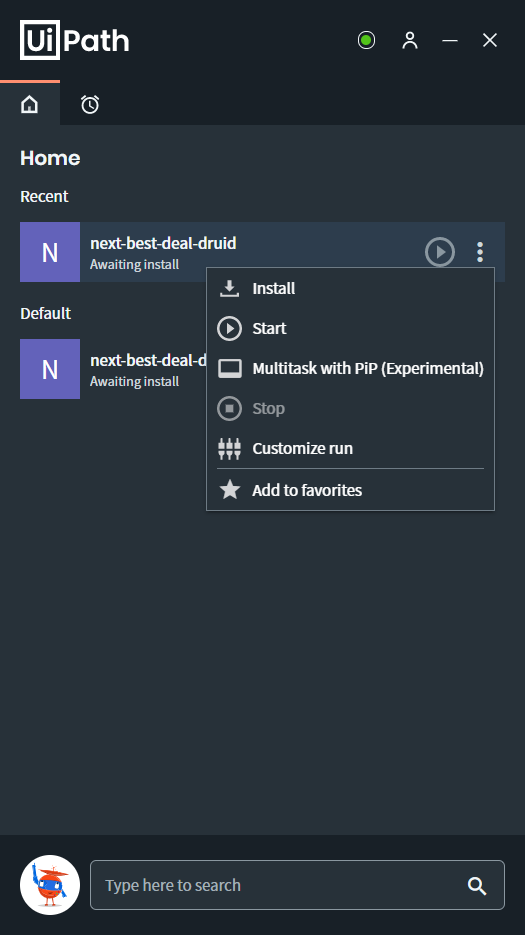
Switch to the UiPath Assistant. Search for the process you created, click the three dots on the right and click Install.
In the Druid Portal, go to Victor Flow sand search for [SME] UiPathResponse. Double click on it, go to the flow details and copy the Flowid.
Search for the flow [SME] Next_Best_Deal. Click on it. Go to the flow step Trigger-Uipath-Process, click Edit and in the Set Variables section, change the response [[Offer[[.CallbackFlowid with the flowId of the [SME] UiPathResponse (the one copied previously).