LLM Email Handling
This intelligent LLM-enabled solution automatically processes incoming emails sent to a specified email address. It:
- Categorizes and prioritizes each message and its attachments
- Translates the content if needed
- Summarizes the main issue
- Suggests a standard answer from the Knowledge Base
Once processed, the email case is saved in the Druid back end. A human agent can then review and respond to the case in English (or another preferred language). The response is automatically translated and sent back to the user in the language of the original email.
Prerequisites
Before you begin, make sure the following requirements are met:
- Tenant Druid community (open new tenant here) or Druid subscription.
- You should have a Druid bot. For information on how to create a bot, see Creating Druid Bots.
- Microsoft Office 365 email is configured and activated as Email Channel.
Configuring the Skill Template
To configure the skill template, follow these steps:
Step 1. Install the solution from the Solutions Library
Go to the Solutions Library, search for solution "LLM Email Handling" and import it following the instructions provided in section Installing Solution Templates.
Wait until the import status shows as “Success”.
Step 2. Activate Email channel
After importing the solution, navigate to Bot Settings. Click the Channels tab, and activate the Email channel by following the instructions described in Email Channel.
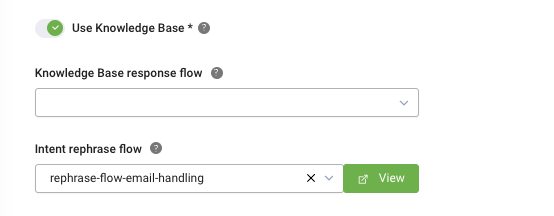
Step 3. Set up the bot special flows and enable KB usage
Go to the bot settings, Details page and click the Dialog management section header. The section expands. Select the following special flow:
|
Special Flow |
Select |
|---|---|
|
Intent rephrase flow |
rephrase-flow-email-handling |
Toggle on Use Knowledge Base.
Scroll down and click Save & Close.
Step 4. Configure the apps connection
- Go to Solution Contents > Apps.
- Search for each of the following apps one by one. Click on the app, and edit its settings as described below:
- DRUID-LLM. To configure this app connection, follow these steps:
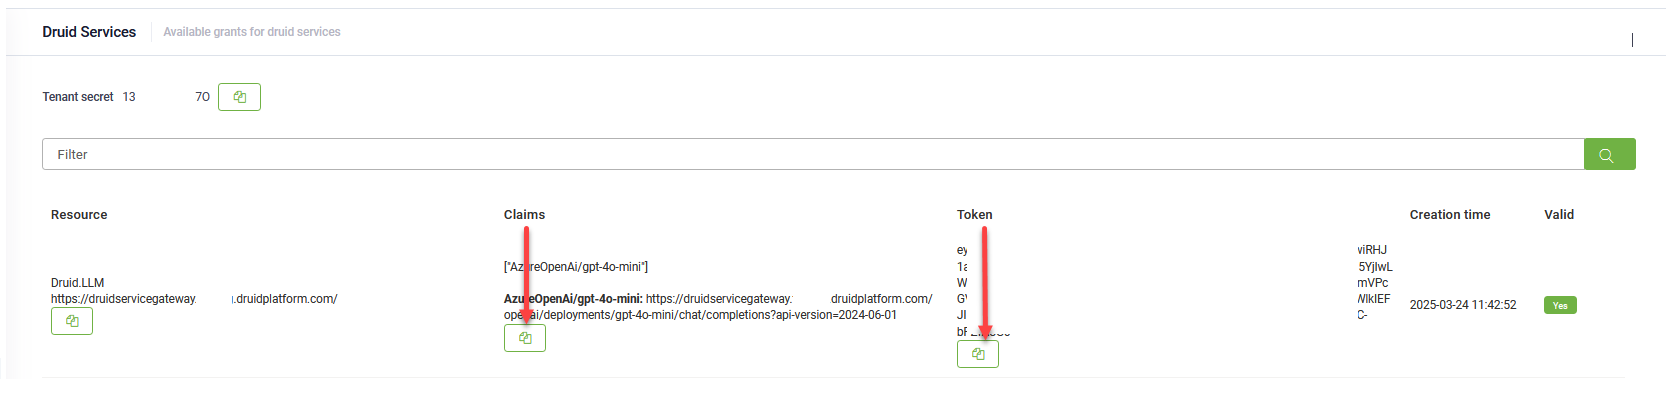
- Go to Administration > Druid Services.
- Copy the claims and token corresponding to the DRUID.LLM resource you want to use — you’ll need them to configure the app connection.
- Go to Solution Contents > Apps and click on the DRUID-LLM app.
- In the Base URL field, paste the claims value you copied at step b.
- In the Variables table, enter the token you copied at step b as the key.
-
Click Save to complete the configuration.
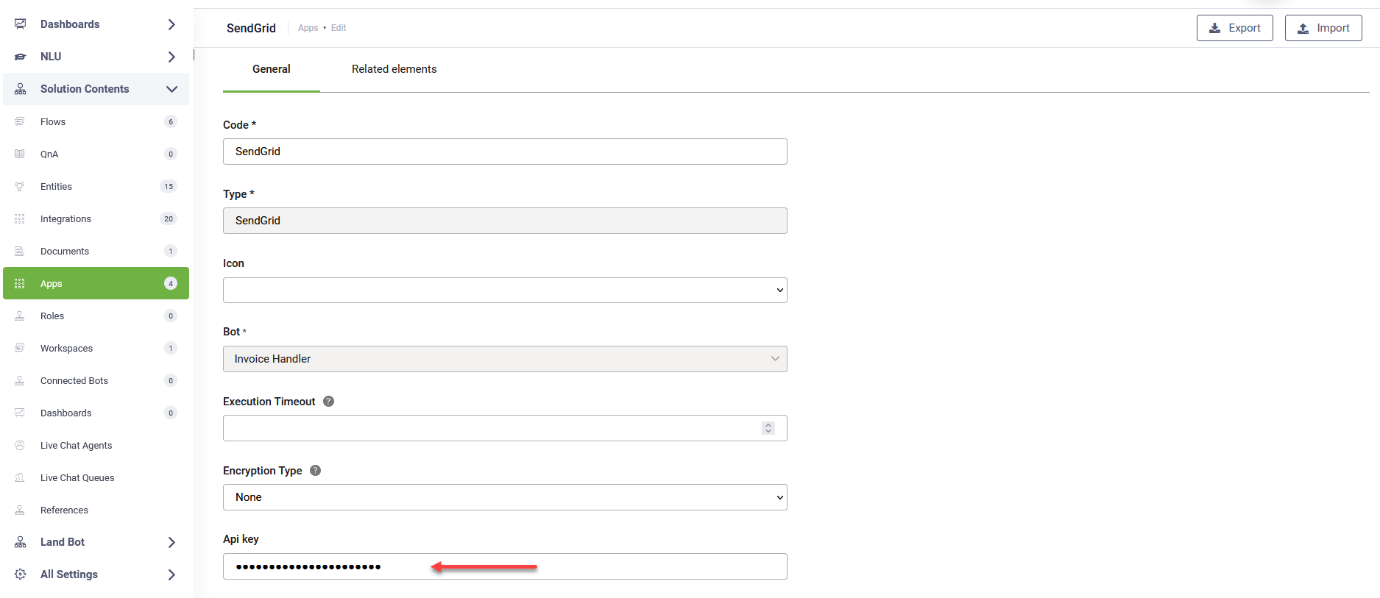
- SendGrid: Enter your SendGrid API key or set up a new SMTP connection to send emails. After entering the SendGrid key, click Save & Close.
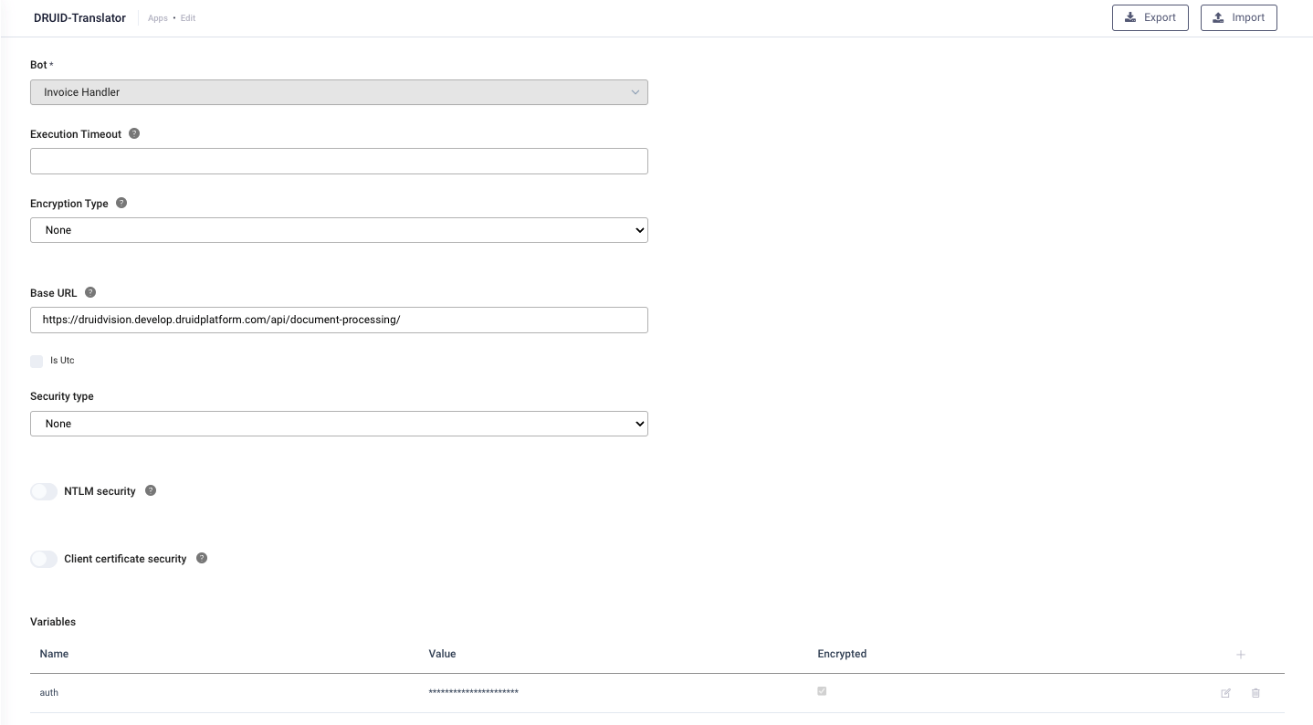
- DRUID-Translator. Ask DRUID for an Authentication key. After entering the key in the screen below, click Save & Close.
- Once the apps are configured, click Publish.

Step 5. Prepare the standard answer Knowledge Base
Follow these steps to configure the data sources for storing standard support responses:
- Download and extract the archive of Structured documents.
- Unzip the archive to access five Excel files, each representing a different email category.
- For each Excel file, create a structured document data source and extract the data:
- Go to NLU > Knowledge Base.
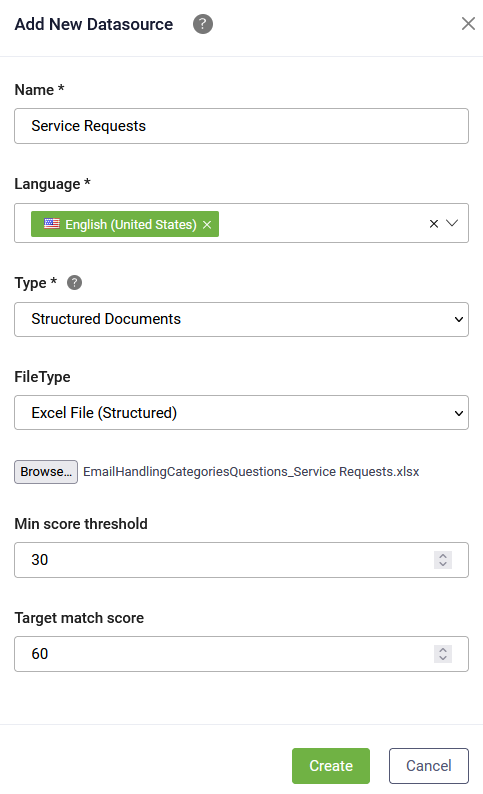
- Click Add new in the top-right corner.
- In the Name field, enter a descriptive name that matches the email category.
- For Type, select Structured Documents.
- In the File Type field, keep Excel File (Structured) selected.
- Upload the corresponding Excel file. You can use the sample file or upload your own set of standard answers.
- Set Min score threshold to 30.
- Set Target match score to 60.
- Click Create.
- Click Extract to begin processing the uploaded content.
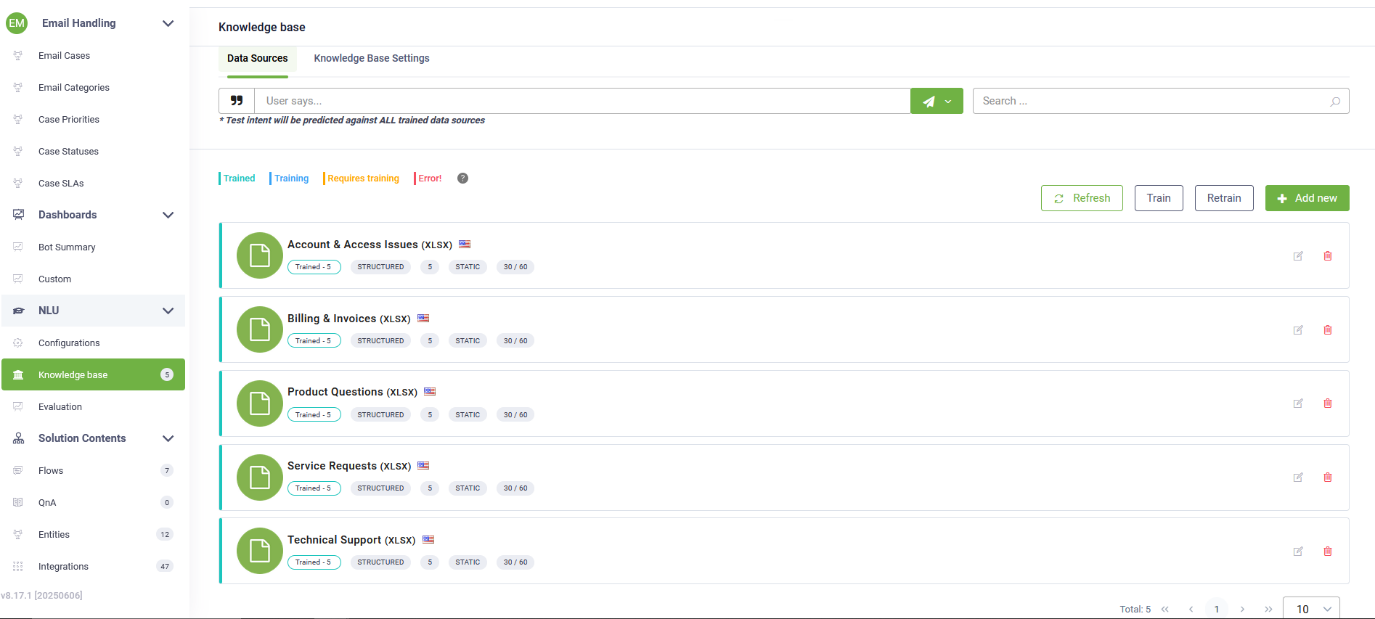
- After all data sources have been extracted, go to the Knowledge Base page and click the Train button to start the training process.
At the end of this step, your Knowledge Base will contain answers organized by email category.
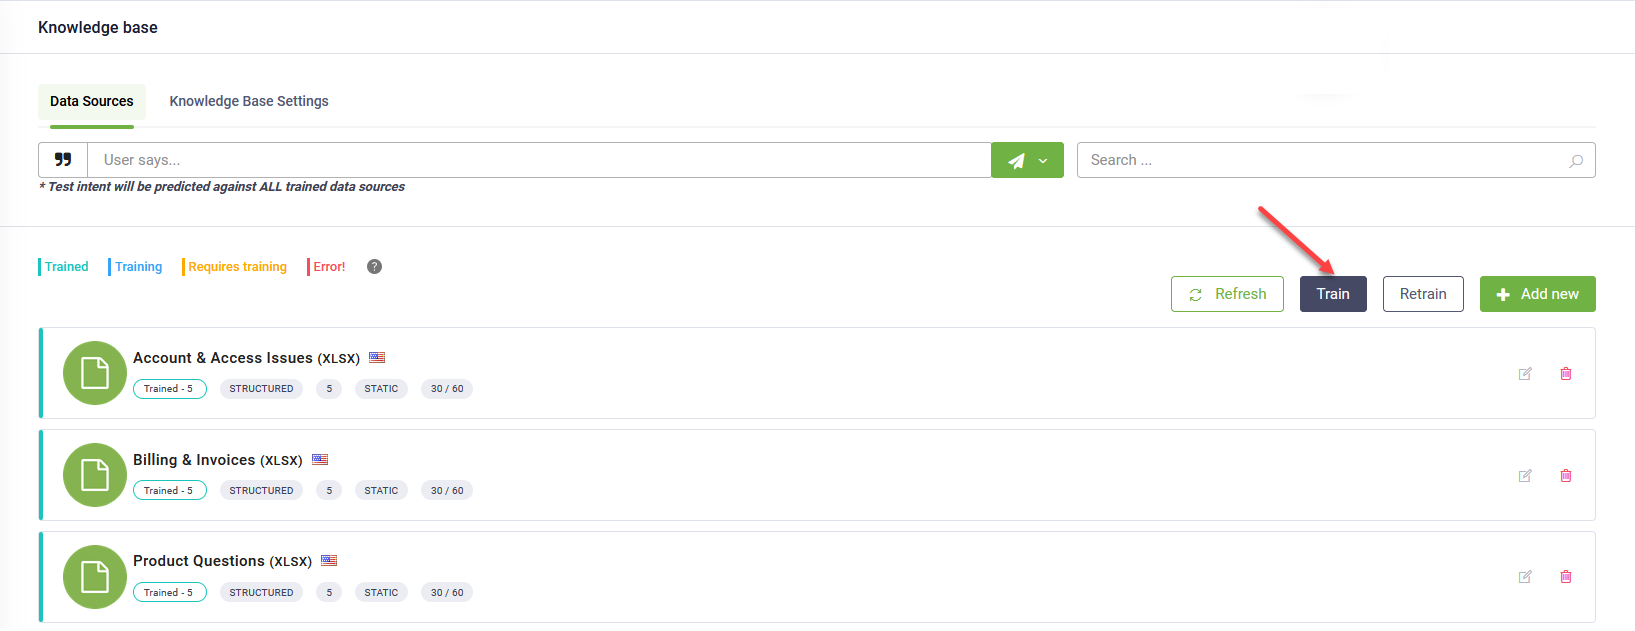
Once training is complete, the Knowledge Base is ready to deliver standard responses for various types of case requests.
Step 6. Run setup flow
Open the chatbot and in the chat, type “add-demo-data” to start the flow that adds the Email Categories, Statuses, Priorities and SLAs in their corresponding we views, which can be adjusted to meet specific business needs.
The solution is now ready to be used.
How to use the solution
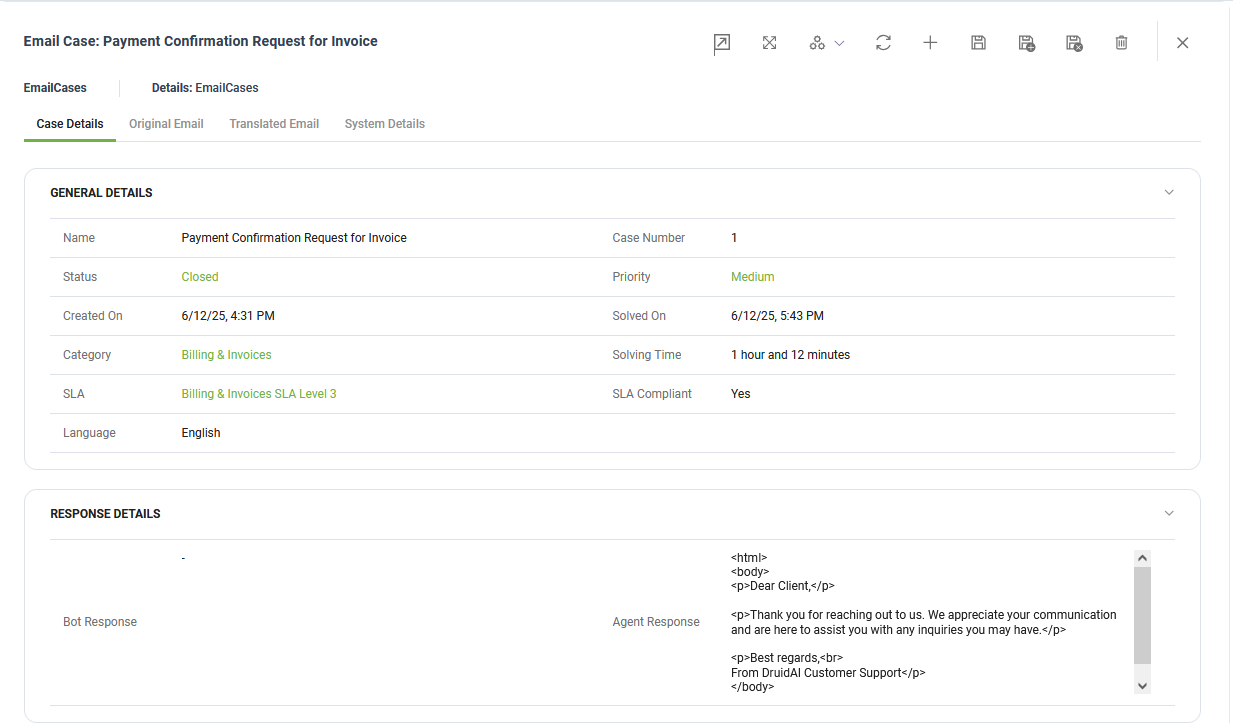
To create the first email case, send an email to the email address you used when activating the Email channel. The email can contain one or several attachments (PDF or image format). The bot will process the email body and any attachments, then will create a case in the Email Cases view.
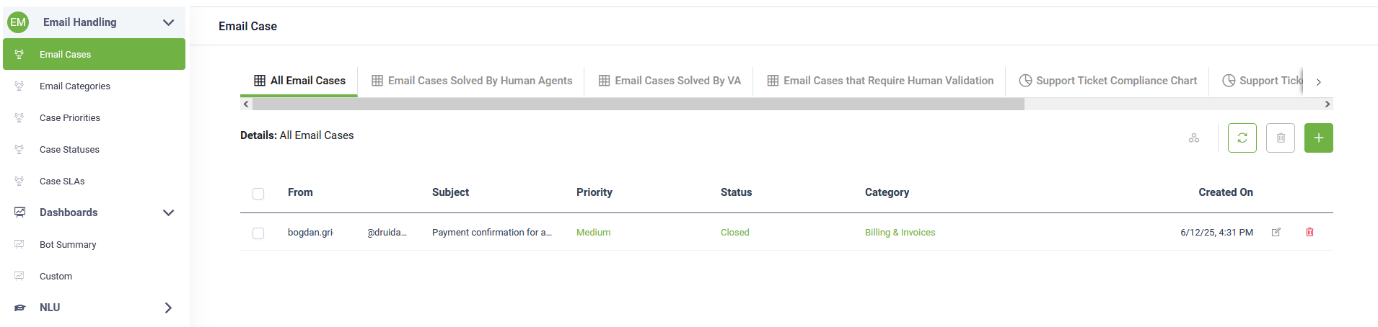
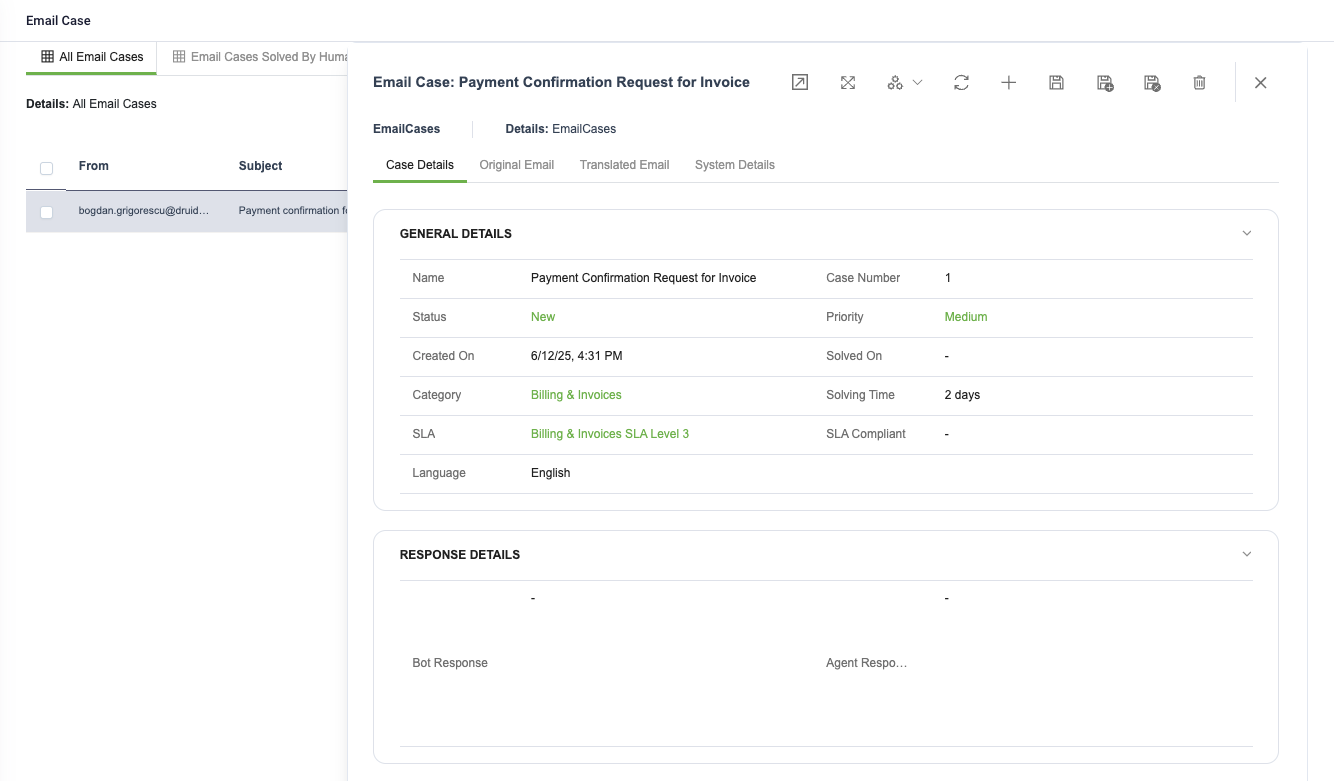
The Email Handling Agent analyzes each incoming email and automatically assigns the following values:
- Category – Selected from the options defined in the Email Categories view.
- Status – Assigned using a value from the Case Statuses view.
- Priority – Set using the options available in the Case Priorities view.
- SLA – Chosen based on the best match from the Case SLAs view.
- Language – Detected from the language of the original email message.
- Bot Response – Provided if the virtual assistant finds a suitable answer in the Knowledge Base.
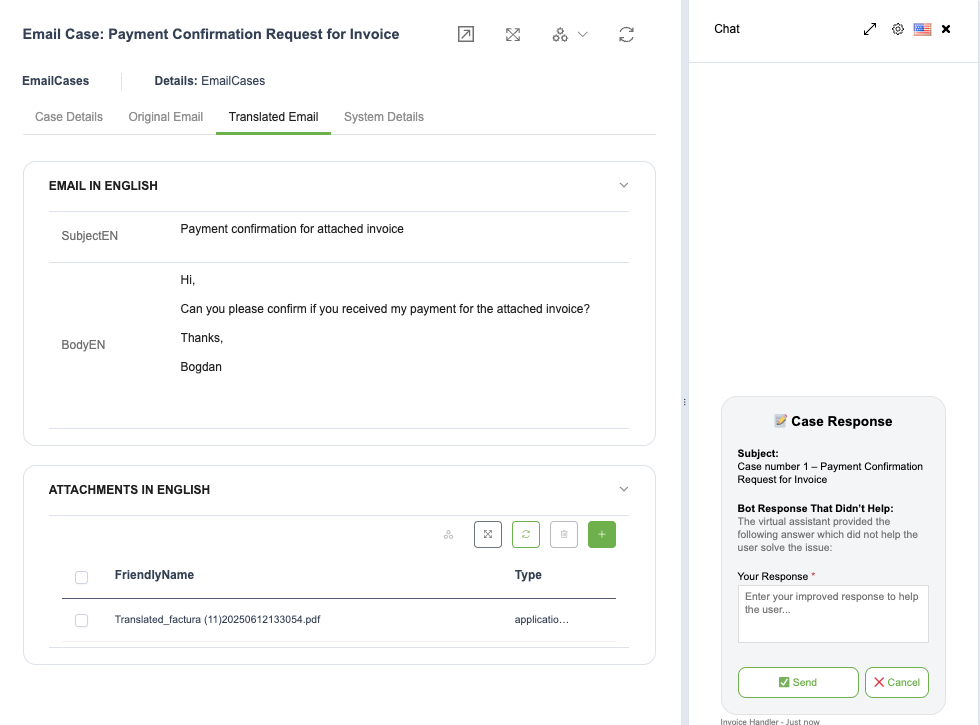
The Original Email tab contains the original email sent by the user / customer, and the attached files.

The Translated Email tab contains an English translation of the original message, including a tarnslation of all the attached files.
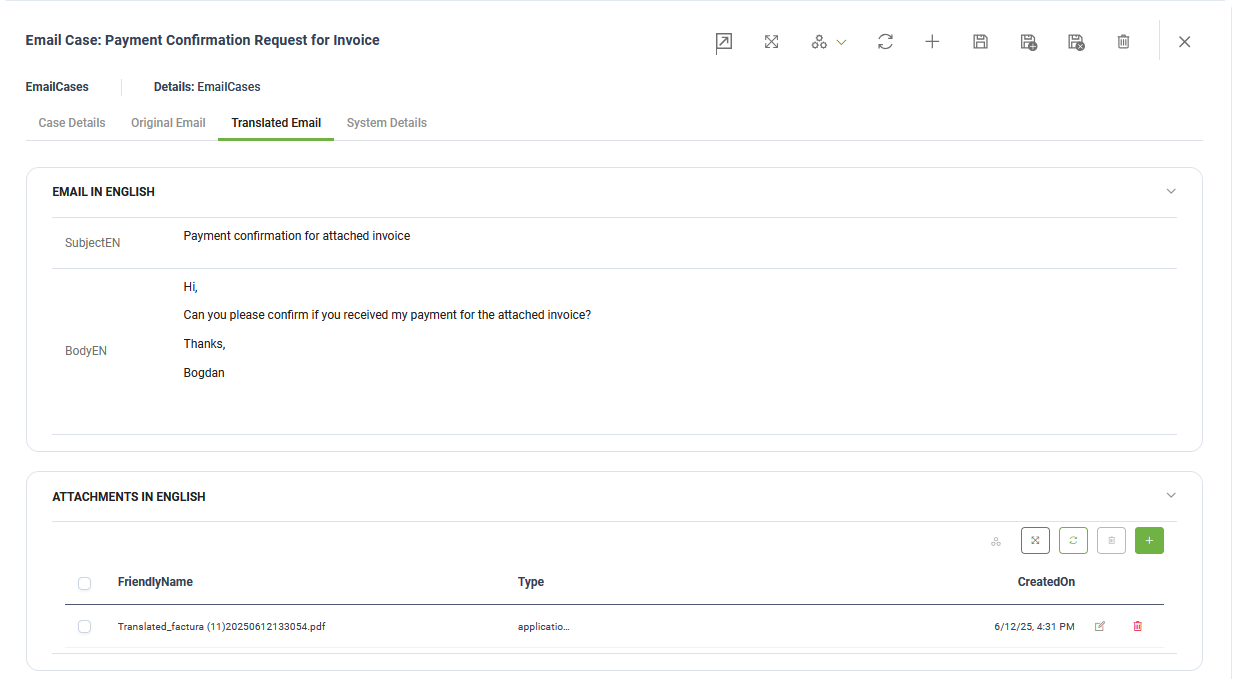
To download either the Original or the Translated files, you can use one of the two Automations:
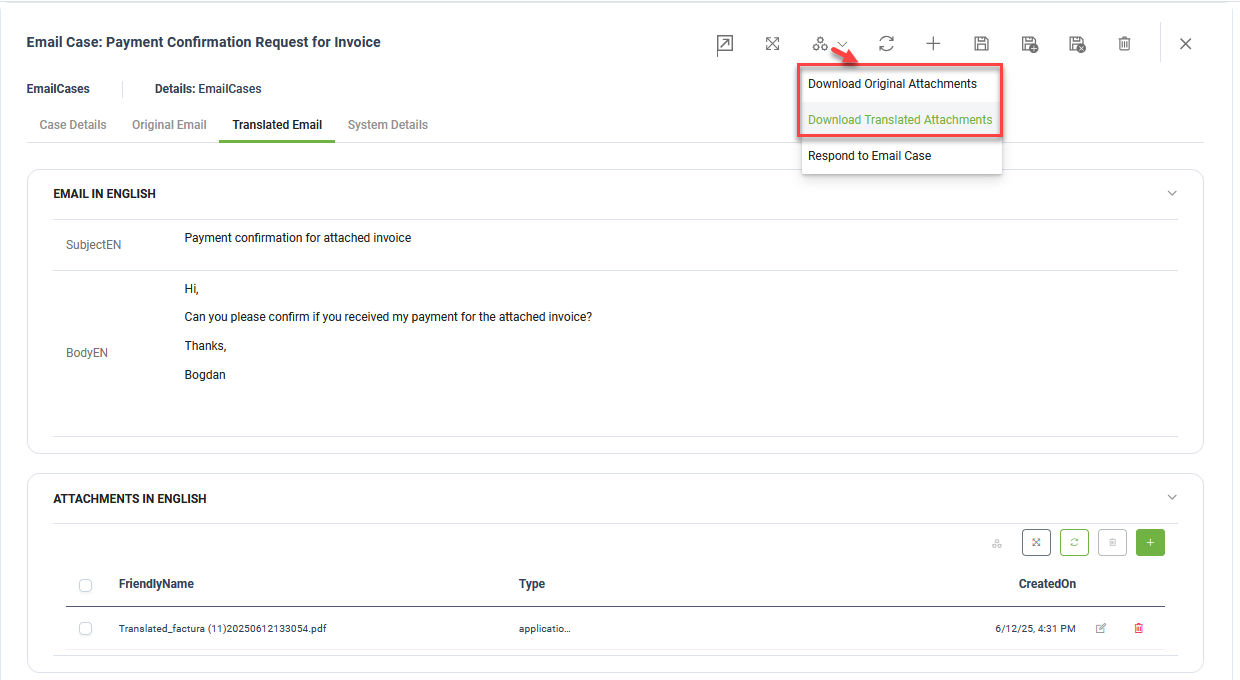
To reply to a case, follow these steps:
- At the top of the view, click the Automations icon, then select Respond to Email Case. The chat form appears on the right.
- Enter your reply and click Send.
The Virtual Assistant will then ask the Agent to confirm if the Email Case can be closed or not.

At the end, the Email Case status is updated to Closed, the solving time is computed automatically and checked if it matches the Case SLA, and the Agent answer is added to the Case.