Zendesk Live Chat
You can connect your AI Agent with Zendesk Contact Center to provide seamless support. This integration allows your customers to interact with a AI Agent and, if needed, get redirected to a live Zendesk agent. You can use either Zendesk widgets or DRUID channels (such as the DRUID web snippet).
Prerequisites
- You set up the Zendesk Sunshine channel by following the instructions in the Zendesk Sunshine topic.
Use Zendesk Live Chat with Zendesk Widgets
Follow these steps to connect users interacting through Zendesk widgets (Zendesk messaging channels) with live agents in Zendesk:
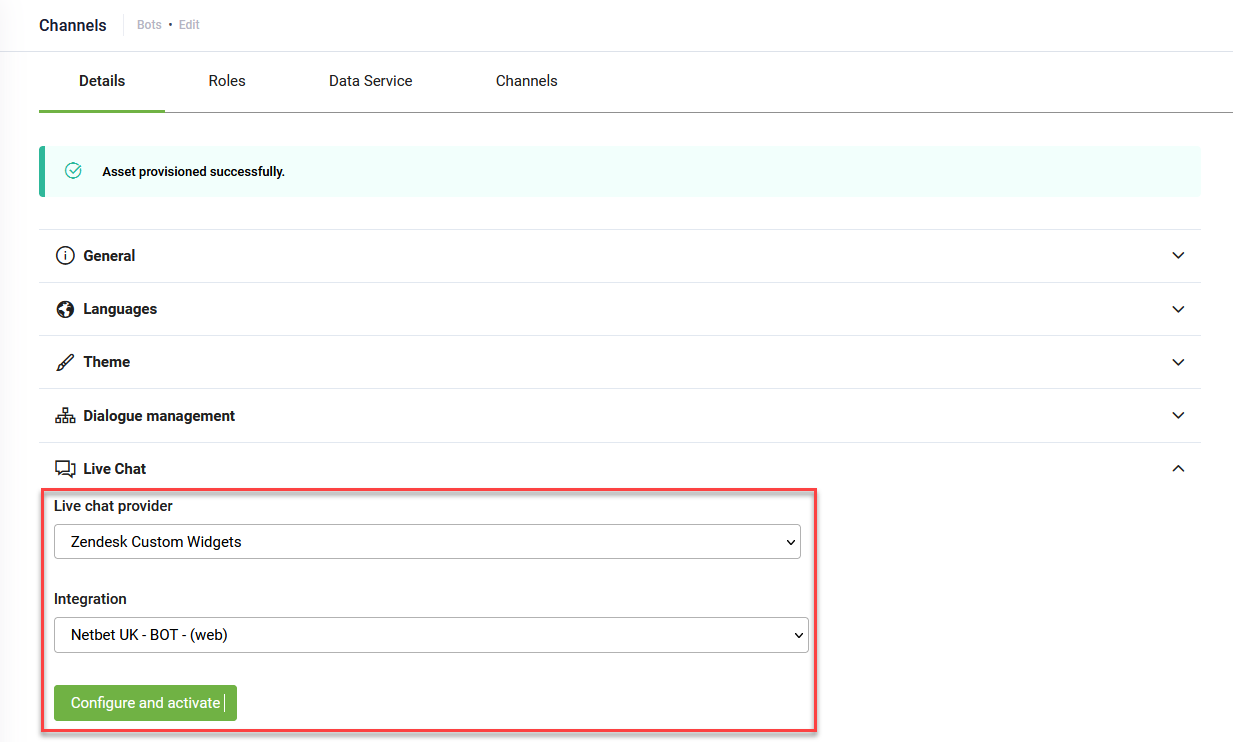
- Navigate to the AI Agent Details page and click on Live Chat.
- From the Live chat provider drop-down, select Zendesk Custom Widgets.
- In the Integration field, choose the desired Zendesk messaging channel.
- Click Configure and Activate.
- Save the AI Agent.
Use Zendesk Live Chat with DRUID Channels
This setup connects users from DRUID channels — such as the DRUID web snippet or Direct Line — to Zendesk live agents.
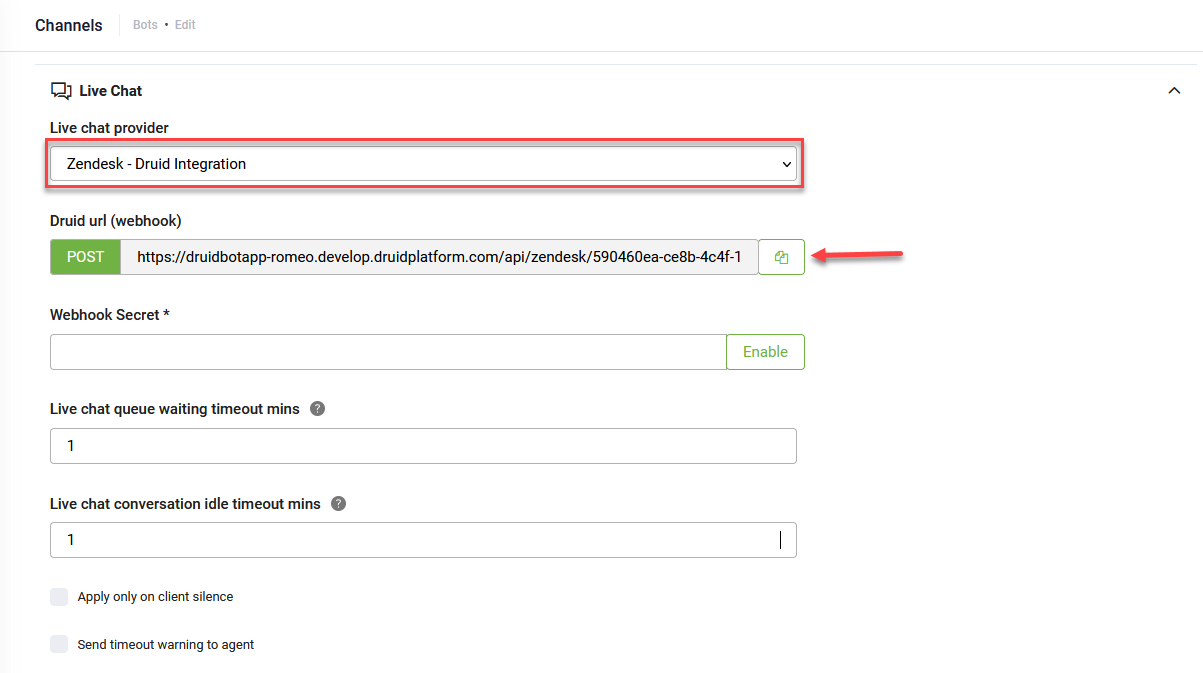
Step 1: Get the DRUID Webhook URL
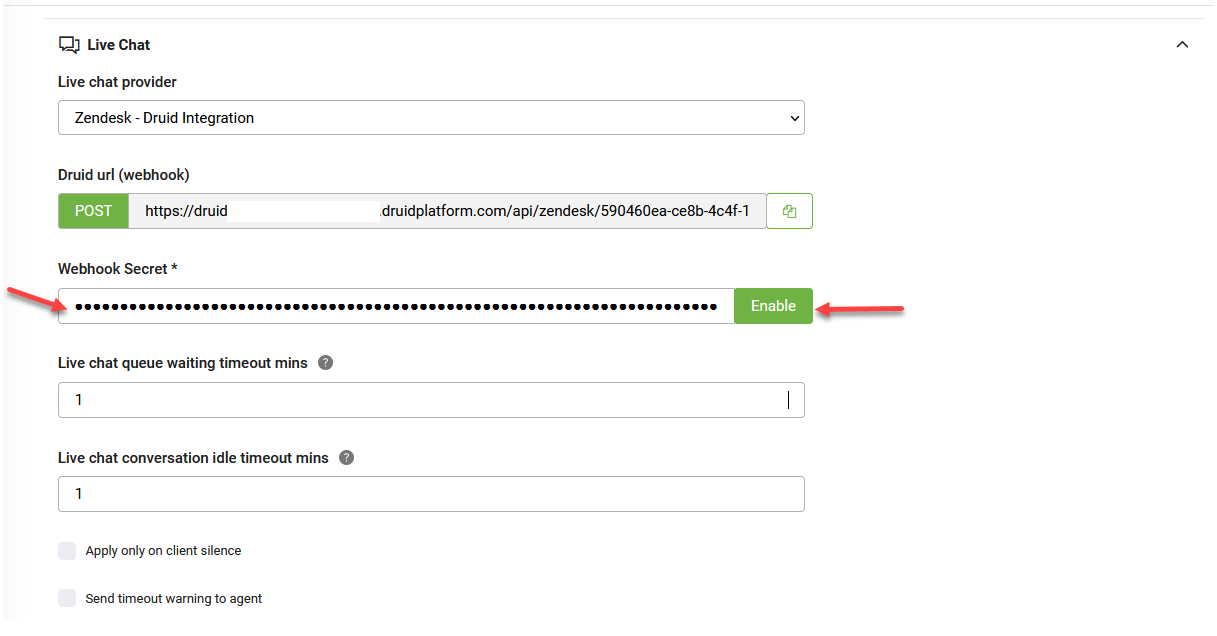
- In the Druid Portal, go to the AI Agent Details page and click Live Chat.
- From the Live chat provider drop-down, select Zendesk – DRUID integration.
- Copy the Druid url (webhook) displayed on the screen.
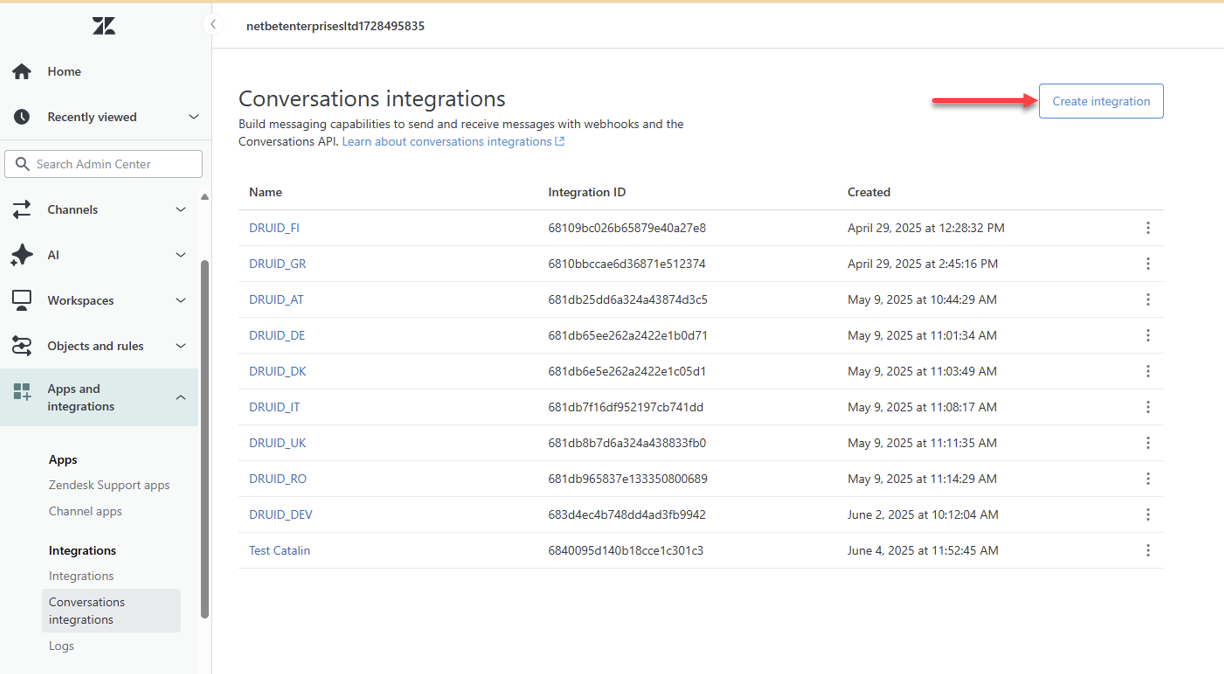
Step 2: Create an Integration in Zendesk
- In a new browser tab, log in to your Zendesk Admin Center with an admin account.
- In the left-hand menu, select Apps and Integrations > Conversations integrations.
- Click Create integration.
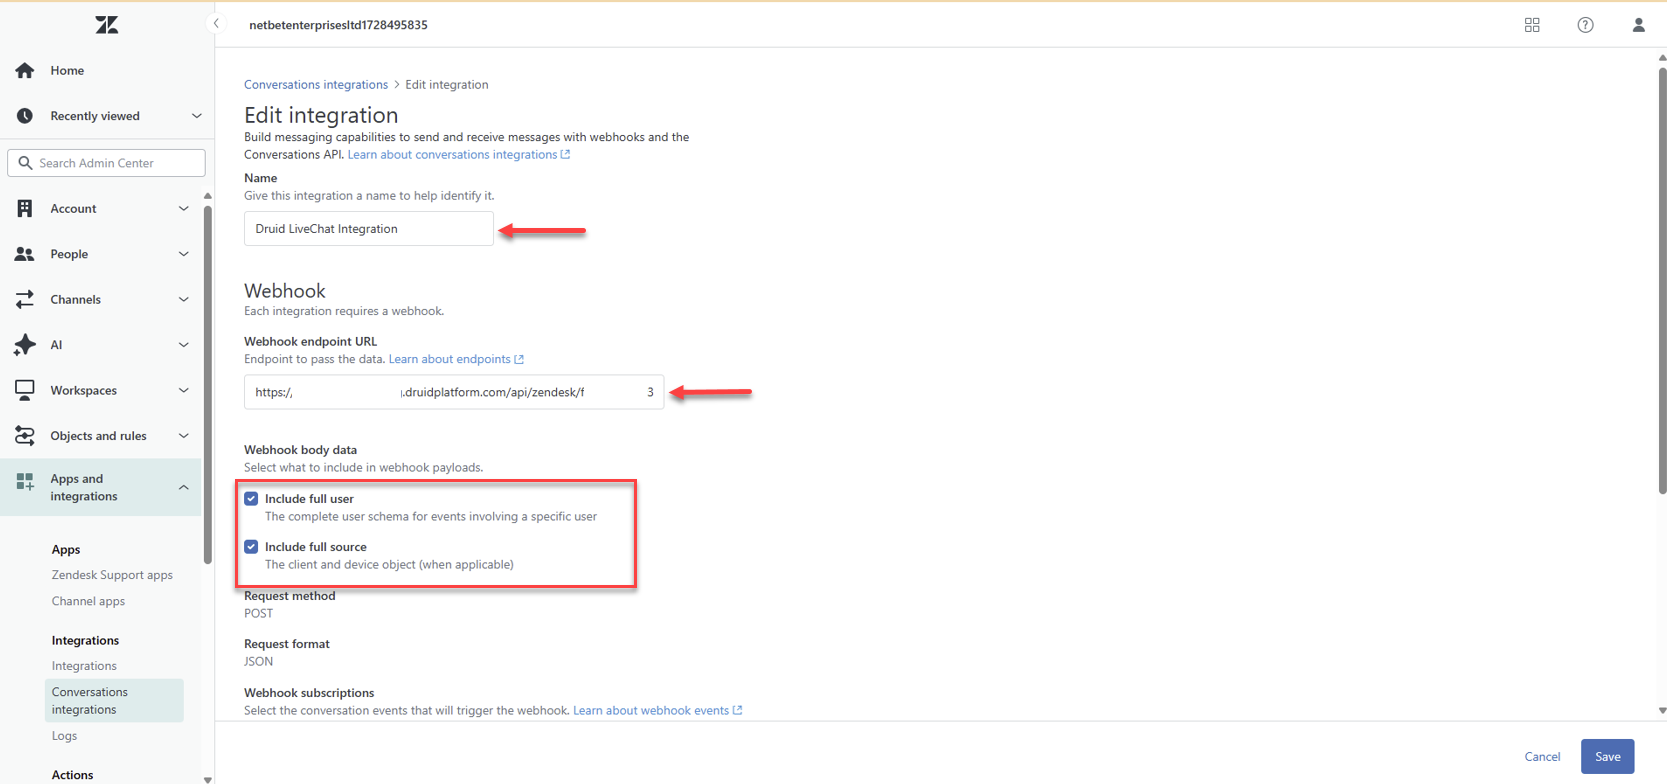
- Enter a name for the integration to help identify it later.
- In the Webhook endpoint URL, paste the Druid url (webhook) you copied earlier.
- Enable the options to include full user and full source in the payload.
- Under Webhook subscriptions, select the following:
- Conversation referral
- Switchboard pass control failure
- Switchboard accept control
- Switchboard accept control failure
- Switchboard offer control
- Switchboard offer control failure
- Switchboard pass control
- Participant left conversation
- Conversation message
- Postbacks
- Channel delivery success
- Participant joined conversation
- Click Save to create the webhook.

Step 3: Retrieve the Webhook Secret
- On the Conversations Integrations page, locate your integration.
- Click the Actions button (⋮) next to the integration and choose View details.
- Copy the Shared secret shown on the screen. You’ll use this in the DRUID configuration.
Step 4: Finalize the Setup in DRUID
- Return to the AI Agent Details page in the Druid Portal.
- In the Live Chat section, locate the Webhook Secret field.
- In the Webhook Secret field, paste the shared secret you copied from Zendesk and click Enable.
- Save the AI Agent.
Send Contact Center Parameters
When passing control to Zendesk’s Agent Workspace you can include the following contact center parameters to populate ticket fields on the Zendesk ticket. Note that this feature is currently only available to customers using Agent Workspace
| Parameter | Data Type | Description |
|---|---|---|
| dataCapture.systemField.requester.name | String | The name of the client. |
| dataCapture.systemField.requester.email | String | The email of the client. |
| dataCapture.systemField.group_id | Long |
The ID of the queue or the ID of the agent to which the client will be assigned. |
To send Contact Center parameters to Zendesk Live Chat, on the ConnectToHelpdeskAgent internal action, provide the desired parameters inside the ContactCenterParameters object in JSON format.
{
   "ContactCenterParameters": {
     "dataCapture.systemField.requester.name": "[[ChatUser]].Name",
     "dataCapture.systemField.requester.email": "[[ChatUser]].Email",
     "dataCapture.systemField.group_id": "[[Entity]].QueueId" // recipient zendesk group
  }
}