Live Chat With Multiple Queues
Chat queues help you strike the right balance between wait times and internal resources. They prevent chat overload for agents while keeping your waiting customers updated. They also help you streamline the customer service; if the agents in a live chat with a customer need information from agents in a different department, they can easily transfer the live chat call to the queue specifically defined for that department.
This section provides you with the procedure for configuring Live Chat with multiple queues.
Step 1: Add agents
To add an agent, follow these steps:
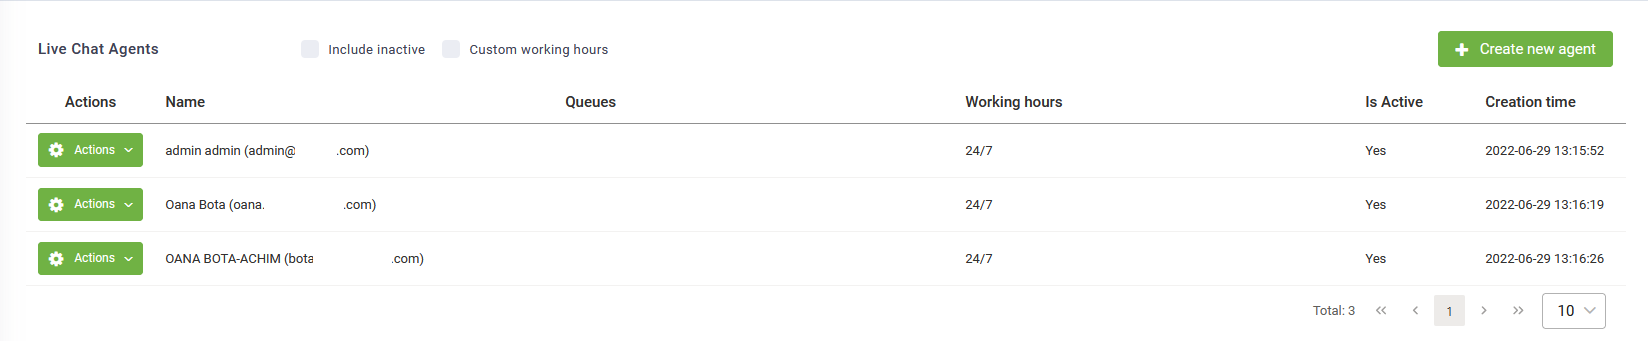
- Select the AI Agent and solution and on the main menu, click Live Chat Agents. The Agents list displays.
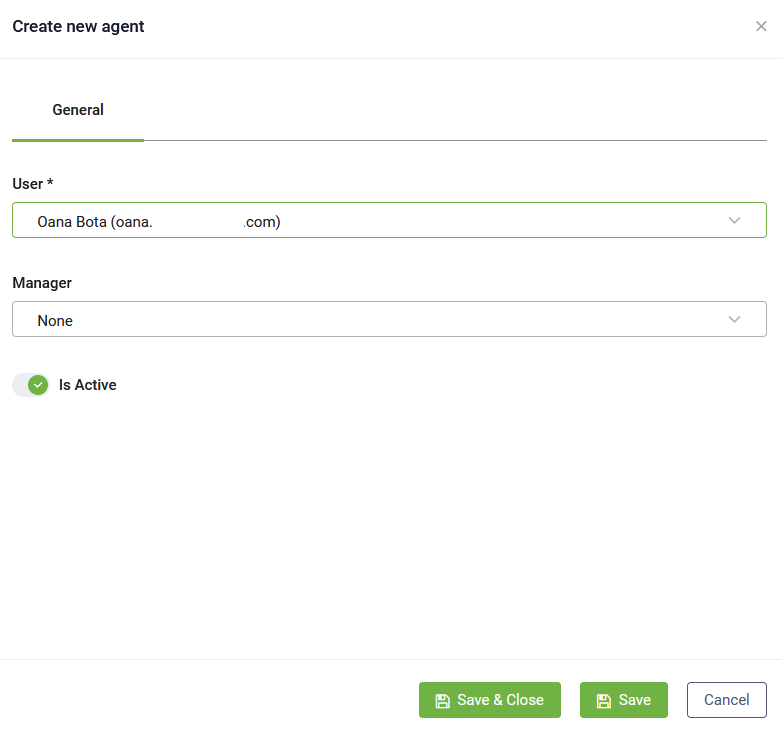
- At the top-right corner of the page, click the Create new agent button. The Create new agent page appears.
- Select the User. Optionally, select the Manager who will oversee the agent's activity.
- Click the Save & Close button. The agent will be saved to the agents list.
Following the procedure above, add as many agents as you need.
Once you add all agents, you can start add queues and assign agents to queues to accommodate your support department structure.
Step 2: Define queues and assign agents
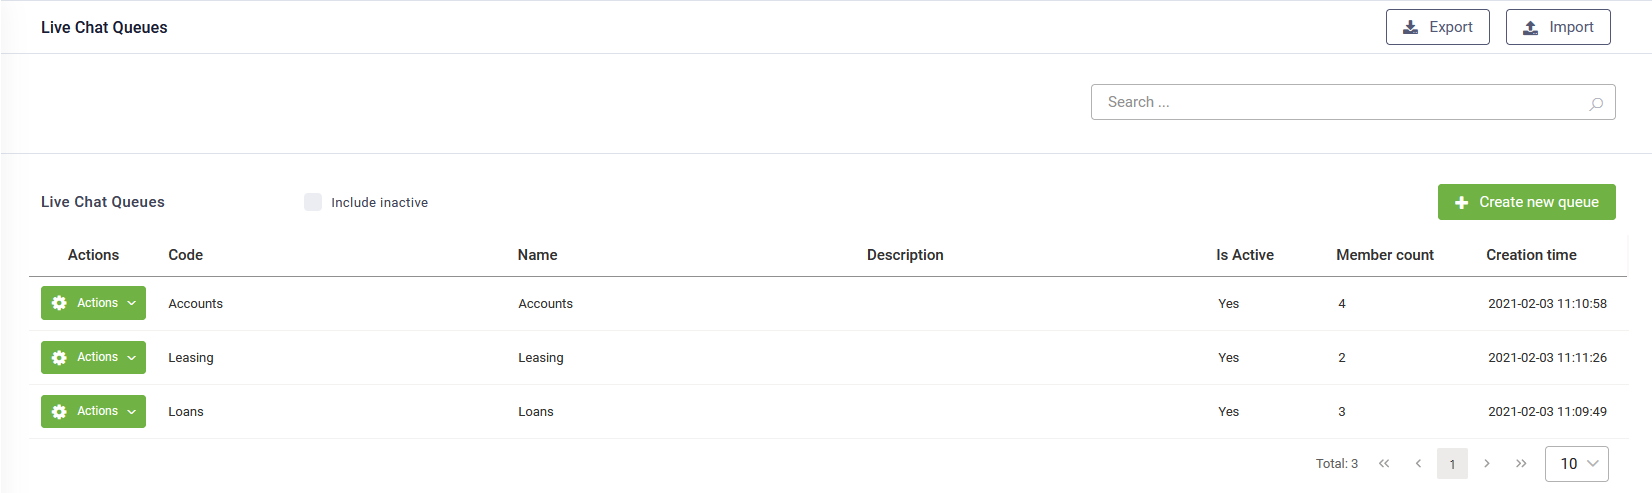
- On the main menu, click Live Chat Queues. The Queues list page appears.
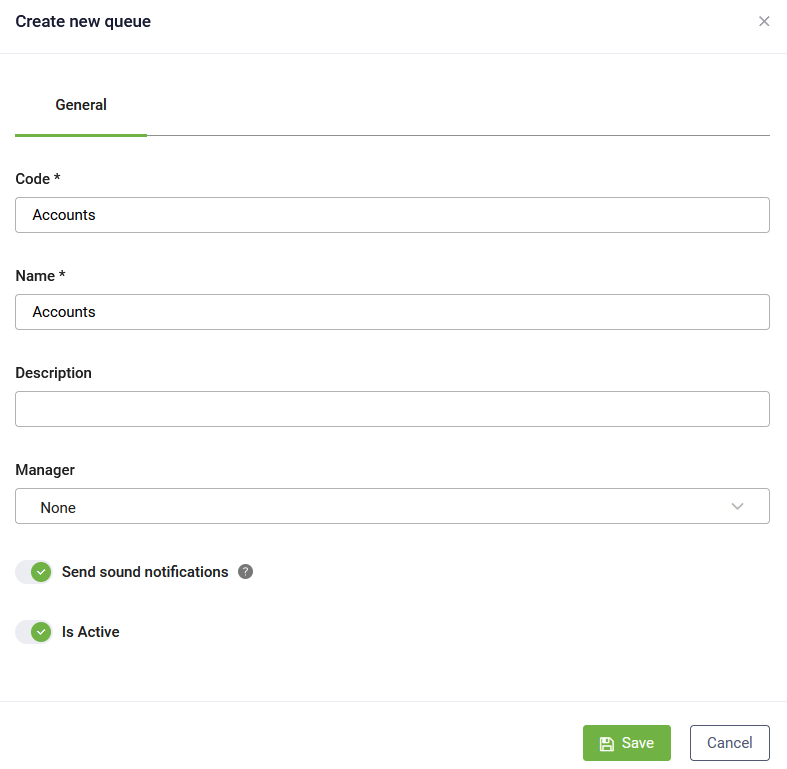
- At the top-right corner of the page, click the Create new queue button. The Create new queue page appears.
- In the Code field, type a queue code. It is language independent and you will use it in flow steps.
- In the Name field, type a queue name in the language of choice.
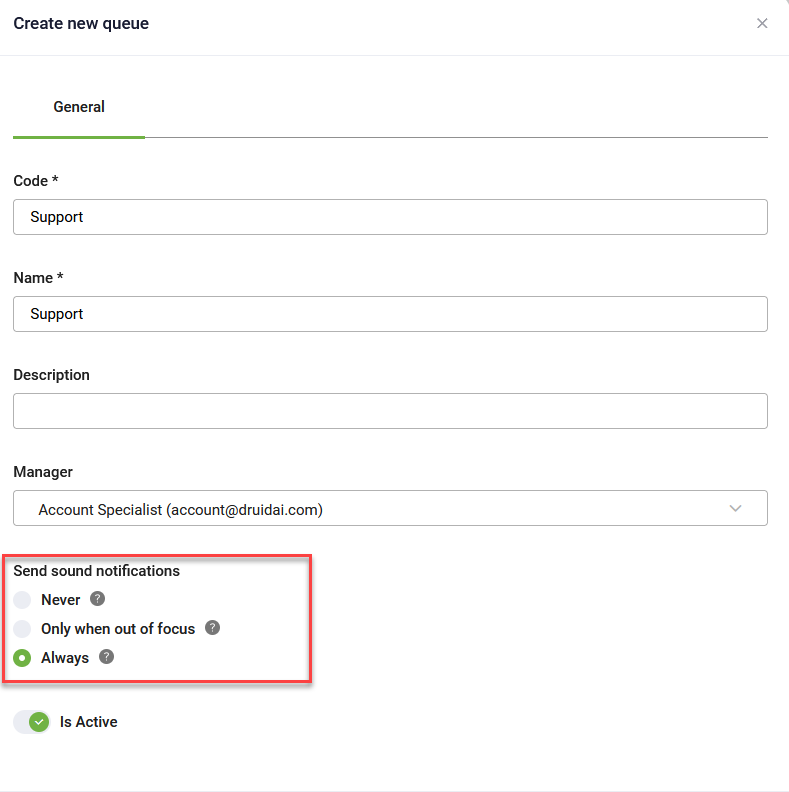
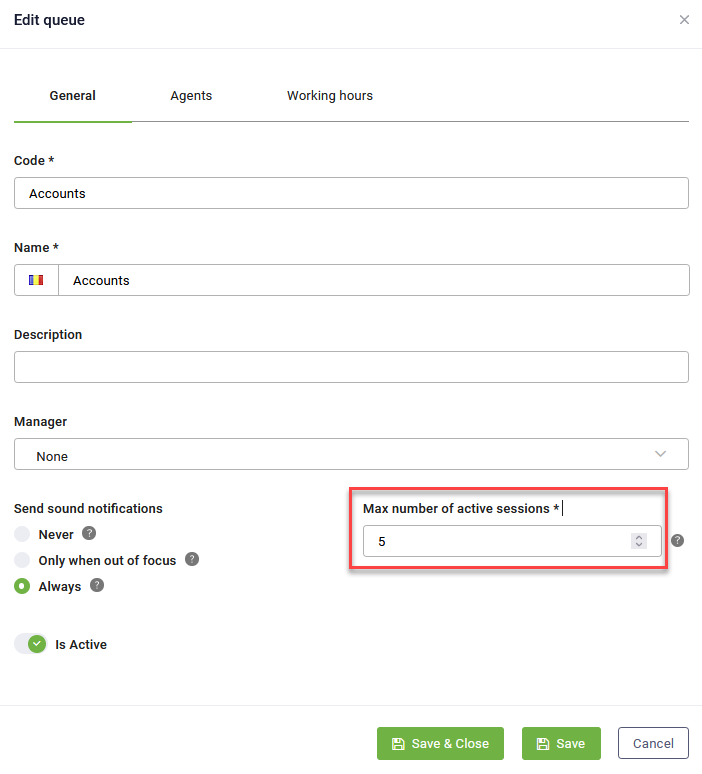
- Never - sound notifications are disabled, no sound notifications are sent to agents.
- Only when out of focus - the browser sends sound notifications when the agent web page is not in focus (agent navigates to another tab / browser).
- Always - the browser always sends sound notifications when users send messages in the chat, regardless if the agent web page is in focus or not.
- By default, agents in a queue can handle maximum 5 active sessions in parallel (handle 5 live chat sessions at the same time). To change the maximum number of active sessions agents assigned to that queue can handle, from the Max number of active sessions drop-down, select a value between 1 and 5.
- Select the Display Connect Button at Queue Level option to enable agents to connect to the oldest client waiting in any queue, regardless of the order in which the clients joined or their priority. This is especially useful when agents are assigned to multiple active queues.
- Click the Save button. The queue is added to the Queues list and the Edit queue page appears on the General tab.
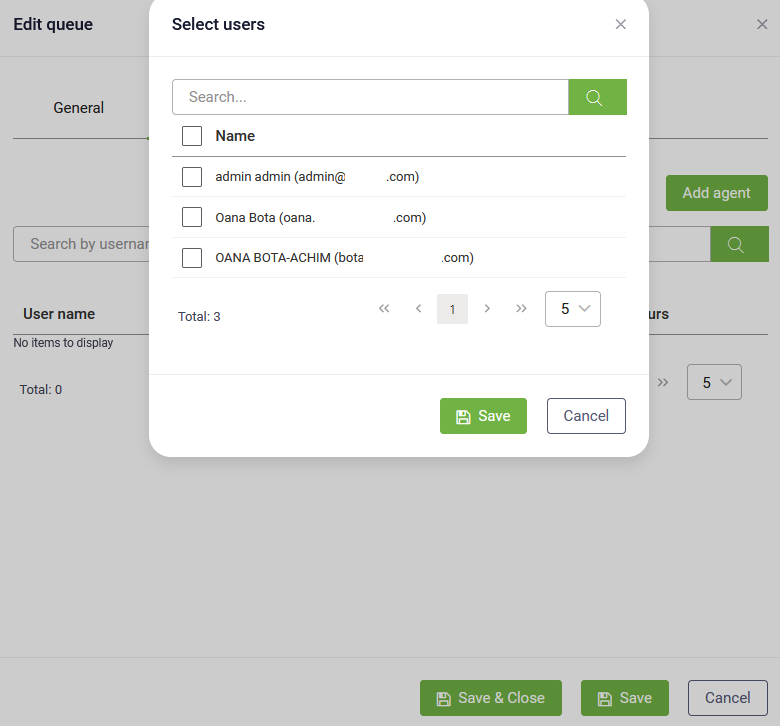
- Click the Agents tab and click the Add agent button.
- Select the desired agent(s) from the list and click Save. If one of the agents you selected has a working schedule set on another queue, you will be prompted to choose if you want to keep that schedule on the current queue as well. If so, select the agent whose working schedule you want to apply on the current queue and click Continue.
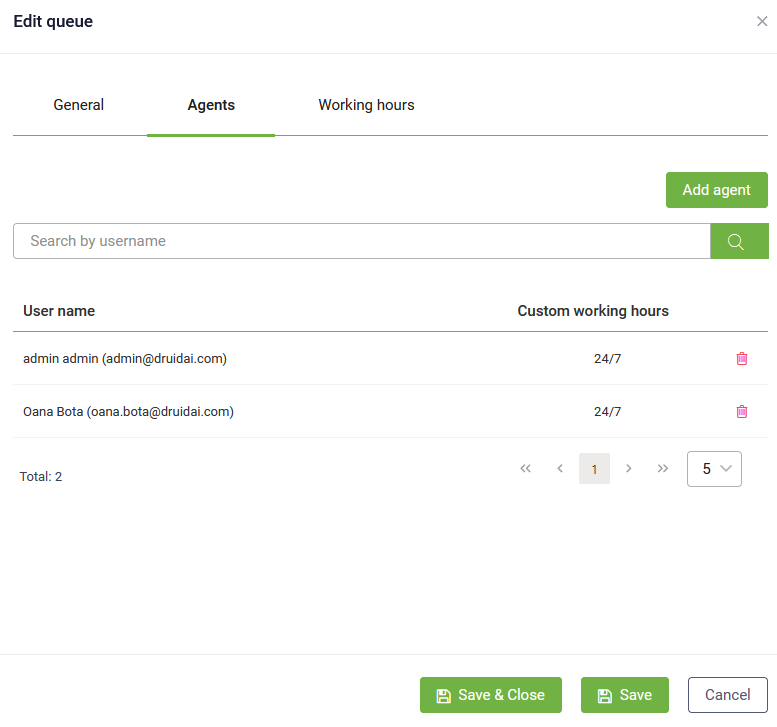
- The pop-up closes and the selected agent(s) display in the queue's agents list.
- Click Saveto save and stay on the page or click Save & Close to save and close the Edit queue page. The selected agents have been assigned to the queue.
If Max number of active sessions is set on both AI Agent level and queue level, DRUID takes into consideration the minimum value when automatically allocating clients to agents. If an agent is allocated to multiple queues with different maximum active sessions set, DRUID takes into consideration the smallest value of them.
Example: Queue A has the Max number of active sessions set to 2 and Queue B has the Max number of active sessions set to 3. The Max number of active sessions on the AI Agent level is set to 4. If an agent is allocated to both Queue A and Queue B, the agent will be automatically allocated maximum 2 sessions in parallel for both queues; for Queue B having the possibility to manually take 2 more clients (to reach the maximum number of active sessions set on Queue B).
"DisplayConnectButton": true. The Connect button will appear next to the transferred client, signaling their priority status due to prior waiting time in another queue.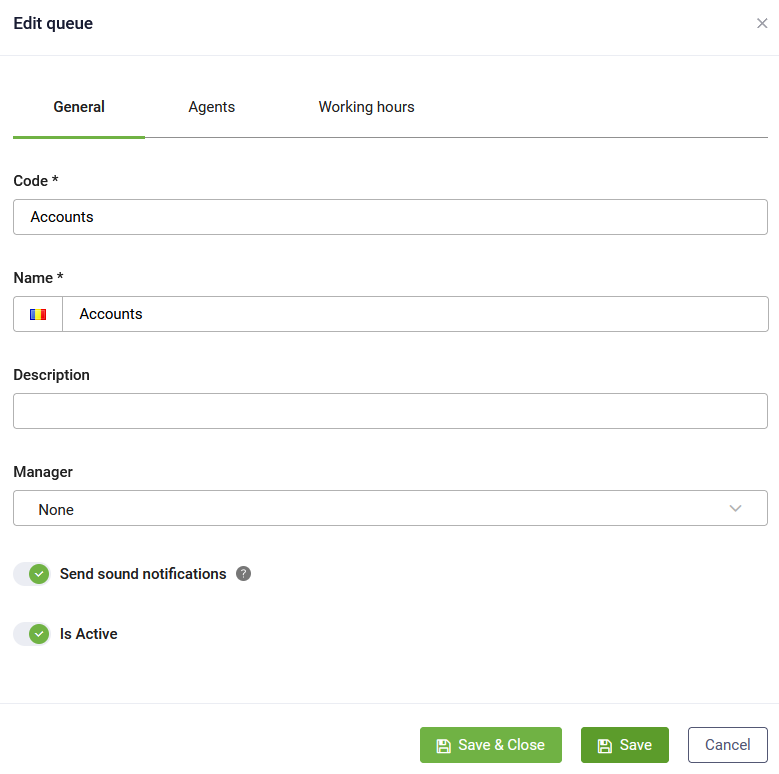
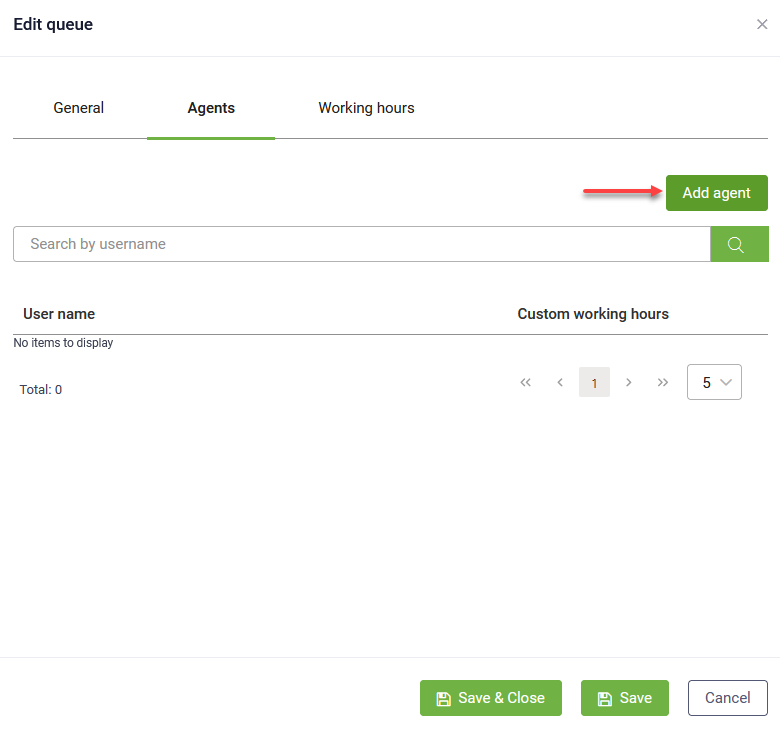
A pop-up listing all agents appears.
Following the procedure above, create as many queues as you need and assign agents per queue.
Step 3: Put clients to a specific waiting queue
If you want to place live chat calls to a specific waiting queue, you can do so by editing the live-chat-connect-to-agent flow. Add an action step and in the Pre / PostActions section, add the internal action ConnectToHelpdeskAgent and enter the queue code (not the queue name).
Automatically allocate clients to agents
For DRUID version 1.51 or higher, you can automatically allocate clients to agents by adding the following additional parameter to internal action ConnectToHelpdeskAgent: "AutomaticAllocation" : true (in JSON format).
For example:
Example - Automatic allocation to [[MyEntity]].CodeOfTheQueue
{
    "QueueCode" : "[[MyEntity]].CodeOfTheQueue",
    "AutomaticAllocation" : true
}
Place clients in the queue based on the selected priority
For DRUID version 1.60 or higher, you can provide clients with the option to choose the priority of their live chat conversation, share it in a local variable or entity field and then place them in the queue based on the selected priority. To do so, add the following additional parameter to internal action ConnectToHelpdeskAgent: "PriorityLevel":"@priority" in JSON format. For priority, use formats like @localVariable or [[EntityField]].
For example:
{
    "QueueCode" : "ITHelpdesk",
    "PriorityLevel":"@priority",
    "AutomaticAllocation" : true
}

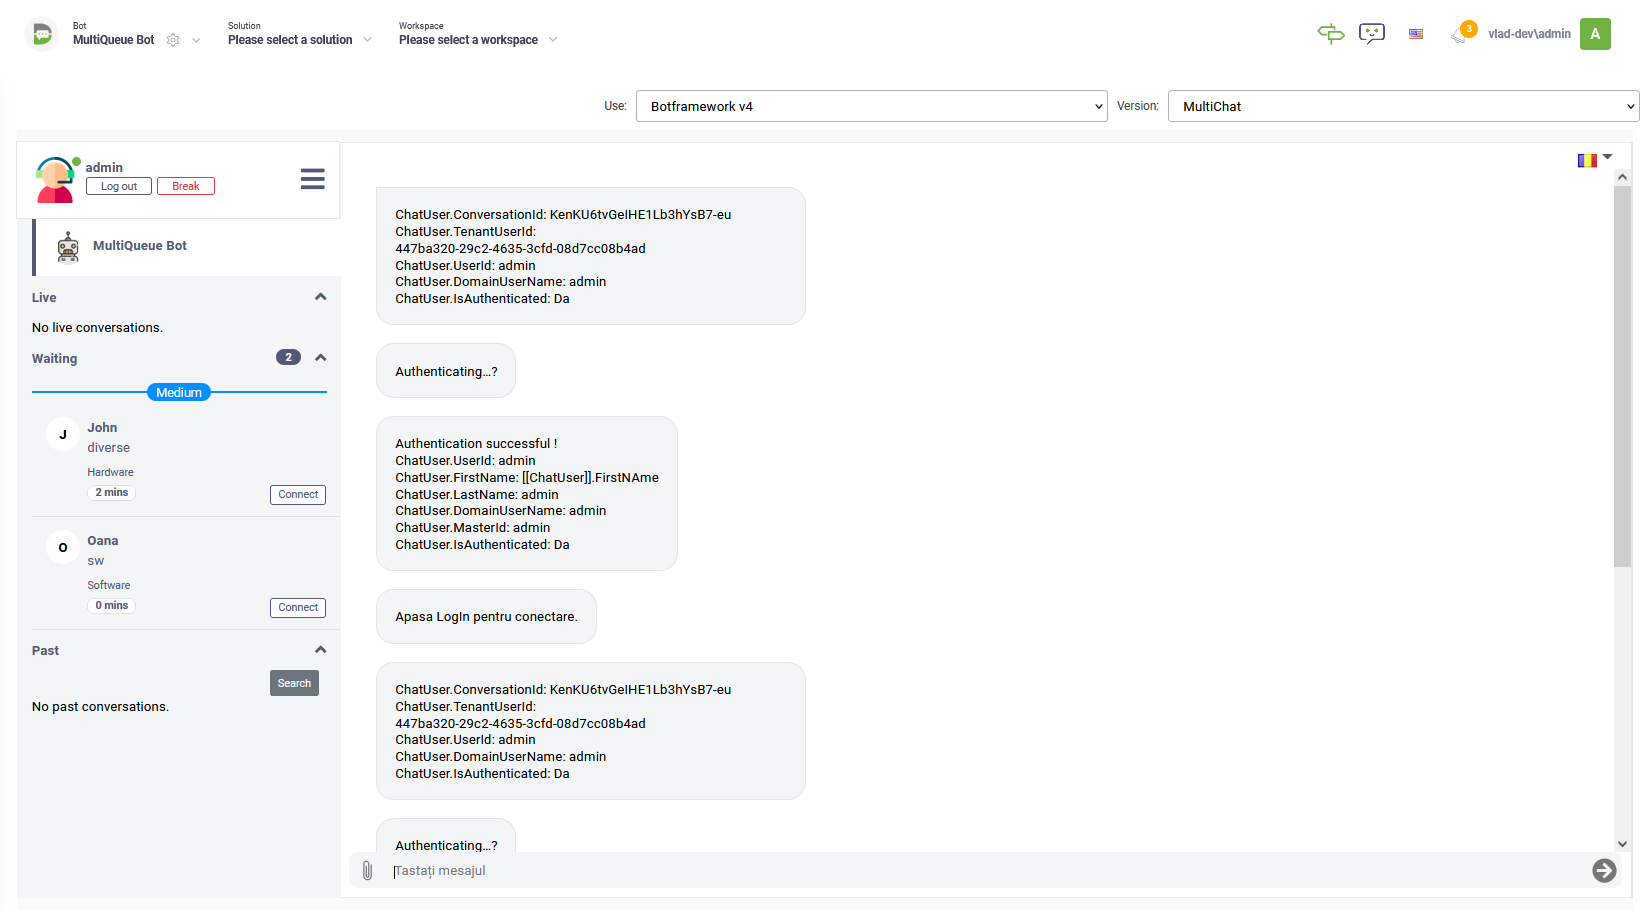
There are three levels of priority available: Normal, Medium and High; where the default priority is Normal.
If an agent is member of multiple queues, and there are high priority clients in some or all of agent’s queues, then all those clients will be added on top of the normal priority clients, in the First In First Out (FIFO) order.
For example, in queue A there are 3 clients with High priority and 2 with normal priority and a new client with High priority wants to connect to an agent, this client will be placed in queue A at the bottom of the High priority clients, on top of the clients with Normal priority.
Step 4: Define the transfer flow
In order to provide agents with the possibility to transfer live chat calls to another agent, you need to define the transfer flow. The agents tell the AI Agent assistant that they would like to transfer live chat to another queue or agent and the assistant executes the transfer flow.
Create a new flow and assign the Helpdesk Agent role. Make sure that you provide the flow utterance (training phrases) which will be used by the AI Agent to identify the transfer request.
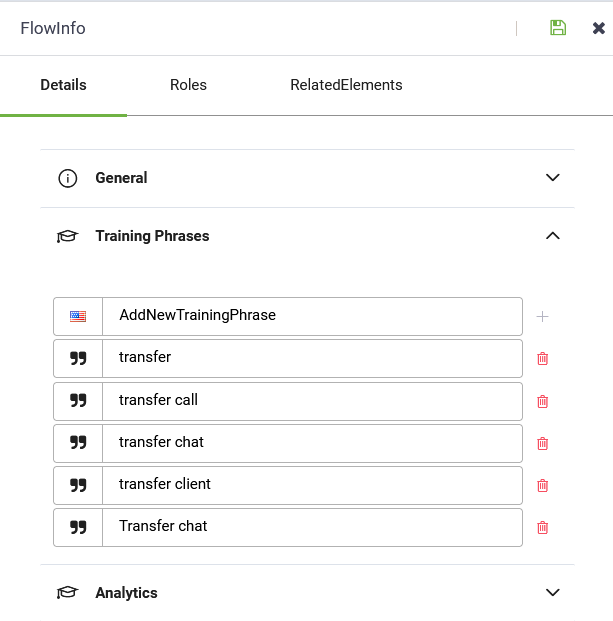
The transfer flow should have at least these two steps:
![]()
This section describes the two required steps. You can add additional steps to the transfer flow based on your needs.
Step 4.1. Give agents the possibility to choose the queue to which the live chat call will be transferred to
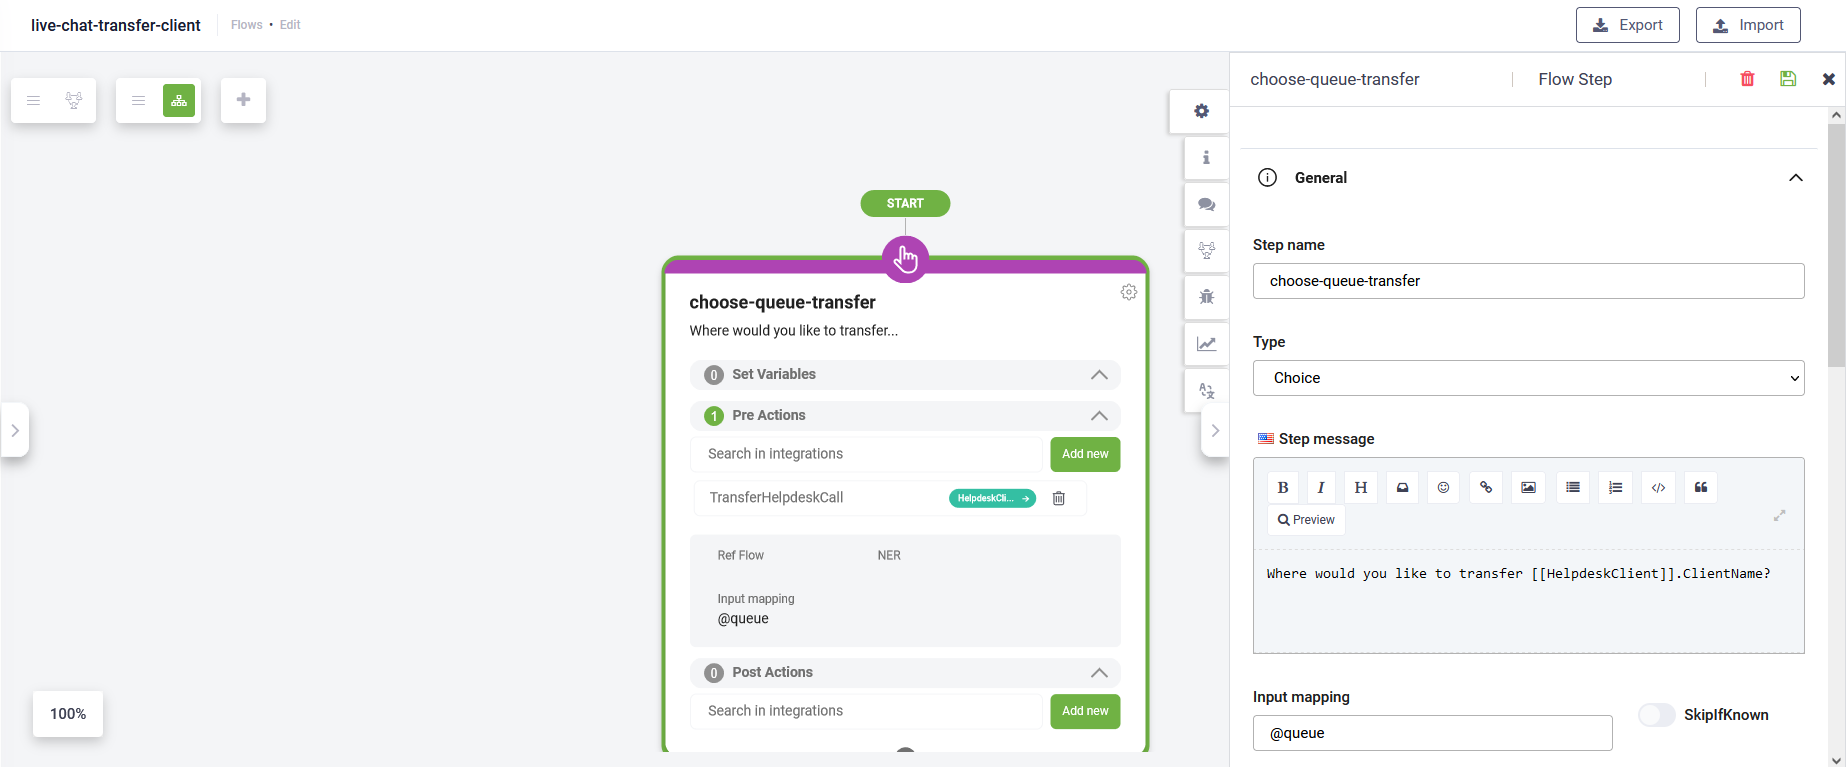
Add a step to provide the agents with the available queues (e.g., Choice step) by making the following settings in the Flow Step editor:
General settings
| Field | Value |
|---|---|
| Step name | choose-queue-transfer. You can set another name for this step. |
| Type | Choice |
| Step message | Where would you like to transfer [[HelpdeskClient]].ClientName? |
| Input mapping | @queue, (“queue_code”) or [[Entity]].QueueCode.By configuring the step this way, you give agents the possibility to choose from a list of queues. |
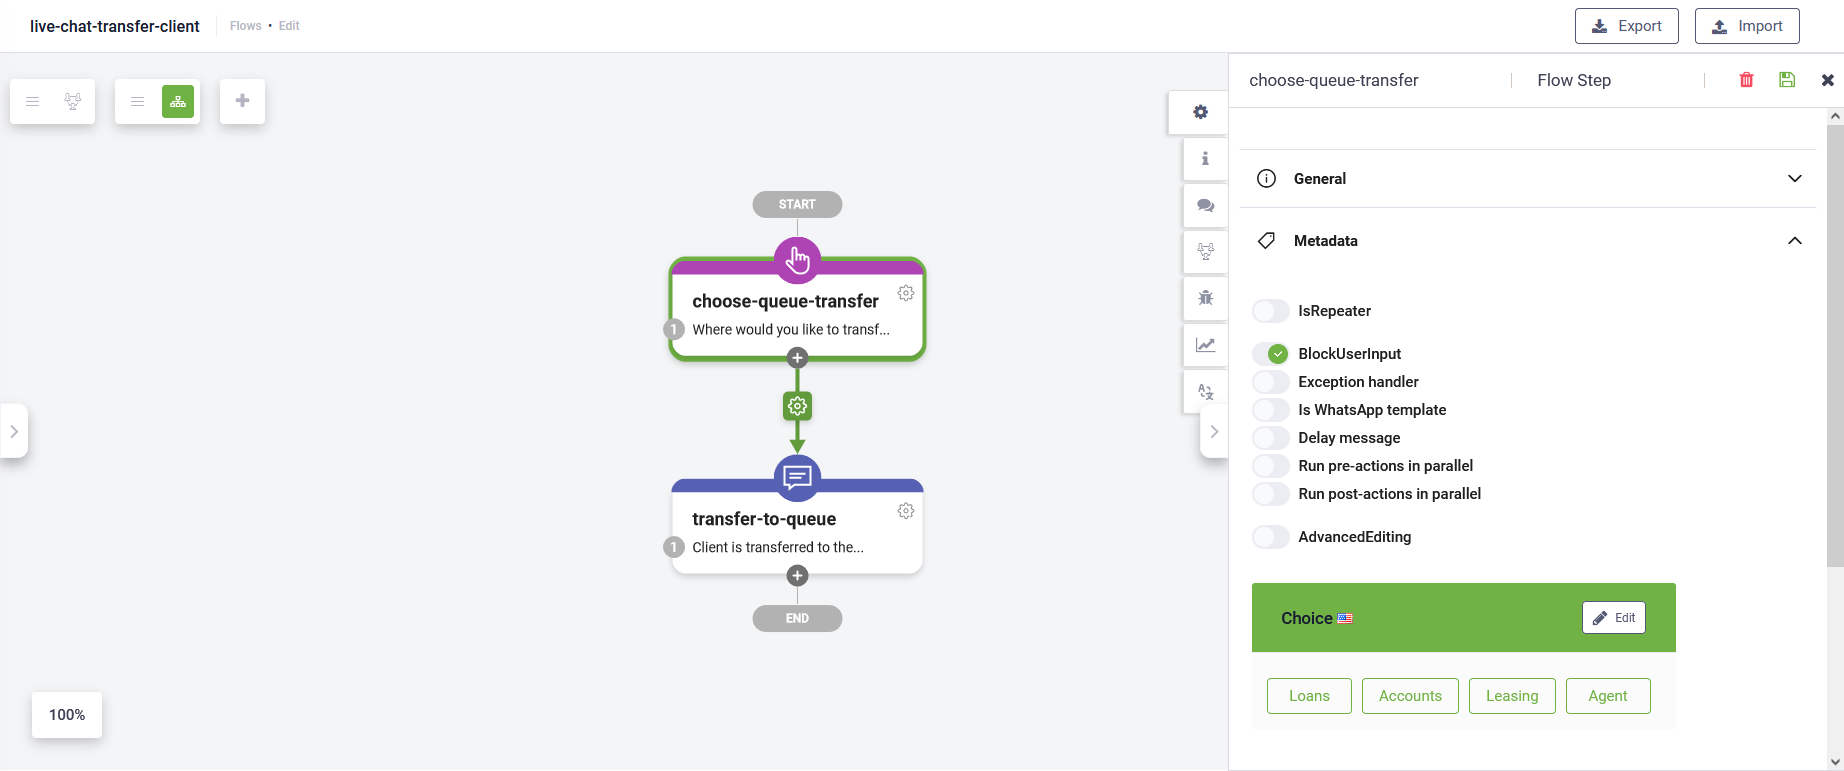
Metadata settings
Add all queues as choice options on the step and make sure to tap on BlockUserInput.
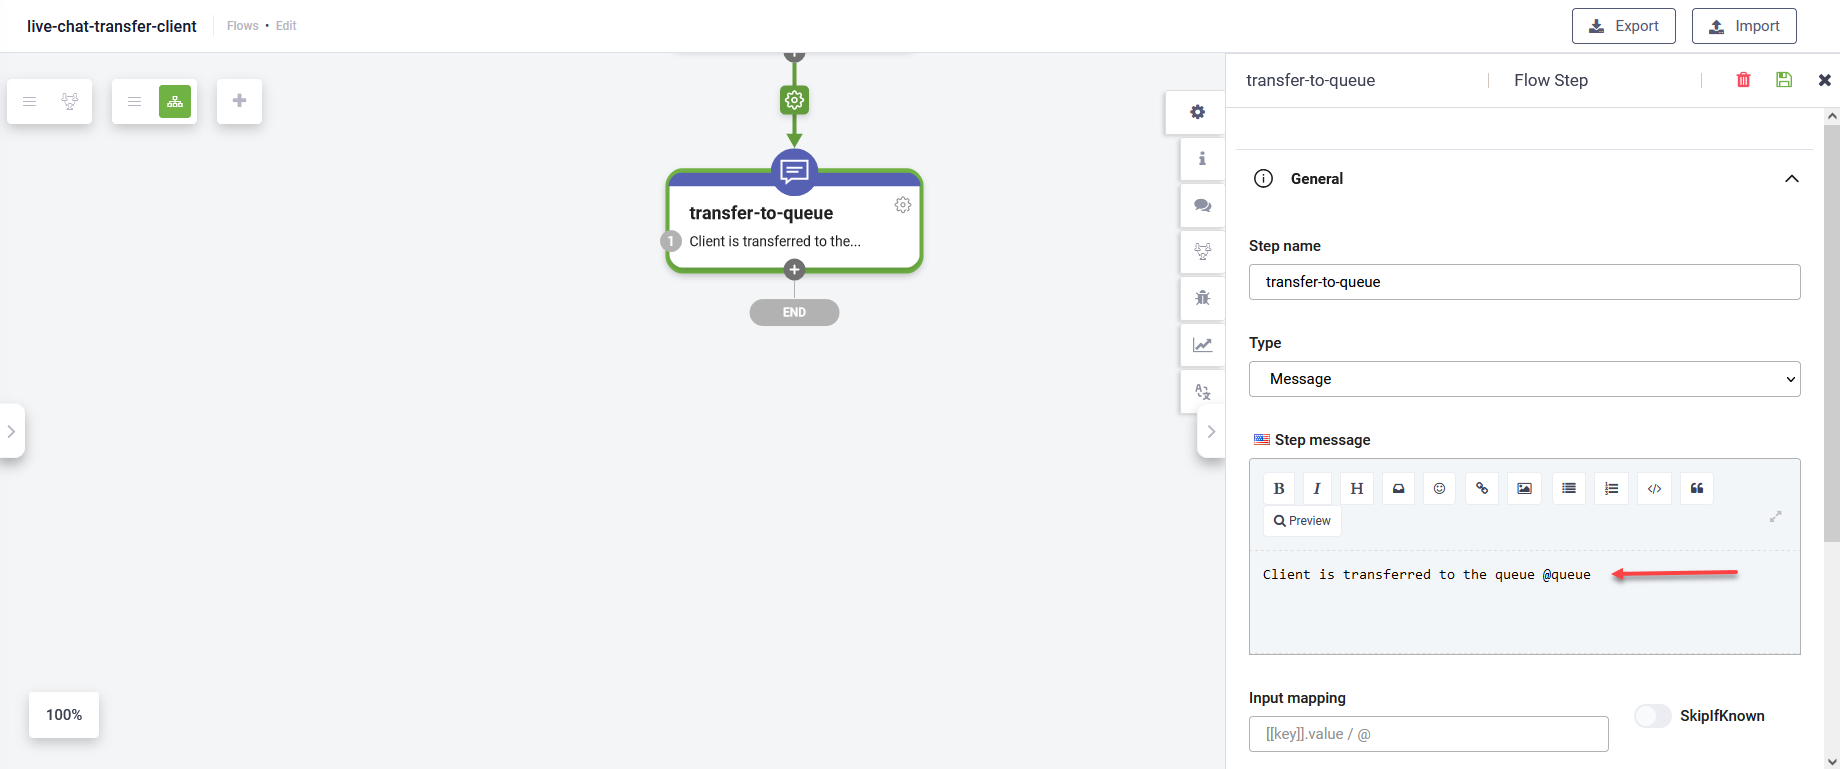
Step 4.2. Transfer the live chat call to the selected queue
Add a flow step of type Message and configure it as described below.
In the Flow Step Editor, click on General and enter the following Step message: "Client is transferred to @queue queue.".
In the PreActions or PostActions section, add the internal action TransferHelpdeskCall and specify either the code of a live chat queue, or the AgentId of an agent, to transfer the call to a specific agent (Ex: [[HelpdeskAgent]].AgentId).
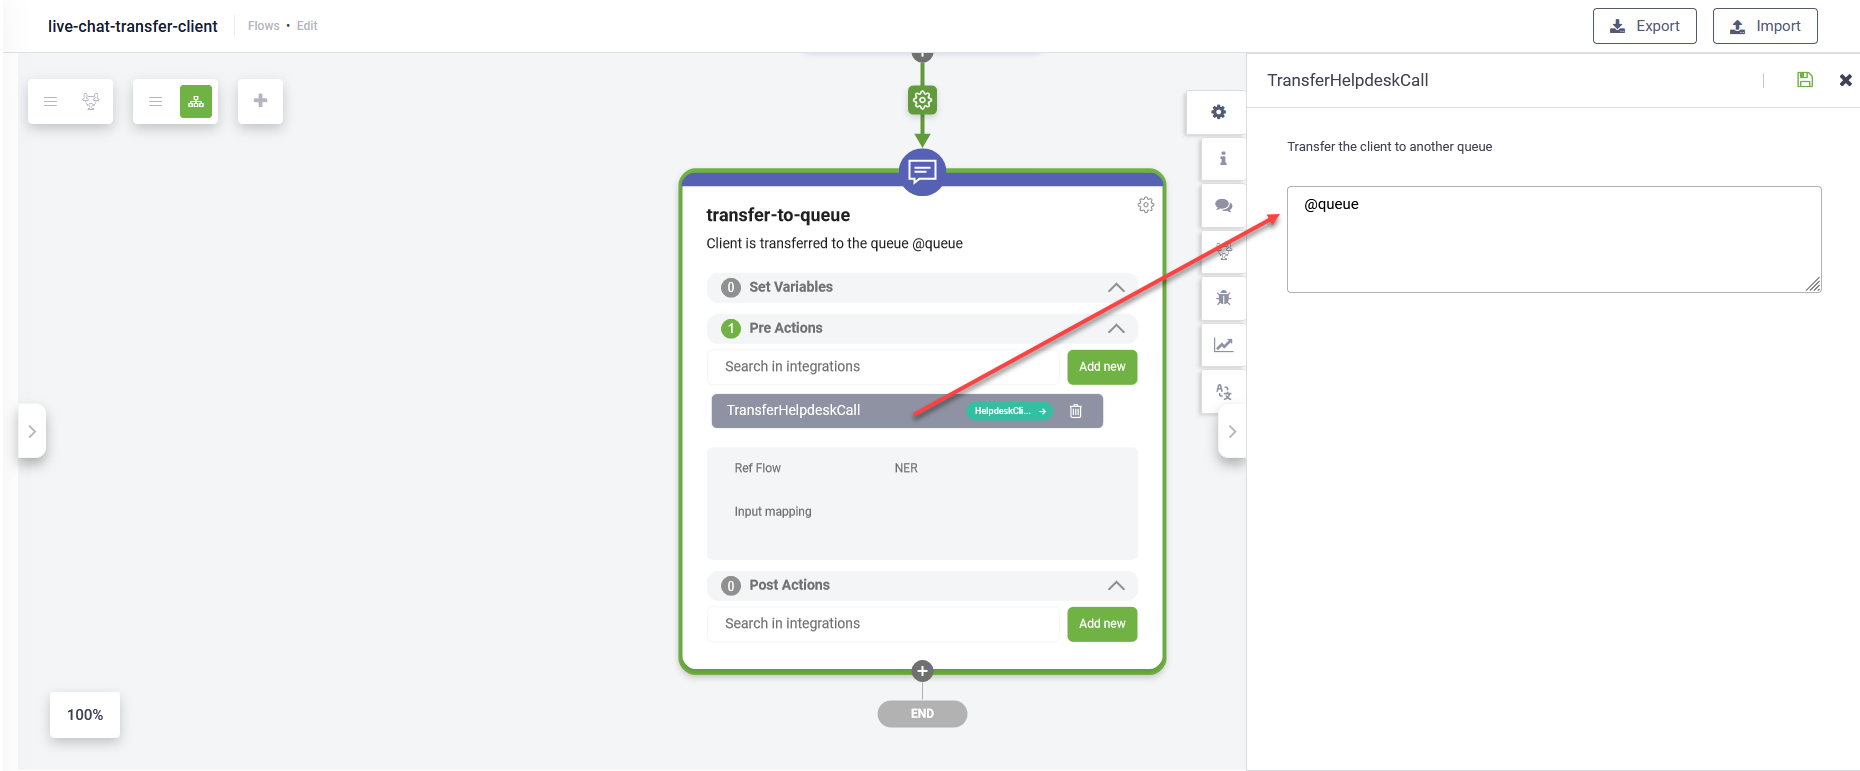
When the agent will choose a specific queue at step 4.1, the call will be transferred to the selected queue / agent.
Automatically allocate transferred clients to agents
For DRUID version 1.51 or higher, when transferring clients to another queue, you can automatically allocate clients to agents by adding the following additional parameter to internal action TransferHelpdeskCall: "AutomaticAllocation" : true (in JSON format).
For example:
Example - Automatic allocation to [[MyEntity]].CodeOfTheQueue
{
    "QueueCode" : "[[MyEntity]].CodeOfTheQueue",
    "AutomaticAllocation" : true
}
For backwards compatibility, you can transfer clients to a queue by specifying the queue code either from a DRUID entity field ( [[<Entity>]].<QueueCodefield>), or a DRUID local variable (@queue_code) or directly as a string (e.g., "Loans").
Place transferred clients in the queue based on the selected priority
For DRUID version 1.60 or higher, you can provide clients with the option to choose the priority of their live chat conversation, share it in a local variable or entity field and then place them in the queue based on the selected priority, using that priority when transferring the client to another queue.
To do so, add the following additional parameter to internal action TransferHelpdeskCall: "PriorityLevel":"@priority" in JSON format. For priority, use formats like @localVariable or [[EntityField]].
For example:
{
    "QueueCode" : "Support",
    "PriorityLevel":"@priority",
    "AutomaticAllocation" : true
}
![]()
There are three levels of priority available: Normal, Medium and High; where the default priority is Normal.
If an agent is member of multiple queues, and there are high priority clients in some or all of agent’s queues, then all those clients will be added on top of the normal priority clients, in the First In First Out (FIFO) order.
For example, in queue A there are 3 clients with High priority and 2 with normal priority and a new client with High priority wants to connect to an agent, this client will be placed in queue A at the bottom of the High priority clients, on top of the clients with Normal priority.
Click Save.
Getting the list of online agents before transferring live chat calls
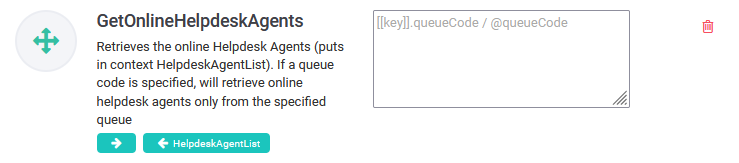
You might want to get the list of online agents before transferring clients to another queue. To do so, add as a first flow step, a step of type Action which gets the list of online helpdesk agents. In the PostActions section, add the internal action GetOnlineHelpdeskAgents.
You can get the list of online agents from a specific queue by specifying the queue code in one of the following formats: [[Entity]].QueueCode, @queueCode, or "<queueCode> ". If you do not specify a queue code, you will get the list of all online agents.
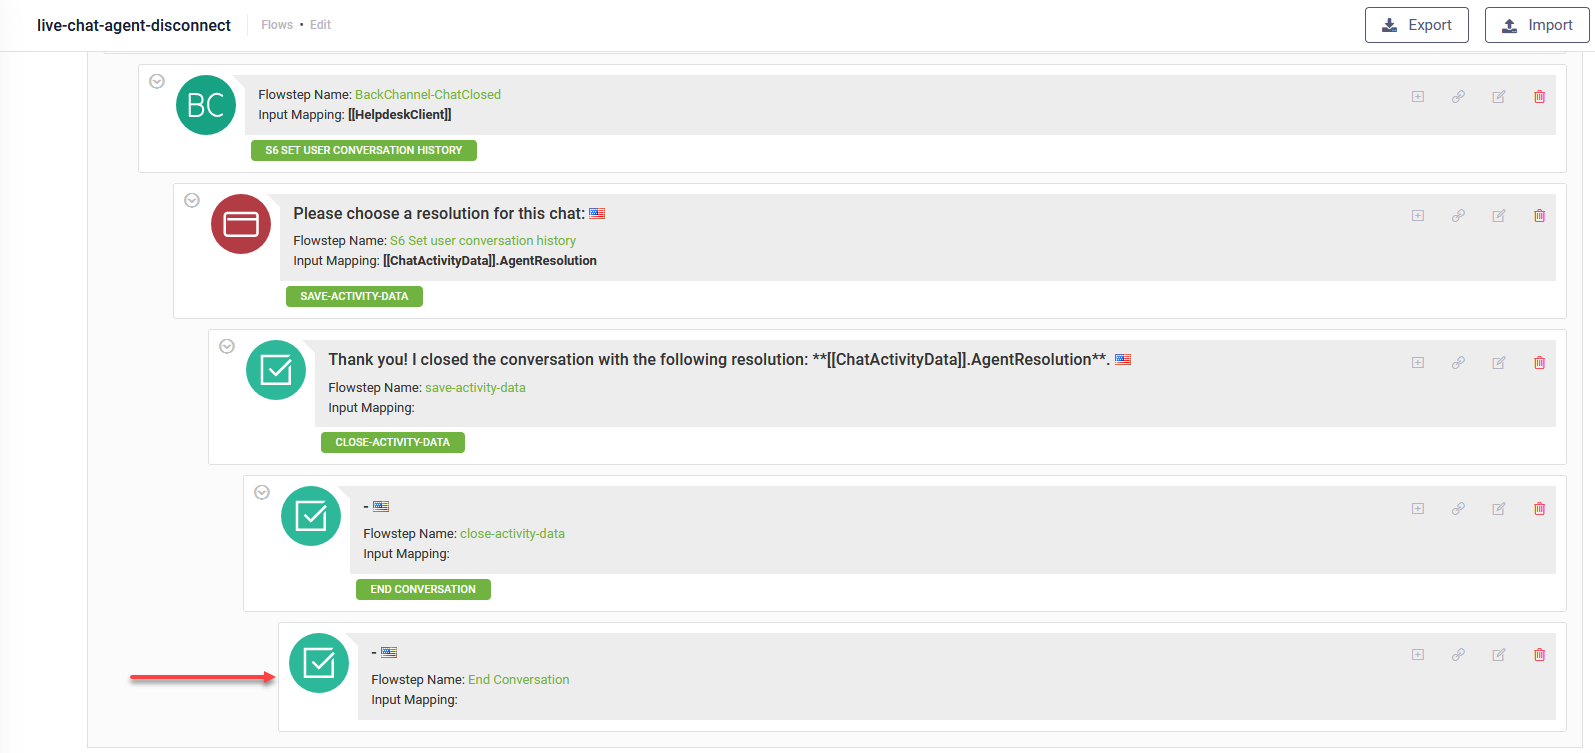
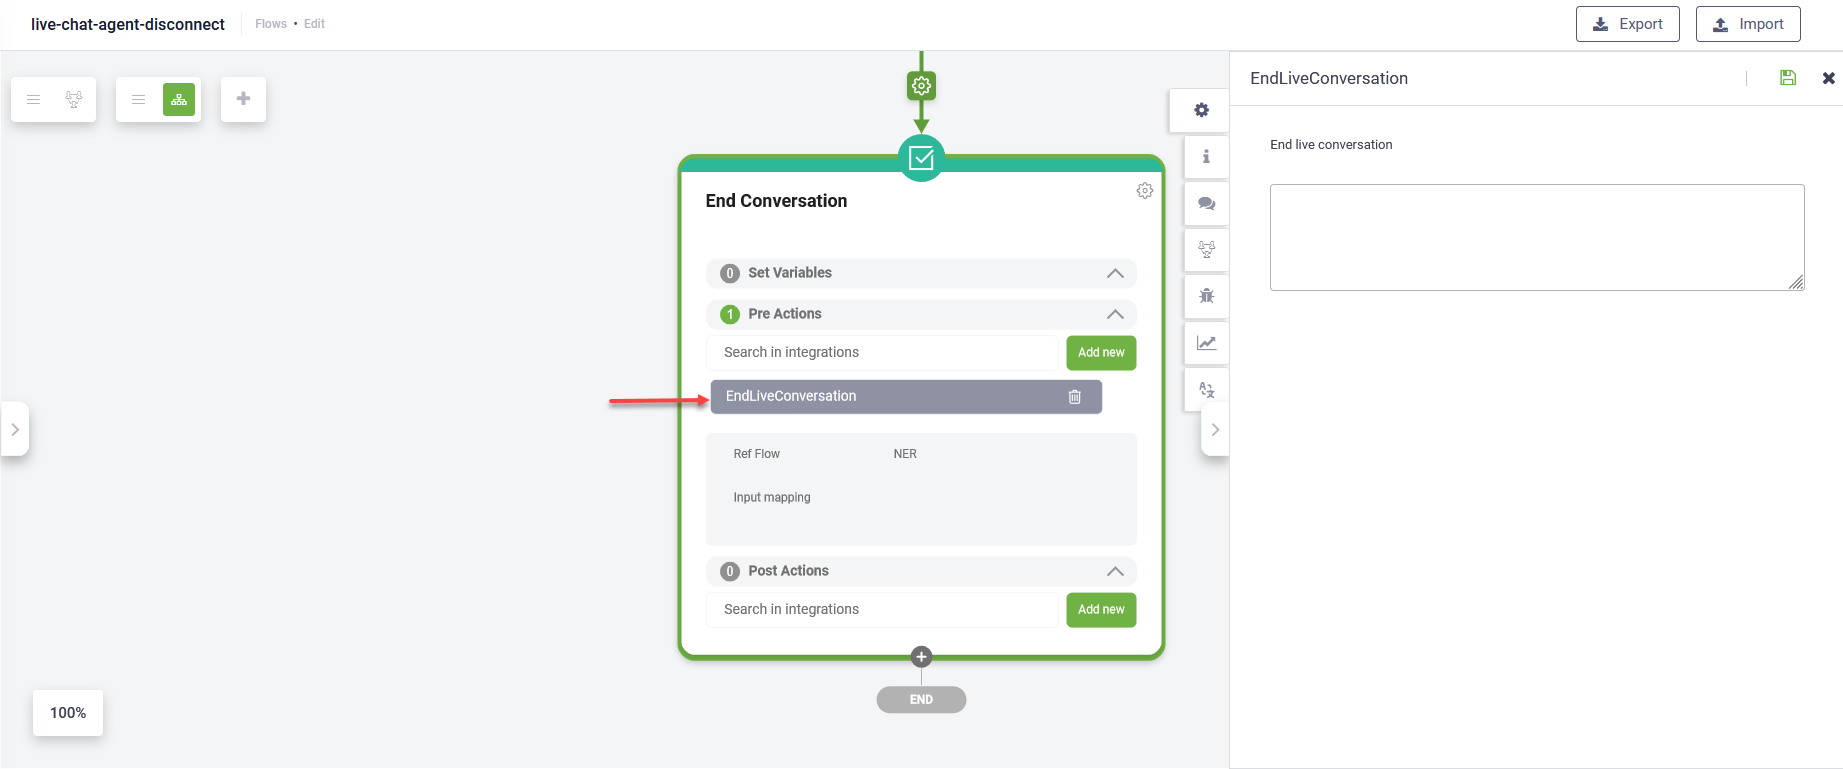
Step 5: Add the EndLiveConversation internal action
If you're using Live Chat DRUID Starter, as last step on the agent side, the AI Agent triggers a backchannel event for removing the client from the agent’s live chats list.
To properly log all activities of a live chat session, we recommend you to update the live-chat-agent-disconnect flow (LiveChatAgentDisconnected special flow) by adding as last step a step of type Action which in the PreActions or PostActions section calls the internal action EndLiveConversation.
Step 6. Enable Agents to take a break
To enable the Break functionality, you need to upgrade the Live Chat Advanced solution template (Solutions Library). For information about upgrading solution templates, see Upgrading Solution Templates.
After the solution upgrade, make sure that the following four flows exist on the solution:

Step 7. Set the LiveChatPauseKeyword in AI Agent additional languages
In DRUID 5.6 and higher, you can set the LiveChatPauseKeyword in all AI Agent additional languages.
To add the LiveChatPauseKeyword on the AI Agent you can either provide keyword in additional AI Agent languages and the keyword is automatically added to the AI Agent or first add it on the AI Agent by clicking the plus icon and then provide the keyword in AI Agent additional languages.
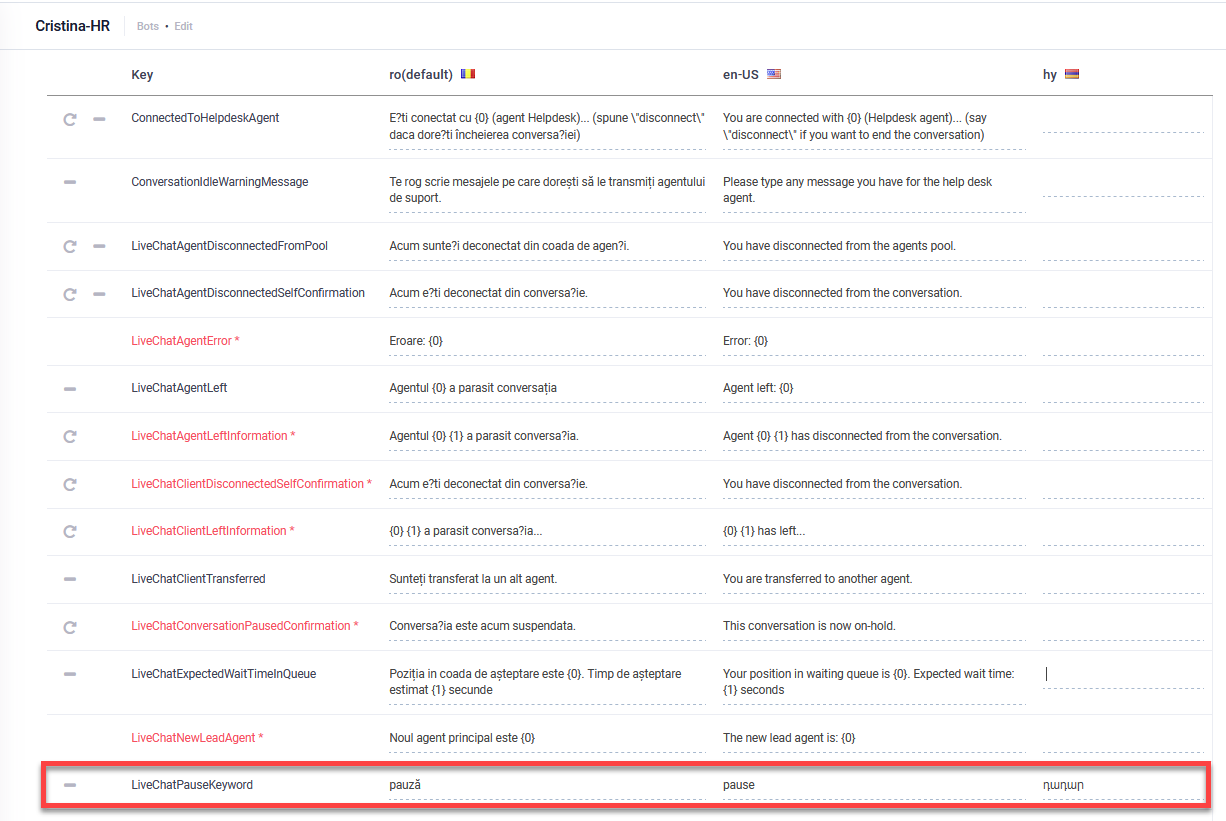
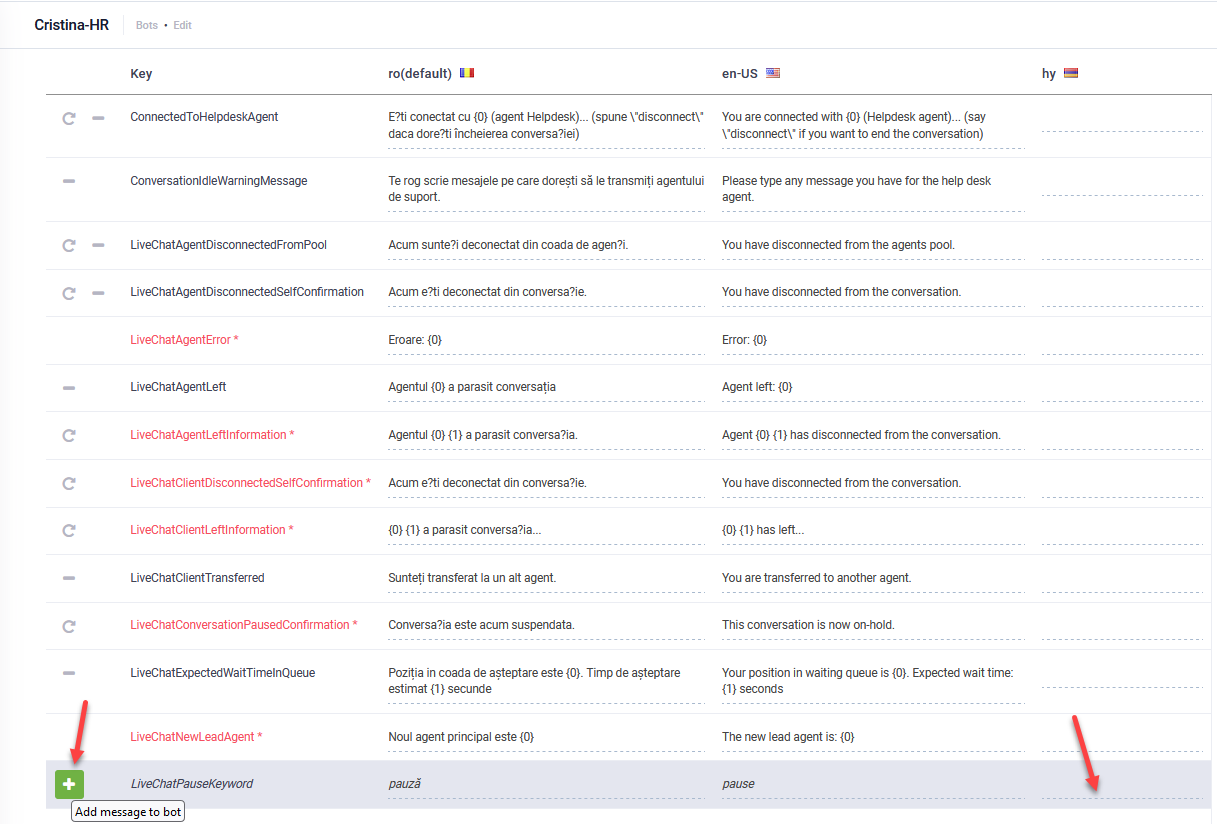
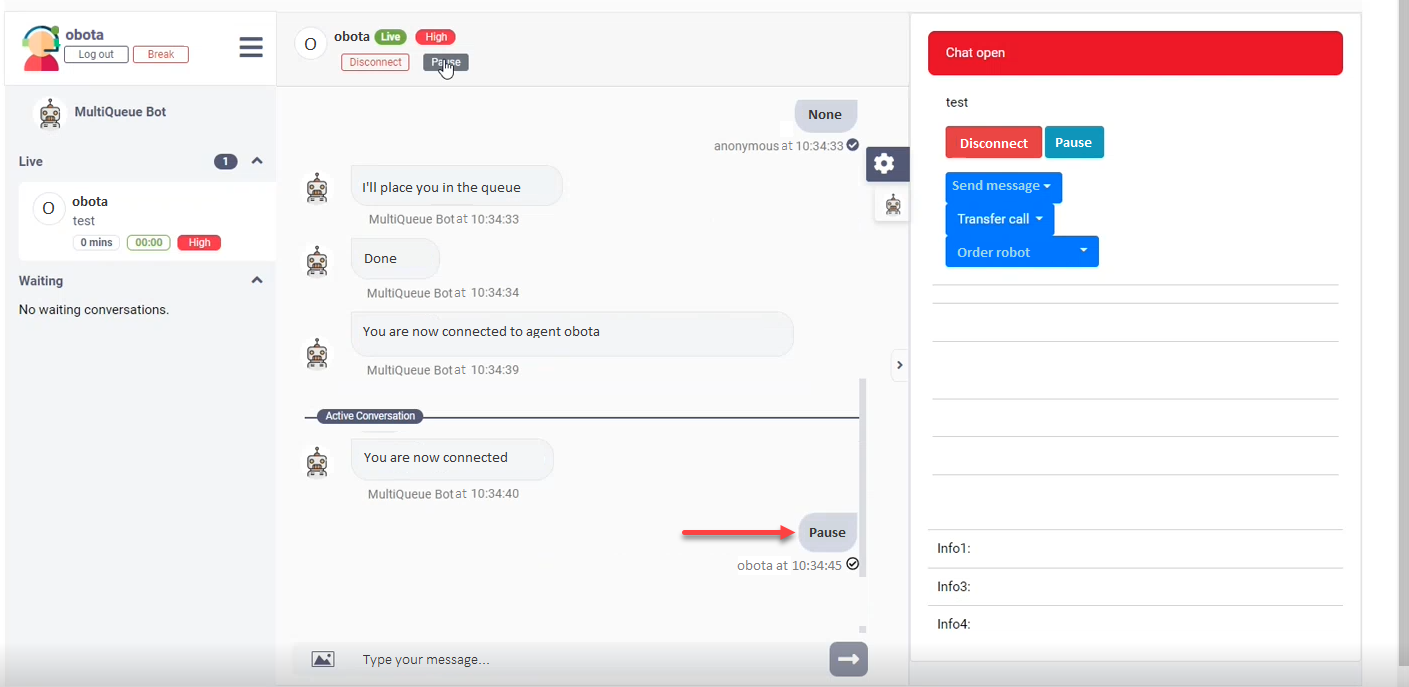
Whenever the agent pauses the conversation (clicks the Pause button), the LiveChatPauseKeyword is sent in the chat in the conversation language, if keyword value was set in that language on the AI Agent, otherwise the value in EN is provided.
Step 8. Perform additional automation prior to actually connecting the helpdesk agent with the client (Optional)
In DRUID version 1.55 or higher, additional data is available in [[HelpdeskClient]] on the ConnectToHelpdeskClientMultichat flow. You can use this data to perform additional automation prior to actually connecting the helpdesk agent with the client (e.g., changing the agent name, salutation, etc.), based on some client information (for example client type, or client queue).
The following fields are now available in [[HelpdeskClient]]:
- Subject ([[ChatUser]].HelpdeskSubject from client conversation context)
- ClientName ([[ChatUser]].Name from client conversation context)
- QueueCode
- EnqueuedAt
- DruidActivityId ([[ChatUser]].ActivityId from client conversation context)
- TenantUserId