Handling Live Chat on Client Side
With the Live Chat Starter solution, the AI Agents will do the following on the client side:
- Add client to the Waiting Queue.
- Notify clients while on the Waiting Queue.
- Get the client’s feedback.
Add client to the Waiting Queue
While in an automated conversation with the AI Agent, if the clients tell the AI Agent that they wish to talk to a live agent, the live-chat-connect-to-agent flow is triggered. Or you can have this flow automatically triggered from the “Intent not recognized” flow.
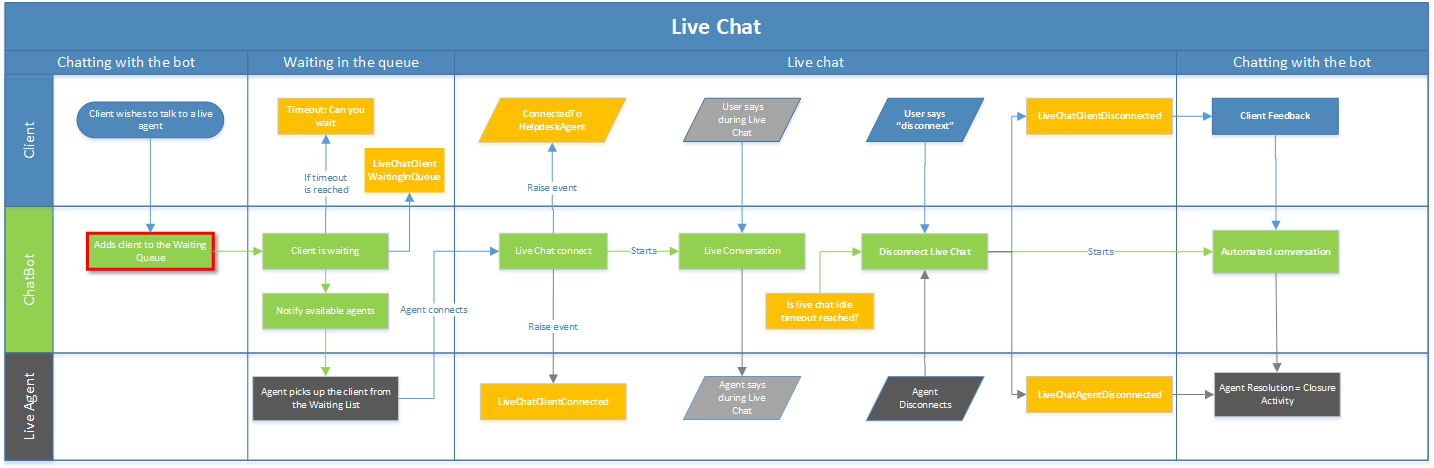
The live-chat-connect-to-agent flow is comprised of the following steps:
- The AI Agent informs the client that the conversation will be registered and asks the client to choose whether they agree or not to the conversation being registered.
- If the client doesn’t agree, he / she will remain in automatic conversation with the AI Agent.
- If the client agrees, specific information from the chat is saved into the conversation history DB. This information will be displayed in the conversation history area when an agent will connect to the live chat session.
- This step is executed only if the client agreed at step 1. The client will be added to the live chat Waiting queue.
You can configure the following settings:
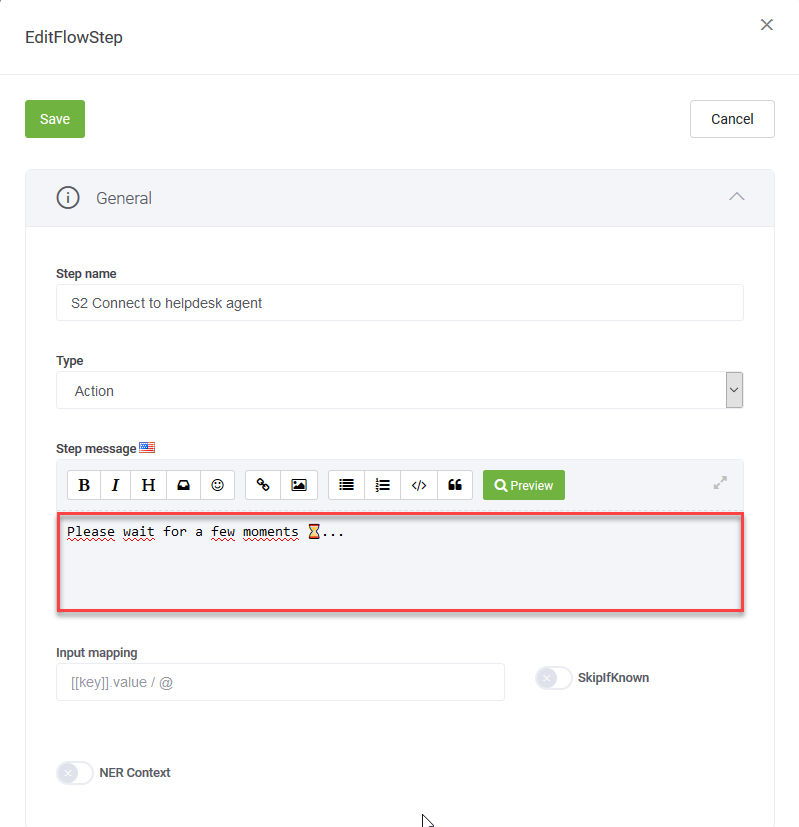
- The messages sent to the clients at steps 1 to 4. To do so, click to edit the desired step, click the General section header and in the field, replace the text in the Step message field with the desired message.
- Add or remove information that will be shown in the conversation history when an agent connects to the client live chat. To do so, edit flow step 3 by adding or removing parameters in the SetVariables section.
Example:
Notify clients while on the Waiting Queue
When the clients are in the Waiting queue, the live-chat-waiting-message-in-the-queue flow is triggered every 1 minute. The purpose is to have the AI Agent interacting with the client while waiting for a live agent to pick up the live chat.
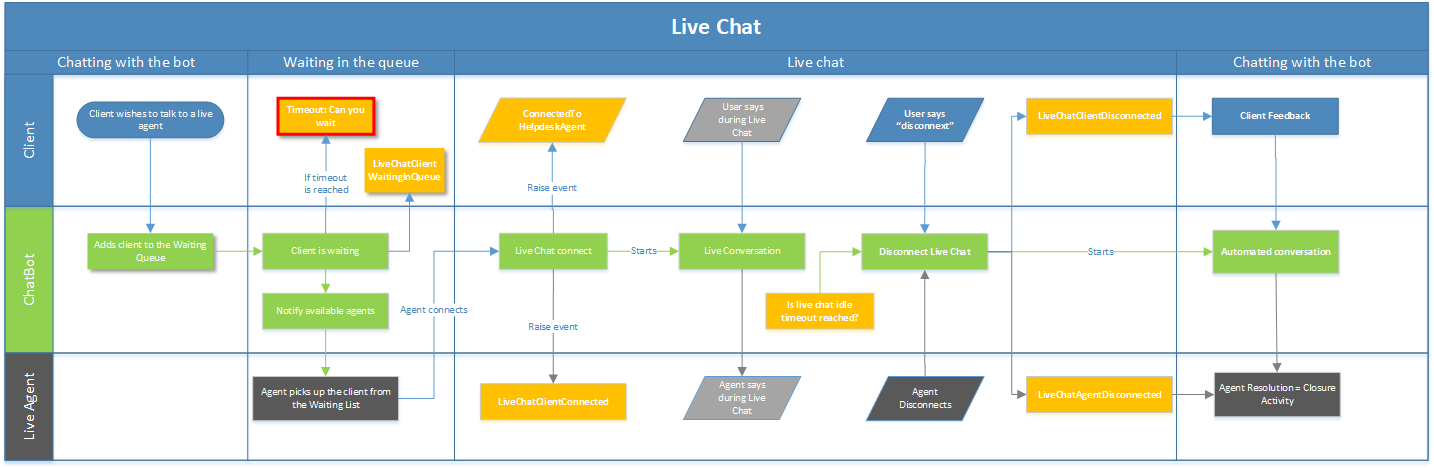
The live-chat-waiting-message-in-the-queue flow is comprised of the following steps:
- The AI Agent verifies what number the client is in the Waiting queue.
- The AI Agent sets the counter of the waiting list to null.
- The client is added as the last entry to the Waiting list. To respond to client inquiries in a timely manner, the clients are added to the Waiting list in the order they have asked for live chatting with an agent. So, the first customer is the first entry in the Waiting list, the second one is the second entry, etc.
-
The AI Agent informs the client the position on the Waiting queue and asks the client to choose whether he / she will be waiting or not.
- If the client chooses to disconnect, the AI Agent will try to remove the client from the Waiting list.
- If for any reason, the AI Agent fails disconnecting the client, a message will be sent to the client.
- If the AI Agent succeeds disconnecting the client, it will provide the client with the possibility to remain in an automatic conversation with the AI Agent. The client will be able to select from a given menu.
- If the client chooses to wait, a message will be sent to the client.
- If the LiveChatQueueWaitingTimeoutMins is reached out, the AI Agent takes the current user off the helpdesk waiting queue.
You can configure the following settings:
- The messages sent to the clients at steps 4 and 5. To do so, by either clicking to edit the desired step, the General section header and in the Step message field, replacing the text with the desired message, or from the AI Agent Details page, Special Flows section by changing the default text.
- Configure the LiveChatQueueWaitingTimeoutMins. To do so, from the AI Agent Details page, click the General tab and change the value of the LiveChatQueueWaitingTimeoutMins field.

Get the client’s feedback
When agents disconnect from a live chat session with a client or in rare occasions, when the clients disconnect from a live chat, the live-chat-feedback-client flow is triggered. The clients are asked to rate the live chat.
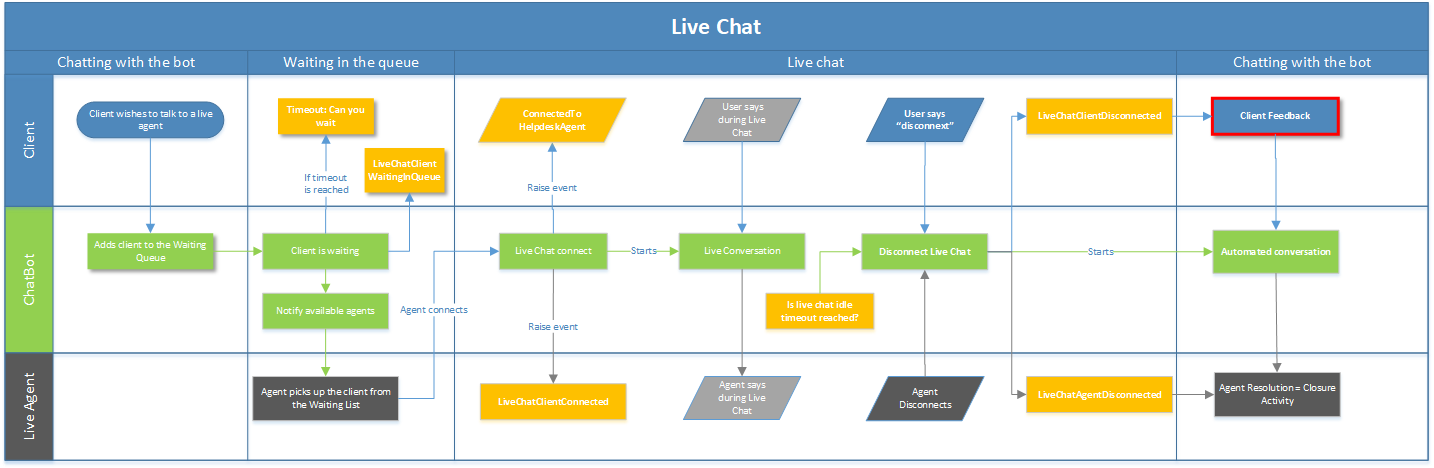
The live-chat-feedback-client flow is comprised of the following flow steps:
- The AI Agent verifies the chat status.
- Sets to null the entity which will store the client information (the entity provided in the SetVariables section).
- The AI Agent asks the client to rate the support provided by the agent during live chat.
- The AI Agent asks the client to rate the waiting time.
- The AI Agent saves the client’s feedback.
- The AI Agent sends the client a message and erases the information from the chat context.
- The AI Agent ends the live chat session.
You can configure the client’s feedback form which is by default comprised of two steps of type choice.