Authenticating Users in the DRUID Webchat
When you want to seamlessly authenticate users in the DRUID Webchat hosted on your web page, it's crucial to follow the proper procedures to ensure security and efficiency. This section provides detailed options for transferring authentication context from your web page to the DRUID Webchat snippet, enabling automatic authentication of conversations.
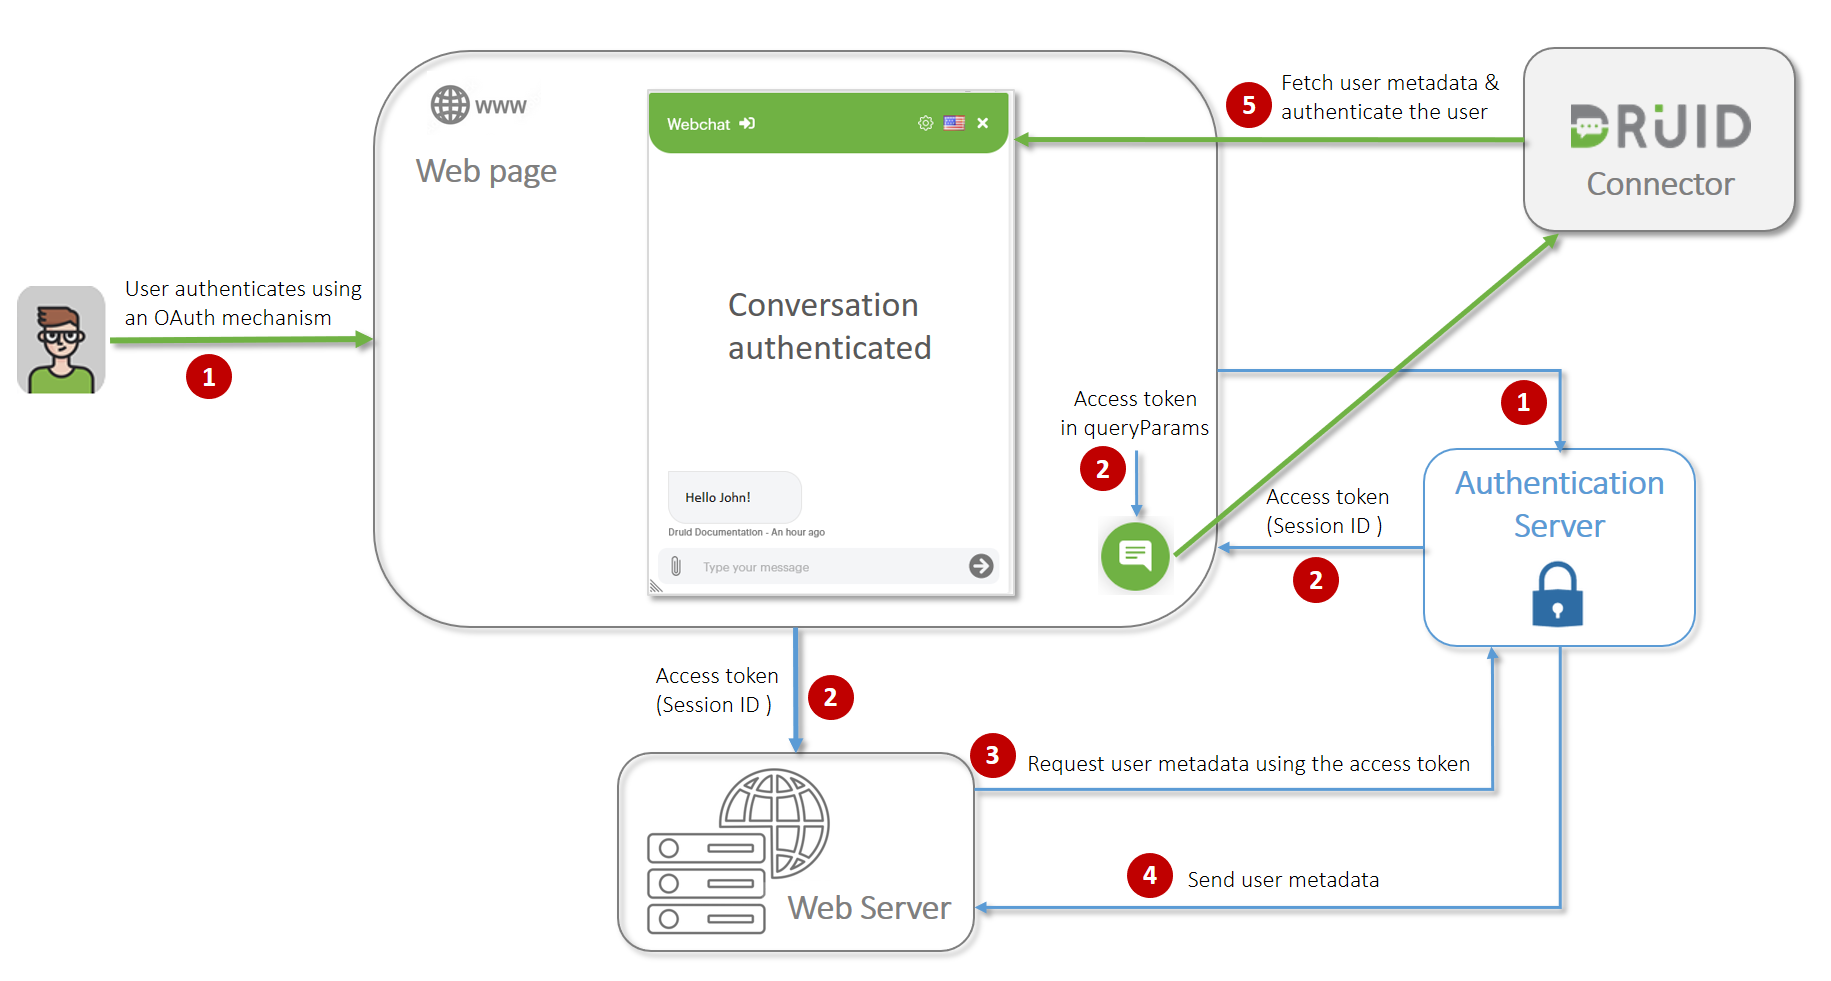
1. Transfer User Metadata Using an Access Token
Authenticate users on your web hosting page using OAuth mechanisms like Google or Facebook SSO.
Retrieve the session's access token from the OAuth system on the server hosting the web page. The server will use it to interrogate the authentication system and retrieve the user metadata backend-side.
From the web hosting page send the access token to DRUID through queryParams. DRUID's backend will use the connector to fetch user metadata and authenticate the user based on known DRUID mechanisms (e.g., SaveIdentifiedUser).
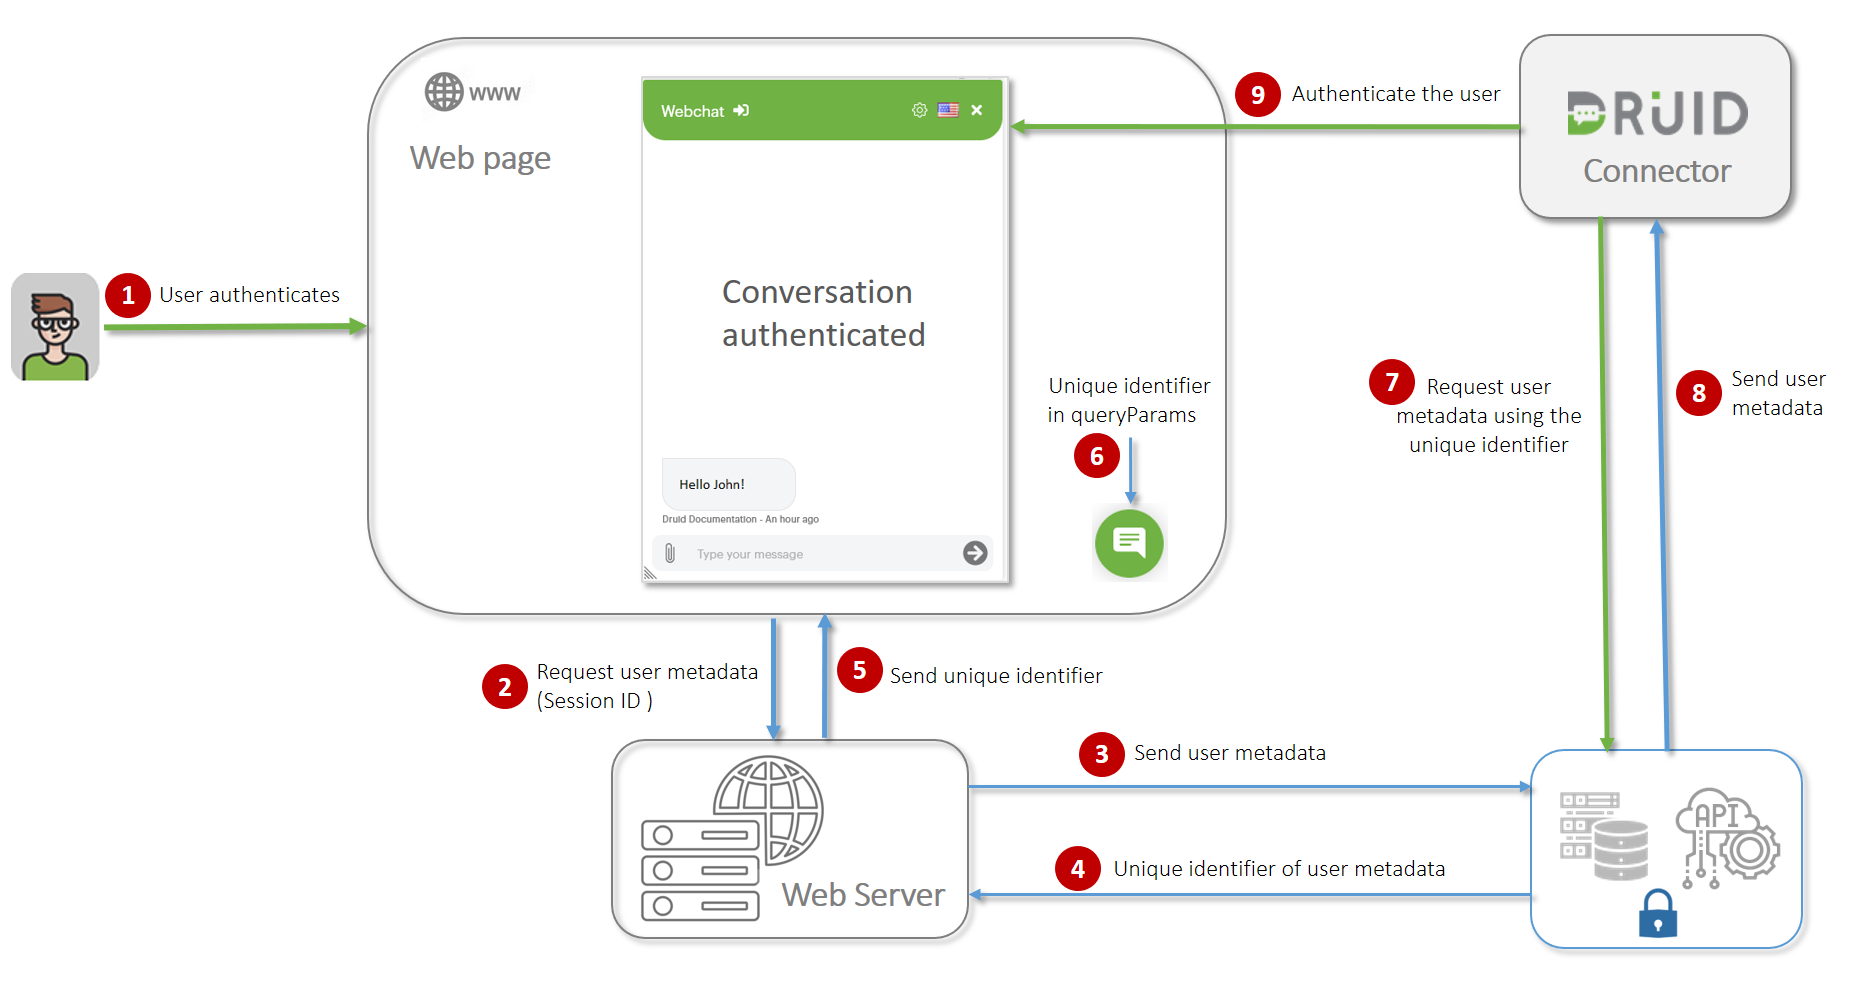
2. Transfer Any User Metadata Backend-Wise Only
To securely transfer user metadata backend-side, employ robust systems such as SQL or API-based services designed to store data securely. These systems ensure the protection and integrity of user information during transmission to the backend. As a best practice, the backend-side process should include the transmission of a unique identifier for user metadata, enhancing the overall security and traceability of the data.
In scenarios where the use of SQL or dedicated API-based services is not feasible, DRUID offers a secure alternative: the DRUID temporary storage. This serves as a reliable solution, guaranteeing the safe transfer and storage of user metadata on the backend. Consider adopting this alternative to maintain the confidentiality and integrity of user information in situations where conventional secure systems are not available.
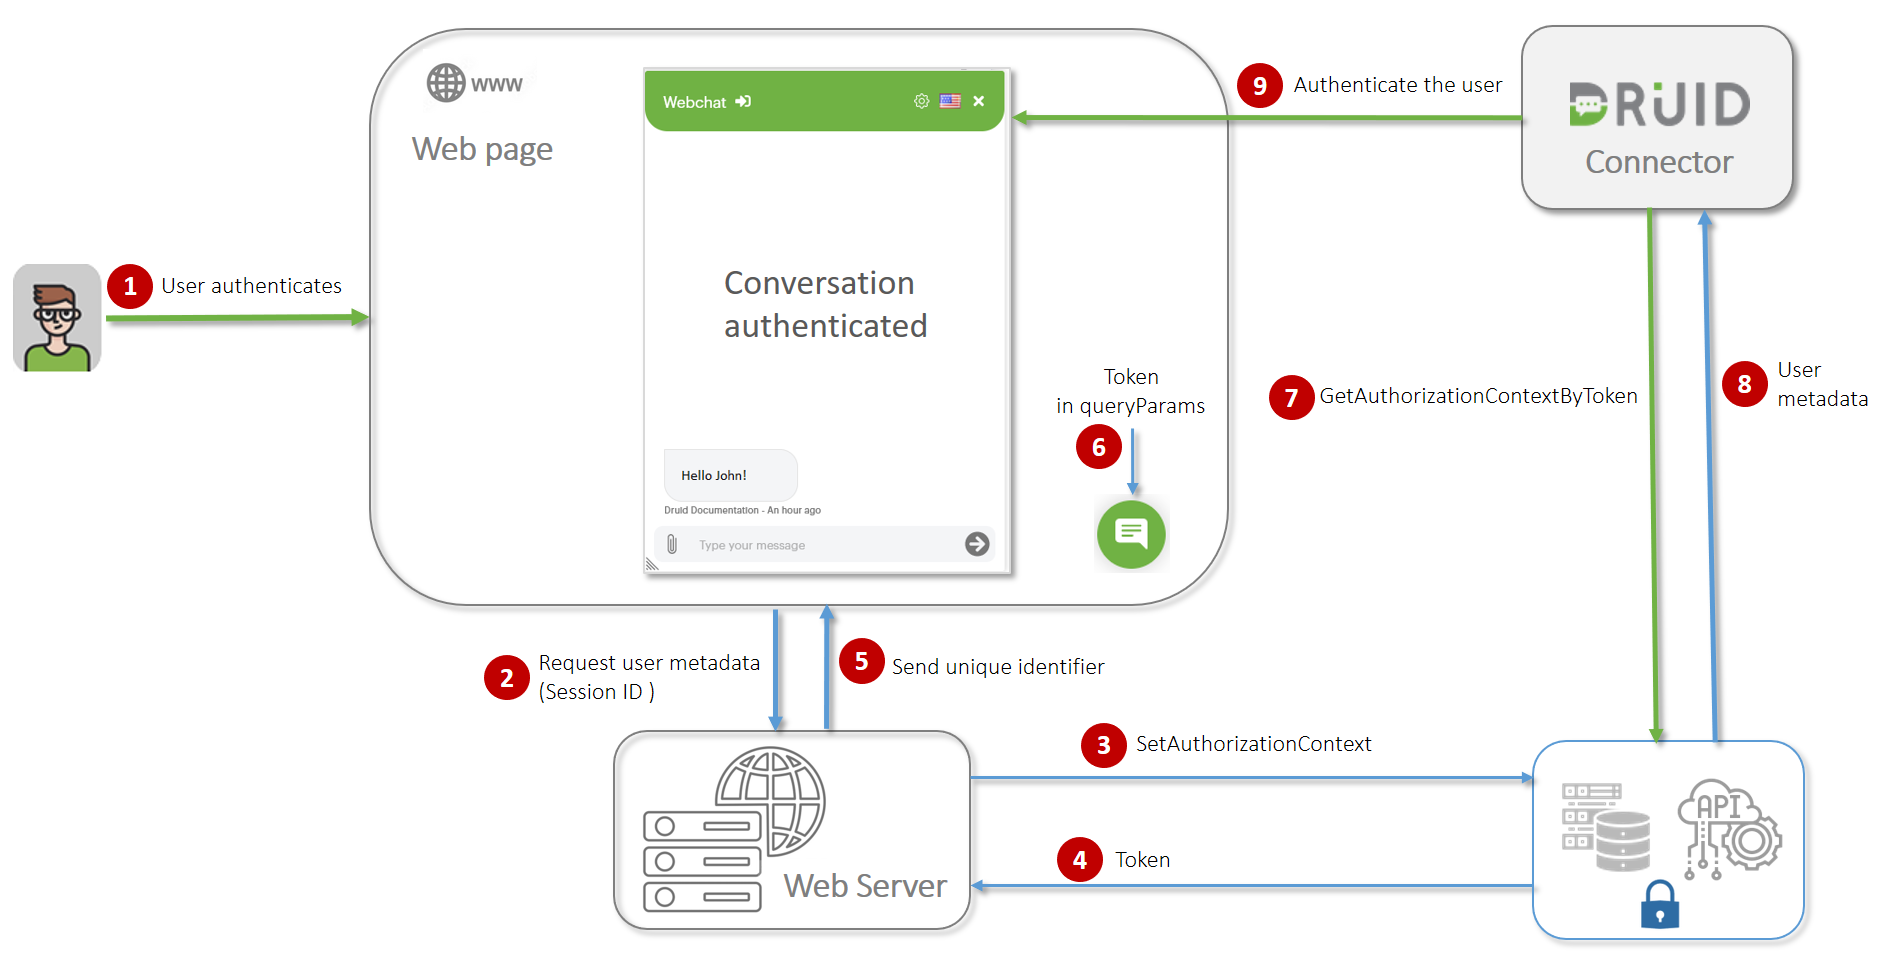
3. Transfer User Metadata Backend-Side Using DRUID Temporary Storage
Securely transfer user metadata backend-side by leveraging DRUID's temporary storage within the DRUID API service.
Follow these steps to transfer user metadata using the DRUID temporary storage:
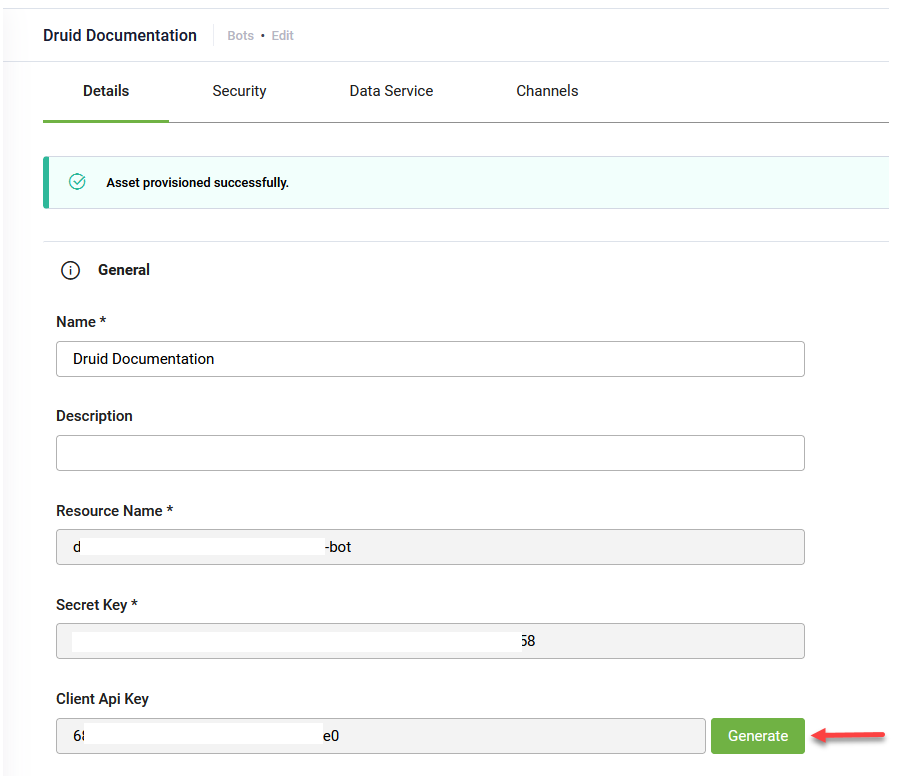
Step 1. Generate Client API Key in DRUID Portal
In DRUID, navigate to your bot details, expand the General section, and generate the Client API Key.
Step 2. Configure Web Hosting Page
Configure the web hosting page to notify the hosting server (backend) when a user authenticates. Prior to displaying the web chat, prompt the server to transmit authenticated user metadata to DRUID.
Step 3. Make Authenticated API Call to DRUID Temporary Storage
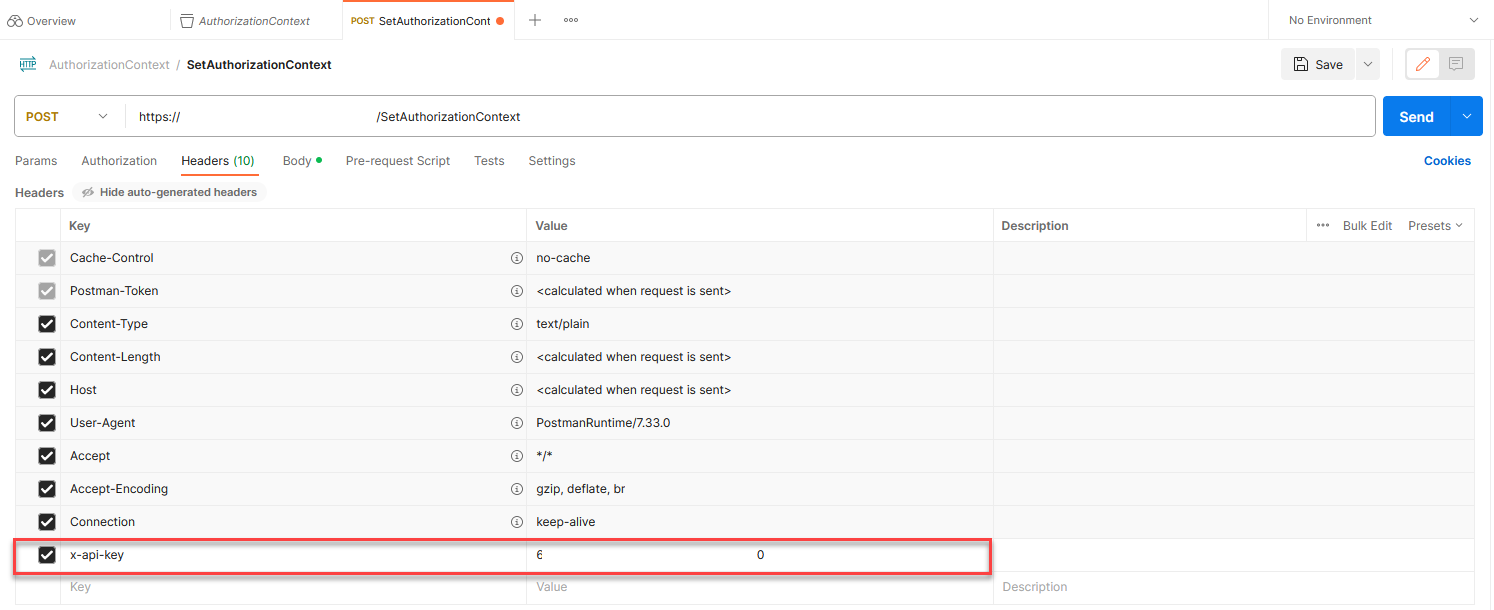
From the hosting server, perform an authenticated backend-wise API call to DRUID temporary storage. Use a POST request to the DRUID endpoint /SetAuthorizationContext.
Request Headers
Add the "x-api-key" property in the request header, setting its value to the Client API Key generated in the DRUID Portal.
Request Body
In the request body send the following user metadata:
Request Body - user metadata
{
    "domainUserName": "string",
    "firstName": "string",
    "lastName": "string",
    "email": "string",
    "masterId": "string"
}
Response
DRUID API responds synchronously to the server hosting the web page (on the response of the call above) with a short-lived token (30 mins).
Step 4. Deliver DRUID Token to Web Page
Transmit the token generated by DRUID from the hosting server to the web page (client-side).
Step 5. Include Token in DRUID Webchat Snippet
Before initializing the web chat, embed the generated token in the DRUID Webchat snippet's queryParams.
<script type="text/javascript">
            document.addEventListener("DOMContentLoaded", function(event) {
                DruidWebchat_v2.init({
                    <!-- Common settings  -->
                    botId: "88c1ccb8-5c52-4b82-8383-08d9e267a599",
                    baseUrl: "https://druidapi.testing.druidplatform.com",
                    queryParams: "DruidToken="+token, // pass queryParams to AuthorizeAsync method
                });
            });
        </script>
When the user initiates the DRUID webchat, the conversation automatically receives the token in the [[QueryParam]] entity, as specified in the code snippet (e.g., DruidToken).
Step 6. Retrieve User Metadata from DRUID API
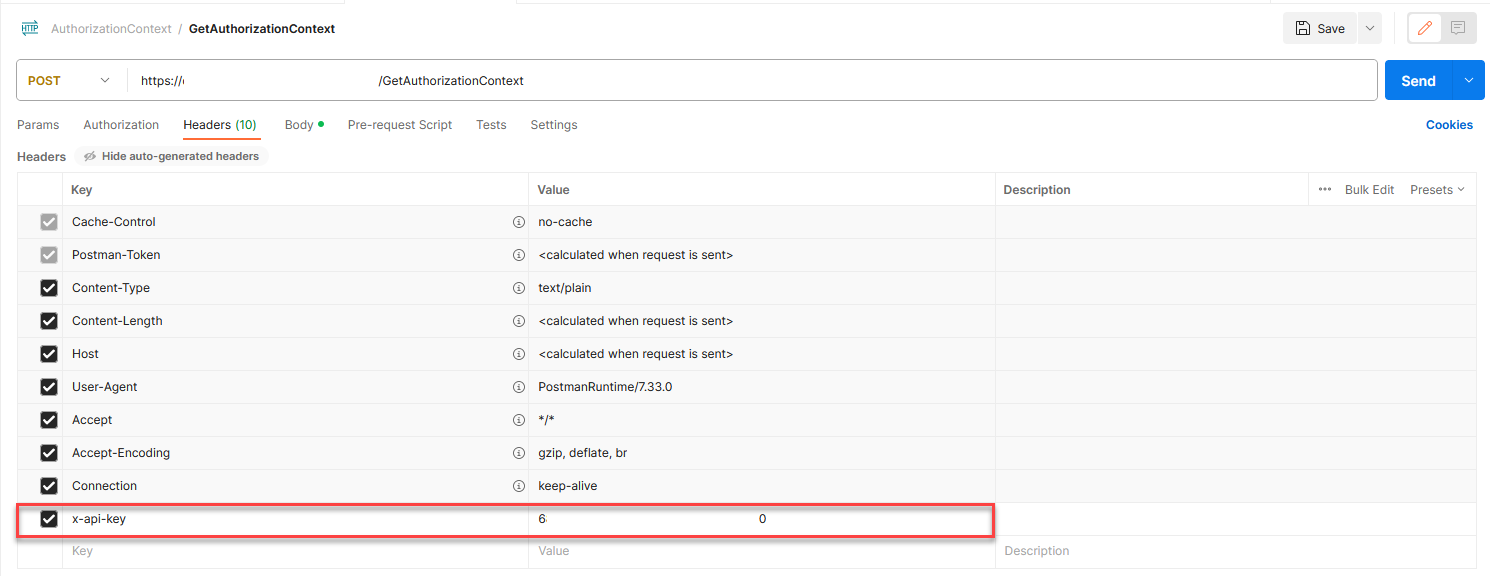
Use that token in DRUID (the token received in the [[QueryParams]] entity) on the authentication flow to retrieve user metadata from DRUID API. Send an authenticated POST request to /GetAuthorizationContextByToken.
Request Headers
Add the "x-api-key" property in the request header, setting its value to the Client API Key generated in the DRUID Portal.
Request Body
In the request body send the token:
Response
DRUID API sends the user metadata based on the token sent.
{
  "botId": "string",
  "domainUserName": "string",
  "firstName": "string",
  "lastName": "string",
  "email": "string",
  "masterId": "string"
}
Step 7. Authenticate User in DRUID Conversation
Use the retrieved user metadata to authenticate the user in the DRUID conversation using classic methods (e.g., SaveIdentifiedUser). This ensures a secure and seamless user authentication process within the DRUID Webchat environment.
By following these steps, you can seamlessly authenticate users in the DRUID Webchat while ensuring data security and integrity.