Provisioning Portal Users with Google SAML
You can now streamline portal access for your team by enabling Google Single Sign-On (SSO) authentication with the SAML protocol. This feature allows team members to sign in to the portal using their managed Google Account credentials, eliminating the need to create and manage separate portal passwords.
With Google SSO, your organization benefits from:
- Simplified access management – Team members use credentials they already know and trust.
- Enhanced security – Leverage Google's authentication infrastructure and security features.
- Reduced administrative overhead – No need to handle password resets or manage additional credentials.
- Faster onboarding – New team members can access the portal immediately using their Google accounts.
Prerequisites
To successfully enable Google Portal SSO with SAML, you will need the following:
- Google admin account.
- You have a Druid Portal account with privileges to manage users.
Configuration Steps
Once you have gathered the prerequisites, follow these steps to establish the connection:
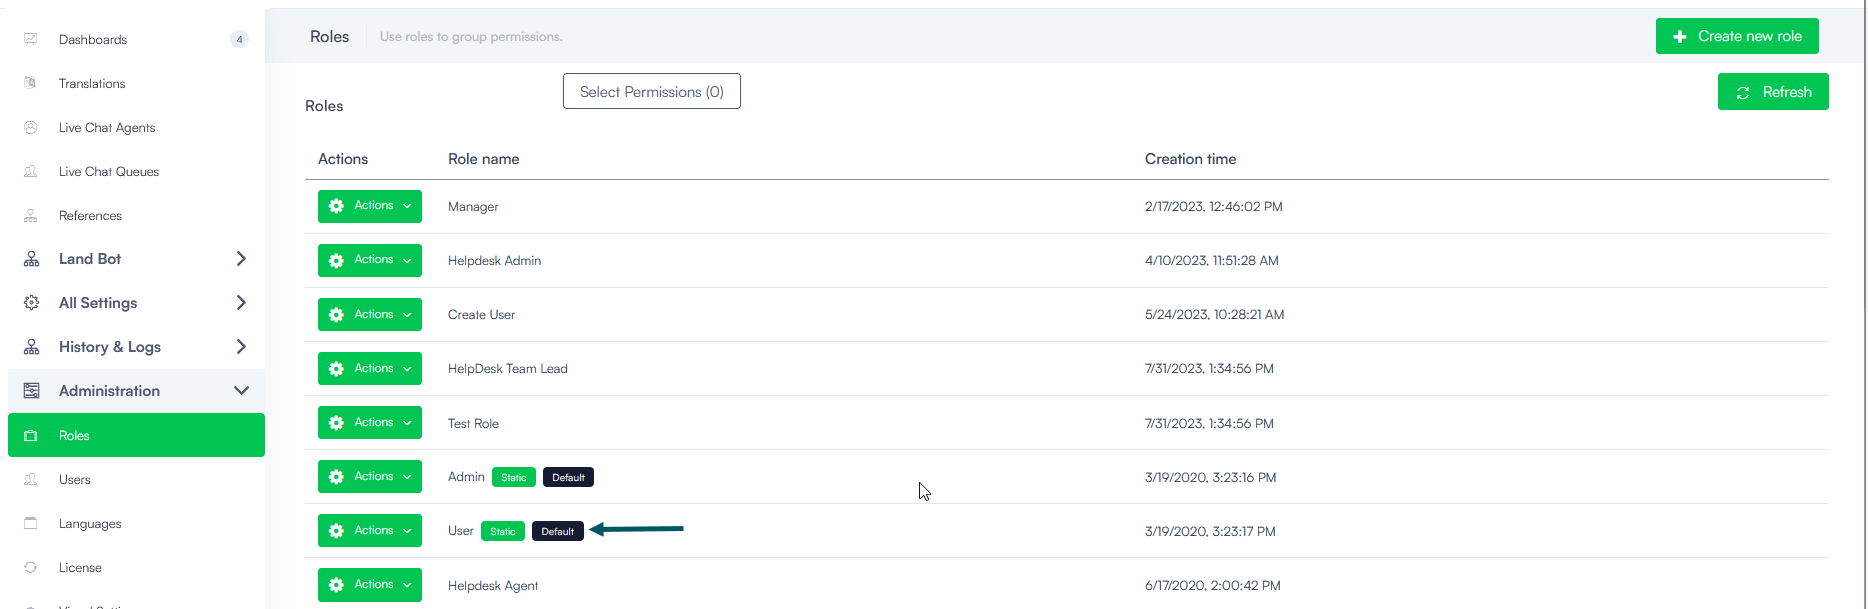
Step 1. Set up roles for automatically provisioned users
To set up default role(s) to be assigned to automatically provisioned users, from the Administration menu, click Roles. Edit the desired role(s) by selecting Default. You can create a new roles with permissions specific to your organization and set it as Default.
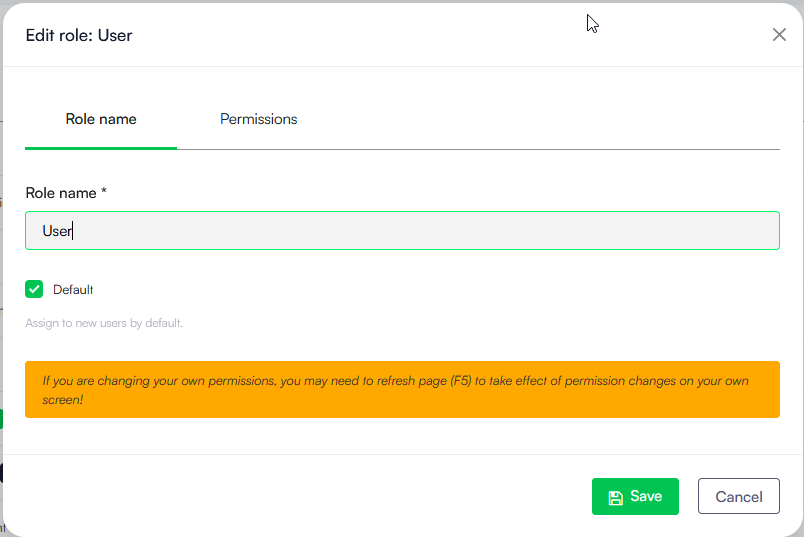
Whenever new users log in Druid Portal for the first time, they will be assigned with the default role(s).
Step 2. Get details from the Druid Portal
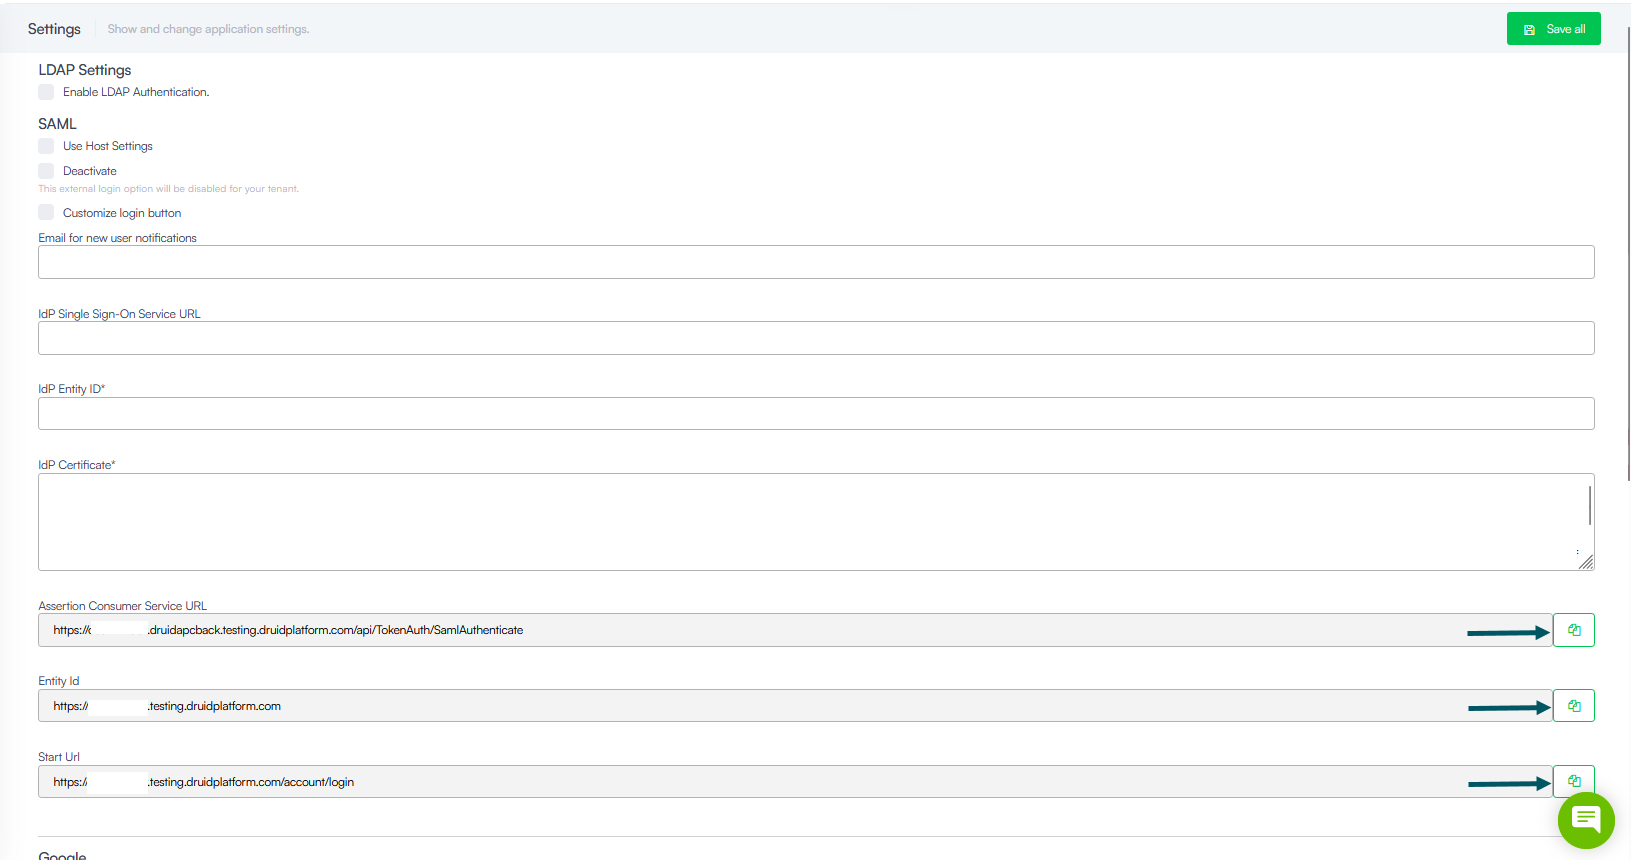
In Druid Portal, from the Administration menu, click Settings and in the Settings page, click the External Login Settings tab.
From the SAML section, copy the following details you will need in the Google Admin console: Assertion Consumer Service URL, Entity Id and Start Url.
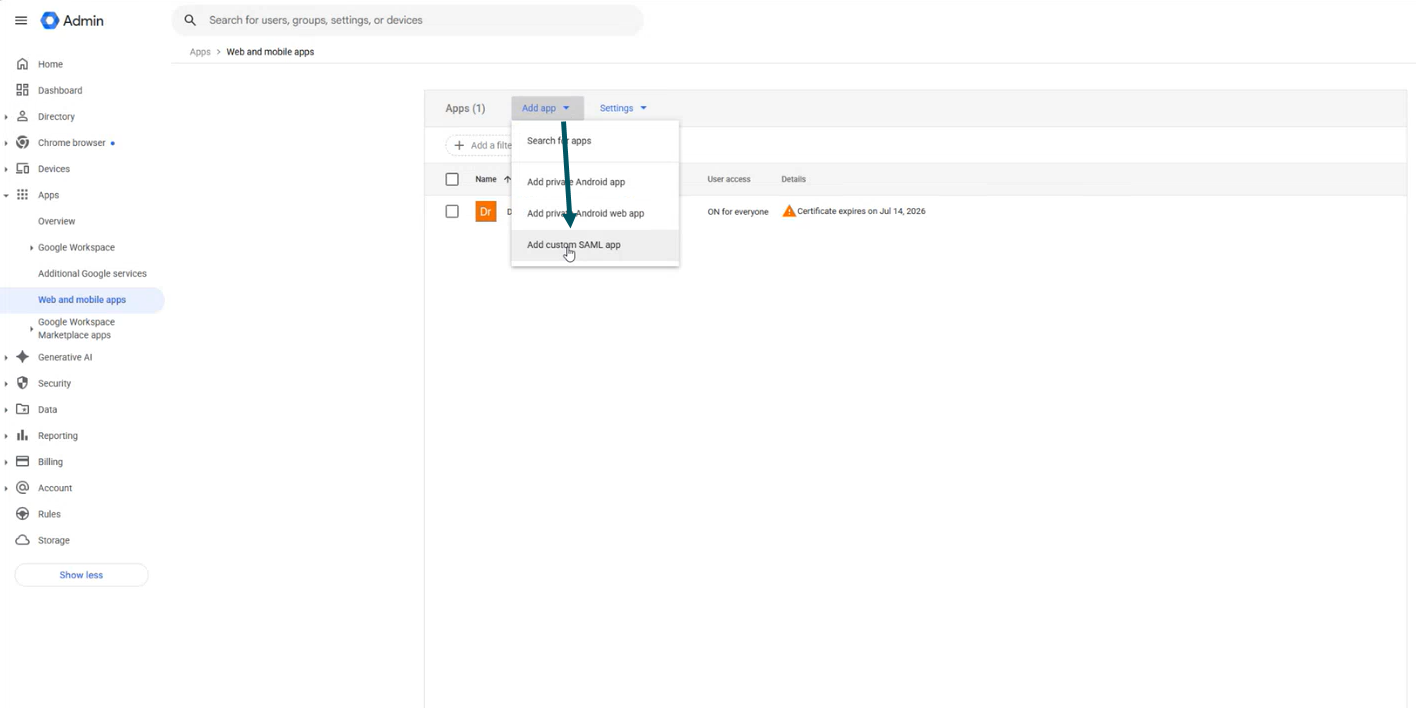
Step 3. Set up a Google custom SAML app
To set up a Google custom SAML app, follow these steps:
- Log into the Google Admin console using a Google admin account.
- On the menu, click Apps, then click Web and mobile apps.
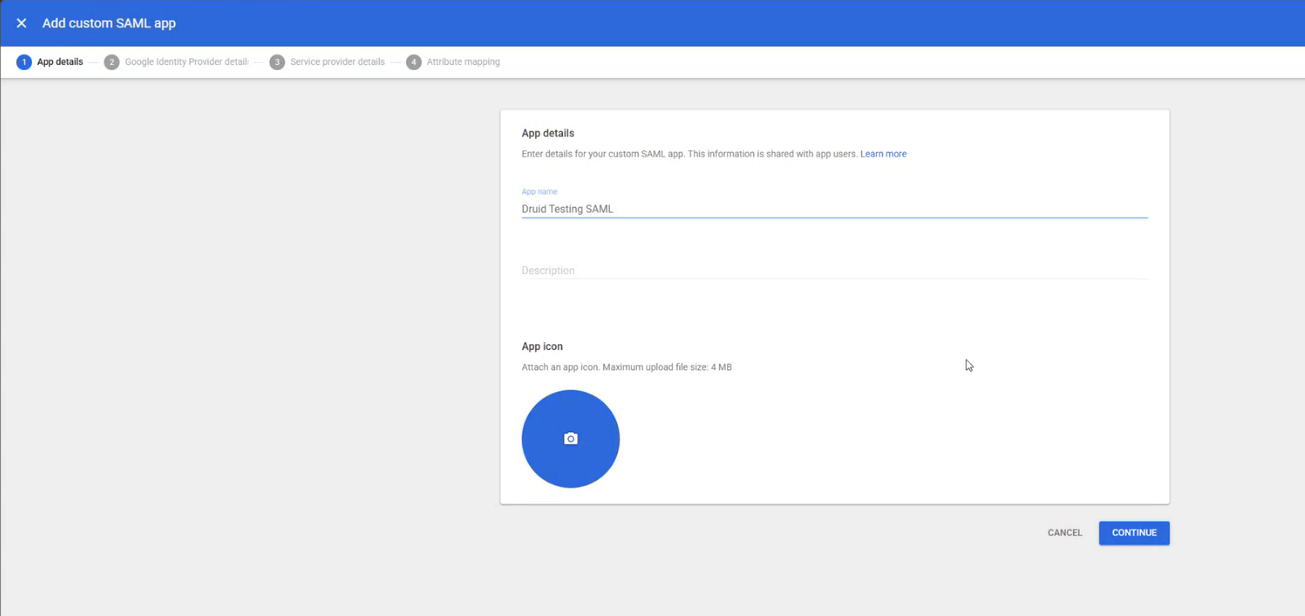
- From the Apps dropdown, select Add custom SAML app.
- Enter the app name.
- Click Continue.
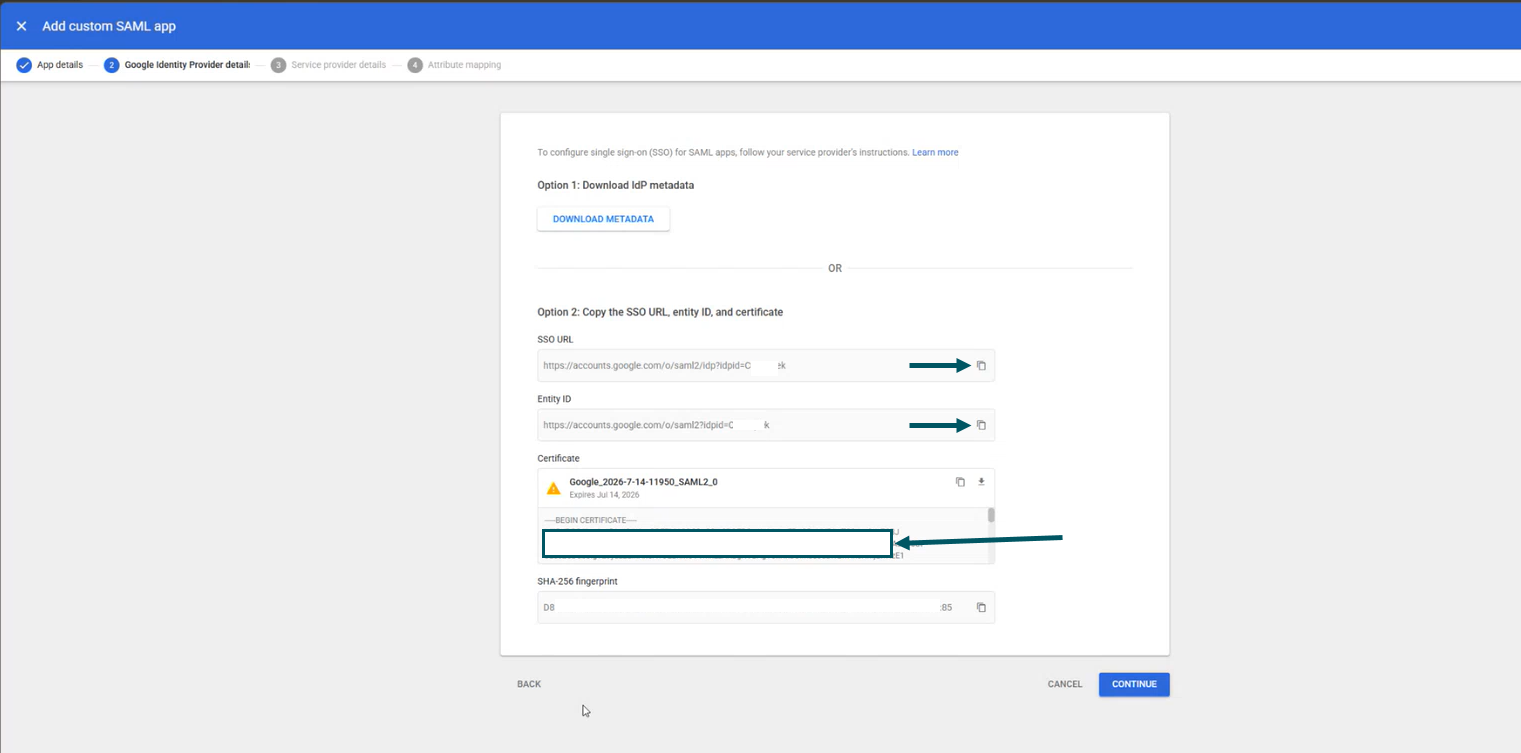
- On the Google Identity Provider details page, get the setup information needed in Druid. Copy the SSO URL and Entity ID and from the Certificate field, copy everything between the --BEGIN / END CERTIFICATE-- tags.
- Click Continue.
- In the Service Provider Details window, enter the details you copied at Step 2.
- Select Signed response.
- From the Name ID format drop-down, select EMAIL.
- From the Name ID drop-down, select Basic information > Primary email
- Click Continue.
- Click Add mapping and map the following user attributes:
- Click Finish.
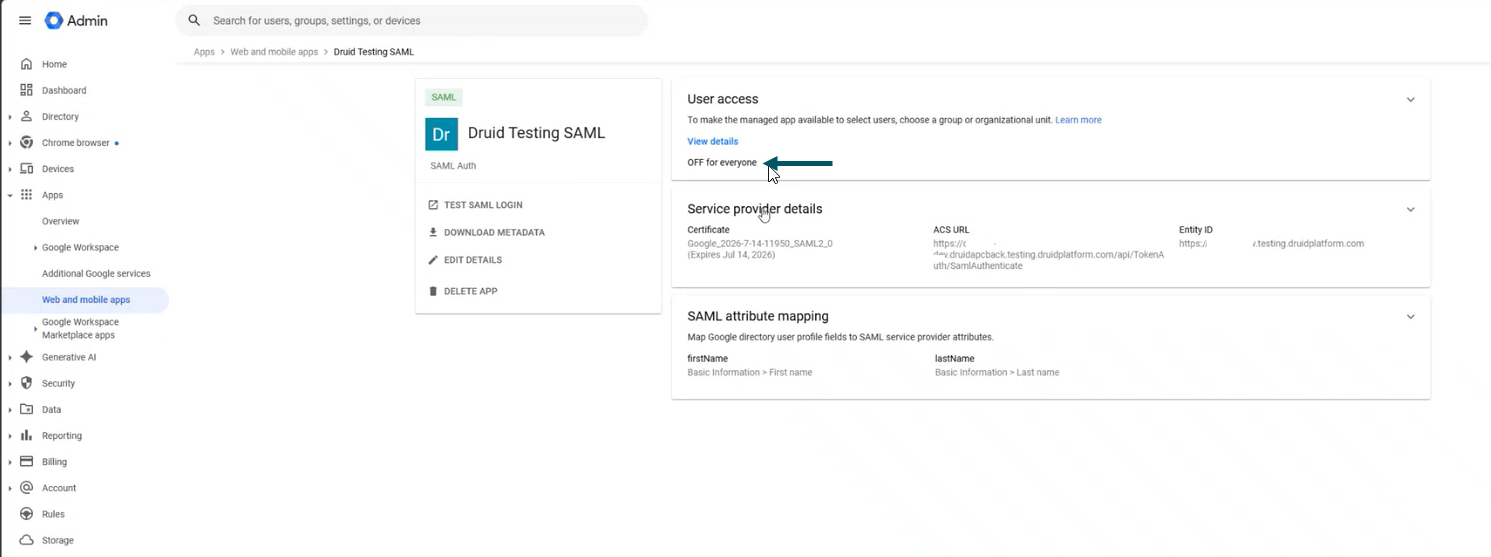
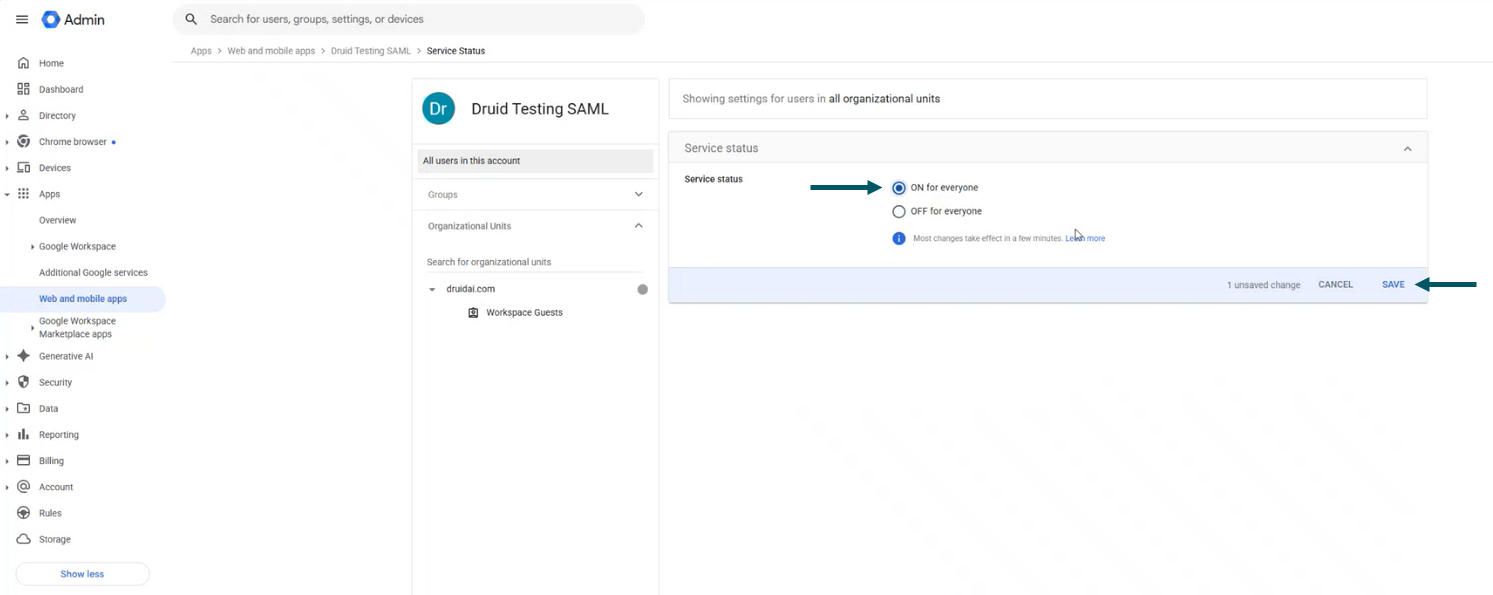
- Turn on your SAML app. In the User access section, click on OFF for everyone.
- Select ON for everyone.
- Click Save.

| Google Directory attribute | Druid entity field |
|---|---|
| First name | firstName |
| Last name | lastName |

For more information, see the instruction provided in the Google documentation.
Step 4. Set up Druid Portal authentication with Google SAML
To set up Druid Portal authentication with Google, in Druid Portal, from the Administration menu, click Settings and in the Settings page, click the External Login Settings tab.
In the SAML section, set the details described in the table below.
| Setting | Description |
|---|---|
| Email for new user notifications | Any email address that should receive notifications when new users sign up via Google SSO. We recommend entering the email address of a Druid Portal user in charge of reviewing users. This field is optional. |
| IdP Single Sign-On Service URL | The SSO URL you copied from the Google Identity Provider details page when setting up your Google custom SAML app. |
| IdP Entity ID | The Entity ID you copied from the Google Identity Provider details page when setting up your Google custom SAML app. |
| IdP Certificate | The string you copied from the Certificate field from the Google Identity Provider details page when setting up your Google custom SAML app. |
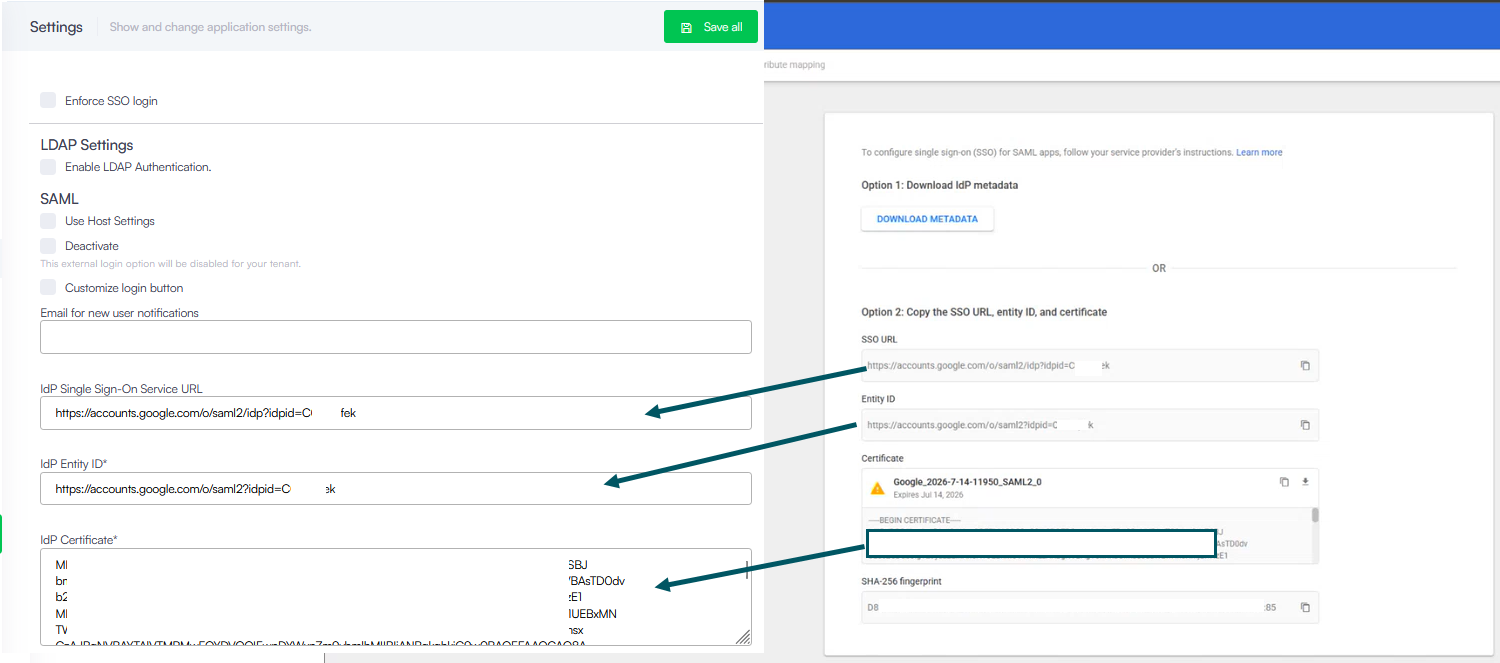
Save the settings by clicking the Save all button at the top-right corner of the page.
Step 5. Allow user registration and activate new accounts
Druid provides built-in functionality to manage user registrations. To allow new users to register themselves to the Druid Portal, on the Administration menu, click Settings. In the Settings page, click the User Management tab, and in the Form-Based Registration area, select Allow users to register to the system.
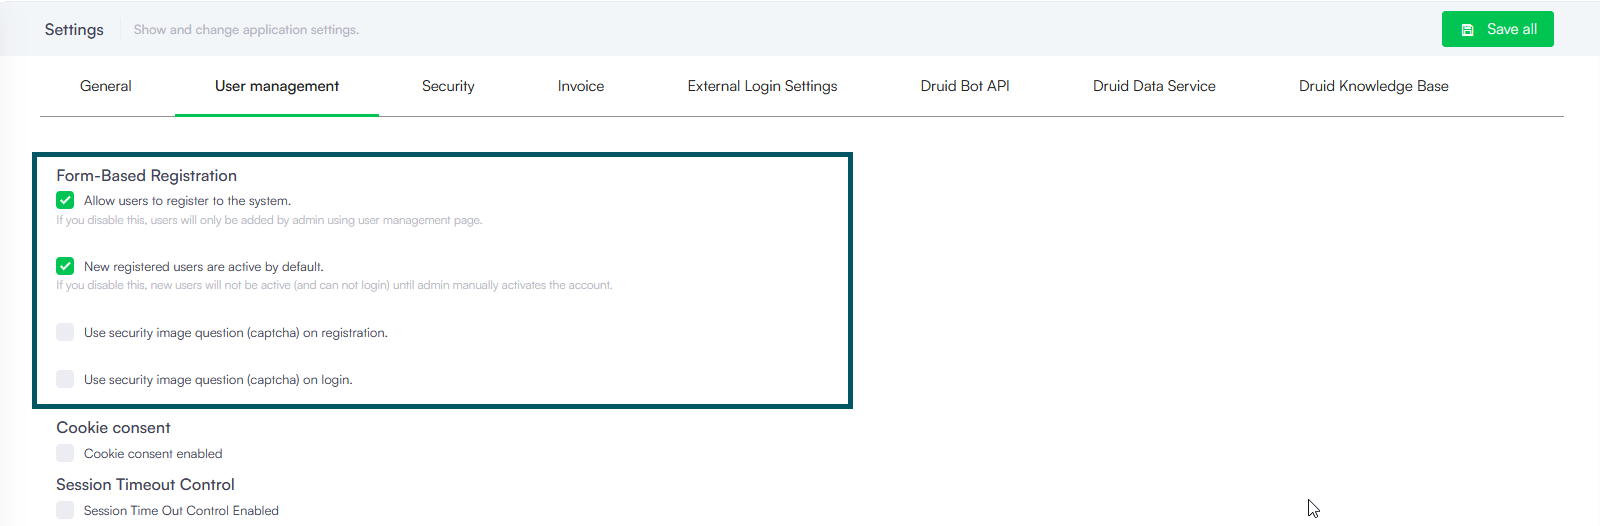
By default, new users are inactive and unable to log in until their Druid administrator manually activates their accounts.
To activate new self-registered users, select New registered users are active by default.
Save the changes. New users can now register themselves and access the Druid Portal.
Step 4. Review provisioned users roles and privileges (ongoing task)
New users provisioned in Druid are automatically assigned with the roles marked as default.
Whenever a new user is provisioned in Druid Portal, you as the Portal admin get an email notification. You might want to review the user’s assigned roles and make the proper changes based on business need to know (roles and privileges).