Install Druid Connector Host
- To install / upgrade / uninstall Druid Connector use the installer. You won’t be able to install / upgrade / uninstall it using the old installation procedure due to ASP.NET Core Runtime and .NET Runtime upgrade to version 5.x.
- To upgrade Druid Connector version 1.52 or below to version 1.53 or higher, you have to uninstall the existing version using the old procedure, then install the new version using the installer.
Druid Connector Host installer enables you to easily install, upgrade or uninstall Druid Connector in Druid hybrid deployments by following some basic prerequisites and steps and go through an installation wizard.
In a future release, we’ll make the installer even more user friendly allowing you to download it from the Druid Portal and only go through the wizard steps to set up the Connector Host.
Prerequisites
- Make a request to Druid Tech Support to activate the hybrid-mode for your tenant.
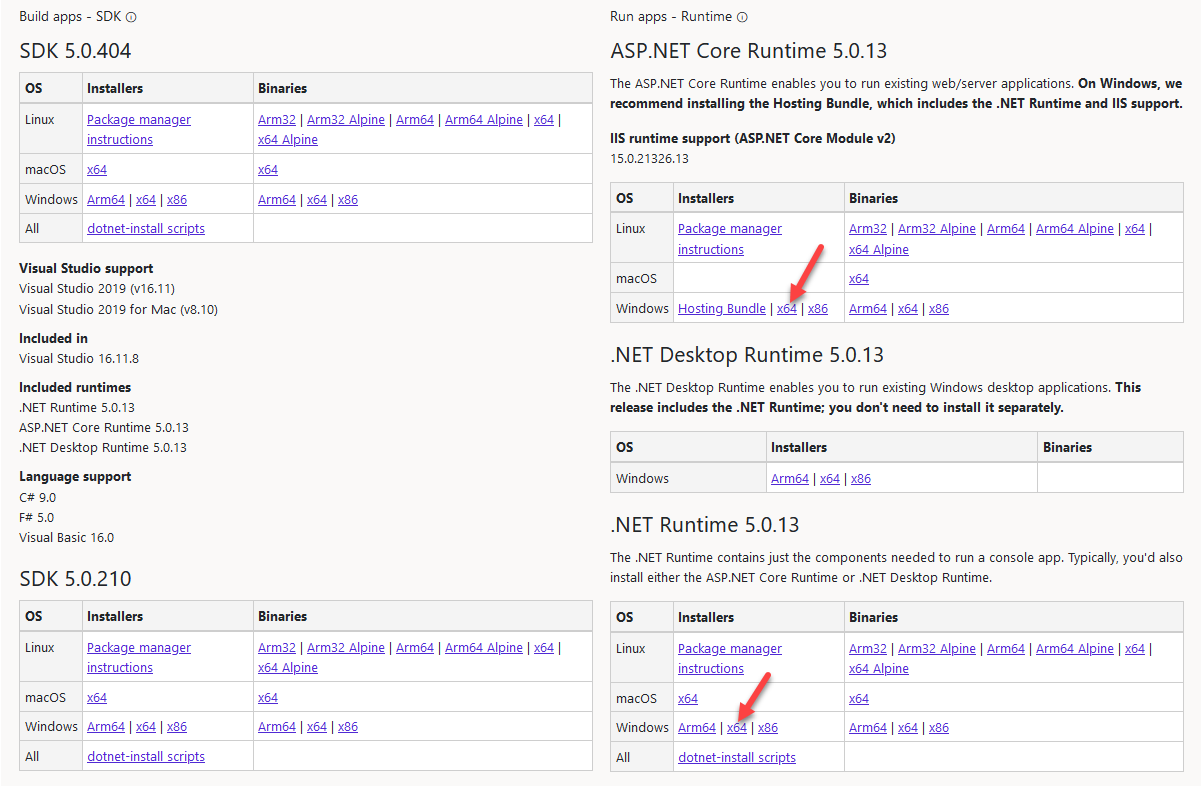
- For Druid Connector Host version 1.53 or higher, ASP.NET Core Runtime 5.0.11 or higher and .NET Runtime 5.0.11 or higher are required on Windows x64.
- You have an SQL Server database that will store the conversation history.
- You have an SQL Server Edition 2019 or above.
- Provide access to a dedicated disk storage where Druid Connector Host will store document templates and files uploaded or generated by the AI Agent during the conversations.
- You have an admin account to access your Druid Online tenant.
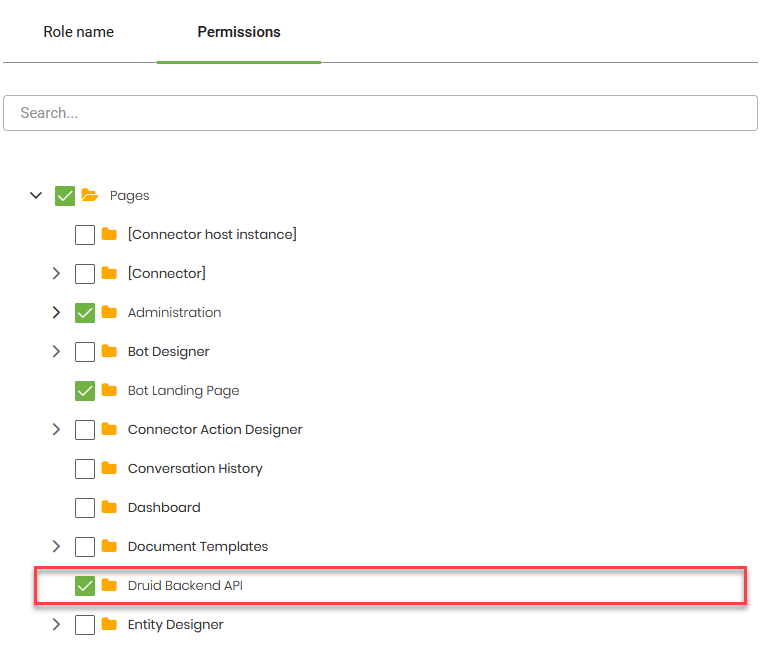
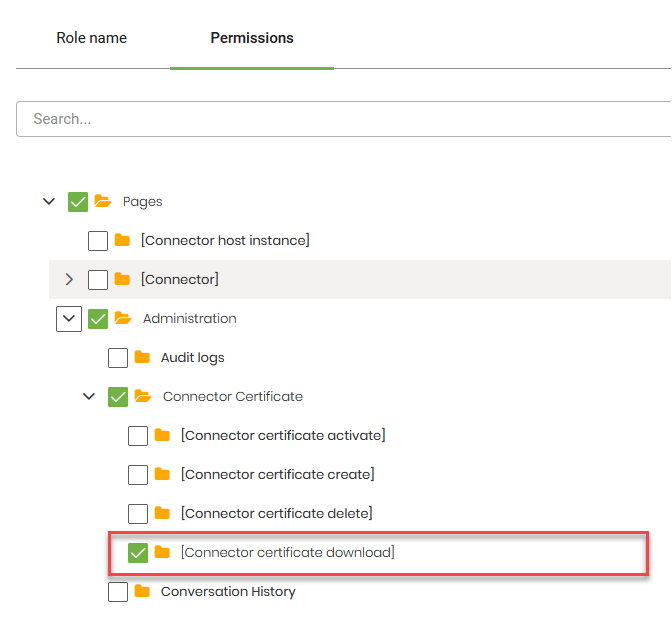
- Create dedicated user in Druid Portal, with “Druid Backend API” and “Connector certificate download” permissions. For information on how to add user and grant permissions, see Authoring User Management.
- Outbound calls to specific IP addresses specific to your DRUID environment. For detailed information, see DRUID Platform Services and IPs.
Step 1: Download Druid Connector Host Installer
- Access the machine where you will host the Druid Connector.
- Access the Druid Portal using an admin account and from the left menu select All Settings > Download Binaries. The Connector and Data Service tab appears by default.
- Download the latest version.
The file is downloaded as zip in the default download folder.
Step 2: Unzip the downloaded file
Usually, the URL security zone might prevent the downloaded file execution. Right-click on the file and click Properties, untick the Read-only checkbox, click Apply, confirm the changes and then click OK. Unzip the downloaded file into the installation folder, e.g. D:\Druid.
Step 3. Install Druid Connector Host
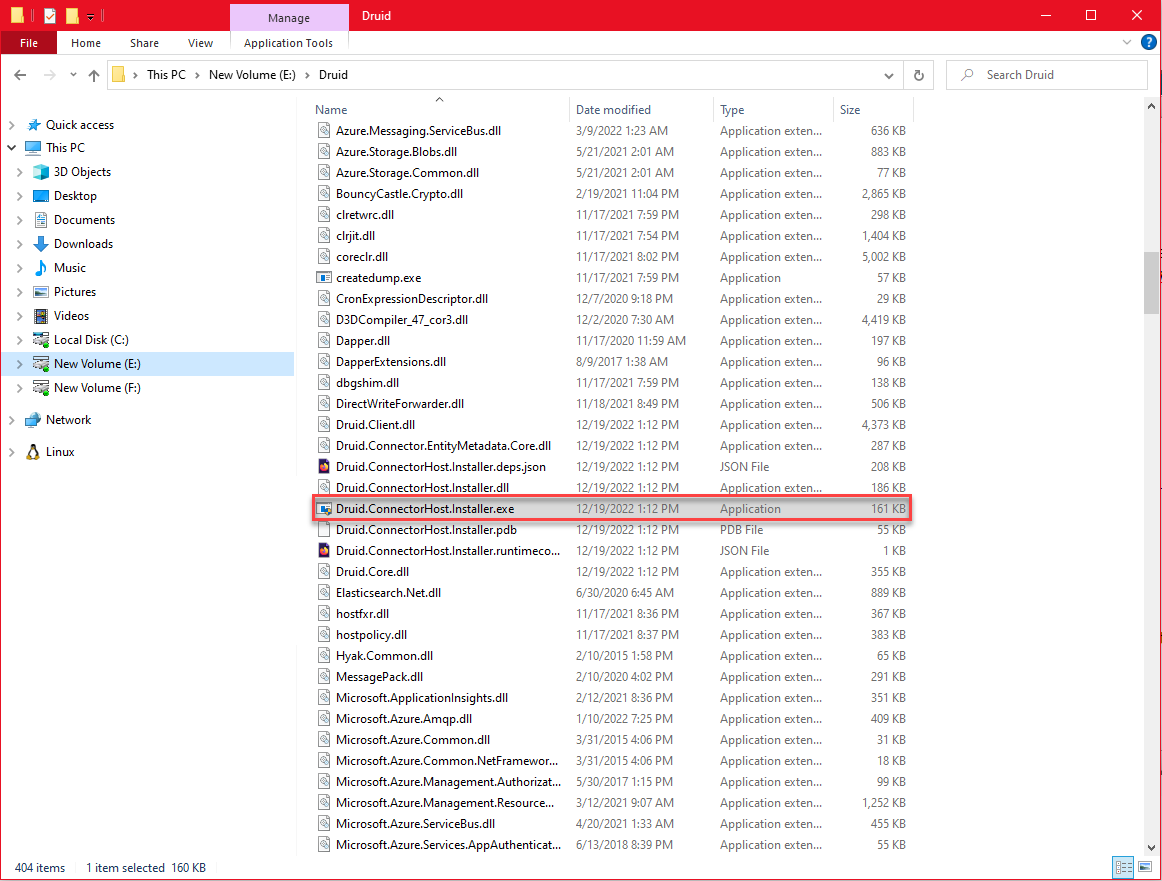
Go to the folder where you unzipped the Druid Connector Installer kit and double-click on Druid.ConnectorHost.Installer.exe.
Druid Connector Host installation wizard opens. Follow the installation wizard on screen instructions. Select Connector Host.
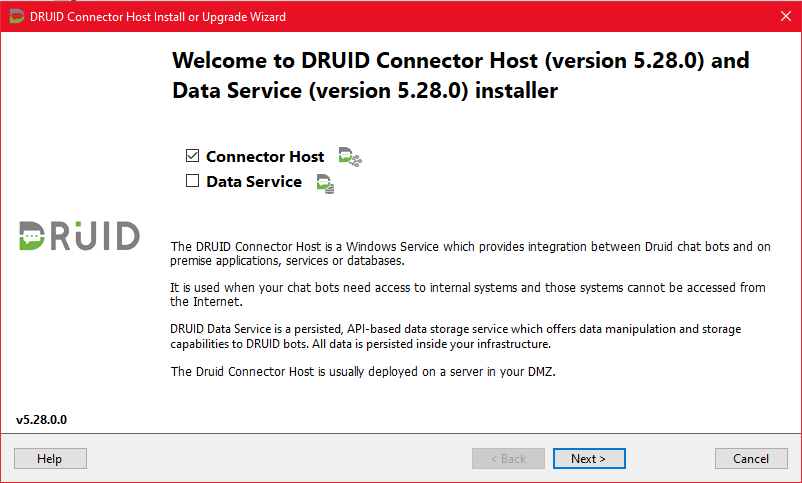
Click Next.
Leave selected the option to Install a new Connector Host instance.
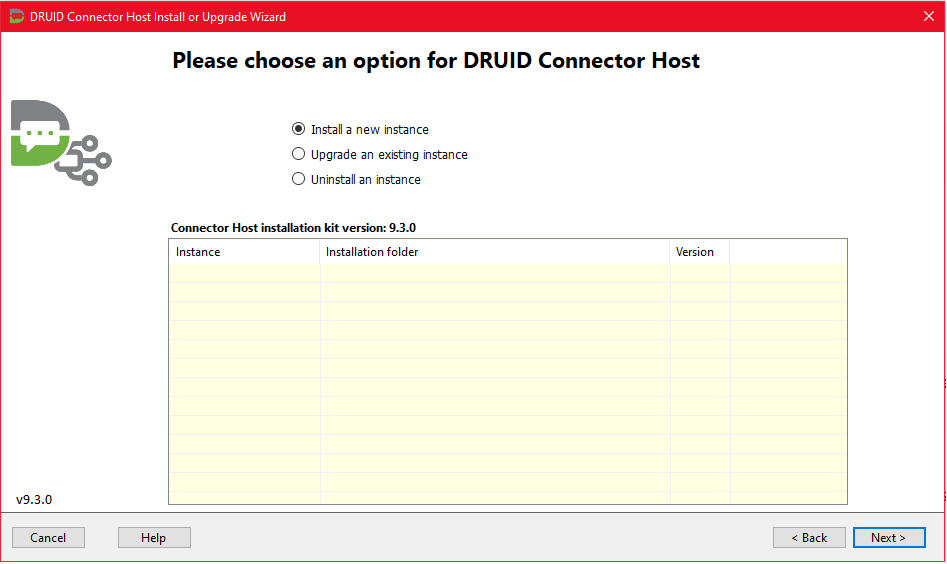
Click Next.
The next wizard page provides you with the prerequisites for installing Druid Connector Host. Make sure that you meet all the prerequisites before moving forward. Click Next twice.
The installer checks if .NET version that comes with it is installed on the machine and if it's not, automatically installs it on the machine. (E.g., .NET 5 is installed on the machine and the installer comes with .NET 6).
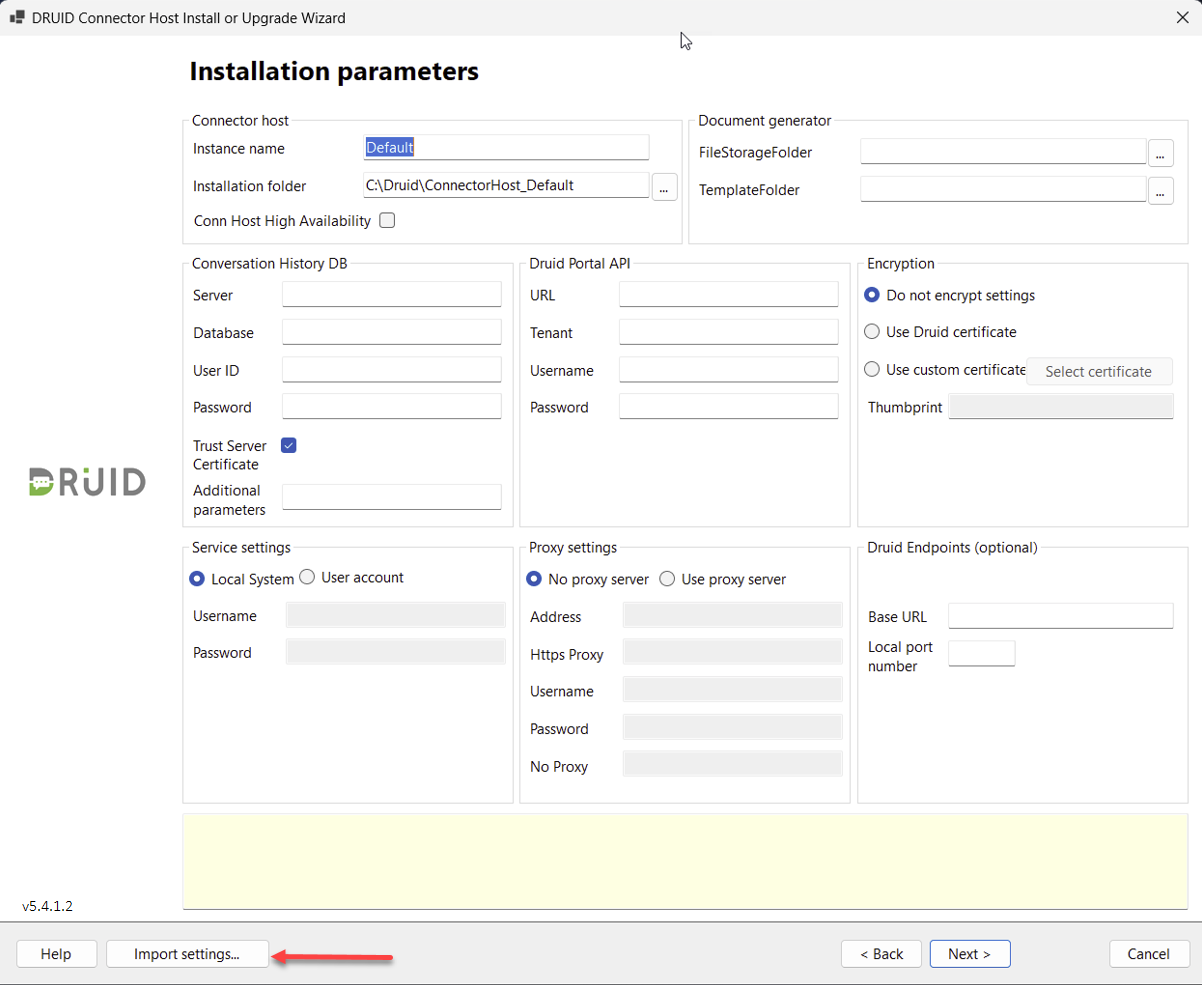
The Installation parameters wizard page appears. The parameters are divided across two pages. After setting the parameters on the first page, click Next to continue and set the remaining parameters.
Provide the installation parameters described below in this section.
Connector Host Parameters
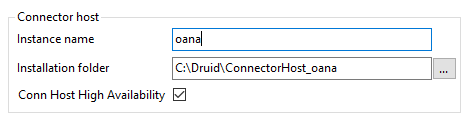
You can customize the name of the Connector Host instance (Instance name) and select the folder where you want to install the instance (Installation folder).
If you want to install the Druid Connector Host in the high availability scenario and ensure increased load by parallel running multiple Connector Host instances for your tenant, tick on Conn Host High Availability.
The Connector Host instances will automatically sync their configuration, operate concurrently, and can independently handle specific requests.
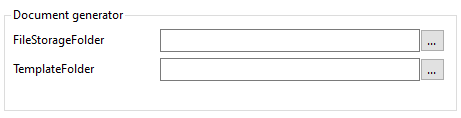
Document Generator Parameters
Provide access to a dedicated disk storage where Druid Connector Host will store document templates and files uploaded or generated by the AI Agent during the conversations.
Configure the connection to the file storage and define the files uploaded by users and the files generated by the AI Agent during the conversations.
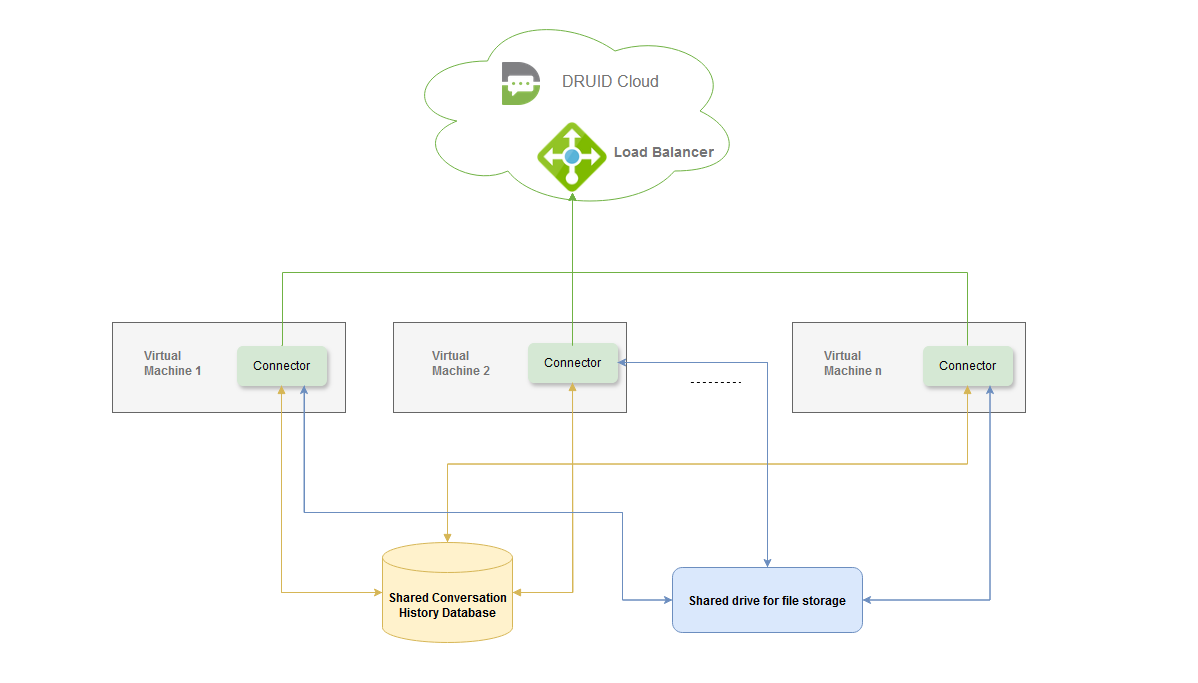
Configuration for the high availability setup
In a high availability (HA) setup, all Druid Connector Host instances must connect to the same shared network drive for file storage. This ensures consistent access to user-uploaded files and files generated by the AI Agent across all instances. All virtual machines hosting the Connector Host instances must have access to this shared network drive.
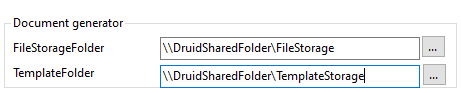
For each Connector Host instance, configure the Document Generator parameters as follows:
- In the FileStorageFolder parameter, specify the path to the shared network disk storage where user-uploaded files or files generated by the AI Agent will be stored.
- In the TemplateFolder parameter, provide the path to the location where the document templates will be stored.
Conversation History DB Parameters
Configure the connection string to the SQL database that will store the conversation history. To do so, define the following parameters:
|
Parameter |
Description |
|---|---|
|
Server |
Enter the name/address of the SQL server (exactly how you use it in Microsoft SQL Management Studio). NOTE: In a high availability (HA) setup, all Connector Host instances must connect to the same shared Conversation History database. In the Server field, enter the unique address of the database resource. This can either be the address of the database server or, if the database is configured for high availability, the address of the server cluster. Make sure that all virtual machines (VMs) where the Connector Hosts are installed can access the shared Conversation History database.
|
|
Database |
Enter the name of the database you want to connect to. |
| Encrypt traffic |
Select it to encrypt the communication between the DRUID Connector Host and the SQL Server with a certificate that is installed on the SQL Server. IMPORTANT! If the traffic is encrypted using a self-signed certificate or a certificate that has not been issued by a recognized Certified Authority (CA), select Trust server certificate; otherwise, the DRUID Connector Host and the SQL Database will be unable to communicate.
|
| Trust server certificate |
Trust the certificate installed on the SQL Server that is used for traffic encryption. |
| SQL Server authentication / Windows authentication |
You can connect to the SQL Server by using SQL credentials of an SQL account with DB Owner permission or by automatically using the Windows credentials of the Windows account under which the DRUID Connector Host service runs. NOTE: The Windows account should have access rights to the SQL server. The Windows authentication is available in DRUID Connector Host 5.11 and higher.
Tap on the desired authentication method. If you select SQL Server authentication, you need to provide the credentials of your SQL Server account. |
|
User ID |
The credentials (user name and password) of your SQL Server account. NOTE: The SQL user for the Druid dedicated conversation history database should have DB Owner permission; otherwise, the Druid Connector Host will not be able to communicate with the Druid conversation history database.
|
|
Password |
|
| Additional parameters (optional) |
Syntax:
Example:
For information on the available connection parameters, see Additional Connection Parameters. |

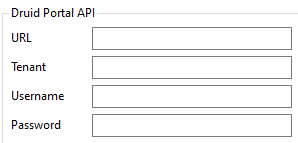
Druid Portal Parameters
Define the connection to your Druid tenant by providing the following parameters.
|
Parameter |
Description |
|---|---|
|
URL |
Enter your tenant URL: https://tenant_name.Druidplatform.com. |
|
Tenant |
Enter the name of your tenant. |
|
Username |
The credentials (user name and password) of your dedicated Druid Portal account. |
|
Password |
Encryption
You have the option to encrypt all the credentials provided in this step, when stored on the local machine drive. By default, no encryption is selected, so administrators can see the credentials in clear, in the connector host installation files. There are two options for encryption: you can either choose to use Druid Connector Host certificate (the one automatically generated in Druid Portal, Administration > Connector Certificate) or your custom certificate.
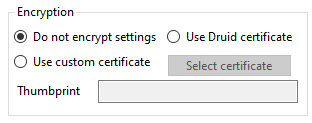
If you choose to use a custom certificate, select Use custom certificate, click the Select certificate button, browse for the certificate and select it. A hexadecimal string that uniquely identifies the certificate displays in the Thumbprint field.
Click Next to continue setting the installation parameters.
Proxy settings
By default, the proxy is disabled and you will use a direct connection to connect to Druid.
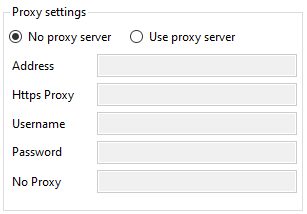
If your network setup provides access via a proxy, and the proxy connection requires authentication, you need to grant the Druid Connector Host service permission to use the proxy. For that, select Use proxy server and provide the proxy IP and credentials to connect to it.
Service settings
By default, the service is installed under the Local System Account.
![]()
If you want to install the service under a dedicated User Account configured for the Druid Connector Host, enter the account credentials. This user account should have Full Control on the installed folder (permission to write/read/create file).
DRUID Endpoints (optional)
This configuration should be used in the hybrid scenario only, when both the Druid Connector Host and the integrating services (e.g., UiPath Orchestrator) are installed in on-premise infrastructure and can only communicate INSIDE the intranet.
The Druid Connector Host will forward the calls received in its endpoint service towards the Druid AI Platform cloud infrastructure.
If the on-premise third-party application webhook cannot make calls outside the internal network, then its calls can be directed towards the Druid Connector Host, which in this scenario acts as an endpoint. For an use case example, see Accessing Druid Endpoints in Druid Hybrid Deployments.
Define the Druid endpoint by providing the following parameters.
|
Parameter |
Description |
|---|---|
|
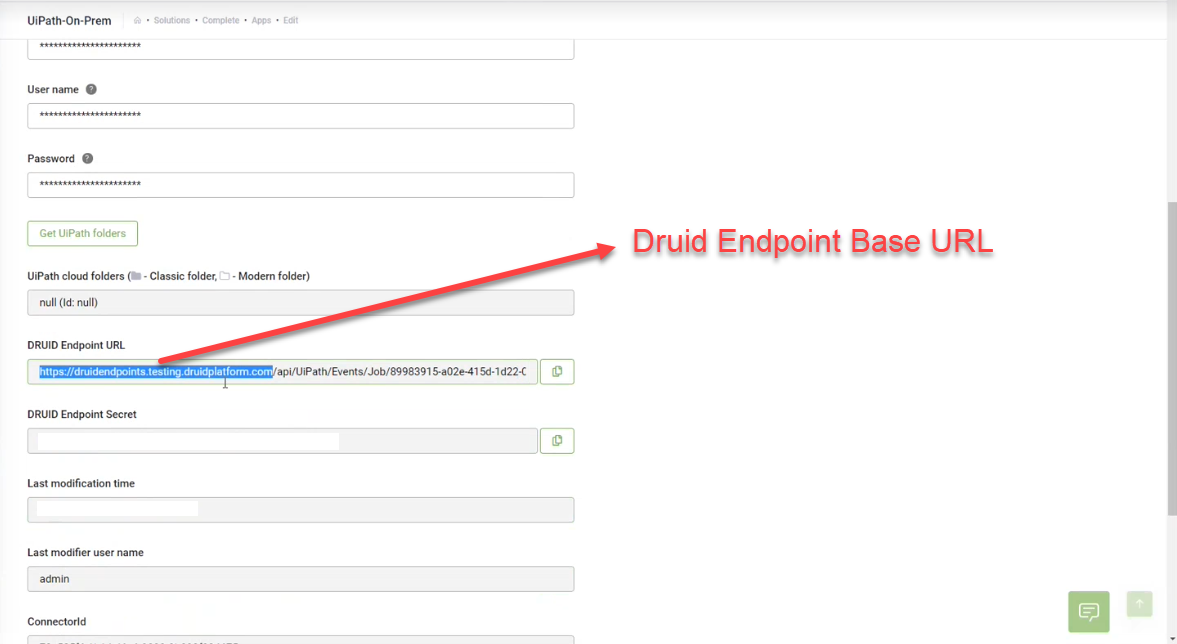
Base URL |
The { Druid Endpoint Base URL} is unique to each environment and it is available in the connector app details, Druid Endpoint URL field.
|
|
Local port number |
The port number to be open on the machine where the Druid Connector Host is installed and can be accessed from another machine within the intranet. |
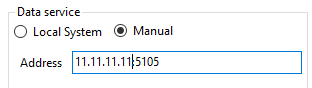
Data Service
If the Data Service and the Connector Host are installed on the same machine, select Local System and from the Local instance drop-down, select the Data Service the Connector Host will connect to.
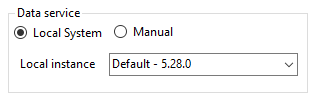
If the Data Service and the Connector Host are installed on different machines, select Manual and provide the address of the server where the Data Service is installed in the following format:<network address>:<port>.
Knowledge Base settings
If you have installed the Knowledge Base Agent on-premises, select Is installed and provide the address of the machine where you installed it, along with the second port you configured in the KB Agent installation parameters (default is 5111).
If the KB Agent and the Connector Host are on the same machine, and you are using the default port for communication between the KB Agent and the Connector Host, enter http://localhost:5111 as the address. Otherwise, enter the second Local URL set in the KB Agent installation parameters.

Allow file manipulation
You can seamlessly save and read files from local disks or network locations through the DRUID Connector Host, enabling richer file-based interactions in your conversations. To enable this, select Use local files, then enter the path where the connector can access the files.

Once you finish setting up the installation parameters, click Next. You’re ready to start the installation. Click Start.
Wait until the installation completes.
If the installation completes successfully, click Finish; otherwise check what went wrong and make sure that you meet the prerequisites and you properly set up the installation parameters.
Step 6: Publish the tenant in the new DRUID Connector
To register the tenant in the connector host application, you need to establish the connection between the portal and the newly installed connector host. Go to the Druid Portal, on the left menu, click Integrations and in the Integrations page, click the Publish button.