Install Druid Connector Host (Old installation procedure)
Prerequisites
- Make a request to Druid Tech Support to activate the hybrid-mode for your tenant.
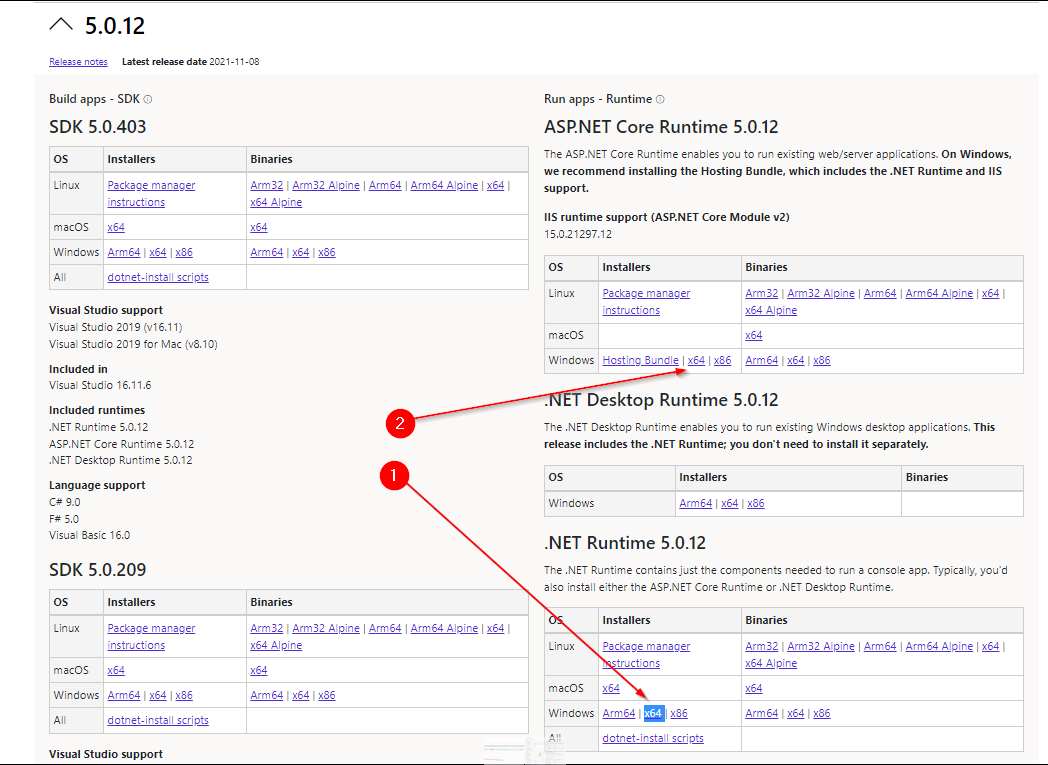
- For Druid Connector Host version 1.53 or higher, ASP.NET Core Runtime 5.0.11 or higher and .NET Runtime 5.0.11 or higher is required on Windows x64.
- You have an SQL Server database that will store the conversation history.
- You have an SQL Server Edition 2016 or above. SQL Server 2012 is still supported but it might be deprecated in future versions.
- Provide access to a dedicated disk storage where Druid Connector Host will store document templates and files uploaded or generated by the chatbot during the conversations.
- You have an admin account to access your Druid Online tenant.
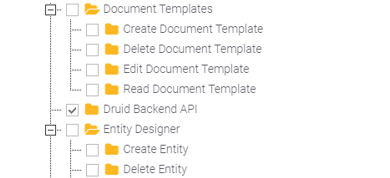
- Create dedicated user in Druid Portal, with “Druid Backend API” permission. For information on how to add user and grant permissions, see Authoring User Management.
- Outbound calls to the following IP addresses are allowed:
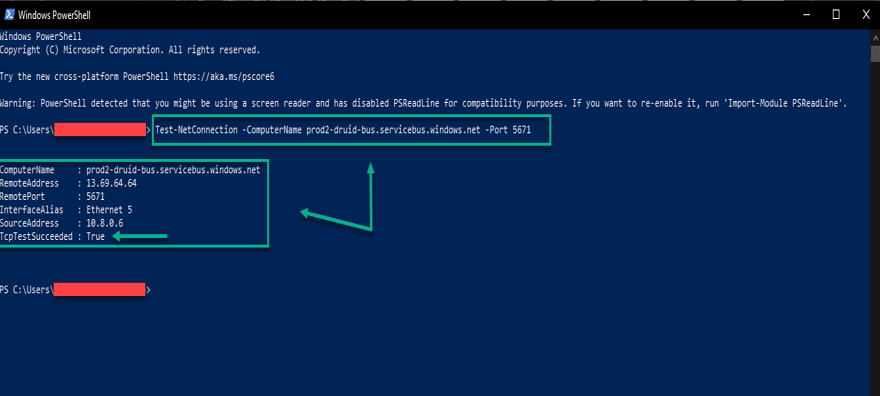
- prod2-Druid-bus.servicebus.windows.net -Port 5671. On the computer where you will host the Druid Connector open the browser and test these outbound calls. To test the connectivity to Druid dedicated Azure Service Bus, in Windows PowerShell run the following command:
-
Outbound call to https://prodDruidbot.blob.core.windows.net (required for in-transit user uploads, with archived data size bigger than 250KB). On the computer where you will host the Druid Connector open the browser and test this outbound call. You should get the following message:
- Outbound for https://<tenantName>.Druidplatform.com (port 443). On the computer where you will host the Druid Connector open the browser and test this outbound call.
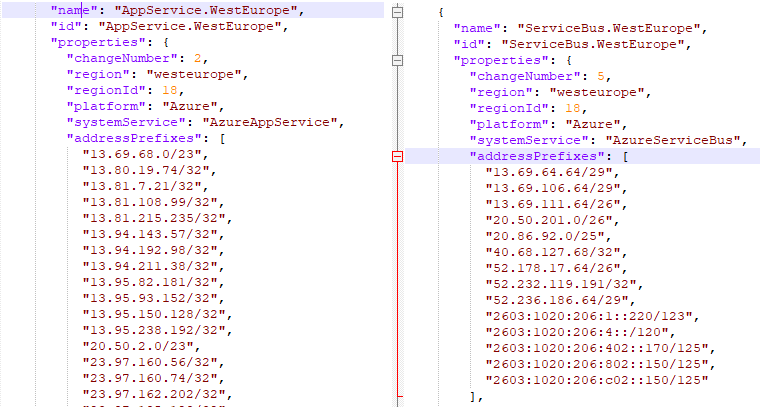
- If there are restrictions in setting up the FQDN rules in firewall for prod2-Druid-bus.servicebus.windows.net, white list the following IP Addresses (for the ports mentioned above) according to Microsoft recommendations: 52.236.186.66., 13.69.106.64 and 13.69.64.64.
-
If you’re using a proxy, if proxy connection requires authentication, grant the Druid Connector Host service permission to use the proxy. If you want to use a direct connection instead, disable the proxy by opening the “Druid.ConnectorHost.exe.config” file and adding the following settings inside the <configuration> tag:
Test-NetConnection -ComputerName prod2-Druid-bus.servicebus.windows.net -Port 5671
<system.net>
    <defaultProxy>
        <proxy usesystemdefault="false" />
    </defaultProxy>
</system.net>
Step 1: Download the Druid CNN Host binaries
- Access the machine where you will host the Druid Connector.
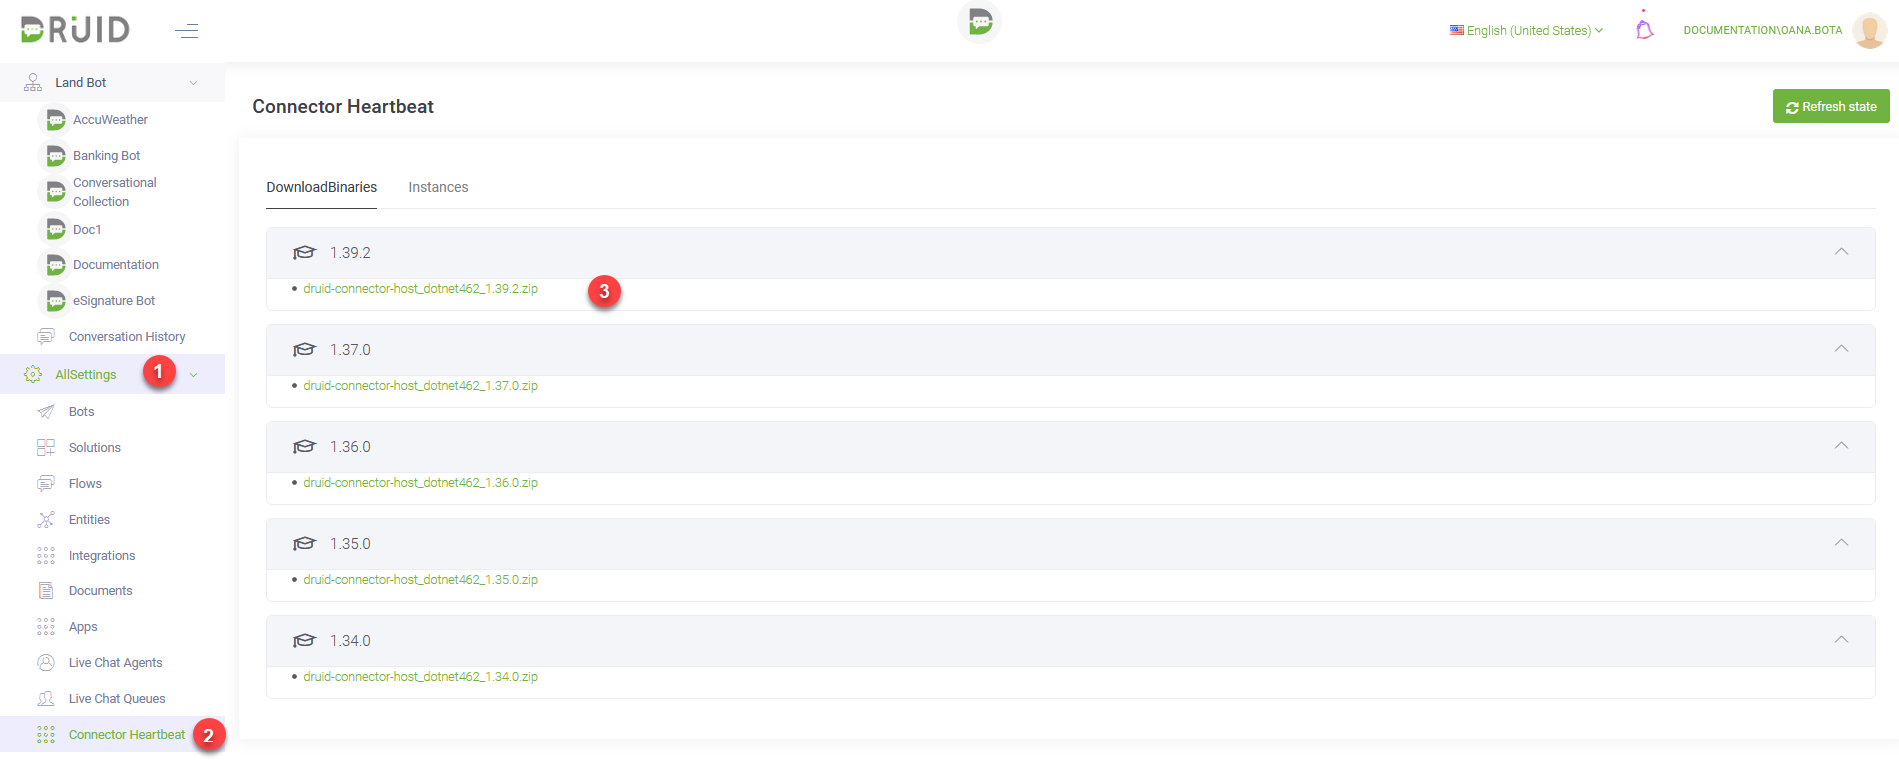
- Access the Druid ChatBot Portal using an admin account and from the left menu select AllSettings > Connector Heartbeat. The DownloadBinaries tab appears by default.
- Download the latest version.
The file is downloaded as zip in the default download folder.
Step 2: Unzip the downloaded file
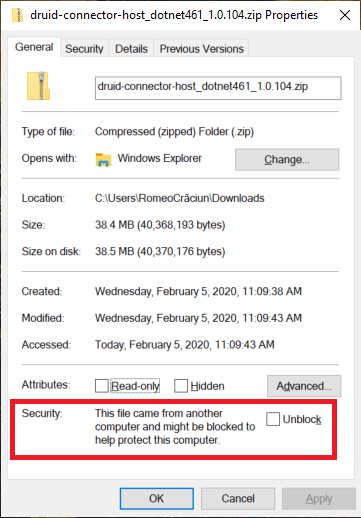
Usually, the URL security zone might prevent the downloaded file execution. Right-click on the file and click Properties, tick the Unblock checkbox, click Apply, then click OK. Unzip the downloaded file into the installation folder, e.g. D:\Druid.
Step 3: Install the Druid Connector Host service
Open the command prompt console, navigate to the installation folder (e.g. D:\Druid) and run the following command:
Druid.ConnectorHost.exe install -servicename "Druid Connector Host" -displayname "Druid Connector Host"- You can customize the ServiceName and DisplayName parameters upon preference (e.g.
–servicename "Druid Connector Host" -displayname "Druid Connector <tenantName>" - By default, the service is installed under The Local System Account. In order to finish setting up the Druid Connector Host, the System Account or the User Account configured for the Druid CNN Host should have Full Control on the installed folder (permission to write/read/create file).
You can always uninstall the Druid Connector Host by running the following command from the command prompt (from the installation folder):
Druid.ConnectorHost.exe uninstall -servicename "Druid Connector Host"Step 4: Configure the connection string to the SQL database that will store the conversation history
- Go to the installation folder and open the configuration file Config/Druid.connection.config.
- Configure the connection to the Druid ChatBot Portal using the Druid Connector Host configuration details received by email:
- Configure the connection string to the Druid Conversation History Database using SQL dedicated user account (SQL username and password):
- Configure the connection to the file storage and define the files uploaded by users and the files generated by the chatbot during the conversations.
<ConnectionConfig>
     <DruidApi>
          <Url>https://tenant_name.Druidplatform.com</Url>
          <Tenant>tenant_name</Tenant>
          <UserNameOrEmailAddress>dedicated_user</UserNameOrEmailAddress>
          <Password>password</Password>
     </DruidApi>
</ConnectionConfig>
<ConnectionStrings>
       <ConversationHistoryDbContext>data source=SERVERNAME;initial catalog=DBNAME;integrated security=False;User ID=<DEDICATED USER>;Password=<DEDICATED PASSWORD>;MultipleActiveResultSets=True;App=DruidConnectorHost
	</ConversationHistoryDbContext>
</ConnectionStrings>
<DocGeneratorConnection name=”<replace with your tenant name>:Document_Generator”>
    <FileStorageFolder>C:\Druid_FileStorage\FileStorage</FileStorageFolder>
    <TemplateFolder>C:\Druid_FileStorage\TemplateStorage</TemplateFolder>
</DocGeneratorConnection>
The configuration file should look like this:
<?xml version="1.0" encoding="utf-8" ?>
<Druid>
   <ConnectorCertificatesEnabled>true</ConnectorCertificatesEnabled>

   <ConnectionStrings>
        	<ConversationHistoryDbContext>data source=server\instance;initial catalog=DruidConversationHistory;integrated security=False;User ID=user;Password=password;MultipleActiveResultSets=True;App=DruidConnectorHost</ConversationHistoryDbContext>
   </ConnectionStrings>

   <ConnectionConfig>
        <DruidApi>
        	<Url>https://tenant_name.Druidplatform.com</Url>
        	<Tenant>tenantName</Tenant>
        	<UserNameOrEmailAddress>dedicated_user</UserNameOrEmailAddress>
        	<Password>password</Password>
        </DruidApi>

        <DocGeneratorConnection name="tenant_name:Document_Generator">
        	<FileStorageFolder>C:\Druid_FileStorage\FileStorage</FileStorageFolder>
        	<TemplateFolder>C:\Druid_FileStorage\TemplateStorage</TemplateFolder>
        </DocGeneratorConnection>

   </ConnectionConfig>
</Druid>
Step 5: Download and install the Connector certificate
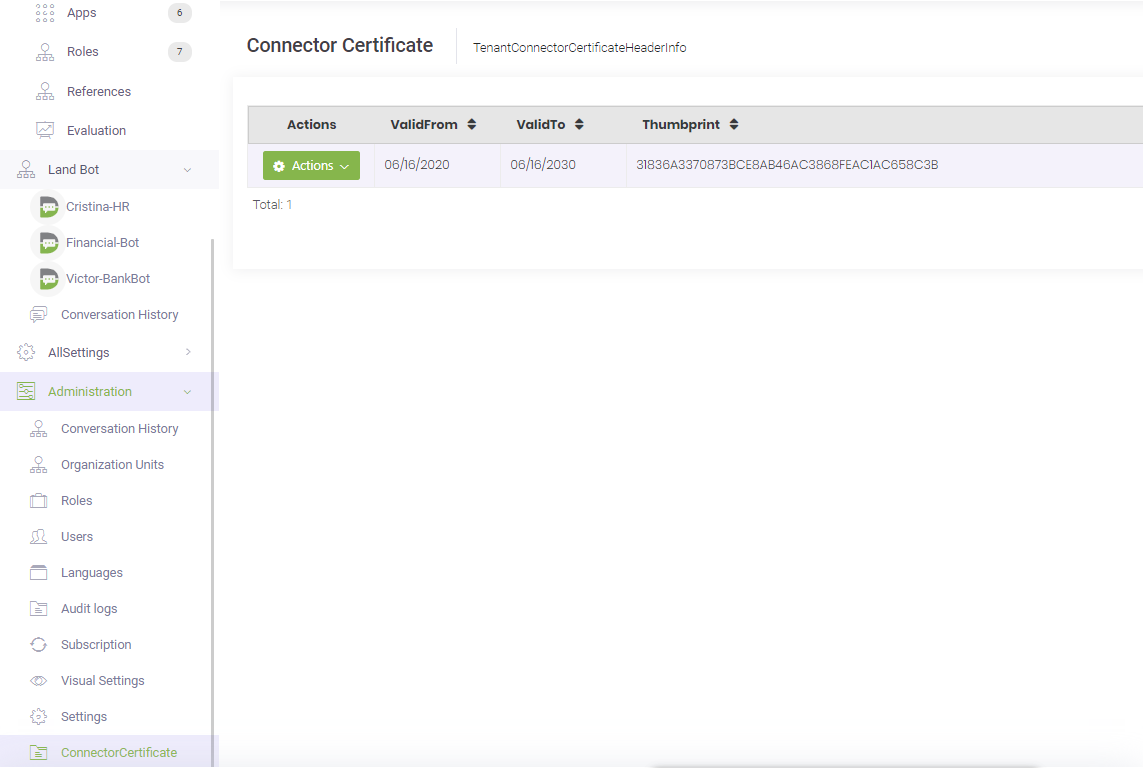
From the left menu, click Administration > ConnectorCertificate. The Connector Certificate page appears.
Click Actions > Download. The certificate is downloaded in the default download folder.
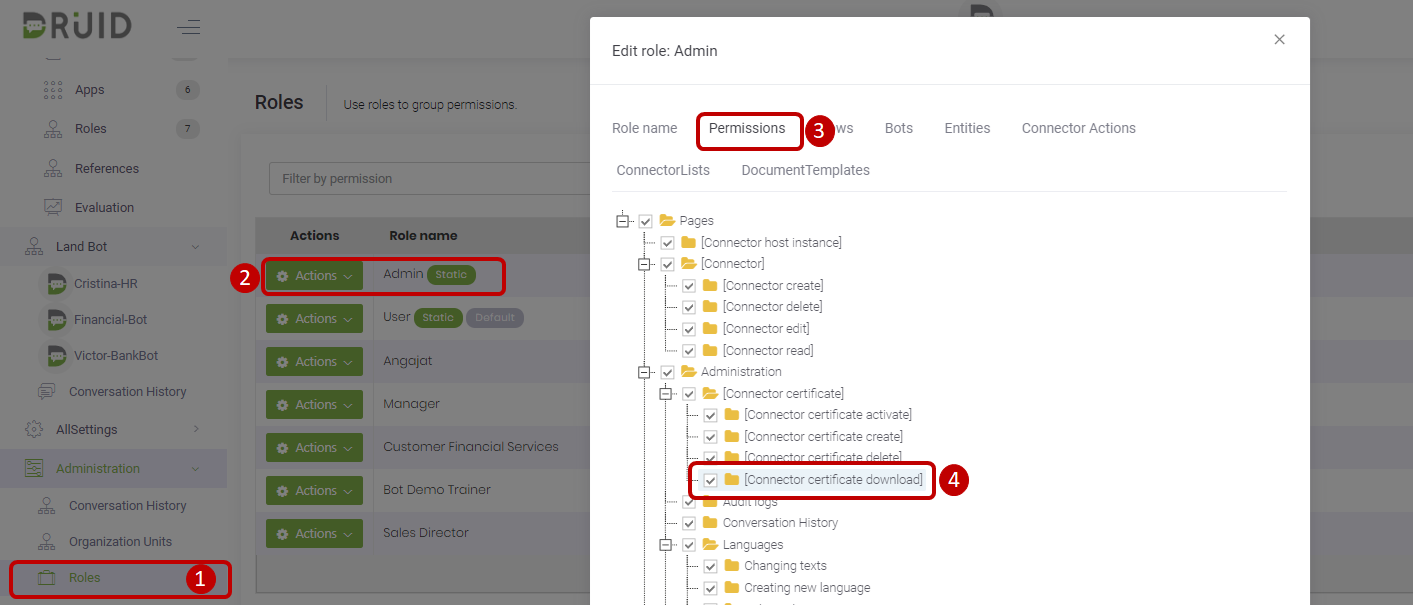
Try downloading the connector certificate again.
After you download the certificate, go to the download folder, right-click on the certificate file and click Properties. Tick the Unblock checkbox, click Apply, then click OK.
Right click on the certificate file again and click Install.
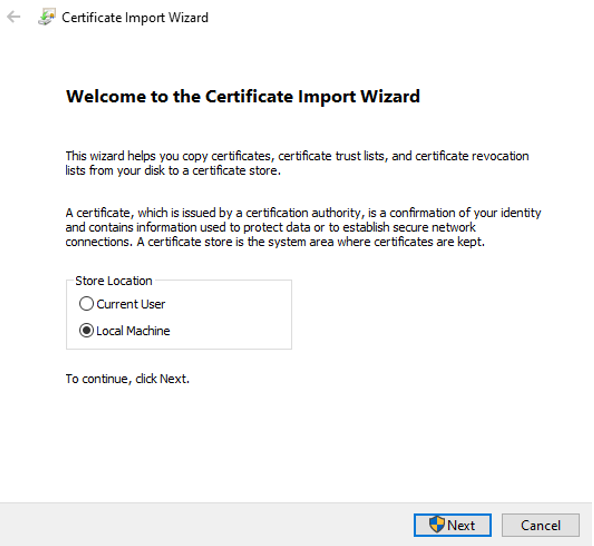
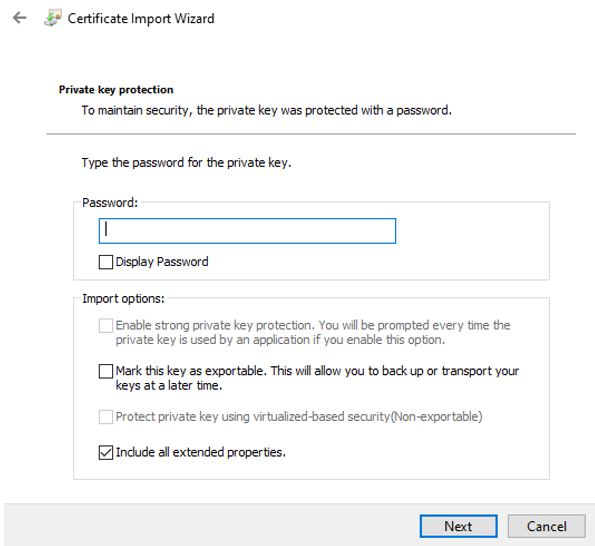
Install the certificate following the installation wizard on screen instructions , for Local Machine (not Current User) and with no Password (leave the password field empty).
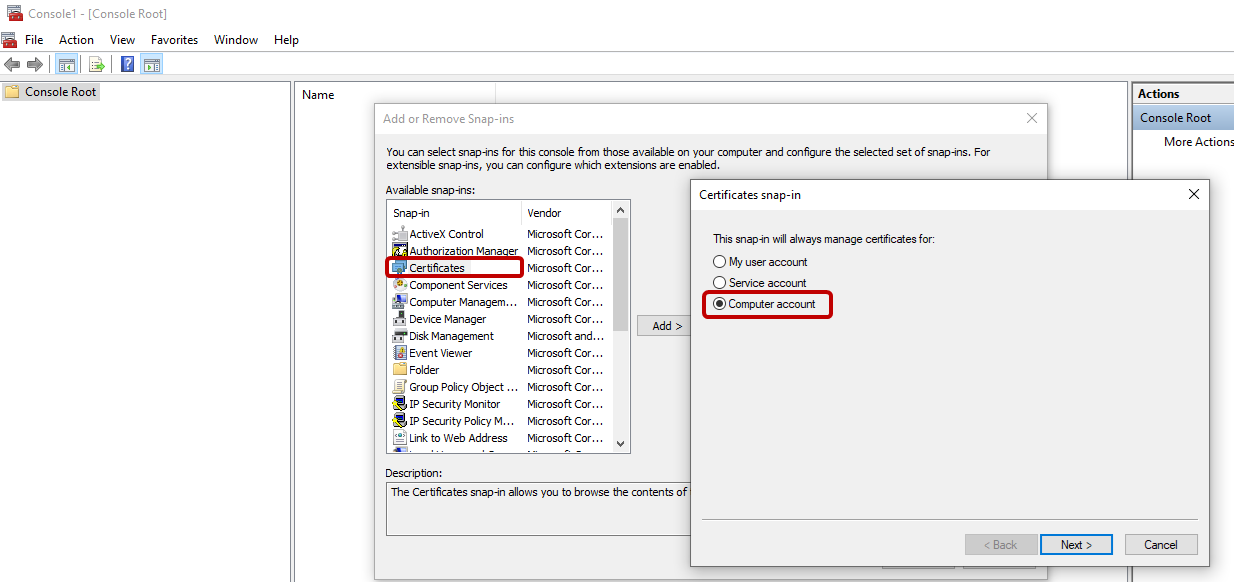
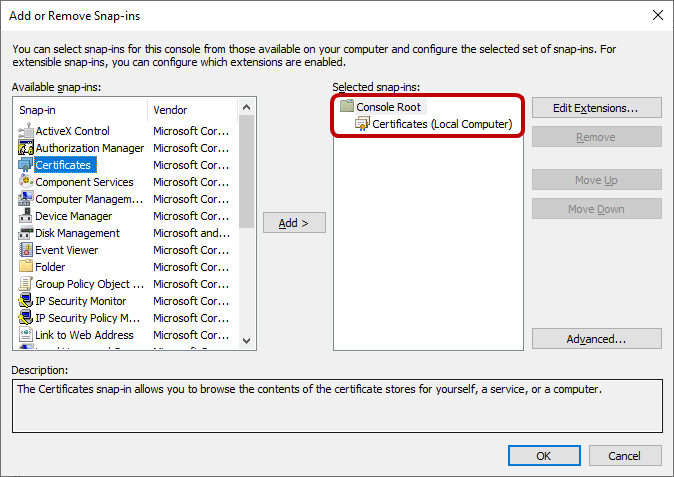
After you complete the installation, check the certificate installation. To do so, run MMC. The Console Root appears. From the File menu select Add/Remove Snap-in… The Add or Remove Snap-ins page appears. Double-click on Certificates. The Certificates snap-in wizard appears.
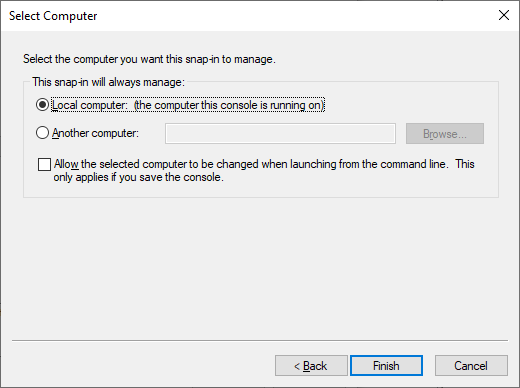
Click Next.
Click Finish.
The snap in selection displays in the list of Selected snap-ins.
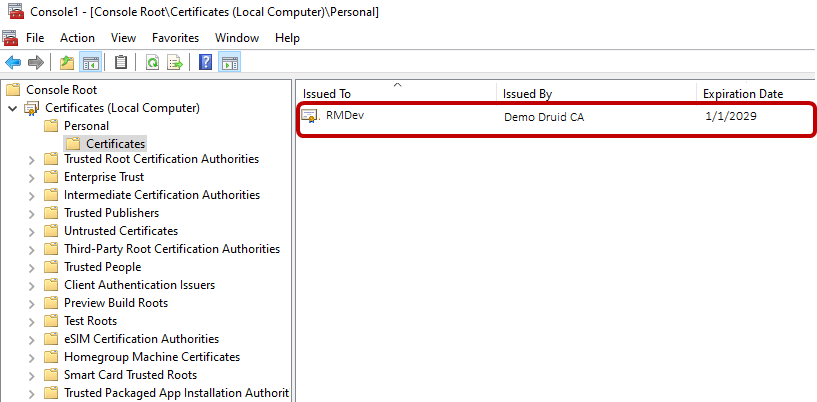
Click OK. From the left menu, click Personal and double click on Certificates. On the right side, check the expiration date of the certificate issued for your tenant name
Step 6: Start the “Druid Connector Host” Service
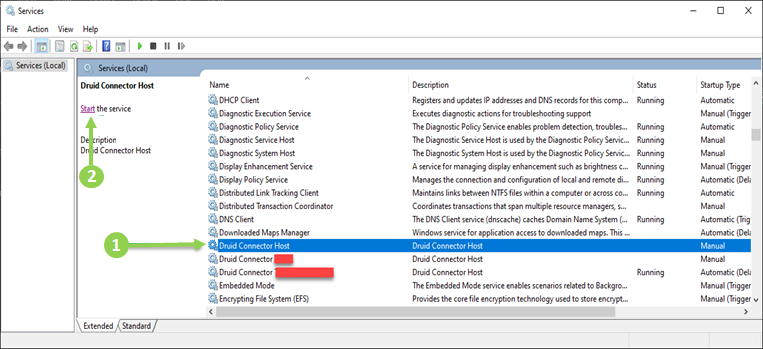
Go to Windows Services, locate the Druid Connector Host service and start it.
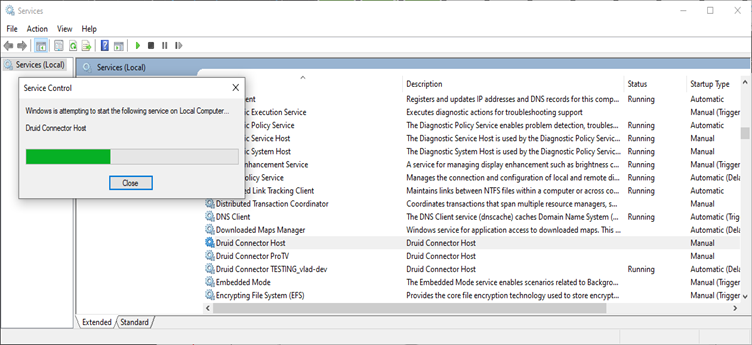
Wait for the starting process to complete, then proceed to Step 7.
If the service fails to start, contact the Druid Support Team for troubleshooting.
Step 7: Publish the tenant in the new Connector Host
To register the tenant in the connector host application, you need to establish the connection between the portal and the newly installed connector host. To do so, go to the Druid ChatBot Portal, on the left menu, click Integrations and in the Integrations page, click the Publish button.
Step 8: Test the Druid Connector connection
To test the connection via the Druid Connector Host, follow these steps:
- Go to the installation folder, open the log file and check the tenant settings received.
- Check the outbound call to the Druid Bus:
- Check the connection with the Conversation History database. To do so, access the Druid ChatBot Portal and from the left menu, click Administration > Conversation History.
Test-NetConnection -ComputerName prod2-Druid-bus.servicebus.windows.net -Port 5671If you get an error message, the Druid Connector cannot connect to the Conversation History database. For details on why that might occur, check the log file in the installation folder.
Once you make sure that the connection is ok, you can start creating connectors for future integrations based on your business needs.
