Creating SendGrid Connectors
SendGrid is a cloud-based SMTP provider that allows you to send email without having to maintain email servers.
DRUID allows you to integrate with Twilio SendGrid service to enable your AI Agents sending emails.
Step 1. Create SendGrid App
Creating a SendGrid app means defining your SendGrid connection strings for the AI Agent within the selected solution.
To create a SendGrid app:
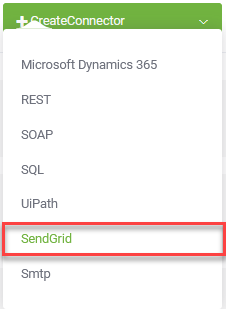
- From the solution main menu, click Apps. The Apps page appears listing the connection strings created for the selected solution.
- Place the cursor at the top-right corner of the page on CreateConnector. A drop-down appears.
- Click SendGrid.
- Provide the details listed in the table below.
- Encryption Key – click the Generate button to generate the key, which will be used by the Encrypt Data task to encrypt the data and by the client / 3rd party application to decrypt the data and use it further.
- Secure encryption with salt – adds a random 64-bits salt to the data before encrypting it. Please note that using this feature requires the client to develop code for data decryption.
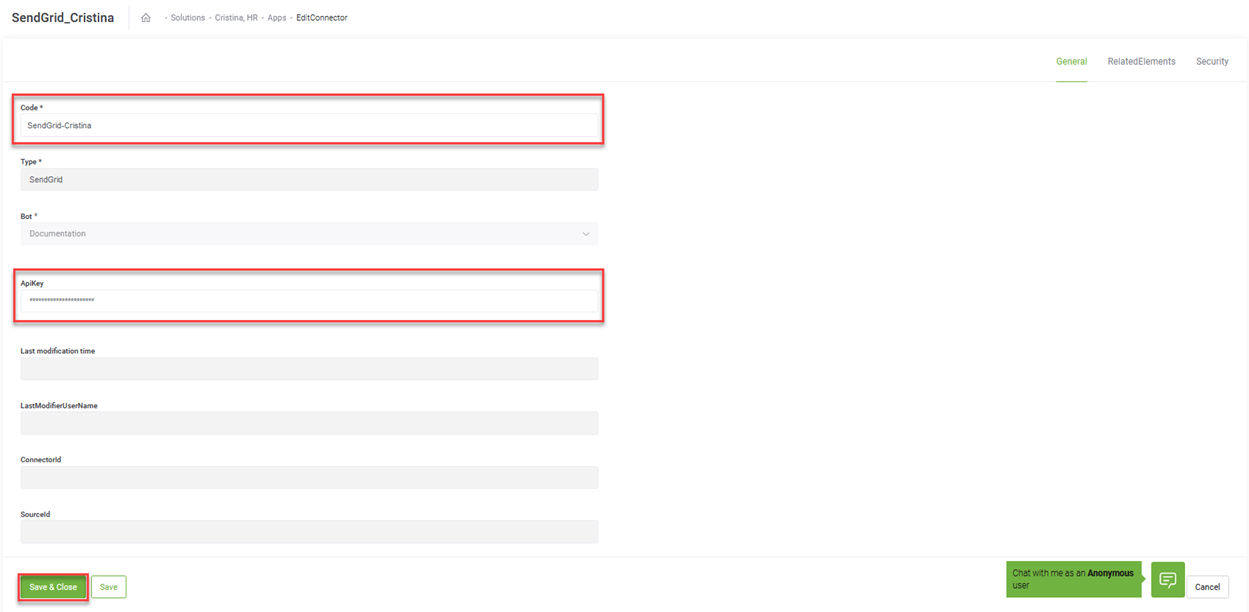
- Click the Save & Close button to save the app.
The Edit Connector page appears.
|
Field |
Description |
|---|---|
|
Code |
Unique name to identify the App. You will reference in each Integration you call from this SMTP App. |
| Icon |
Select the icon that best describes the app. It helps you easily identify the app in the list of apps. If no icon is selected, DRUID default icon per selected app type will be shown in the apps list. NOTE: This field is available in DRUID 1.71 and higher.
|
|
ApiKey |
Enter the Api Key you generated for your SendGrid account, the one you generated for authenticating SendGrid requests. |
| Execution Time |
The maximum number of seconds a request is allowed to execute. By default, the timeout for all connector integrations is 60 seconds. This setting will apply to all connector tasks which use this app. NOTE: This field is available for DRUID version 1.60 or higher and requires Connector Host upgrade.
IMPORTANT! To avoid long execution time for an integration with many tasks, in DRUID 5.4 and higher, the maximum sum of all timeouts configured on an integration is 250 seconds. Whenever this maximum is reached, the execution of the currently running integration task is interrupted and any subsequent integration tasks are no longer executed.
|
| Encryption Type |
NOTE: This feature is available in DRUID version 1.61 or higher and requires Connector Host upgrade.
Enables data encryption on the connector using the AES CGM encryption algorithm and allows authors to encrypt specific data before sending it to external SendGrid apps, by using the Encrypt Data integration task as first task in the desired connector action. When you select AES CGM encryption algorithm (the only one currently available), two new options are available: For more information, see Encrypt Data. |
Step 2. Create Integration Actions
Connector Action (Integration) only represents a host for a group of one or more integration tasks. The integration technology / type (SQL, REST, SOAP, SMTP, etc.) is defined at task level, not at action (integration) level.
Example: If, at a certain point in the conversation flow, you need to send an email to the client, but the necessary data for that email comes from 2 different sources, you can create a single action which always performs the 3 operations, sequentially (getting email address from an SQL Database, then getting some HR data via a REST API call, and then sending this data to that email address using a SMTP call). From the flow designing point of view, you only place one integration action on the flow step.
If a connector action (integration) has more tasks, the response data will be returned to the flow only after ALL tasks inside the action have run. Implicitly, data in the response entity might be altered by the execution of each task. Also, tasks within the same action can be of different types (SQL, REST, SOAP, SMTP, etc.).
Thus, at Connector Action (Integration) level, only the general information is saved, and used for describing and identifying the action.
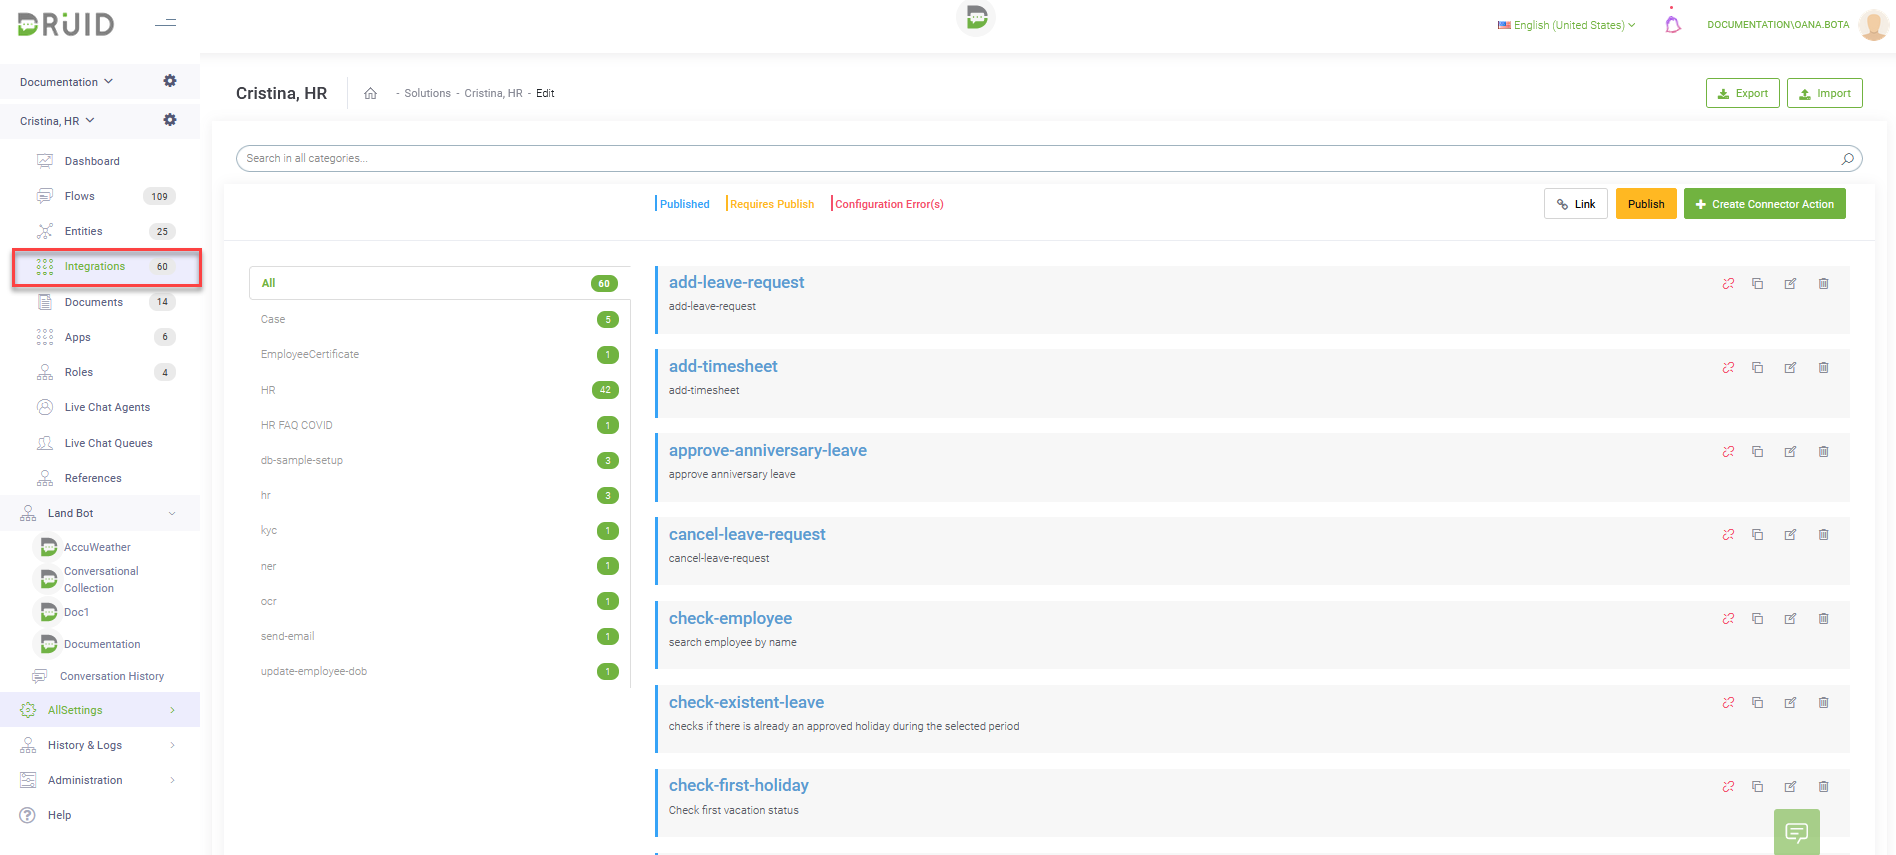
Using the solution’s Connector Designer, you can define the integration actions and tasks:
- From the main menu, click Integrations. The Connector Designer appears.
- At the top-right corner of the page, click the Create Connector Action button (
 ). The Edit Connector Action page appears by default on the ConnectorGeneral tab.
 - Provide the connector action general details by setting up the parameters described in the table below.
- Click Save to save the settings and stay on page to add tasks, or click Save & Close to save and exit the page. If you click Save, the ConnectorSteps tab appears.
|
Parameter |
Description |
|---|---|
|
Name |
The name of the action. The field is mandatory. |
|
Description |
A brief description of the action that might be useful for other tenant admins. The field is mandatory. |
|
Category |
Define on the spot when creating the action. Useful when you want to find the actions in the Integrations list. The field is mandatory. |
|
Request Entity Name |
Select Email. The AI Agent uses the [[Email]] entity to send emails to the SMTP server via the current action. |
|
Response Entity Name |
Select Email. The AI Agent uses the [[Email]] entity to receive notifications from the SMTP server via the current action. |
|
Is Active |
Tick to activate the connector action. An inactive connector action is ignored at runtime. |

You can add as many connector actions as best suit your integration needs.
Step 3. Add Integration Tasks
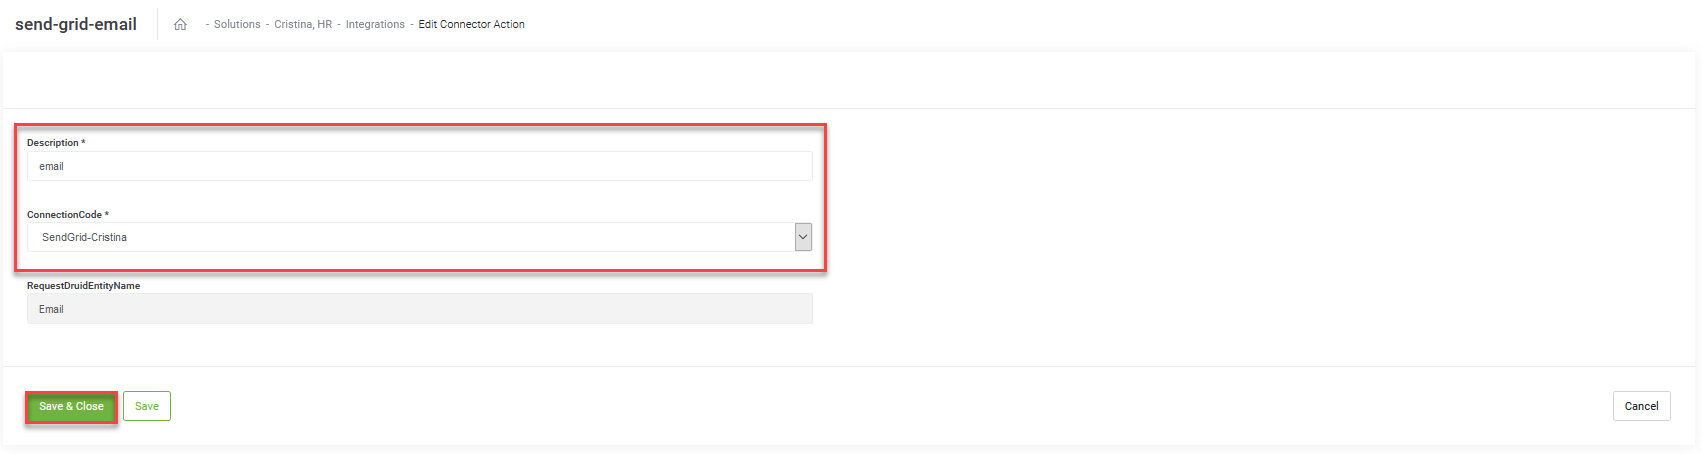
- At the top-right corner of the Edit Connector Action page (ConnectorSteps tab), click on the Create Task button, and then click Send email with SendGrid. The Edit Connector Task page appears by default on the General tab.
- Set the general parameters:
- Click the Save button.
|
Parameter |
Description |
|---|---|
|
Description |
Provide a brief relevant description of the task to be performed. |
|
ConnectionCode |
Select the SendGrid app you created at Step 2. |
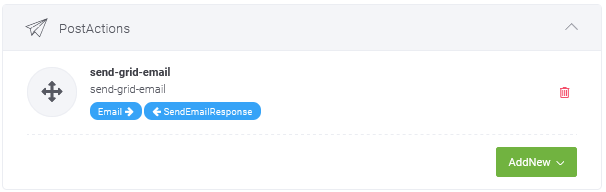
Step 4. Use Integration Action on Your Flow
On your flow, add a step for sending emails and configure it as follows:
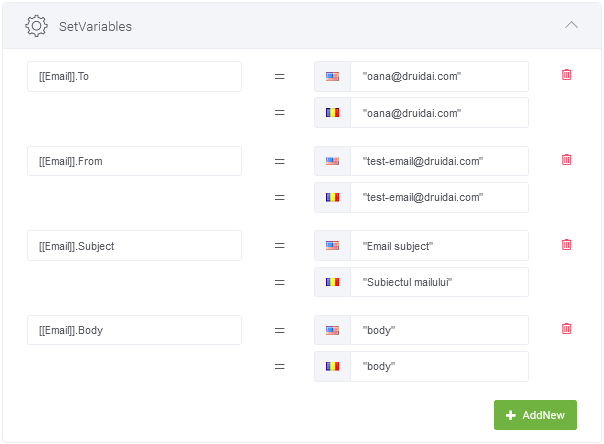
- Click the Set Variables section header and add the following variables:
- Click the PreActions/PostActions section header and select the integration action you created for sending emails via the SMTP server.
- Click the Save button to save the flow step.
|
Variable |
Description |
|---|---|
|
[[Email]].To |
The main recipient(s) of the email. If you want to send email to more than one person (email address), separate their email addresses using semicolon, no spaces. E.g., “person1@emailaddress.domain;person2@emailaddress.domain” |
| [[Emai]].Cc | The email address(es) to which a copy of the email will be sent to other than the main recipient(s) of the email. The other recipients will see that someone else has been sent a copy of the email. |
| [[Email]].Bcc |
The email address(es) to which a copy of the email will be sent to other than the main recipient(s) of the email. The other recipients won’t be able to see that someone else has been sent a copy of the email. |
|
[[Email]].From |
The email address from which emails are sent. It is the email address reserved by your system administrator for the AI Agent. E.g., no-reply@Druidai.com. |
|
[[Email]].Subject |
A short description about the objective or primary topic of the email. It is the first text recipients see after the sender name when an email reaches their inbox. |
|
[[Email]].Body |
The email content. If you want to include HTML in the email body, you can do so by escaping the double quotation mark (“”) and replacing it with backslash (\). For an example, see Email Body. |
If you want to add attachment to the email and you uploaded file to a previous step, you also need to add the variable [[Email]].Attachment and in the value field, type the name of the file to be sent as email attachment. E.g., [[Email]].Attachment1 = [[Employee]].File.