Druid Data Service
Druid Data Service is Druid data storage used to persist Druid entity records created and managed within the Druid Platform simplifying records authoring. authors can further use these records in NER training and in other different contexts. For example, if you have a CRM where you keep your Accounts list, you can have as well a Data Service from Druid where you can keep the account records list.
This section describes how to enable Druid Data Service in a cloud deployment. If you want to use Druid Data Service in a hybrid deployment, you need to install it. For information on how to install Druid Data Service, see Druid Data Service Installation.
Review and upgrade Druid Data Service
Go to Administration > Settings. Click the Druid Data Service tab and click the Review & Upgrade button.
Druid screens all existing entities across all AI Agents on your tenant and detects the entities that have fields for which the field type is incompatible with the required system field type. You can go through the list and click on entity (entities) to see which field types were found incompatible.
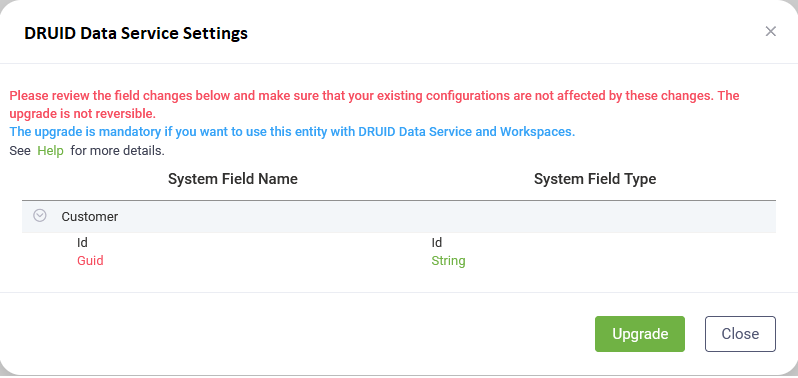
The following Druid system fields are automatically populated on entity and entity field creation; therefore, a specific field type is required by Druid.
| Druid System Field | Druid field Type |
|---|---|
| Id | String |
| CreatedByUserId | String |
| CreatedOn | DateTime |
| ModifiedByUserId | String |
| ModifiedOn | String |
| OperatedByBotId | String |
Click the Overwrite entity fields button at the bottom of the pop-up to overwrite your existing field types to the ones required by Druid.
At the top-right corner of the page, click the Save all button.
Use Druid Data Service Connector to manage entity records within the conversational flows.
Add Data Service Indexes
You can optimize Data Service queries for entities with a large volume of records by adding indexes directly within the Druid Data Service DB. To add an entity index, follow these steps:
- Navigate to Administration > Settings and access the Druid Data Service Tab.
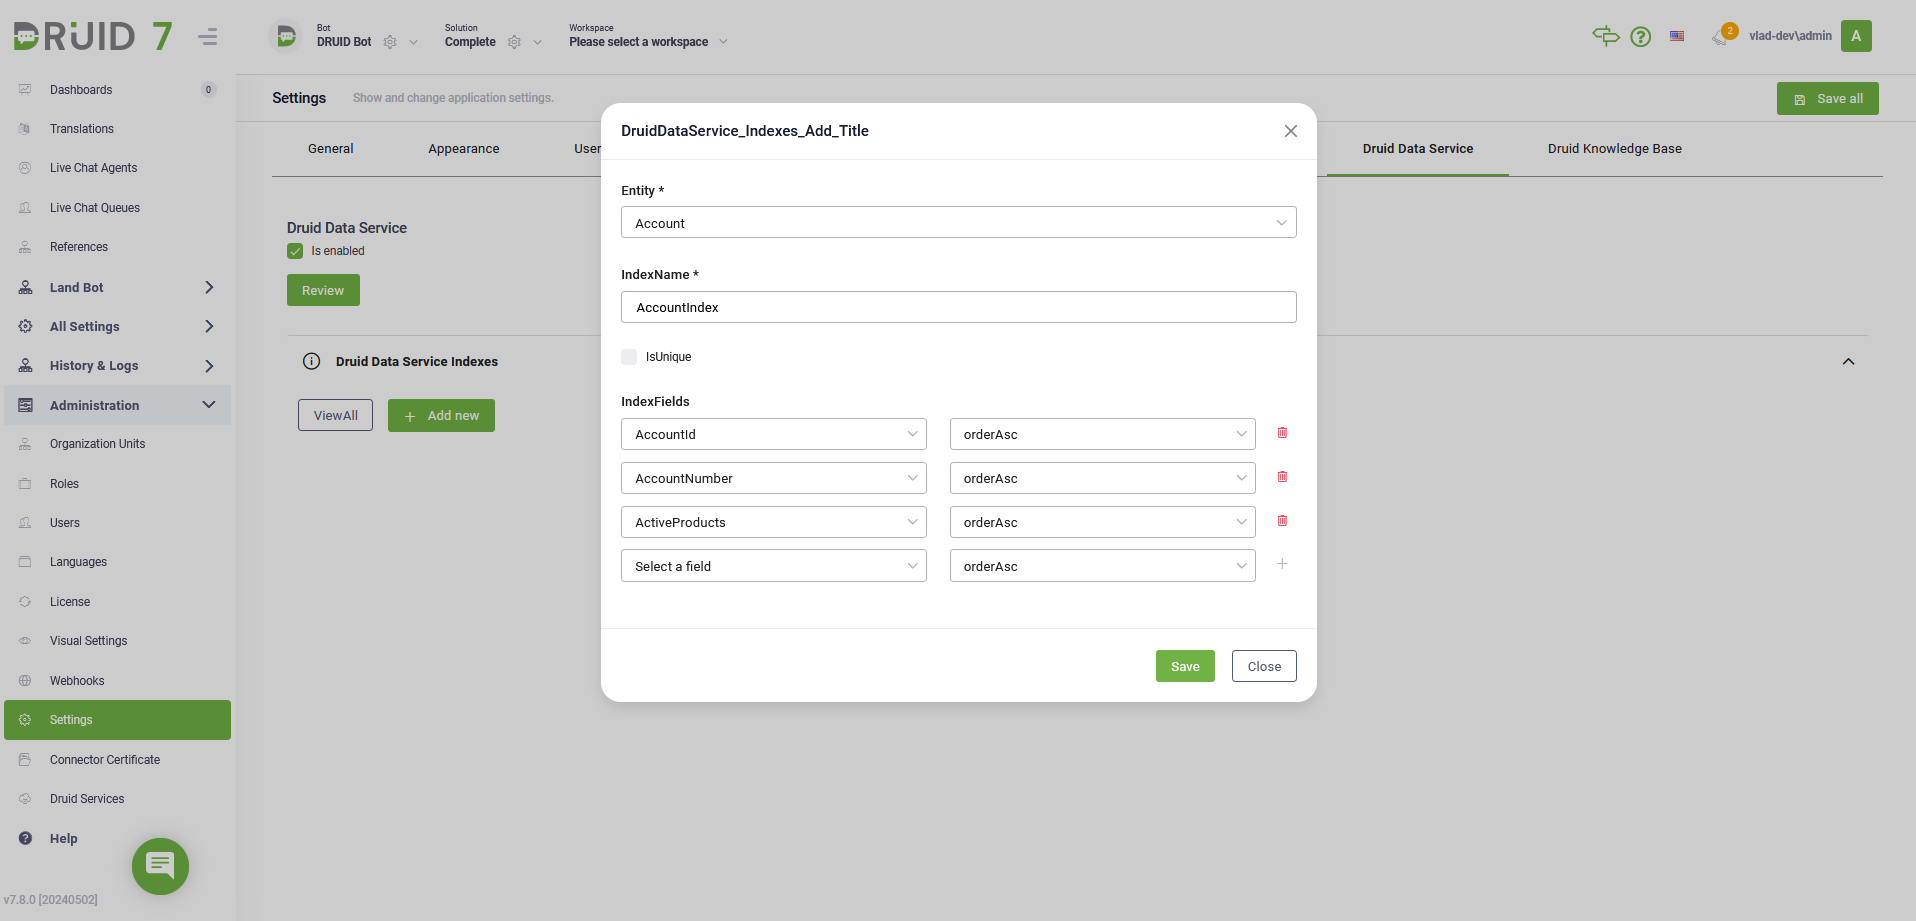
- In the Druid Data Service Indexes section, click the Add New button. The Druid Data Service Add Index modal opens.
- In the modal, select the desired Entity and provide an Index Name. Optionally, add specific entity fields to the index in the 'Index Fields' area.
- Save the index.
Feel free to add as many entity indexes as needed to suit your requirements.
Review entity indexes
To review existing entity indexes:
-
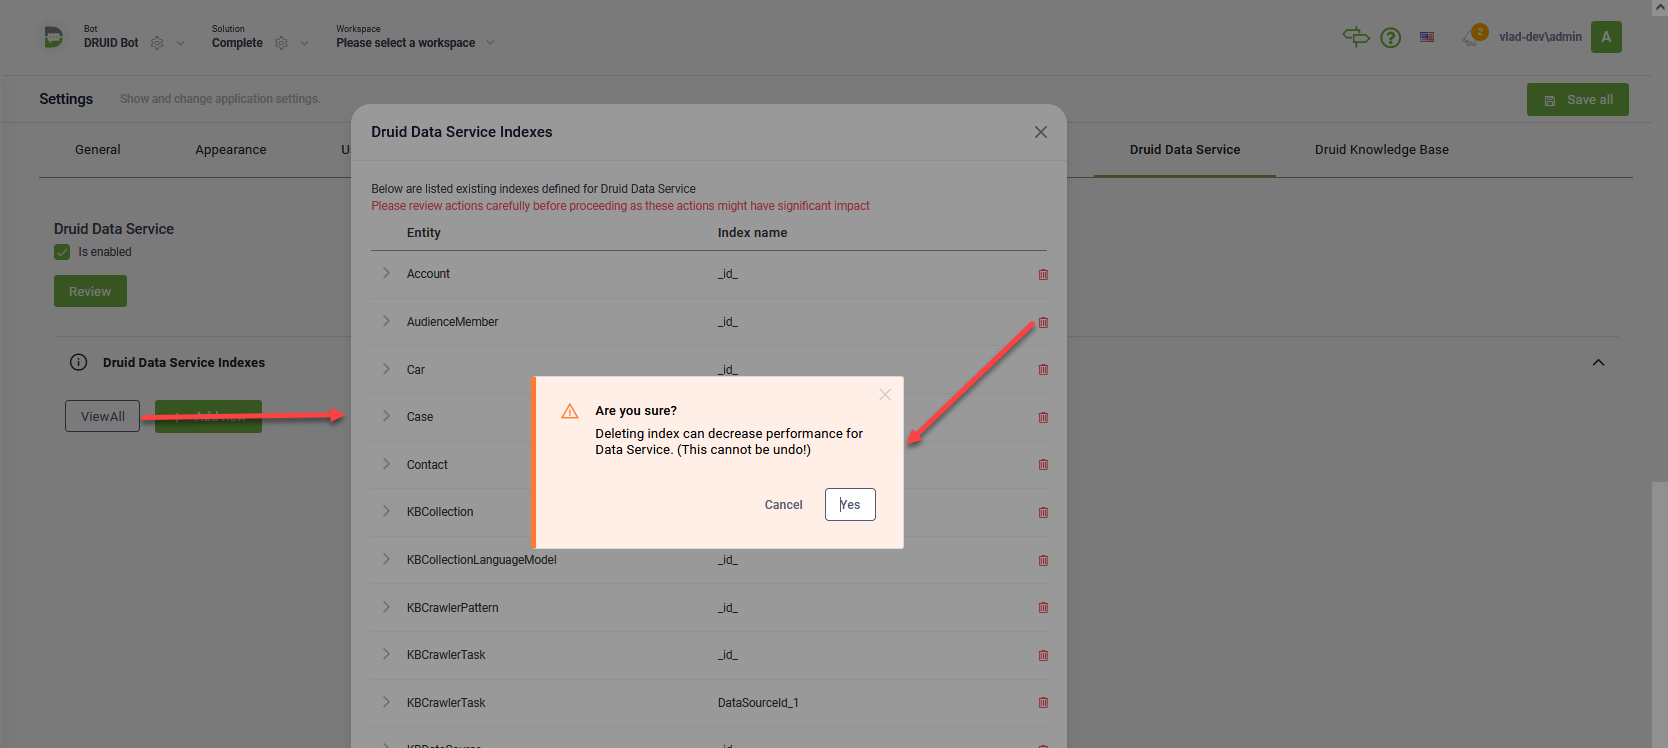
Click the View all button in the Druid Data Service Indexes section.
-
A modal opens that lists all indexed entities.
-
You can manage indexes by removing them using the corresponding delete icon.
Druid Data Service indexes offer improved query performance and greater control over data retrieval, enhancing the efficiency of your Druid experience.
Analyze Data Service Performance (Worst Calls)
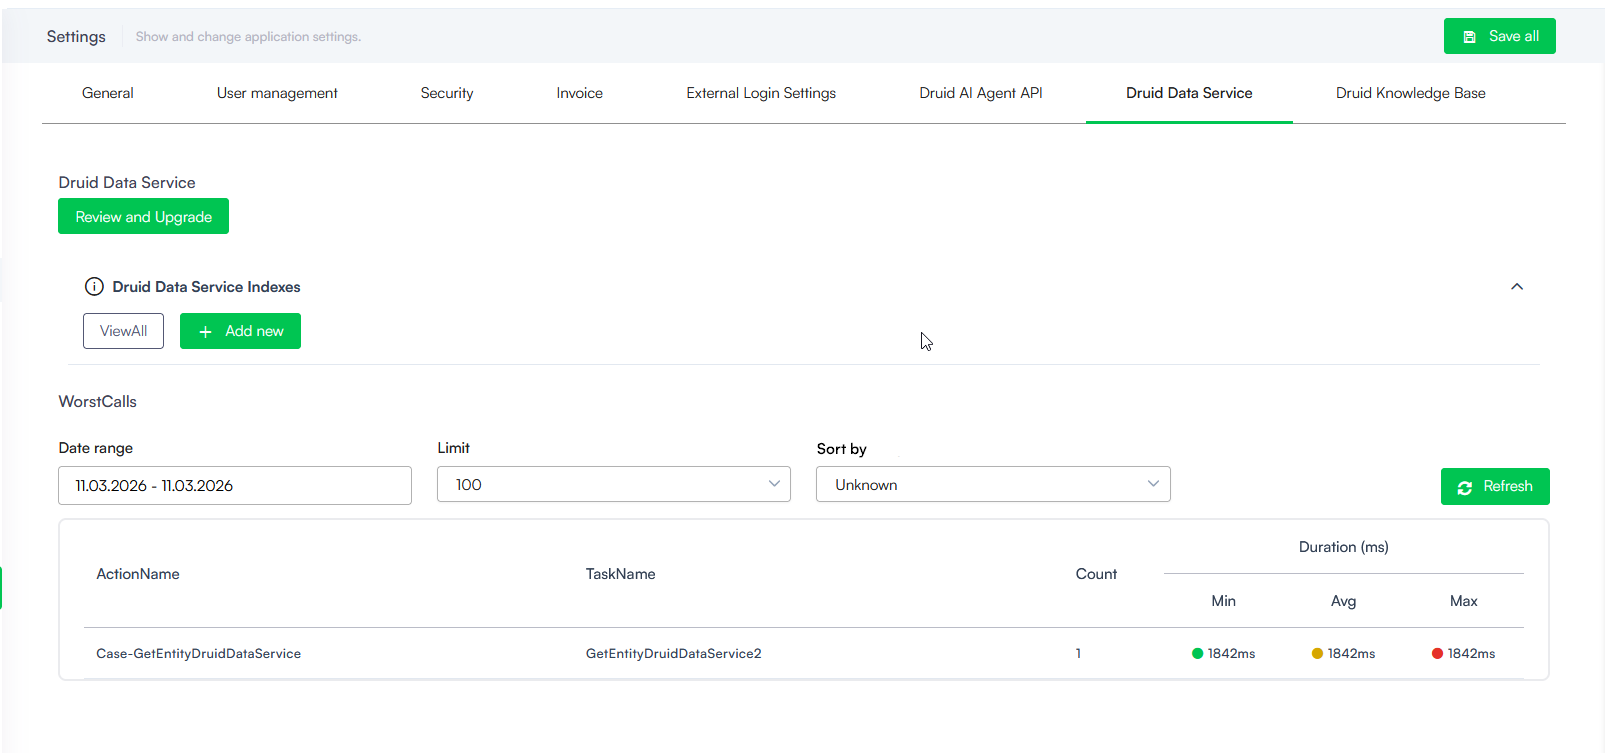
The WorstCalls section allows you to monitor and optimize your Data Service performance by identifying integrations that may be affecting your AI Agent efficiency. This table automatically displays all Data Service integrations that took longer than one second to execute.
Monitoring these calls is a key performance optimization step. If an integration consistently appears in this list, you should analyze it to determine if the integration logic needs improvement or if you should add a Druid Data Service Index to the specific entity used in that integration to speed up data retrieval.
The table provides the following details for each slow call:
- Action Name & Task Name. Identifies exactly which integration and task are experiencing delays.
- Count. The number of times the task exceeded the one-second threshold within the selected date range.
- Duration (ms). Displays the Min, Avg, and Max execution times. These are color-coded (Green, Yellow, Red) to help you quickly visualize the severity of the latency.
Filter and Sort Worst Calls
You can customize the data displayed in the table using the following controls:
- Date range. Select the specific time period you want to analyze.
- Limit. By default, the table displays a maximum of 100 records. You can adjust this limit by selecting a different value from the drop-down menu to view more or fewer results.
- Sort by. Use this drop-down menu to organize the records based on your troubleshooting needs. You can sort the results by:
- Avg Duration. To find tasks that are consistently slow.
- Max Duration. To identify the single slowest execution instances.
- Count. To see which slow integrations are triggered most frequently.
After making changes to your configuration or adding indexes, click the Refresh button to update the table with the latest performance data.