Connector Designer
The Connector Designer enables authors to create complex automations. It allows you to define the integration steps (for a connector action), add integration tasks, set conditions on integration tasks, link tasks, etc.
Access the Connector Designer
To access the Connector Designer, in your connector action, click the Connector steps tab and the diagram icon.

The Connector Designer appears.

The Actions menu provides you with extensive options to edit and analyze the flow and the flow steps.
|
|
Settings. Edit the selected integration task. |
|
|
Info. View and edit the current integration (connector action) details. |

|
Code. Provides you with the JSON structure of the connector action and a comprehensive historical record of all changes made by authors to the integrations (Audit trail tab). For information on how to view the flow changes, see Review flow changes.htm. NOTE: The Audit feature is available in technology preview in DRUID version 7.8.
|
|
|
Analytics. View integration analytics. |


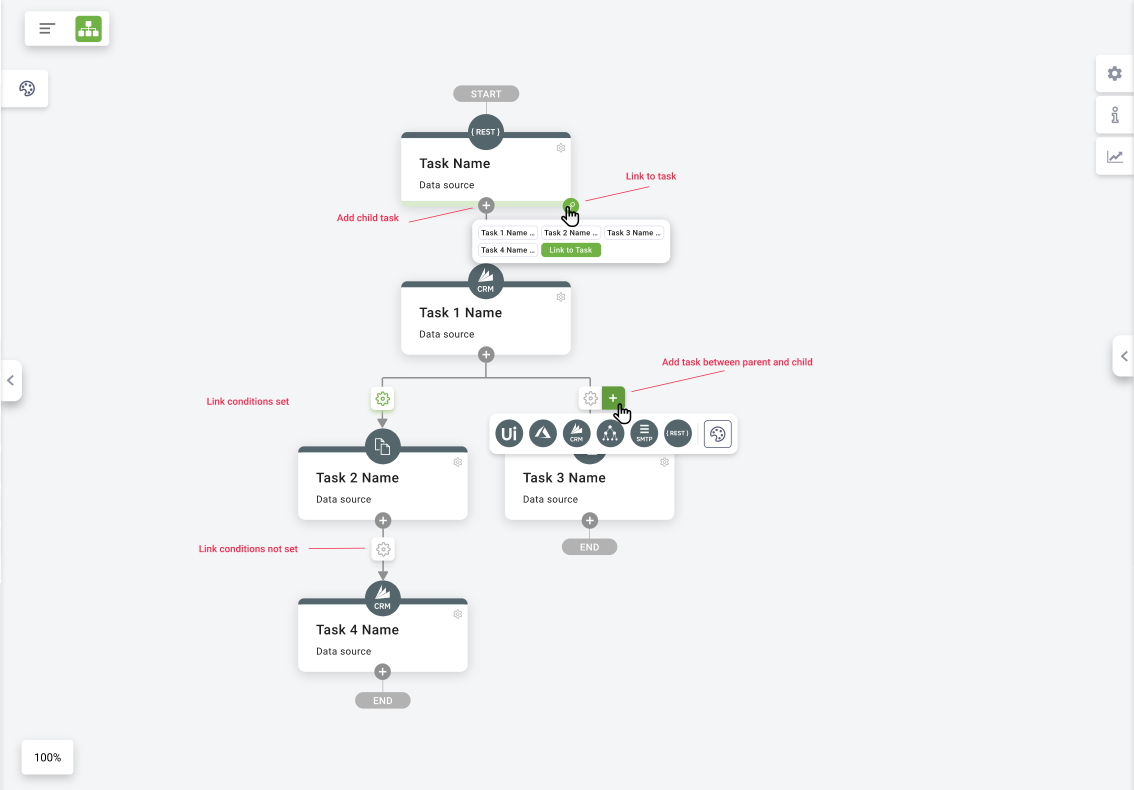
In the Connector Designer, all integration tasks are connected by strong links ( ). The last integration tasks is marked with END.
Add integration tasks
On the connector (arrow), place the mouse over the add icon ( ) and select the desired integration type you want to add. By default, you can select from the six most common integration tasks types. If you want to add other available integration tasks types, use the Connector Palette (
 ).
).
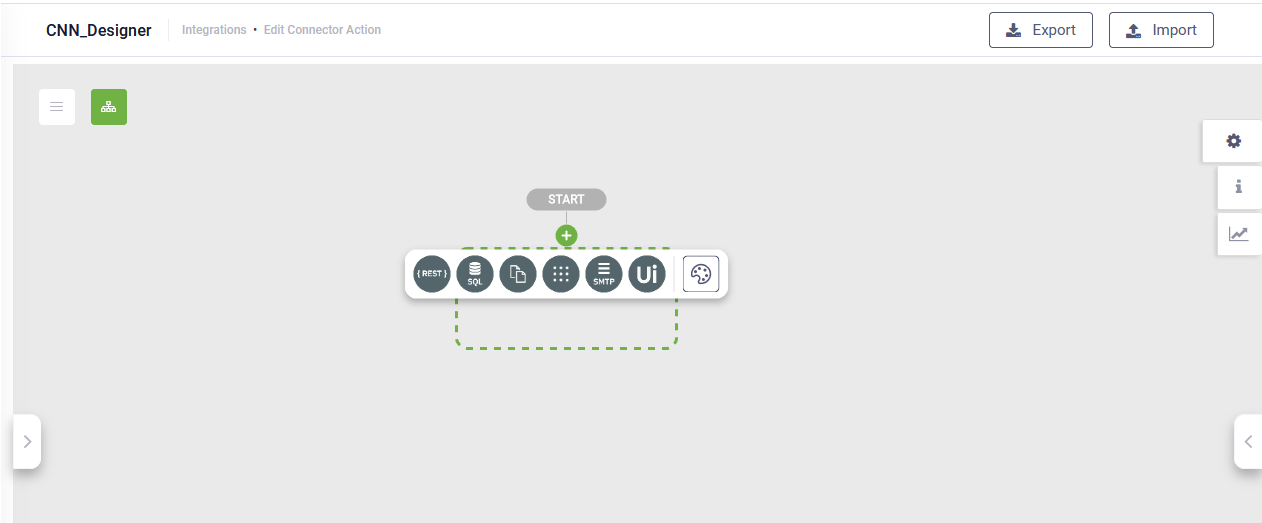
You can also use the Connector Palette to add integration tasks, except for the first one.
Set conditions
On the connector (arrow), the place the mouse over the settings icon ( ) and click on it. The Update link condition editor appears on the right. Define which condition should be met for the next integration task to be executed. The green Settings icon (
 ) on the connector indicates that a condition is defined on the integration task.
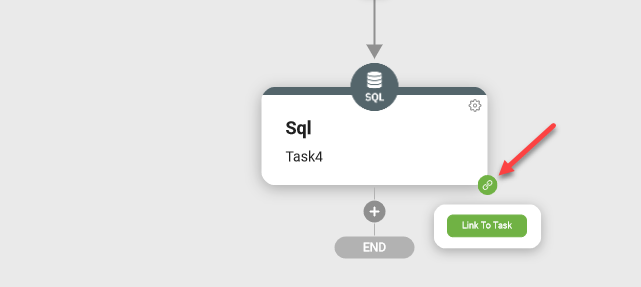
Link two integration tasks
Linking integration tasks is useful when you want to jump on another existing integration task (up or down) when a given condition is met.
To link two integration tasks, place the cursor on the task you want to link, hover over the link icon and click Link to Task.
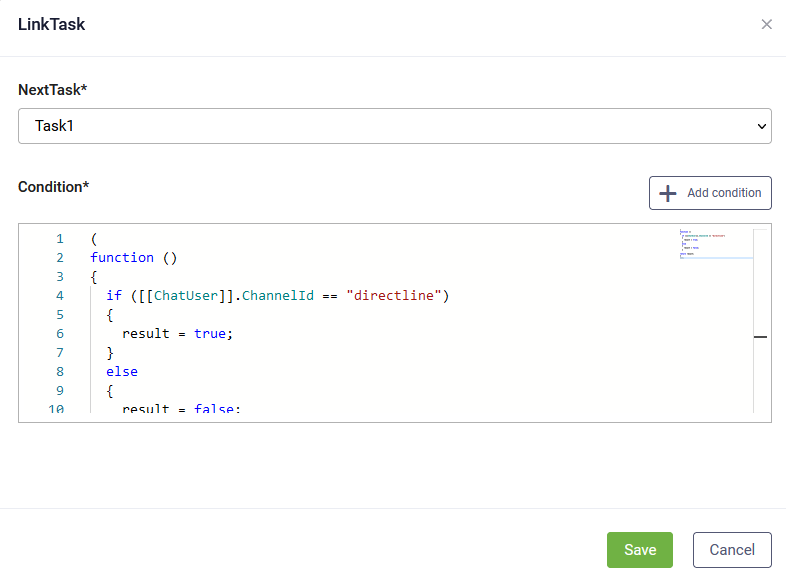
The LinkTask page appears. From the drop-down, select next task to be executed if the condition you define on this page is met.
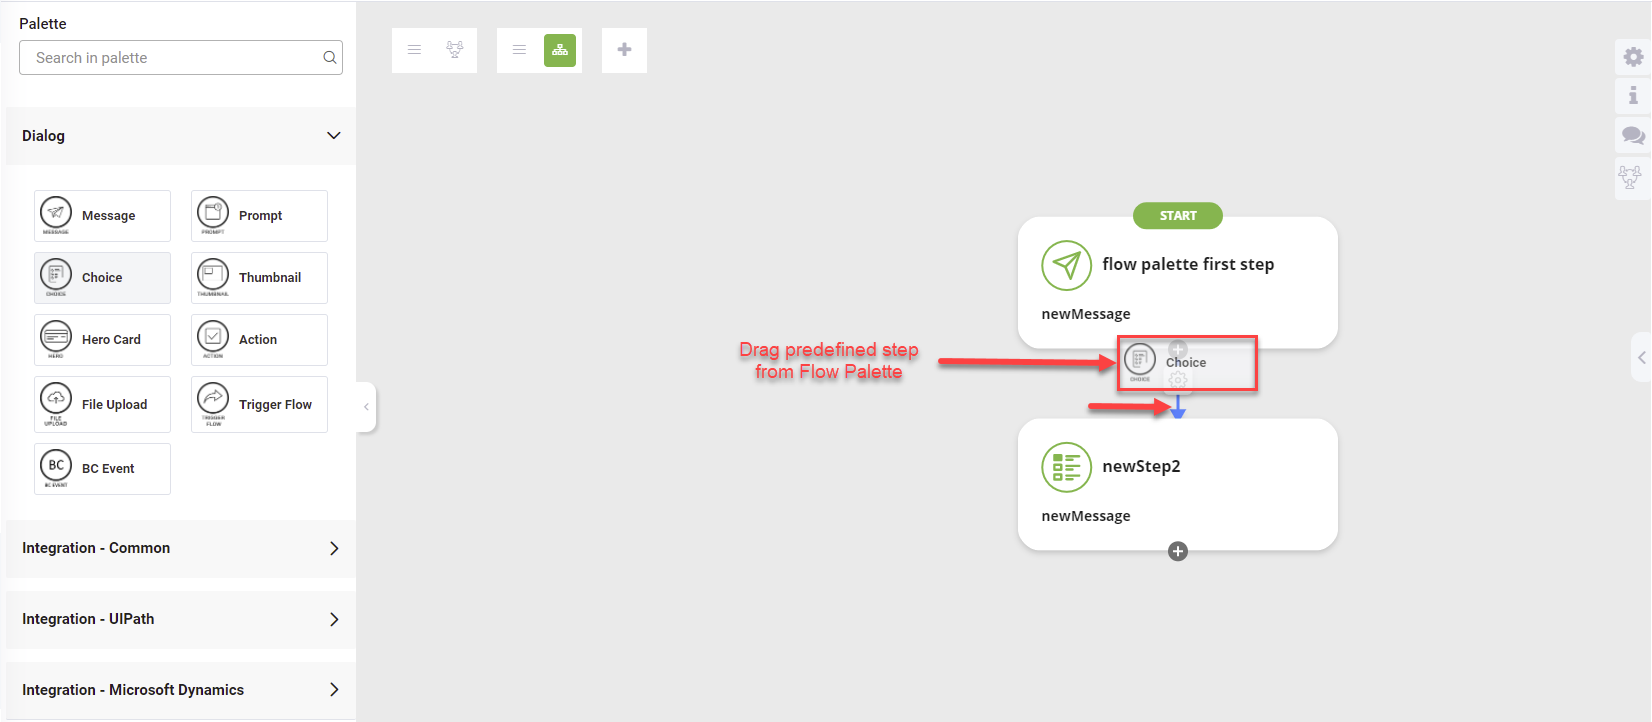
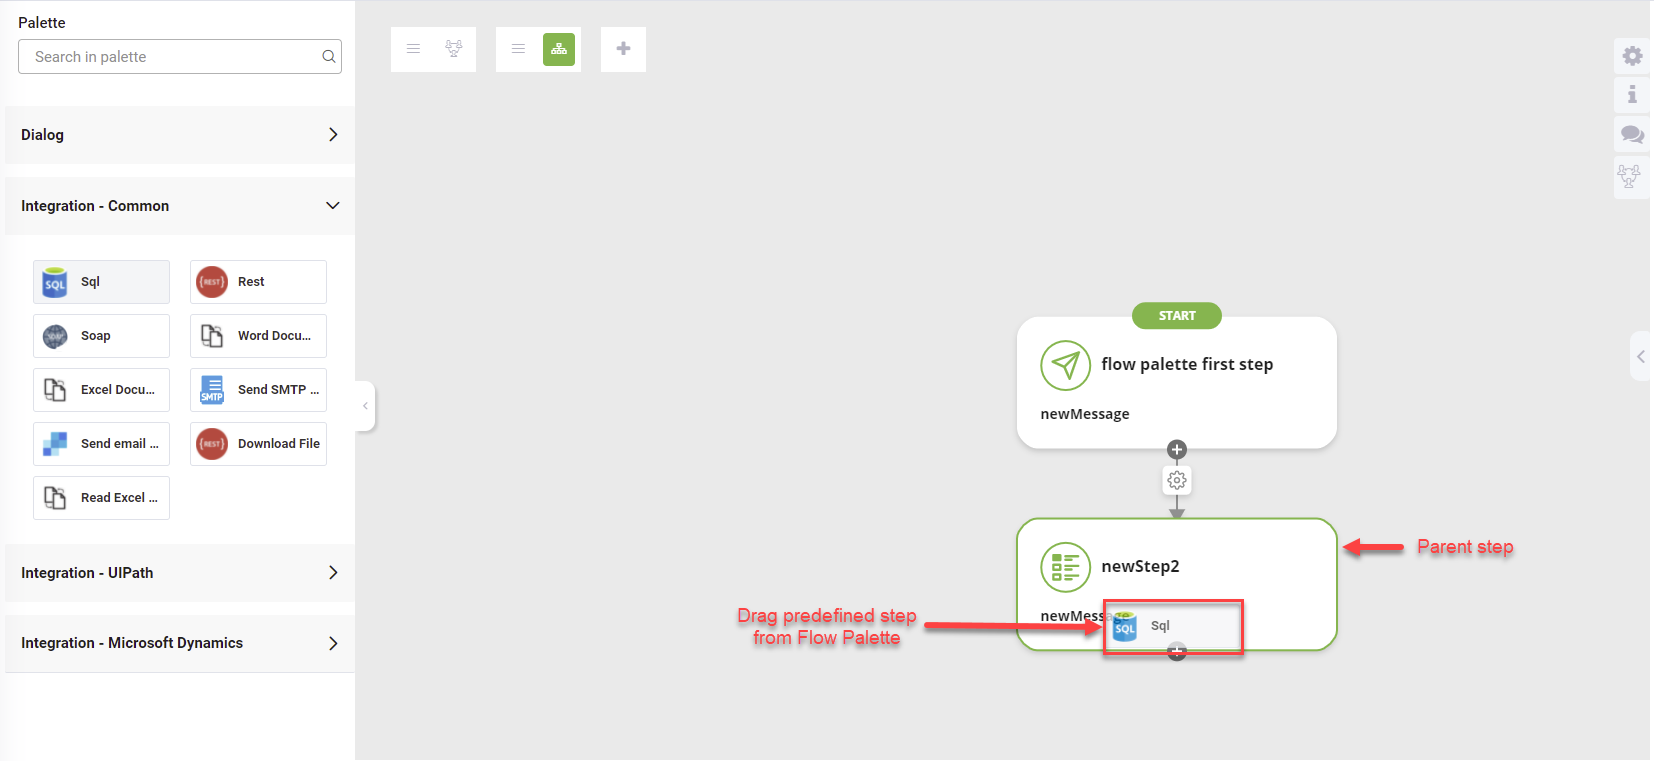
Use the Connector Palette
The Connector Palette simplifies AI Agent authoring. It displays all integration tasks defined on the AI Agent organized by category.
To access the Connector Palette, click the  icon on the left side of the Connector Designer. You can also access the Connector Palette from the Connector Designer by hovering the mouse over the add icon () and clicking the Connector Palette icon (). When you add the first integration task, use the second option.
You use the Connector Palette using drag and drop functionality. Search for the desired integration task or navigate the Connector Palette until you find the desired task, drag and drop it in the working area as follows based on where you want to add the task:
- To add the task between two existing integration tasks, place the task on the line that connects the two tasks and when the line connecting the second step is highlighted, drop the task from the Connector Palette.
- To add as child integration task, place the cursor on the parent task and when it is highlighted, drop the integration tas from the Connector Palette.
To configure DRUID predefined integration tasks steps, in the working area, click on the desired task and use the right editor to configure the details.