Step 3. Add Integration Task
Druid provides you with four integration tasks:
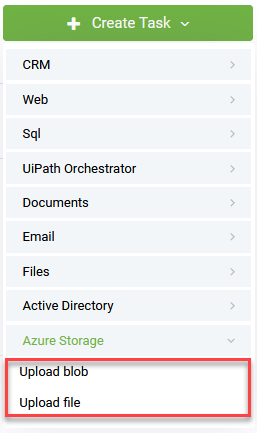
To know which task to use, learn the difference between the blob and file storage.
What is the difference between Azure blob and file storage?
Azure Blob Storage is an object store used for storing vast amounts unstructured data, while Azure File Storage is a fully managed distributed file system based on the SMB protocol and looks like a typical hard drive once mounted.
The two integration tasks allow you to share specific resources (blob objects / files). The resource can be accessed from anywhere in the world using a URL that points to the resource and includes a shared access signature (SAS) token, or can be accessed directly in the browser via Direct Link.
|
Azure Storage Feature |
Description |
Integration task |
When to use |
|---|---|---|---|
|
Azure Blob |
Allows unstructured data to be stored and accessed at a massive scale in block blobs. |
Upload blob |
|
|
Azure Files |
Offers fully managed cloud file shares that you can access from anywhere via the industry standard Server Message Block (SMB) protocol. |
Upload file |
To serve small files directly in the browser. To store small files for distributed access |
Upload Blob
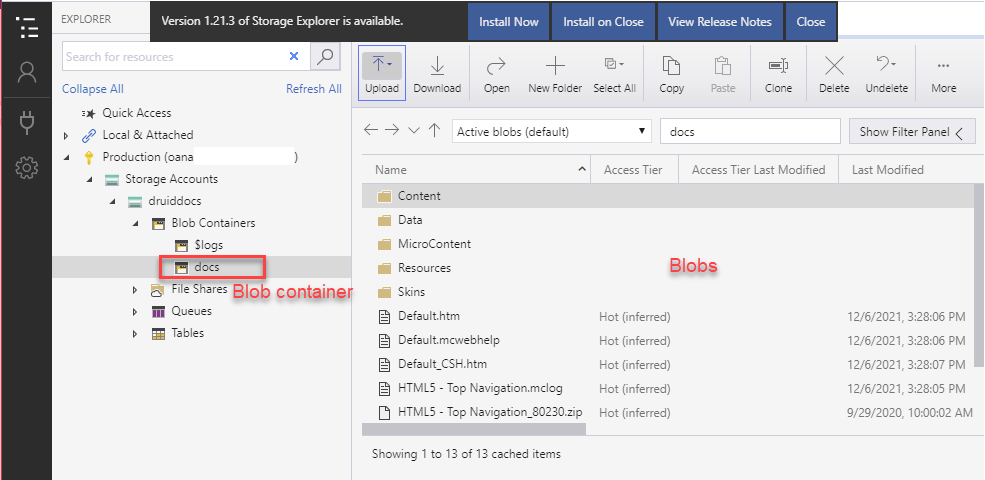
All blobs must reside in a blob container, which is simply a logical grouping of blobs. An account can contain an unlimited number of containers, and each container can store an unlimited number of blobs.
To add an integration task for uploading a blob container, at the top-right corner of the Edit Connector Action page, Connector steps tab, click the Create task button, and then click Azure Storage >Upload blob.
Step 1. Set the task general parameters
After you click to create an Upload blob task, the Edit Connector Task page appears by default on the General tab.
Set the general parameters:
|
Parameter |
Description |
|---|---|
|
Description |
Provide a brief relevant description of the task to be performed. |
|
Connection Code |
Select the Azure Storage app.
|
|
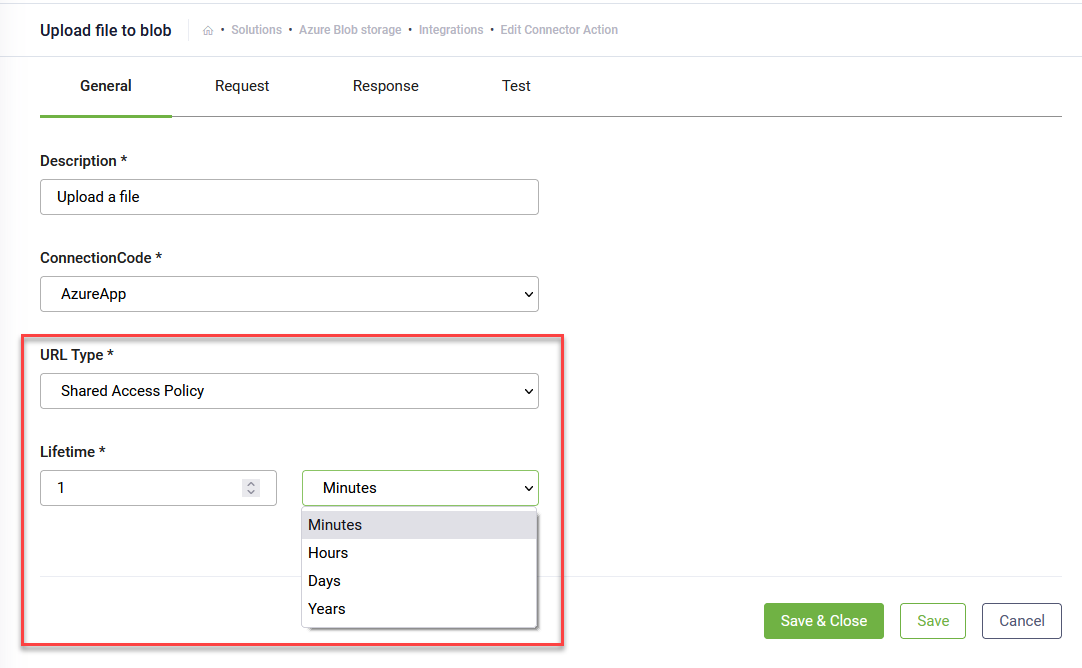
URL Type |
Select the type of URL to be generated by Azure Blob Storage to access the resource you uploaded (in this case, a blob container). Two options are available:
|
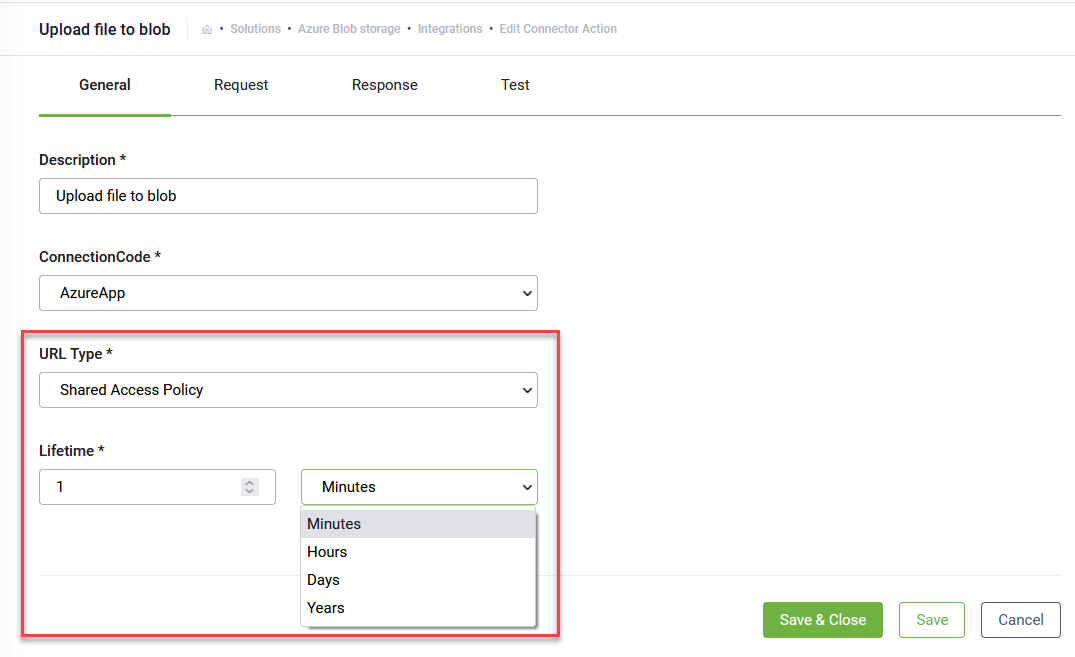
Click the Save button. You can now set the request.
Step 2. Set the request
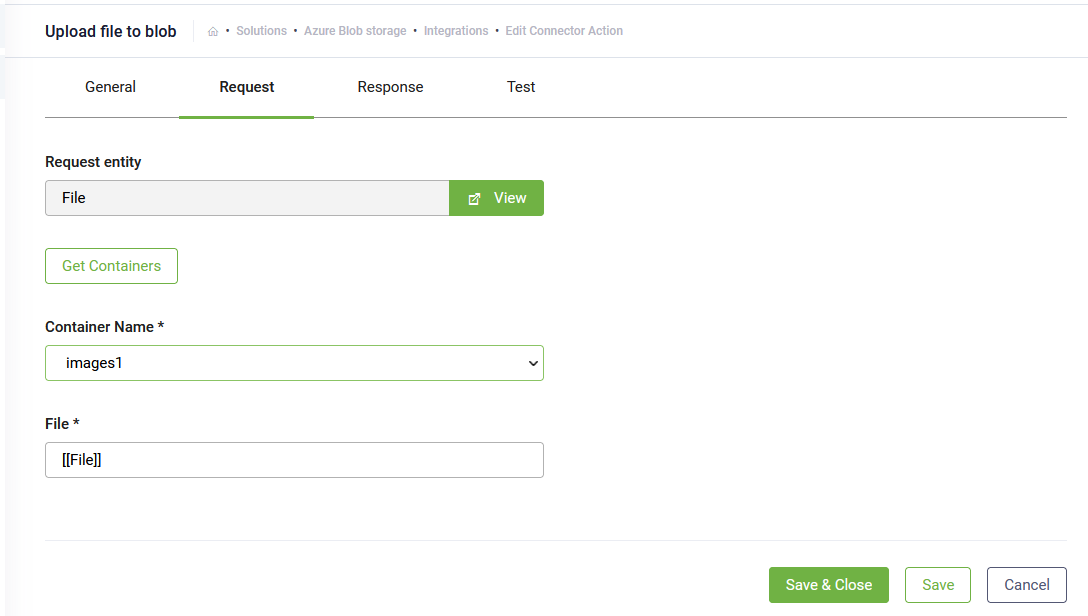
Click the Request tab. The Request entity field is automatically filled in with the request entity selected on the connector action.
Click the Get Containers button to get the list of blob containers from your storage account.
From the Container Name field, select the blob container where you want to upload.
In the File field, enter the desired Druid file entity.
You can now set the response.
Step 3. Set the response
Click the Response tab. The response entity field is automatically filled in with the response entity set on the connector action.
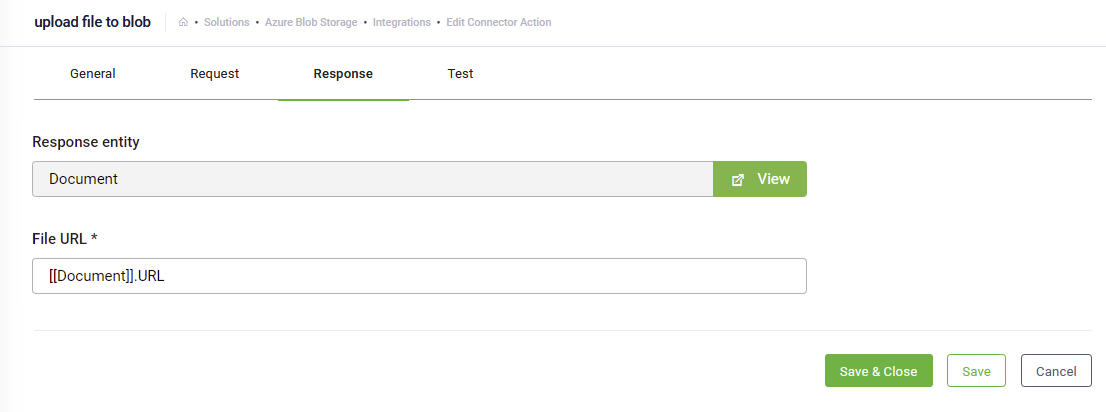
In the File URL field, select the entity field that will store the share URL generated by Azure Blob Storage. Type “[[”, select the entity, type “.” and select the field.
Click the Save button. You can now test the integration task.
Step 4. Test the integration task
Click the Test tab.

Click the Choose file button and browse for the desired file and click the Test button ( ).
).
Upload File
All files must reside inside in a file share. They can be further organized in directories.
To add an integration task for uploading a blob container, at the top-right corner of the Edit Connector Action page, Connector steps tab, click on the Create Task button, and then click Azure Storage > Upload file.
Step 1. Set the task general parameters
After you click to create an Upload file task, the Edit Connector Task page appears by default on the General tab.
Set the general parameters:
|
Parameter |
Description |
|---|---|
|
Description |
Provide a brief relevant description of the task to be performed. |
|
Connection Code |
Select the Azure Storage app.
|
|
URL Type |
Select the type of URL to be generated by Azure Blob Storage to access the resource you uploaded (in this case, a blob container). Two options are available:
|

Click the Save button. You can now set the request.
Step 2. Set the request
Click the Request tab. The Request entity field is automatically filled in with the request entity selected on the connector action.
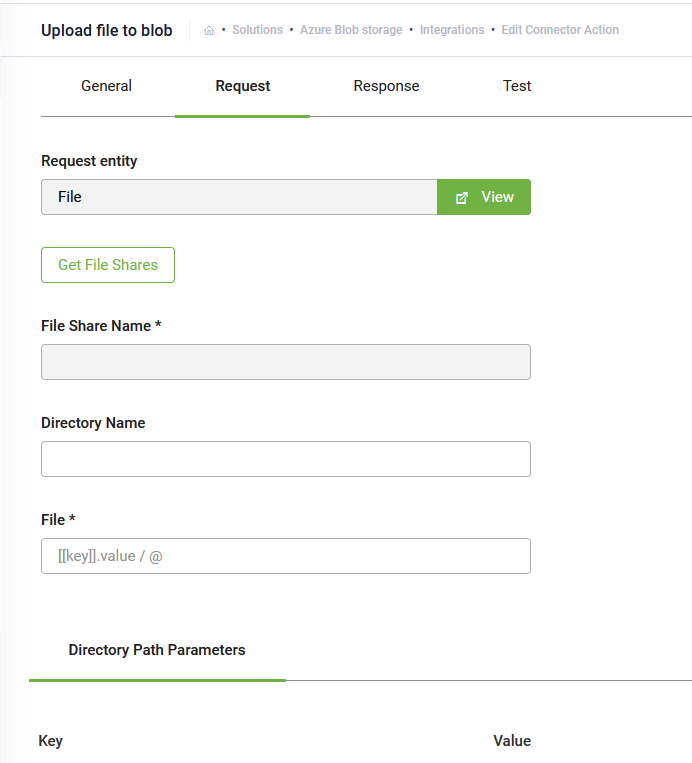
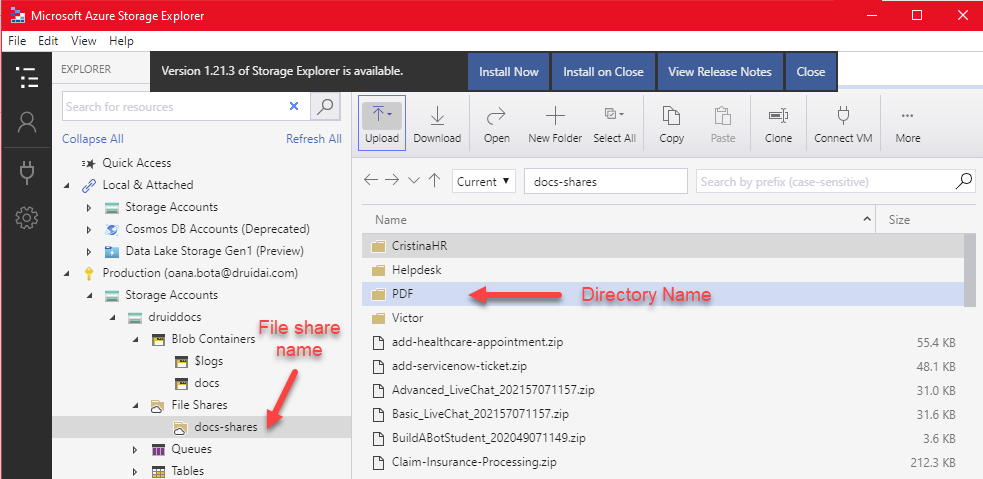
Click the Get File Shares button ( ) to get the list of file shares from your storage account.
From the File Share Name field, select the file share where you want to upload the file.
If you want to upload the file in a specific directory in the selected file share, in the Directory Name field, enter the name of the name of the directory. Leaving the filed empty, will upload the file to the file share root.
In the File field, enter the desired Druid file entity.
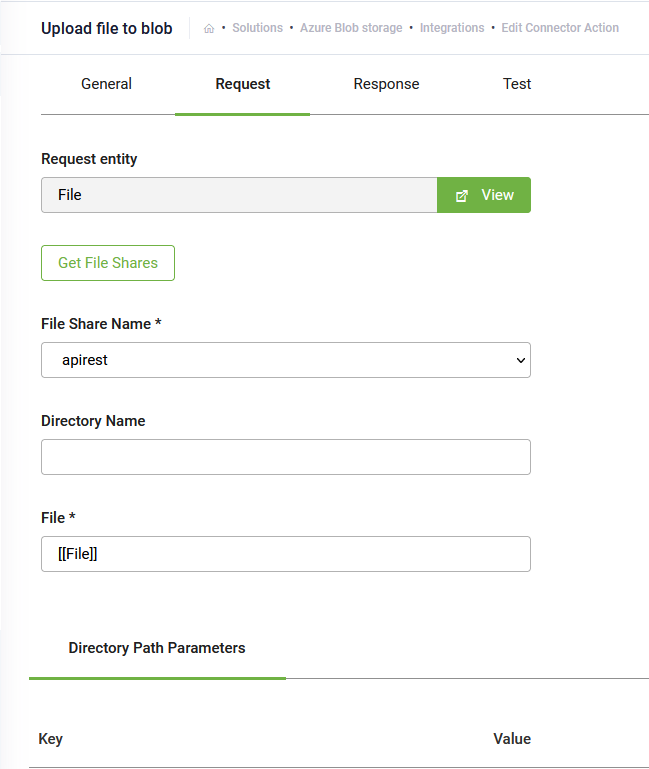
You can also specify the directory in the file share by using the Directory Path Parameters table.
You can now set the response.
Step 3. Set the response
Click the Response tab. The response entity field is automatically filled in with the response entity set on the connector action.
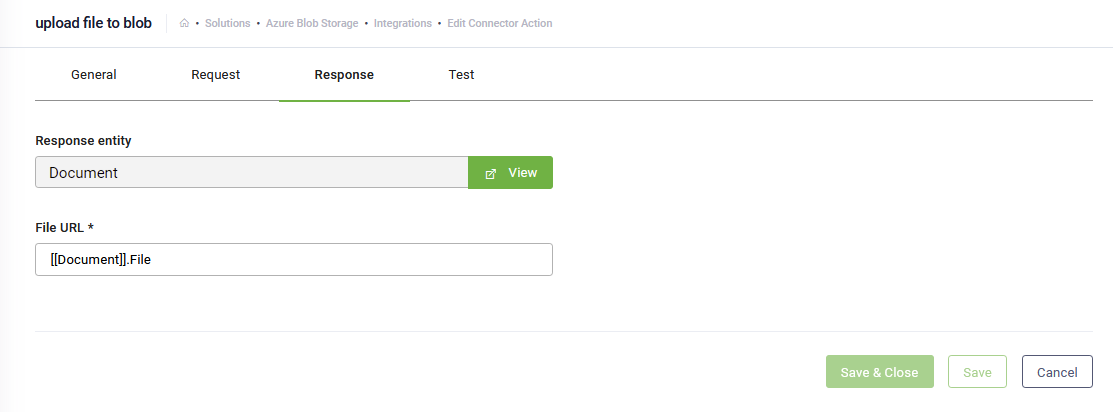
In the File URL field, select the entity field that will store the share URL generated by Azure Blob Storage. Type “[[”, select the entity, type “.” and select the field.
Click the Save button. You can now test the integration task.
Step 4. Test the integration task
Click the Test tab.
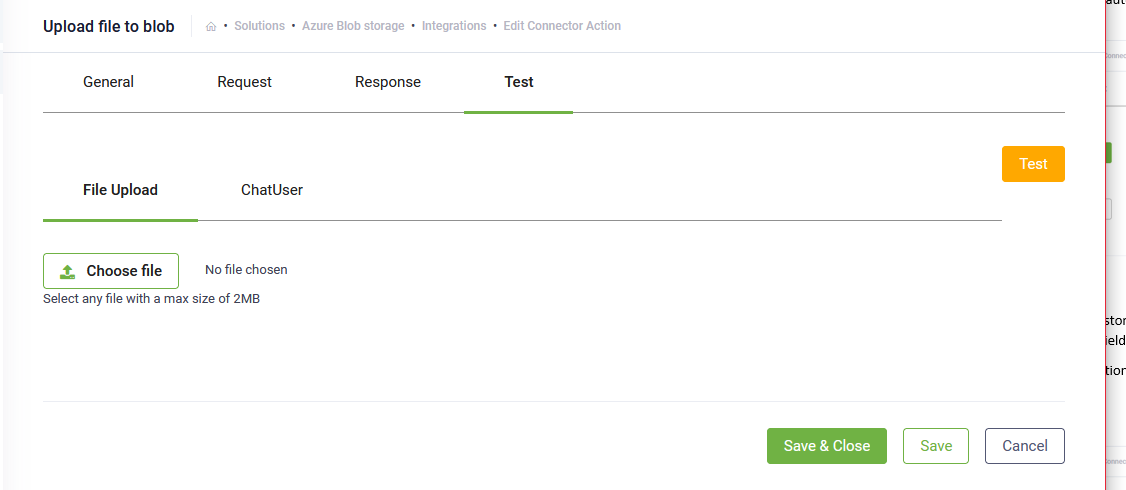
Click the Choose file button and browse for the desired file and click the Test button ().
To add an integration task for uploading a blob container, at the top-right corner of the Edit Connector Action page, Connector steps tab, click the Create task button, and then click Azure Storage >Upload blob.
Step 1. Set the task general parameters
After you click to create an Upload blob task, the Edit Connector Task page appears by default on the General tab.
Set the general parameters:
|
Parameter |
Description |
|---|---|
|
Description |
Provide a brief relevant description of the task to be performed. |
|
Connection Code |
Select the Azure Storage app.
|
|
URL Type |
Select the type of URL to be generated by Azure Blob Storage to access the resource you uploaded (in this case, a blob container). Two options are available:
|
Click the Save button. You can now set the request.
Step 2. Set the request
Click the Request tab. The Request entity field is automatically filled in with the request entity selected on the connector action.
Click the Get Containers button to get the list of blob containers from your storage account.
From the Container Name field, select the blob container where you want to upload.
In the File field, enter the desired Druid file entity.
You can now set the response.
Step 3. Set the response
Click the Response tab. The response entity field is automatically filled in with the response entity set on the connector action.
In the File URL field, select the entity field that will store the share URL generated by Azure Blob Storage. Type “[[”, select the entity, type “.” and select the field.
Click the Save button. You can now test the integration task.
Step 4. Test the integration task
Click the Test tab.
Click the Choose file button and browse for the desired file and click the Test button ().
Delete Blob
The Delete blob task allows you to automate the removal of files from your cloud storage while maintaining data synchronization within the Druid AI Platform.
To add an integration task for deleting a blob container, at the top-right corner of the Edit Connector Action page, Connector steps tab, click the Create task button, and then click Azure Storage > Delete blob.
Step 1. Set the task general parameters
-
Navigate to the Connector steps tab on the Edit Connector Action page.
-
Click Create task > Azure Storage > Delete blob.
-
In the General tab, provide a Description for the task and select your Connection Code.
-
Click Save.
Step 2. Set the request
- Click the Request tab to define exactly what should be deleted.
- Click the Get Containers button to get the list of blob containers from your storage account.
- From the Container Name field, select the blob container you want to delete.
- In the Resource Path, enter the Druid file entity or variable storing the full URL to the blob you want to remove.
Delete File
The Delete file task allows you to automate the removal of specific files from an Azure File Share.
Step 1. Set the task general parameters
- Navigate to the Connector steps tab on the Edit Connector Action page.
- Click Create task > Azure Storage > Delete file.
- On the General tab, configure the following:
- Description: Enter a brief, relevant description of the task.
- Connection Code: Select the appropriate Azure Storage app from the dropdown.
- Click Save.
Step 2. Set the request
- Click the Request tab to define the file location and the associated Druid entity.
- Click the Get File Shares button to get the list of file shares from your storage account.
- From the File Share Name field, select the file share where you want to upload the file.
- For Static Deletion: In the Resource Path field, enter the full URL of the file you want to delete.
- For Dynamic Deletion:
- In the Directory Path Parameters table, provide a Key (e.g., fileUrl).
- In the Value column, select the Druid entity field that stores the full URL of the uploaded file.
- In the Resource Path field, enter the key inside curly brackets: {fileUrl}.
- Save the integration.