Step 1. Create App
Creating an Azure Blob Storage app means defining your Azure Blob Storage connection string for the AI Agent within the selected solution.
To create an Azure Blob Storage app:
- From the solution menu, click Apps. The Apps page appears listing the connection strings created for the selected solution.
- Place the cursor at the top-right corner of the page on CreateConnector. A drop-down appears.
- Click Azure Storage.
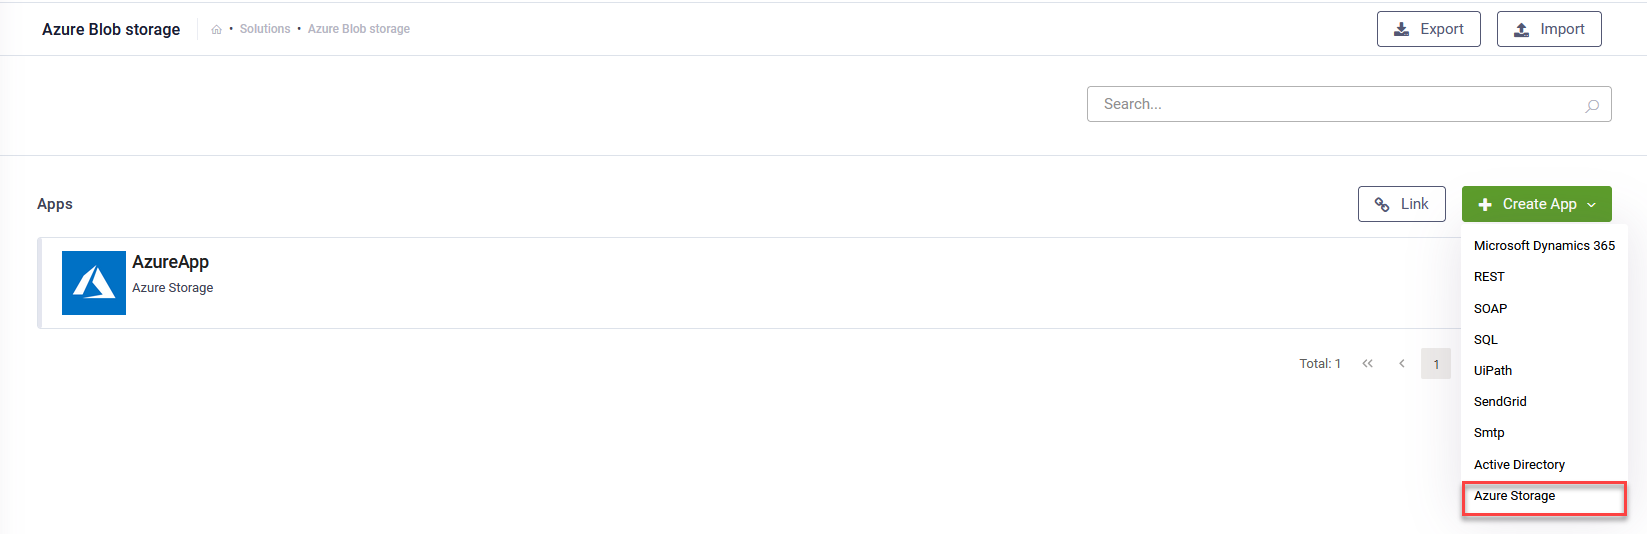
The Edit Connector page appears.
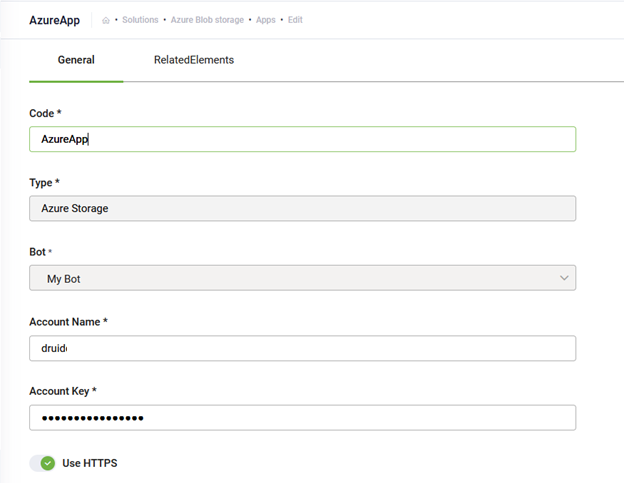
- Provide the details listed in the table below.
- Encryption Key – click the Generate button to generate the key, which will be used by the Encrypt Data task to encrypt the data and by the client / 3rd party application to decrypt the data and use it further.
- Secure encryption with salt – adds a random 64-bits salt to the data before encrypting it. Please note that using this feature requires the client to develop code for data decryption.
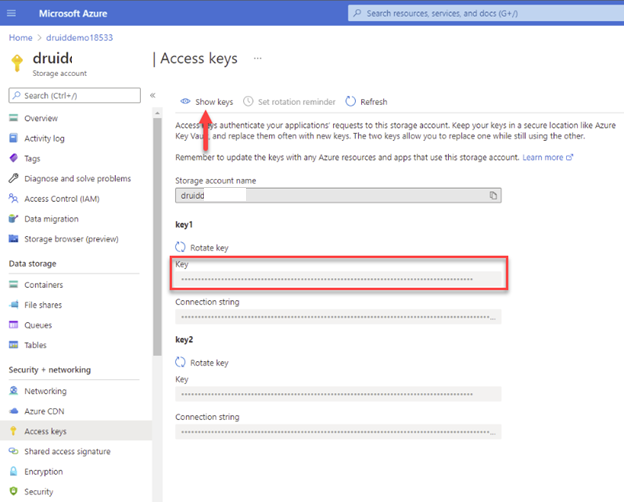
- In the Azure portal, go to your storage account.
- Under Security + networking, select Access keys. Your account access keys appear, as well as the complete connection string for each key.
- Select Show keys to show your access keys and connection strings and to enable buttons to copy the values.
- Under key1, find the Key value. Click the Copy button to copy the account key and paste it in DRUID in the Account Key field.
- Click Save and Close.
|
Field |
Description |
|---|---|
|
Code |
Unique name to identify the App. You will reference in each Integration you call from this App. |
|
Type |
The app type. Read-only and automatically set to Azure Storage. |
| Icon |
Select the icon that best describes the app. It helps you easily identify the app in the list of apps. If no icon is selected, DRUID default icon per selected app type will be shown in the apps list. NOTE: This field is available in DRUID 1.71 and higher.
|
|
AI Agent |
The currently selected AI Agent. Read-only field. |
| Execution Time |
The maximum number of seconds a request is allowed to execute. By default, the timeout for all connector integrations is 60 seconds. This setting will apply to all connector tasks which use this app. NOTE: This field is available for DRUID version 1.60 or higher and requires Connector Host upgrade.
IMPORTANT! To avoid long execution time for an integration with many tasks, in DRUID 5.4 and higher, the maximum sum of all timeouts configured on an integration is 250 seconds. Whenever this maximum is reached, the execution of the currently running integration task is interrupted and any subsequent integration tasks are no longer executed.
|
| Encryption Type |
NOTE: This feature is available in DRUID version 1.61 or higher and requires Connector Host upgrade.
Enables data encryption on the connector using the AES CGM encryption algorithm and allows authors to encrypt specific data before sending it to external Azure Blob Storage apps, by using the Encrypt Data integration task as first task in the desired connector action. When you select AES CGM encryption algorithm (the only one currently available), two new options are available: For more information, see Encrypt Data. |
|
Account Name |
The storage account name and the access keys of your Azure Blob Storage account. You can use either of the two keys to access Azure Storage, but in general it's a good practice to use the first key, and reserve the use of the second key for when you are rotating keys. To view the access keys:
|
|
Account Key |
|
|
Use HTTPS |
Although you can use both HTTP and HTTPS connections, we recommend you to use a secure connection, HTTPS. |