Flow Graphical Designer
The Flow Graphical Designer is a robust tool that simplifies flow design within the Druid AI Platform, enhancing efficiency for bot authors. It offers an intuitive interface for visualizing and updating conversational flows.
The Flow Graphical Designer comprises two essential components:
Bot Diagram Designer
- Enables bot authors to visualize bot flows and the connections between them.
- Highlights inconsistency zones requiring attention from bot authors.
- Provides insights into the primary conversation path and possible flow paths.
To access the Bot Diagram Designer, in Druid Portal, select the bot, select solution and click Flows. The Flows page appears.
At the top-left corner of the page, click the icon  . The Bot Diagram Designer appears.
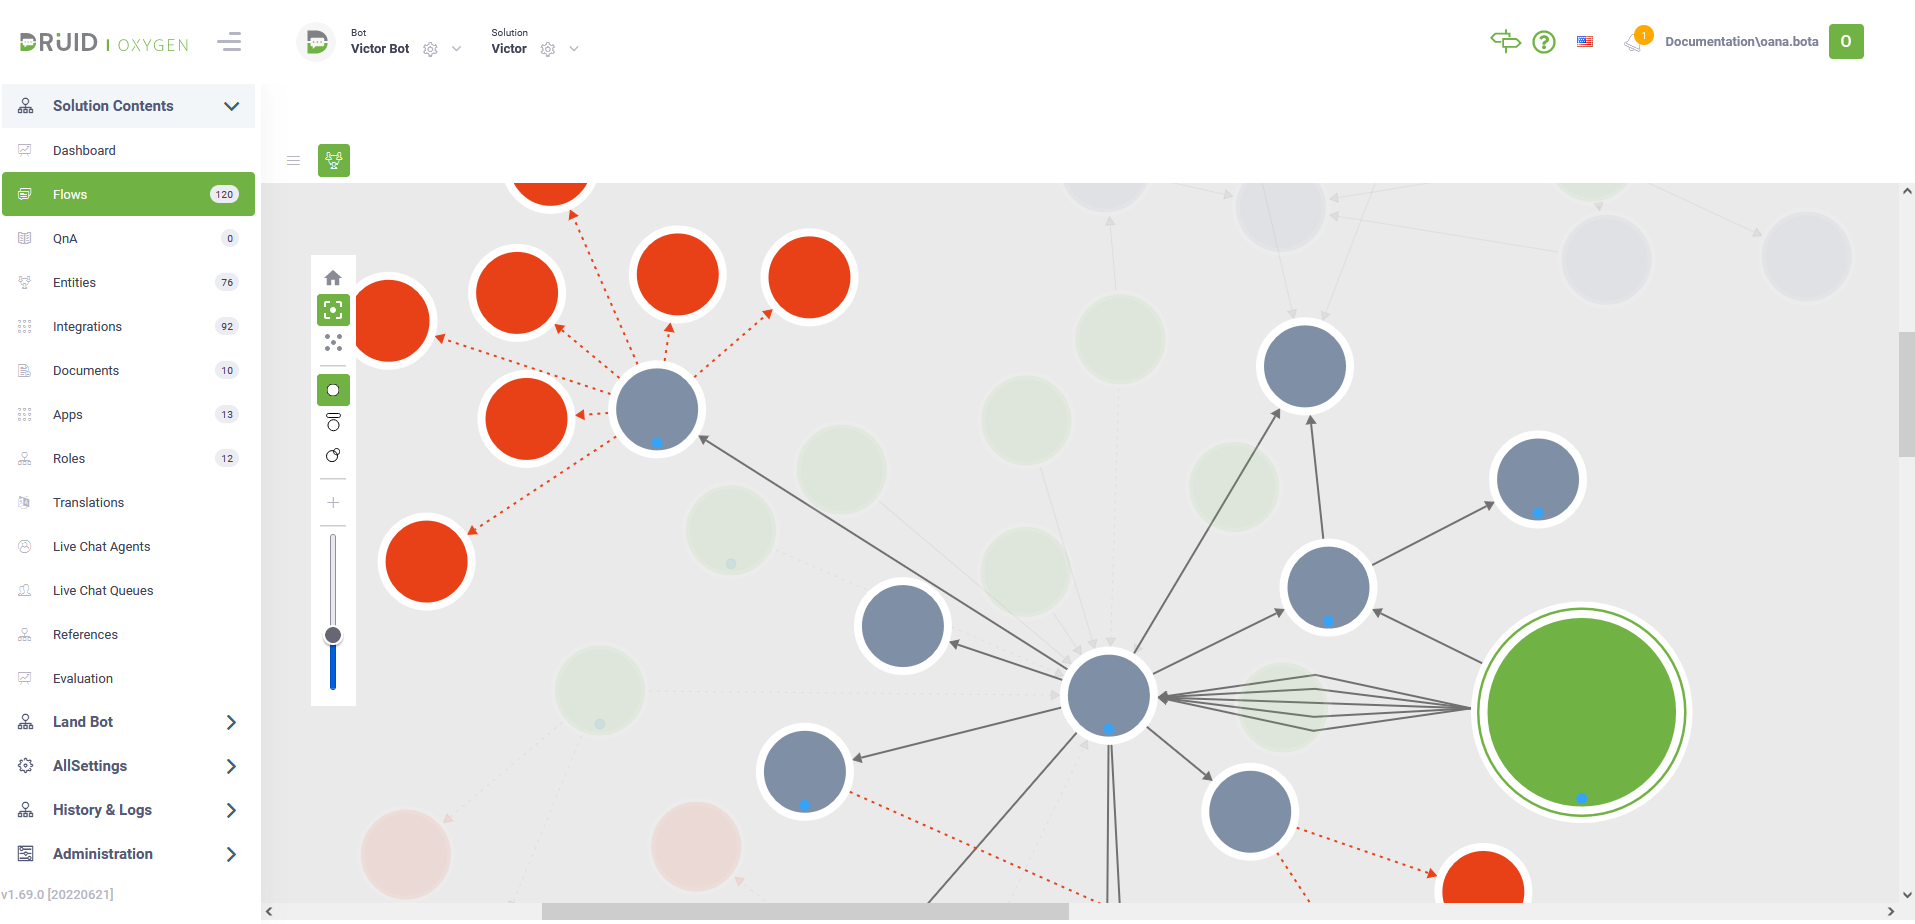
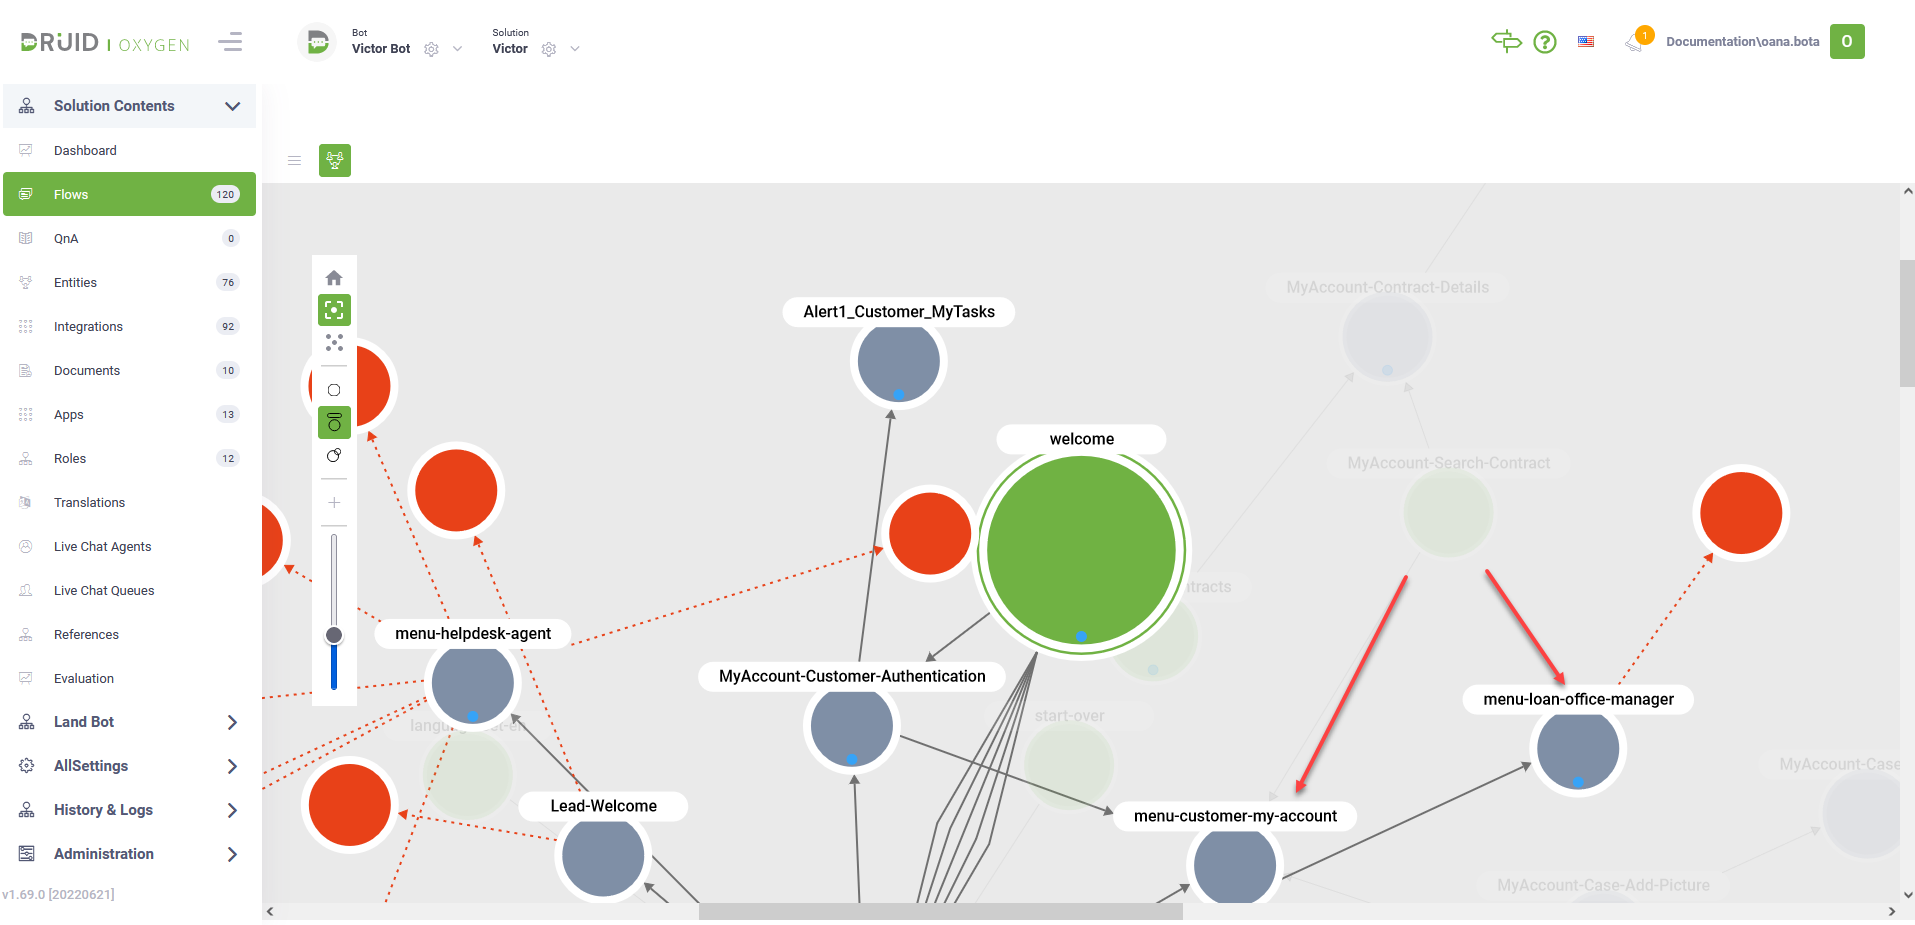
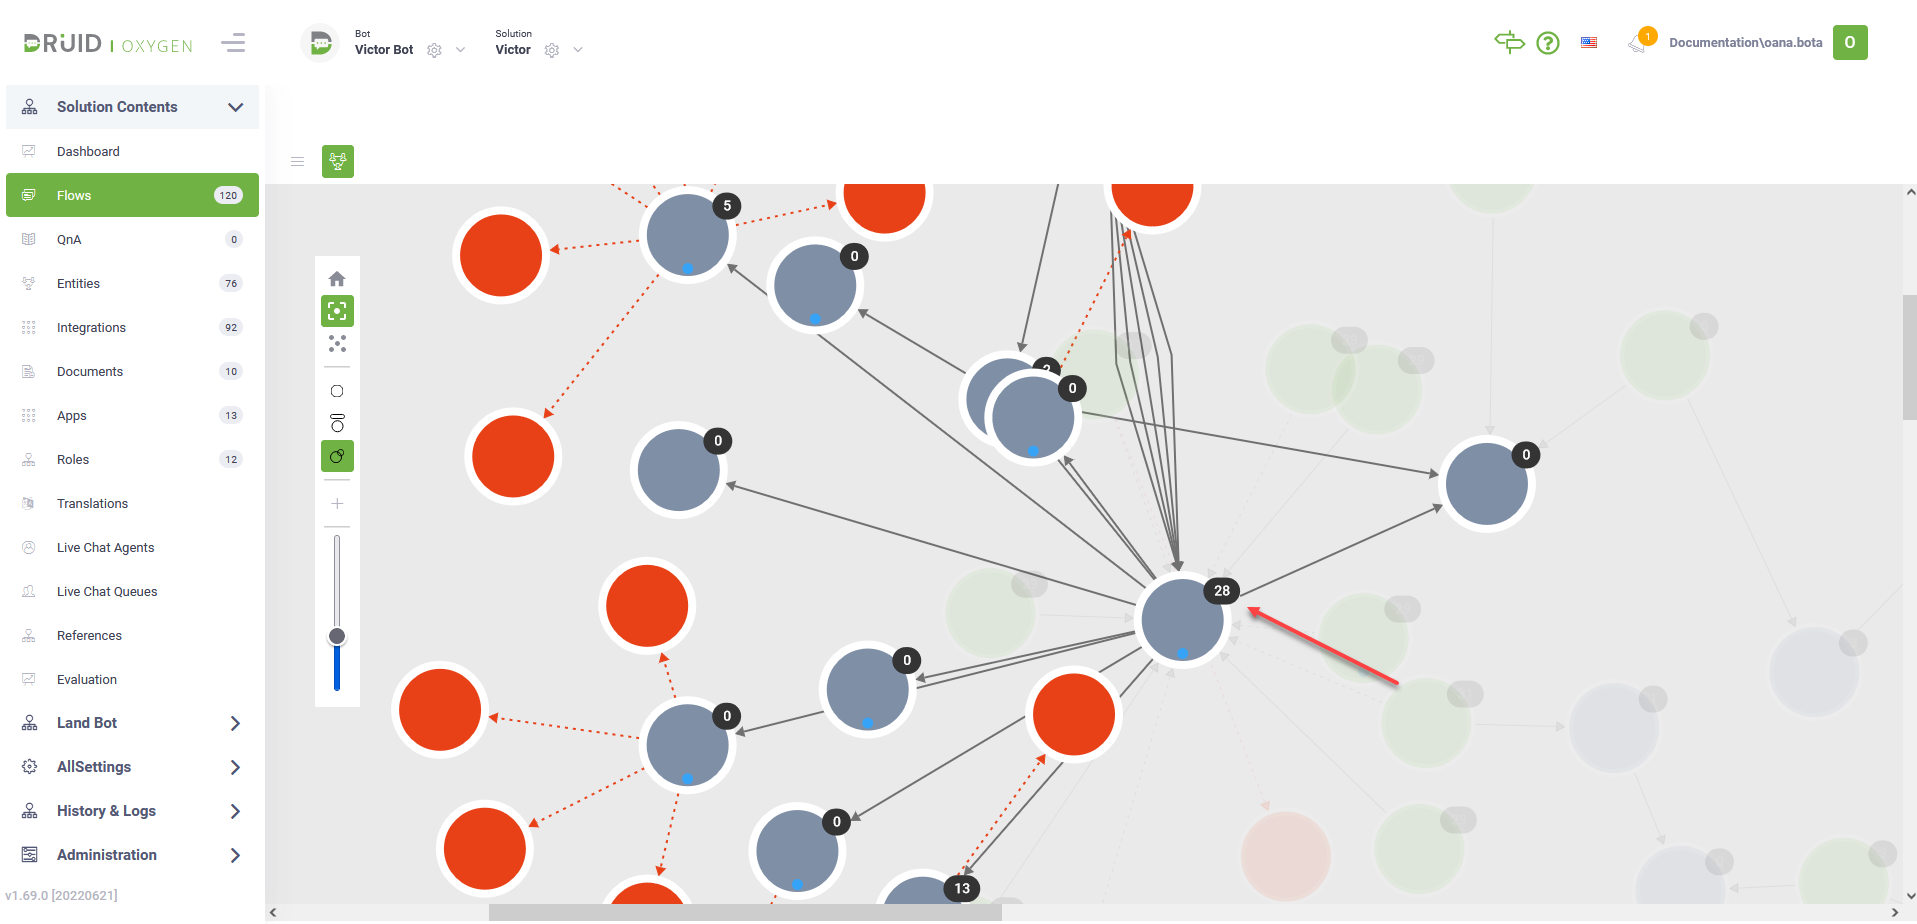
The nodes in the diagram represent the flows. By default, the Bot Diagram Designer displays the most recently viewed selection on the Toolbar.
 icon.
icon.Toolbar
The Toolbar offers options for viewing flow lists, flow steps, and adding/editing flow steps or child flows. Additionally, it provides features for flow layout adjustments and various actions such as testing, debugging, and analytics.
| Button | Description |
|---|---|
|
|
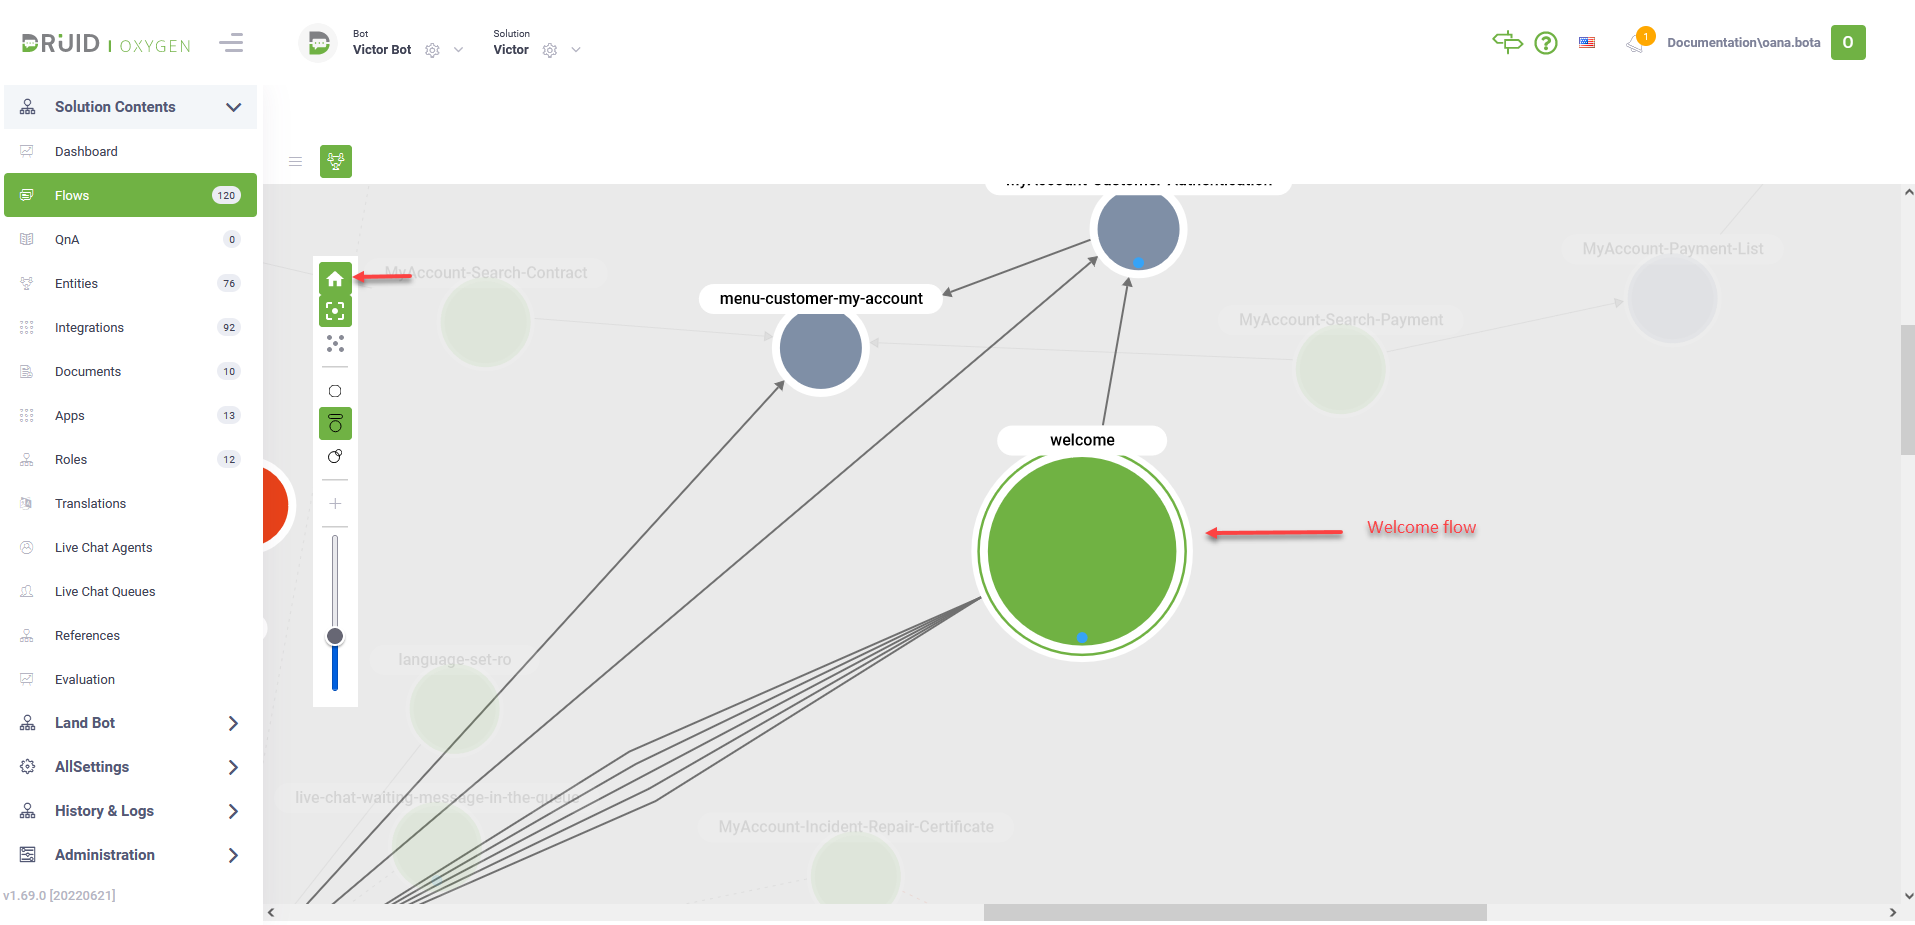
Highlights the Welcome flow and the primary conversation path. |
|
|
Displays flows in the current solution. |
|
|
Displays all bot flows inside and outside the current solution. |
|
|
Hides the flows details (badges and names). |
|
|
Displays the flows name. |
|
|
Displays in badges the number of child flows. |
|
|
Add a new flow.
NOTE: From the Bot Diagram you can add new flows but you cannot add links between the flows. |
|
|
The slicer allows you to view more or less flows based on the number of association levels between the flows. Slice up for more and slice down for less. |
Bot Diagram Designer Legend
Visual elements within the Bot Diagram Designer convey key information:
| Visual element | Description |
|---|---|
|
|
Identifies conversation entry points.
The big green node indicates the Welcome flow. You can easily view it by clicking the Home ( |
|
|
Indicates intermediary flows. |
|
|
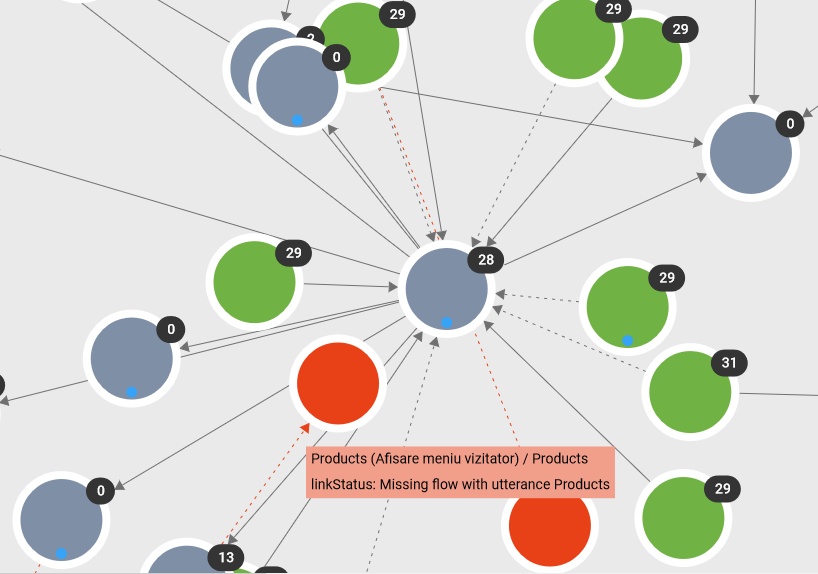
Indicates bot inconsistency zones. Indicates that the result of a menu flow is not found. The value of a button inside a menu flow does not correspond to a training phrase on any flows. The red endpoint indicates that you need to take action. To view what is missing and take the proper action, put the cursor on the red dotted line. Click on the red node. The Flows Diagram of the menu flow where you need to take action appears. Make corrections as indicated in the tooltip displayed on the red dotted line. |
|
|
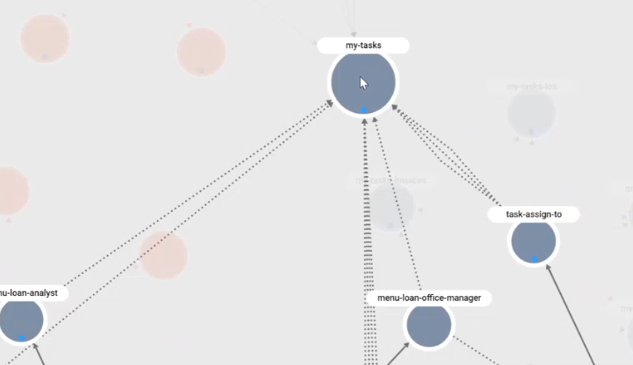
Indicates that there are more links between the flow and its child flow(s). Example: The flow task-assign-to contains buttons which lead to the same flow, that is, my-tasks. |
|
|
Indicates that there is a strong link between two flows; that is, there is a trigger flow step defined on the first flow that triggers the execution of the second flow. |
|
|
Indicates that there is a soft link between the flows. Indicates the result of a menu flow (flow step of type hero card), where the hero card step does not have input mapping and Is last step. The Flow Designer executes the next flow based on the value put in the hero card button. If the button value corresponds to a training phrase of another flow, a soft link is created between the two flows. |
|
|
Indicates that the result of a menu flow is not found. The value of a button inside a menu flow does not correspond to a training phrase on any flows. |
View flow paths
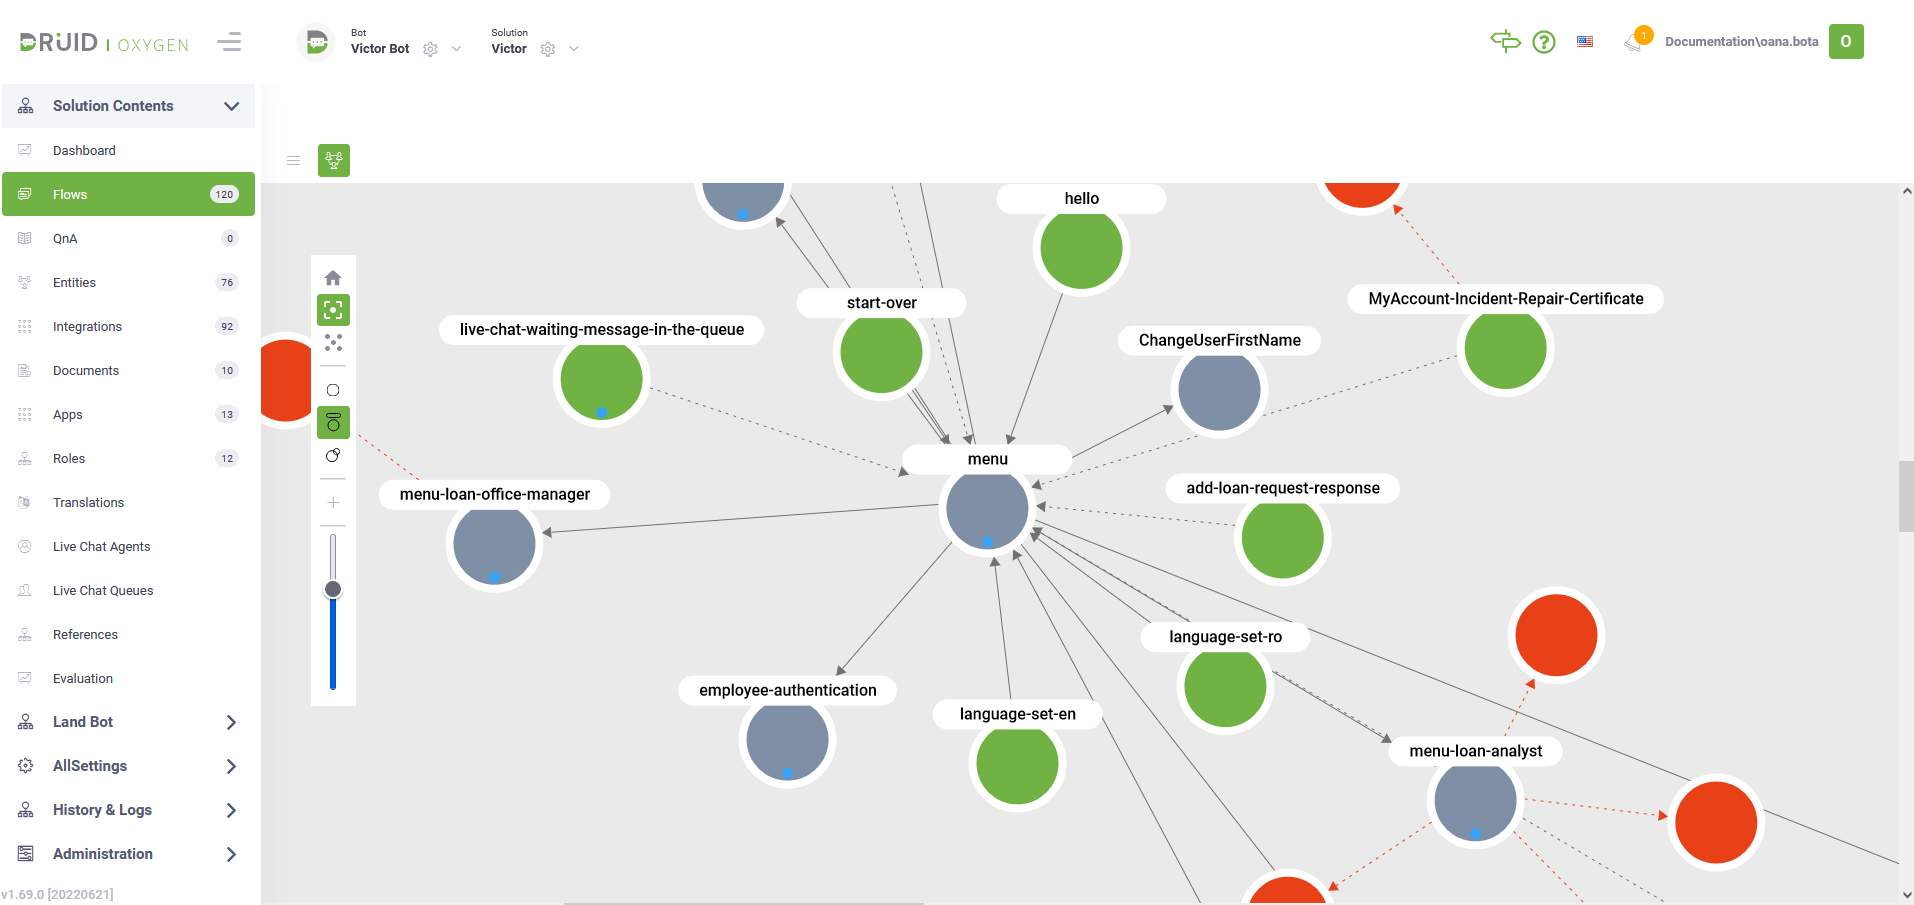
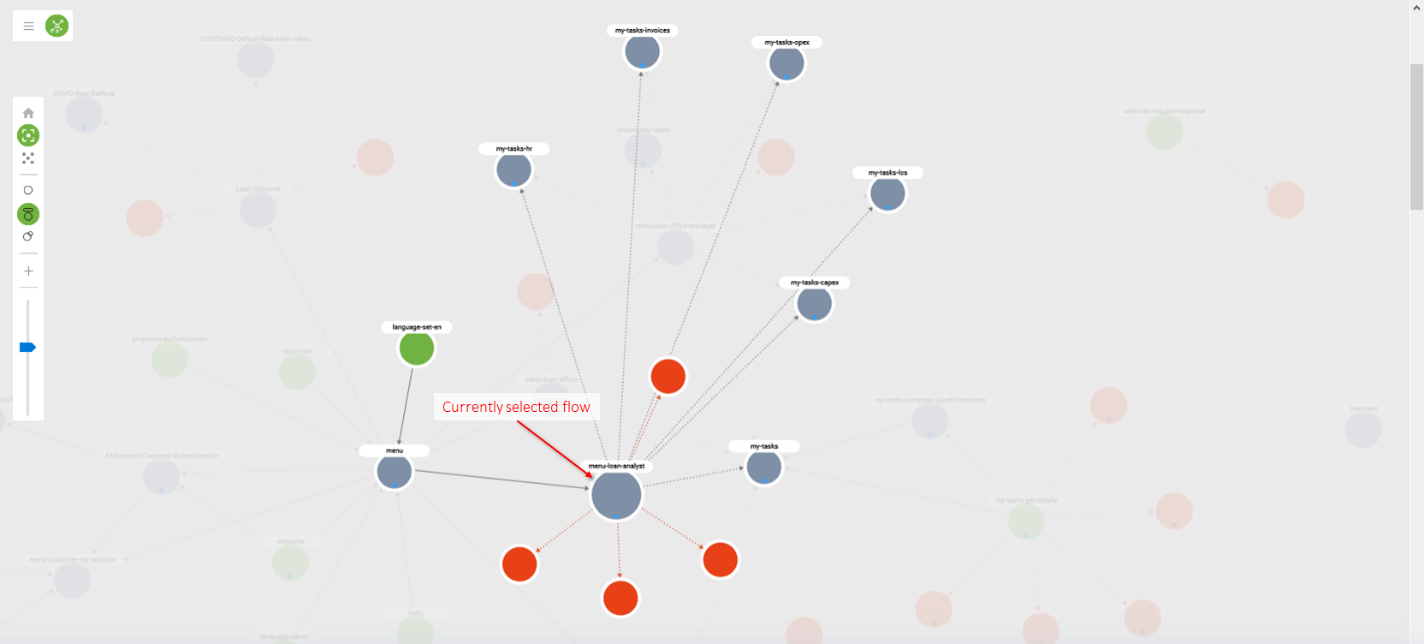
When you click on a flow, the diagram shows the possible paths for the currently selected flow, that is, the links between the currently selected flow and subsequent flows. The bigger node indicates the currently selected flow.
Example: Clicking on the menu-loan-analyst node, you get an overview of the conversations dedicated to the loan analyst role.
Flow Diagram Designer
- Allows users to define the flow structure.
- Facilitates addition of flow child steps and setting conditions on steps.
- Offers detailed visual information on flow step settings, including:
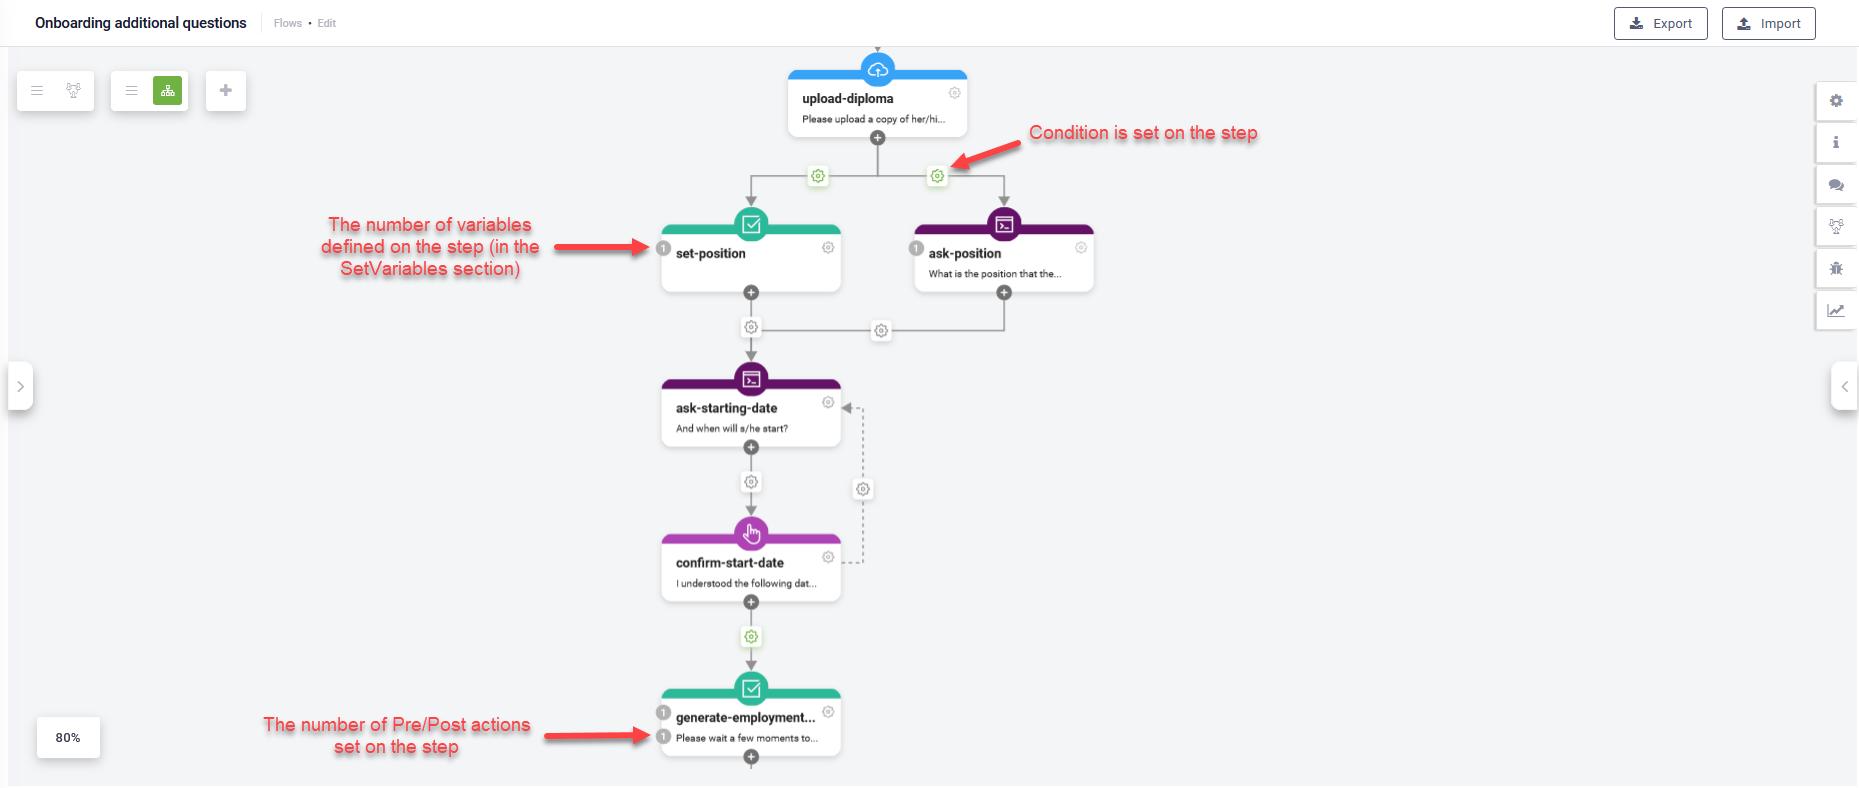
- Number of pre/post actions and variables defined on a flow step.
- Conditions set on a step.
- Identification of the first and last steps in the flow.
To view the Flow Diagram Designer of a specific flow, in the Bot Diagram Designer, click the node corresponding to the desired flow.
You can edit a flow by adding steps, editing step details, remove flow steps, add conditions on steps, etc. to best suit your bot needs.
Flow Diagram Toolbar
The Toolbar offers options for viewing flow lists, flow steps, and adding/editing flow steps or child flows. Additionally, it provides features for flow layout adjustments and various actions such as testing, debugging, and analytics.
|
|
Displays the flow steps in either list view or diagram view. |
|
|
Displays the flow steps in either tree view or layered digraph view. The layered digraph view is available in DRUID version 8.14 and higher. |
|
|
Add a flow step. |
|
|
Add a child flow to the current flow. |
|
|
Automatically calculates all flow steps positions. If you select the Auto layout mode, all previous flow steps positions will be lost. |
|
|
Allows you to change the flow steps positions on the Flow Diagram. Click the Manual layout icon, change the position of the desired flow steps using drag and drop and click the Save icon next to the Manual layout icon. |
Actions menu
The Actions menu provides you with extensive options to edit and analyze the flow and the flow steps.

|
Settings. Edit the selected flow step (node). |

|
Info. View and edit the current flow details. |

|
Audit. Provides you with the JSON structure of the flow and a comprehensive historical record of all changes made by authors to the flow (Audit trail tab). For information on how to view the flow changes, see Review Flow Changes. NOTE: The Audit feature is available in technology preview in DRUID version 7.3.
|

|
Webchat. Test your flow. |

|
Entity Context Viewer. View the entities (and their fields) used throughout the flow. You can also copy entity labels and add or delete entity fields as best suits your needs. For more information, see Using Entity Context Viewer. |

|
Debugging Tool. View Conversation History on a flow and flow step level and debug any issues that occurred during the flow / flow step execution (if any). |

|
Analytics. View flow and flow step analytics. |

|
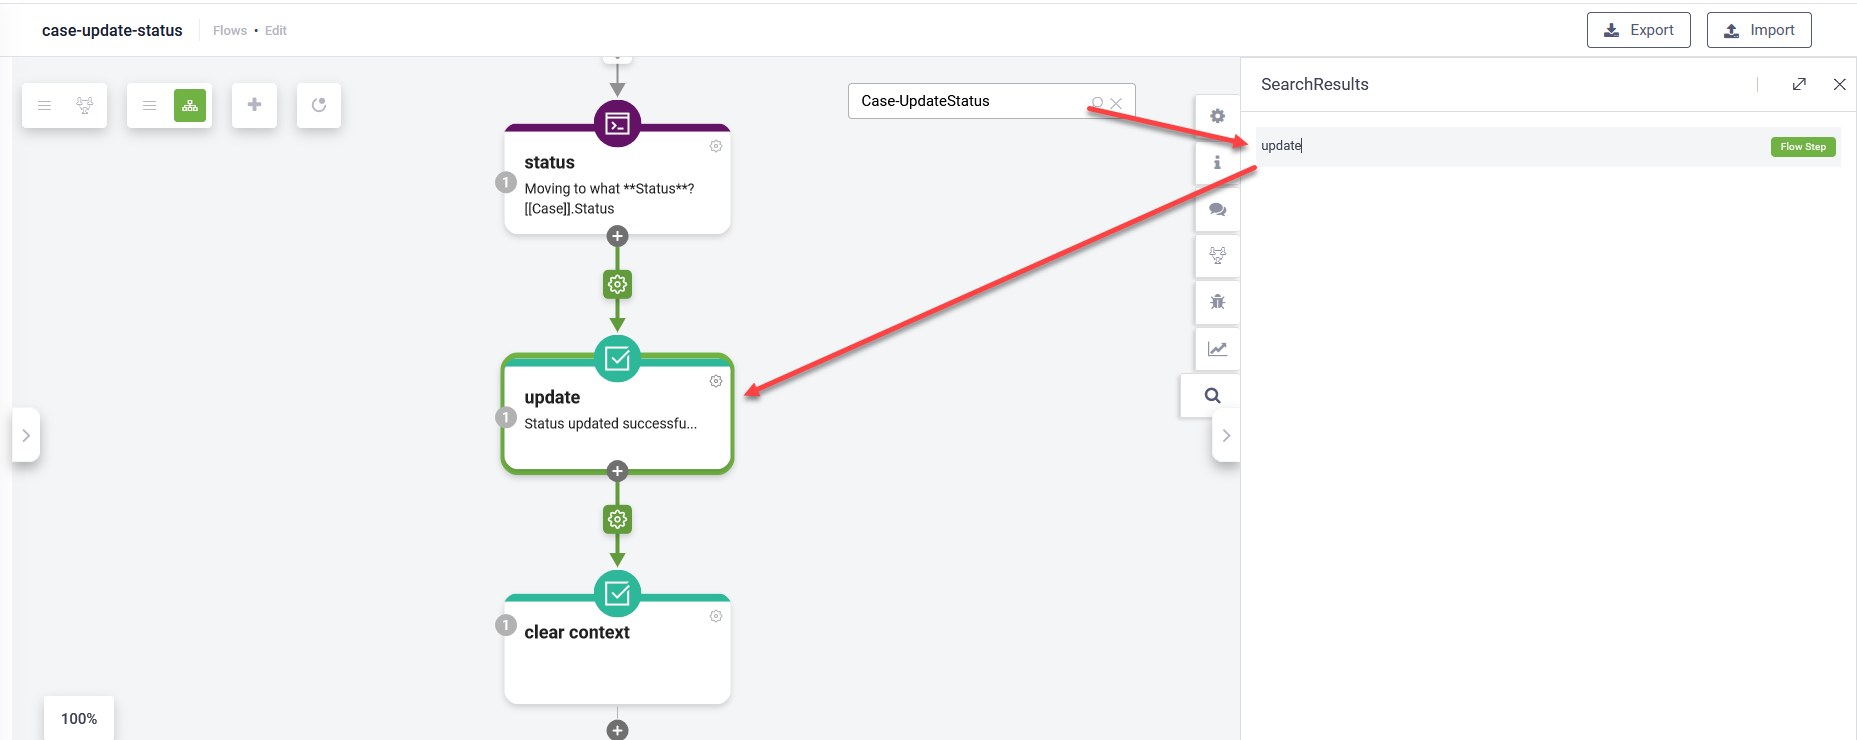
Search. Search for the following elements within the Flow Diagram:
Example: Searching for the flow step that contains a specific connector action name NOTE: Searching elements in the Flow Diagram is available in DRUID 5.28 and higher.
|
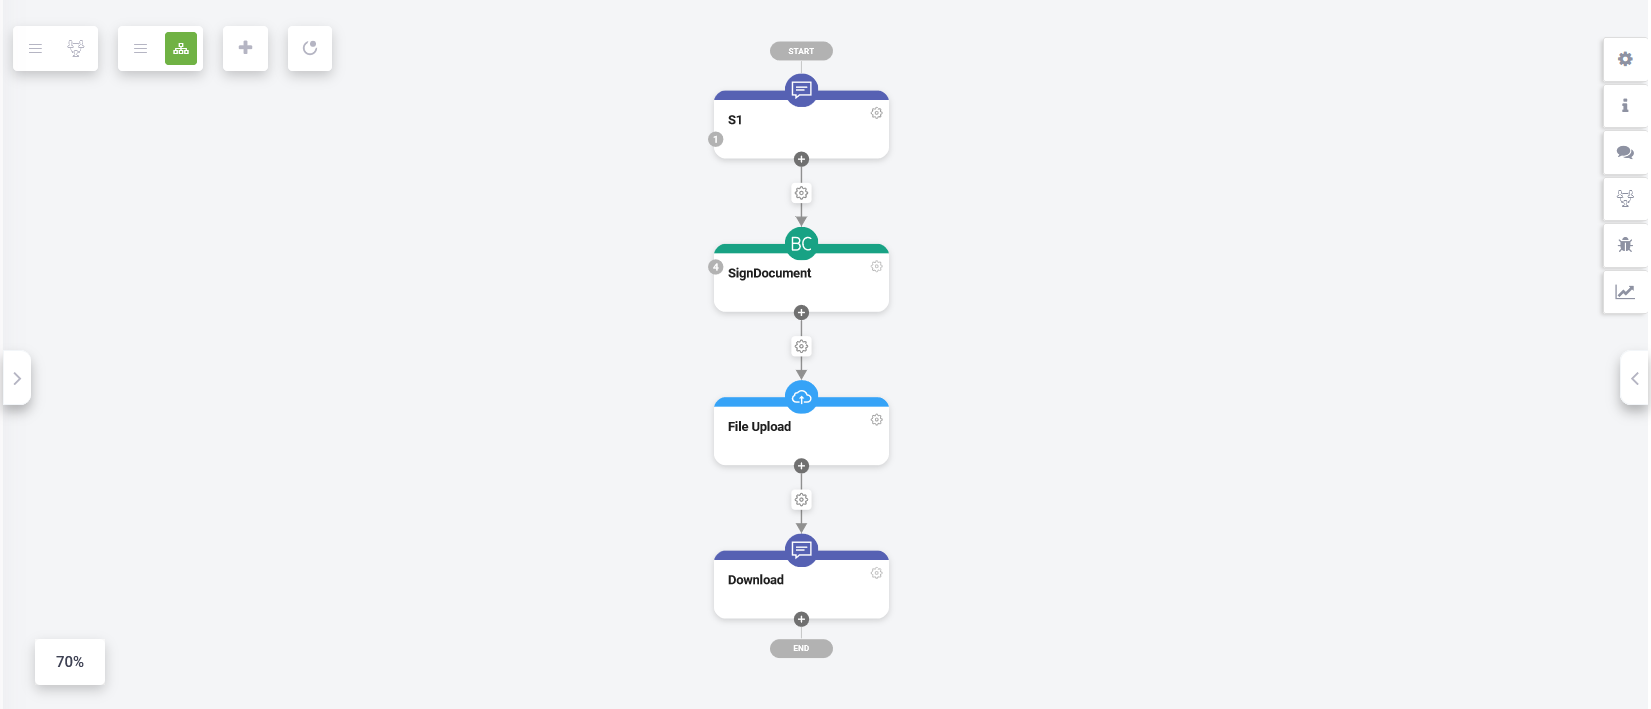
In the Flow Diagram Designer, all steps are connected by strong links ( ). The flow steps that are last steps (have the Is last step? selected) are marked with END.
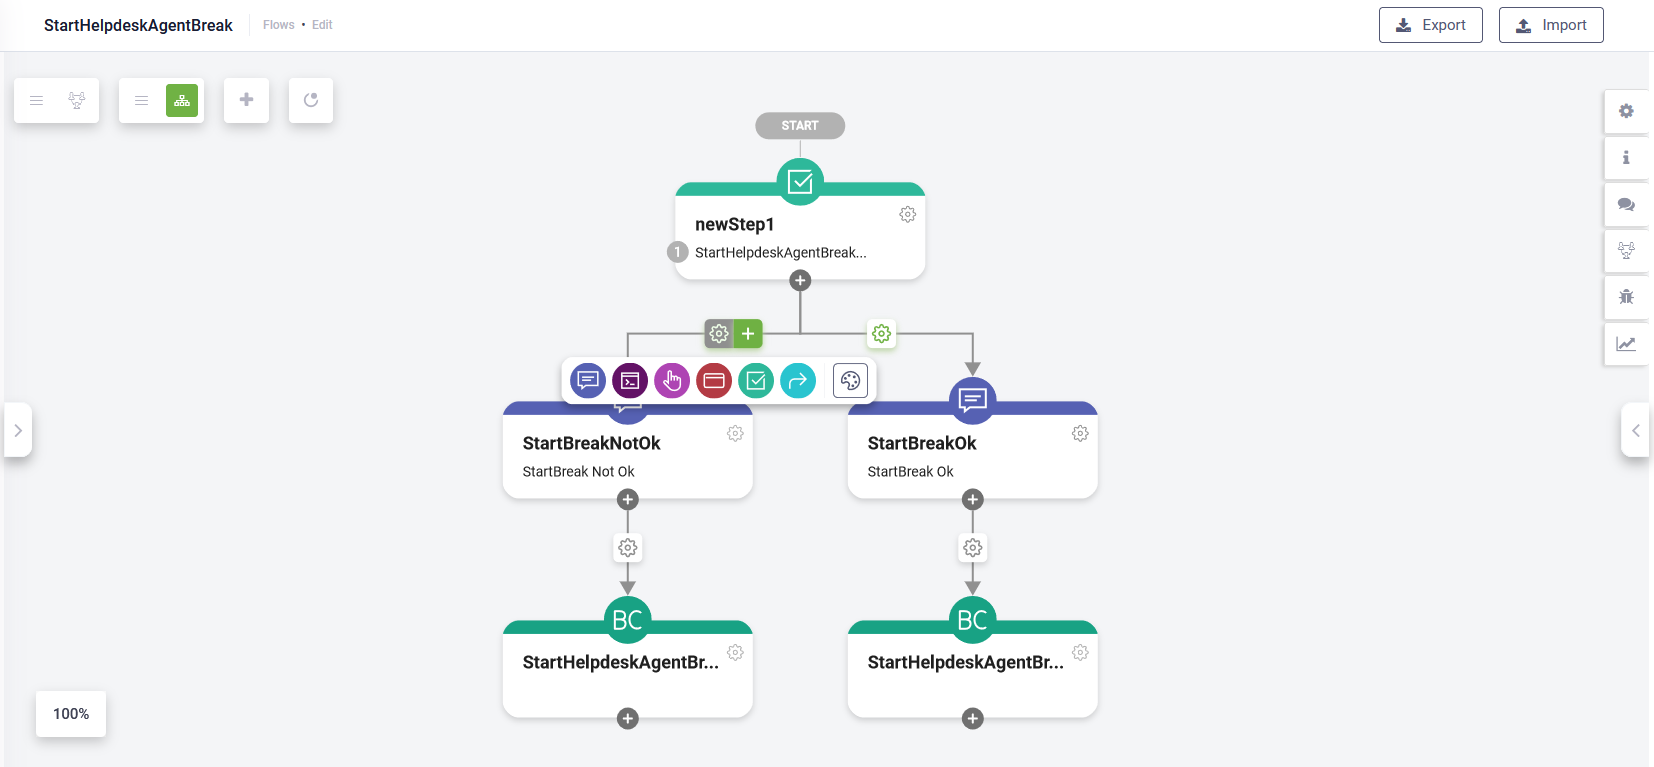
On the connector (arrow), the settings icon ( ) is available. If you place the mouse over the icon, two options are available:
 Allows you to set the next step to be executed only if a specific condition is met, following the logic the chatbot uses to process user input. For more information on the logic the chatbot uses to process user input, see Conversation Lifecycle.
 Allows you to add a parent step to the child step or access the Flow Palette (
 ). If you add a parent step, the flow diagram layout is automatically resized to accommodate the new tree-like structure.
The figure below describes a more complex flow. You can see the number of variables and the number of pre / post actions defined per step (if any). The green Settings icon ( ) on the connector indicates that a condition is defined on the step.
